Table of Contents
Advertisement
Advertisement
Table of Contents

Related Manuals for Miele F 12016 S-2


Summary of Contents for Miele F 12016 S-2
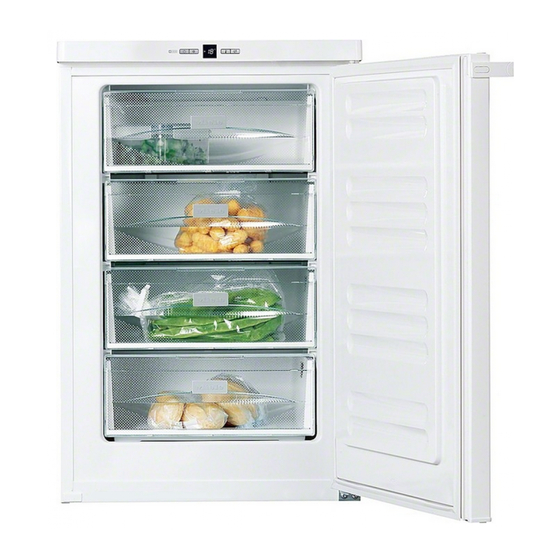
- Page 1 Operating and installation instructions Freezer F 12016 S-2 F 12020 S-2 F 12020 S-3 en - GB To avoid the risk of accidents or damage to the appliance, it is essential to read these operating instructions before it is installed or used for the first time.
-
Page 2: Table Of Contents
Contents Guide to the appliance ..........4 Caring for the environment . - Page 3 Contents Ventilation gaps ........... 29 Door seal .
-
Page 4: Guide To The Appliance
Guide to the appliance a On/Off button d Alarm symbol b Super freeze button e Super freeze symbol c Display f Lock symbol If the appliance is not operated for g Temperature display some time, the display will revert h Temperature selector button automatically to the brightness level which has been set. - Page 5 Guide to the appliance a Freezer drawers...
-
Page 6: Caring For The Environment
Caring for the environment Disposal of the packing Disposal of your old appliance material Electrical and electronic appliances often contain materials which, if The transport and protective packing handled or disposed of incorrectly, has been selected from materials which could be potentially hazardous to are environmentally friendly for human health and to the environment. -
Page 7: Warning And Safety Instructions
Any other usage is not supported by This appliance complies with all the manufacturer and could be relevant safety requirements. dangerous. Miele cannot be held liable Improper use can, however, present for damage resulting from incorrect or a risk of both personal injury and improper use or operation of the material damage. -
Page 8: Technical Safety
Warning and Safety instructions Technical safety The more coolant there is in an appliance, the larger the room it should Before setting up the appliance, be installed in. In the event of a check it for any externally visible leakage, if the appliance is in a small damage. - Page 9 Faulty components must only be requirement is observed and tested replaced by genuine Miele original regularly, and where there is any doubt, spare parts. The manufacturer can only the household wiring system should be guarantee the safety of the appliance inspected by a qualified electrician.
- Page 10 Warning and Safety instructions Correct use Do not refreeze partially or fully defrosted food. The appliance is designed for use Consume defrosted food as soon as within certain climate ranges (ambient possible, as it will lose its nutritional temperatures), and should not be used value and spoil if left for too long.
-
Page 11: Disposal Of Your Old Appliance
Warning and Safety instructions Disposal of your old appliance Do not operate any electrical equipment (e.g. an electric ice-cream Before disposing of an old maker) inside the appliance. Danger of appliance, first make the door latch or sparking and explosion. lock unusable. -
Page 12: How To Save Energy
How to save energy Normal energy Increased energy consumption consumption Installation site In a ventilated room. In an enclosed, unventilated room. Protected from direct In direct sunlight. sunlight. Not near to a heat source Near to a heat source (radiator, oven). (radiator, oven). - Page 13 How to save energy Normal energy consumption Increased energy consumption Drawers, shelves and racks arranged as they were when the appliance was delivered. Only open the doors when Opening doors frequently and necessary and for as short a for long periods results in loss time as possible.
-
Page 14: Switching On And Off
Switching on and off Before using for the first time Switching off ^ Clean the inside of the appliance and the accessories with lukewarm water and a little washing-up liquid, and then dry with a soft cloth. ^ Press the On/Off button until the Switching on display goes out. -
Page 15: Customising Settings
Customising settings Settings mode X Altering the brightness of the display Certain settings on the appliance can The display brightness can be adjusted be changed using Settings mode. to suit the lighting conditions of the room. The brightness of the display You can select one of the five display can be altered brightness settings from ^1 to ^5. -
Page 16: Activating Or Deactivating The Lock
Customising settings Activating or deactivating the lock The lock can be activated to prevent the appliance being switched off by mistake. ^ Press the temperature selector button – To activate the Lock repeatedly until the brightness level required is reached: ^1: dimmest setting ^5: brightest setting. - Page 17 Customising settings – To deactivate the Lock ^ Press the Super freeze button for approx. five seconds. The Menu symbol X will light up and c will start flashing in the display. Settings mode is now activated. ^ Press the Super freeze button briefly to call up the Lock function.
-
Page 18: The Correct Temperature
The correct temperature Setting the temperature It is very important to set the correct temperature for storing food in the appliance. Micro-organisms will cause food which is not stored at the correct temperature to deteriorate rapidly. Temperature influences the growth rate ^ Press the temperature selector button of these micro-organisms. -
Page 19: Temperature Range
The correct temperature Temperature display Temperature range The temperature can be adjusted from: The temperature display on the -14 °C to -28 °C control panel shows the temperature The ambient temperature in the room in the warmest part of the appliance. and the installation location can affect The temperature display will flash if the time it takes for the appliance to... -
Page 20: Alarm
Alarm Activating the alarm system Your appliance has been fitted with a warning system which ensures that the The alarm system works automatically temperature in the freezer cannot rise once the temperature in the freezer is unnoticed. cold enough. Temperature alarm Switching the alarm off early If the temperature in the freezer As soon as the temperature in the... -
Page 21: Super Freeze
Super freeze Switch on Super freeze before putting The compressor can switch on up to fresh food into the freezer. 8 minutes later. This is due to an This helps food to freeze quickly and built-in delay switch, which helps retain its nutrients, vitamins, flavours prolong the life of the appliance. -
Page 22: Freezing And Storing Food
Freezing and storing food Maximum freezing capacity Storing frozen food To ensure that fresh food placed in the When buying frozen food to store in freezer freezes through to the core as your freezer, check quickly as possible, the maximum –... -
Page 23: Home Freezing
Freezing and storing food Home freezing should be taken as the taste of some spices alters when frozen. Only freeze fresh food which is in a good condition. – Do not place hot food or drinks in the freezer. This causes already frozen Hints on home freezing food to thaw, and increases the energy consumption considerably. -
Page 24: Before Placing Food In The Freezer
Freezing and storing food Before placing food in the freezer – Freezing the maximum amount (see data plate) ^ When freezing more than 1 kg of ^ Remove the lowest freezer drawer. fresh food, switch on the Super freeze function for some time before ^ Place the food flat on the bottom of placing the food in the freezer (see the appliance or in contact with the... -
Page 25: Defrosting
Freezing and storing food Defrosting Never re-freeze partially or fully Frozen food can be defrosted in defrosted food. Consume defrosted different ways: food as soon as possible as it will lose its nutritional value and spoil if – in a microwave oven, left for too long. -
Page 26: Defrosting
Defrosting In normal use, ice and frost will form in Do not scrape off ice and frost and the freezer, e.g. on the internal walls. do not not use any sharp edged or How much ice and frost accumulates in the appliance will depend on the pointed instruments to aid the following:... - Page 27 Defrosting ^ Remove any loose pieces of ice. To defrost ^ Use a sponge or towel to soak up the Carry out the defrosting procedure defrosted water, as often as as quickly as possible. The longer necessary. the food is left out at room temperature, the faster it defrosts.
-
Page 28: Cleaning And Care
Cleaning and care Before cleaning Make sure that no water can ^ Switch the appliance off. penetrate into electronic unit or into ^ Disconnect the appliance from the the ventilation gaps. mains. Do not use steam cleaning ^ Take any frozen food out of the apparatus to clean the appliance. -
Page 29: Appliance Door, Side Panels
Cleaning and care Appliance door, side panels The door seal should be cleaned regularly with clean water and then Remove any soiling from the wiped dry with a soft cloth. appliance door and side panels im- mediately. Back of appliance - If this is not done, it might become compressor and metal grille impossible to remove and could... -
Page 30: Problem Solving Guide
Problem solving guide Some minor problems can be corrected without contacting Miele. If having followed the suggestions below, you still cannot resolve the problem, please contact Miele. To prevent unnecessary loss of temperature it is advisable not to open the door while waiting for the appliance to be serviced. - Page 31 Problem solving guide Problem Possible cause Remedy ^ Set a warmer The temperature temperature. inside the appliance is too low. You can switch off the Super The Super freeze function is freeze function earlier to still switched on. The Super freeze function switches save energy: itself off automatically after...
- Page 32 Problem solving guide Problem Possible cause Remedy The compressor runs To save energy, the continuously. compressor runs at a lower speed, but for longer, when less cooling is required. The Super freeze function Super freeze is switched on. Food is frozen rapidly, switches itself off preserving nutrients, automatically after approx.
- Page 33 The warmest recorded temperature will go out in the display. The display will then revert to showing the current temperature in the freezer. ^ Call Miele Service. F0 to F5 appears in There is a fault. the display.
- Page 34 Problem solving guide Problem Possible cause Remedy The external side The warmth created by the panels of the evaporator is used to appliance feel prevent condensation. warm. ^ Use a blunt instrument, Food has frozen e.g. a spoon handle or together.
-
Page 35: Noises
Noises Normal noises What causes them Brrrrr... Humming noise made by the motor (compressor). This noise can get louder for brief periods when the motor is switching on. Blubb, blubb..A gurgling noise can be heard when coolant is circulating through the pipes. -
Page 36: After Sales / Guarantee
– your Miele Dealer – Miele (see back cover for contact details). When contacting your Dealer or Miele, please quote the model and serial number of your appliance. This information is given on the data plate inside your appliance. -
Page 37: Information For Dealers
Information for dealers Demo mode r To deactivate Demo mode ^ Press the On/Off button and the The appliance can be demonstrated in the showroom or at exhibitions in Temperature selector button at the "Demo mode". In this mode the display same time for approx. -
Page 38: Electrical Connection
Electrical connection Electrical connection U.K. Non-rewireable plugs (BS 1363) All electrical work should be carried out The fuse cover must be re-fitted when by a suitably qualified and competent changing the fuse, and if the fuse cover person in strict accordance with current is lost, the plug must not be used until a local and national safety regulations suitable replacement is obtained. -
Page 39: Installation
Further information is available from handle is fitted correctly. Should you your dealer. require further assistance please contact your Miele customer service Location centre. This appliance should not be installed Climate range where it is exposed to direct sunlight or... -
Page 40: Ventilation
Installation Ventilation Installation Air at the back of the appliance gets Two people are required to install warm. To ensure sufficient ventilation, the appliance. Only move the the ventilation gaps must not be appliance when it is empty. covered or blocked in any way. They should be dusted on a regular basis. -
Page 41: Appliance Dimensions
Installation Appliance dimensions 850 mm 555 mm 611 mm 624 mm 1174 mm 595 mm F 12016 S-2 F 12020 S-2 850 mm 600 mm 611 mm 624 mm 1174 mm 640 mm F 12020 S-3 850 mm 600 mm... -
Page 42: Changing The Door Hinging
Changing the door hinging ^ Unscrew upper hinge pin d and refit The appliance is supplied right hand hinged. If left hand door hinging is it on the other side. required, follow the instructions below. ^ Take care not to lose the washer. ^ Close the door. -
Page 43: Changing Over The Door Handle
Changing the door hinging Changing over the door handle ^ Turn the handle 180° and fit to the opposite side. ^ Carefully remove cover a and stoppers b from the sides using a ^ First screw it at the side and then in flatheaded screwdriver. -
Page 44: Building In The Appliance
Building in the appliance – The ventilation cross-section of the air outlet below the ceiling must be at least 300 cm to ensure that air can circulate without hinderance. The compressor will operate more economically, the larger the ventilation cross-section. Otherwise the appliance has to work longer and harder, resulting in an increase in electricity consumption and also an increase in... - Page 48 Alteration rights reserved / 1212 M.-Nr. 09 290 840 / 01 F 12016 S-2, F 12020 S-2, F 12020 S-3...