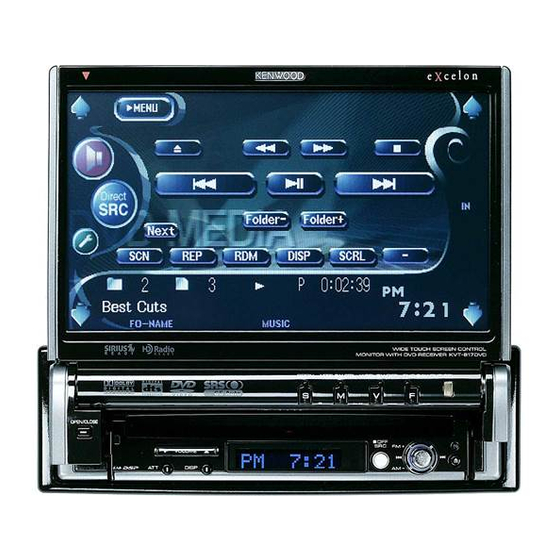
Kenwood Excelon KVT-817DVD Instruction Manual
Kenwood monitor with dvd receiver instruction manual kvt-817dvd
Hide thumbs
Also See for Excelon KVT-817DVD:
- Installation manual (45 pages) ,
- Service manual (116 pages)
Table of Contents
Advertisement
MONITOR WITH DVD RECEIVER
KVT-817DVD
INSTRUCTION MANUAL
Take the time to read through this instruction manual.
Familiarity with installation and operation procedures will help you obtain the best
performance from your new DVD Receiver.
For your records
Record the serial number, found on the back of the unit, in the spaces designated on the
warranty card, and in the space provided below. Refer to the model and serial numbers
whenever you call upon your Kenwood dealer for information or service on the product.
Model KVT-817DVD Serial number
US Residence Only
Register your Kenwood product at
www.kenwoodusa.com
© B64-3171-00/00 (KV)
Register Online
Advertisement
Table of Contents

Related Manuals for Kenwood Excelon KVT-817DVD


Summary of Contents for Kenwood Excelon KVT-817DVD
- Page 1 Record the serial number, found on the back of the unit, in the spaces designated on the warranty card, and in the space provided below. Refer to the model and serial numbers whenever you call upon your Kenwood dealer for information or service on the product. Model KVT-817DVD Serial number...
-
Page 2: Table Of Contents
Contents Before Use ... 4 Notes on playing MP3/WMA/JPEG/MPEG .. 6 Opening/Closing the Monitor and Power Switch ... 8 Removing/Attaching the Protection Panel .. 9 KVT-817DVD Basic operations ... 10 Basic Operations of Remote Controller ... 12 About discs ... 15 Switching Small Display ... - Page 3 Source Select ... 60 Displaying the Control screen Displaying the Source Select screen Adjusting the Monitor Display Position and Quality ... 61 Displaying the Screen Control screen Displaying the Angle Control screen Setup Menu ... 62 Setup Menu ...62 Displaying the Control screen Displaying the Setup Menu screen Audio Set Up ...64 Displaying the Car Type Set Up screen...
-
Page 4: Before Use
Called lens fogging, discs may be impossible to play. In such a situation, remove the disc and wait for the condensation to evaporate. If the unit still does not operate normally after a whilst, consult your Kenwood dealer. - Page 5 Region codes in the world The DVD players are given a region code according to the country or area it is marketed, as shown in the following map. Icons on the DVD discs Icon Indicates the region code where the disc can be played. Number of voice languages recorded with the audio function.
-
Page 6: Notes On Playing Mp3/Wma/Jpeg/Mpeg
Notes on playing MP3/WMA/JPEG/MPEG This unit can play MP3 (MPEG1 Audio Layer 3)/ WMA/JPEG/MPEG (MPEG 1/MPEG 2). Note, however, that the MP3/WMA/JPEG/MPEG recording media and formats acceptable are limited. When writing MP3/WMA/JPEG/MPEG, pay attention to the following restrictions. Acceptable media The MP3/WMA/JPEG/MPEG recording media acceptable to this unit are CD-ROM, CD-R, CD-RW,DVD-R/RW and DVD+R/ When using CD-RW, do full format not quick format to prevent... - Page 7 MP3/WMA/JPEG/MPEG playing order When selected for play, Folder Search, File Search, or for Folder Select, files and folders are accessed in the order in which they were written by the CD/DVD writer. Because of this, the order in which they are expected to be played may not match the order in which they are actually played.
-
Page 8: Opening/Closing The Monitor And Power Switch
Opening/Closing the Monitor and Power Switch Open the monitor Close the monitor Turn the power on Hold down the [SRC] key more than one second to turn it off. Do not touch the moving components when you are opening or closing the monitor. If you touch the moving components, •... -
Page 9: Removing/Attaching The Protection Panel
Removing/Attaching the Protection Panel Remove the protection panel Attach the protection panel Place the right end of the protection panel onto hooks and push it until clicked and locked. Then, push the left end of the panel to lock it. Close the monitor first, then remove or attach the protection panel. -
Page 10: Kvt-817Dvd Basic Operations
KVT-817DVD Basic operations ■ When the monitor is open OPEN/CLOSE DISP ■ When the monitor is closed OPEN/CLOSE DISP 1 Play Disc [Disc insertion slot] A disc is played when you insert it. 2 Stop to Play [7] key Stops to play. 3 Play/Pause [38] key Pauses and replays a disc. - Page 11 DVD/VCD TV */ Video R-CAM * Navigation * * Optional accessory You can also turn off the video display by pressing the key longer than 1 second. When you press the key again, the previous video display comes back on. 7 Audio Source Selection/Power Supply [SRC] key Audio source selection changes in the following order...
-
Page 12: Basic Operations Of Remote Controller
Basic Operations of Remote Controller ENTER MENU RETURN – BAND ZOOM ZOOM POSITION MODE ROUTEM VIEW MENU TOP MENU VOICE MAPDIR 2-ZONE AV OUT REAR 1 Remote Control Mode selector switch Selects one of the following remote control modes when switched to AV control mode with [NAV] switch. TV source DVD: Built-in DVD/VCD/CD/MP3/WMA/JPEG/MPEG player source... - Page 13 6 [BAND] key (When 1 is set to "DVD" or "AUD") DISC Select a disc and a folder. (When 1 is set to "TV" or "AUD") BAND: Switches to TV1, TV2, VIDEO1, or VIDEO2. (When 1 is set to "AUD") TUNER +: Switches to the FM1, FM2, or FM3 band.
- Page 14 o [0] – [9] key (When 1 is set to "TV") (When 1 is set to "AUD") TUNER — : Recall the stations on memory. 1 . ? & 6 MNO You can enter a character/number. [SUBTITLE] key (When 1 is set to "DVD") : Switches a subtitle language.
-
Page 15: About Discs
About discs Handling discs • Do not touch the recording surface of the disc. • CD-R/RW, DVD-R/RW, and DVD+R/RW are easier to damage than a normal music CD. Use a CD-R/RW, DVD-R/RW, or DVD+R/RW after reading the caution items on the package etc. -
Page 16: Switching Small Display
Switching Small Display The Small Display screen mode changes each time the [DISP] key is pressed. OPEN/CLOSE DISP [DISP] key * Hold down the [DISP] key more than 1 second to switch to the Frequency display. English "AUX EXT" Navigation "NAV"... -
Page 17: Switching Screen Mode
Switching Screen Mode The Screen mode of the monitor changes each time the [MODE] key is pressed. OPEN/CLOSE DISP Full picture mode (FULL) Justify picture mode (JUST) Cinema picture mode (CINEMA) Zoom picture mode (ZOOM) Normal picture mode (NORMAL) • When you select the Menu, Easy Control screen, or Navigation, the display is shown in the full-size display mode automatically. The screen mode of these displays cannot be changed. -
Page 18: Controling During Dvd Video, Video Cd, Jpeg Or Mpeg Playback
Control during DVD Video, DVD Audio or Video CD Playback Controling during DVD Video, Video CD , JPEG or MPEG Playback Various control screens appear when you play back a DVD Video (DVD), a Video CD (VCD) disc, a JPEG or MPEG files. -
Page 19: Displaying The Easy Control Panel
Before Use JPEG/MPEG playback screen DVD MEDIA Mode: FULL AVOUT: Displaying the Easy Control Panel The Control Panel is displayed in a floating position of the DVD/VCD screen. Displaying the Easy Control Panel DVD VIDEO Title Chap e Folder/File Number Display P 0:01:48 r Forword File Search Area Selects the next folder or file. -
Page 20: Displaying The Dvd/Vcd Control Screen
DVD VIDEO DVD VIDEO Title 1 Chap T 0:05:20 KENWOOD English g Adjusts the volume. h Ejects the disc from the built-in disc player. j Calls the Sound Effects Menu. (page 90) k Displays the Source Select screen. (page 60) l Calls the Setup Menu. - Page 21 Controling during DVD Video, Video CD, JPEG or MPEG Playback English...
-
Page 22: Dvd Disc Menu
You can select a chapter and title for the DVD Menu screen. When you touch a chapter and title, it is played back. Highlight [ Highlight On ] DVD Menu DVD Menu 1. KENWOOD 1. KENWOOD 2. KENWOOD 2. KENWOOD 3. KENWOOD 3. KENWOOD 4. KENWOOD 4. -
Page 23: Vcd Zoom Control
Controling during DVD Video, Video CD, JPEG or MPEG Playback VCD Zoom Control Displays an enlarged VCD screen. Display the Zoom Control screen Zoom Control Button Area (page 18) Zoom Control Zoom 1 Changes the zoom ratio at 4 levels (2 times, 3 times, 4 times, or off ) each time you touch. -
Page 24: Cd/Mp3/Wma/Jpeg/Mpeg/Disc Changer Play Control
CD/MP3/WMA/JPEG/MPEG/Disc Changer Play Control You can call various control screens during CD/MP3/WMA/JPEG/MPEG/Disc Changer playback. Displaying the Easy Control Panel The CD/MP3/WMA/JPEG/MPEG/Disc Changer Play Control Panel is displayed in a floating position of the selected picture. Displaying the Easy Control Panel During CD playback DVD CD Track 1... -
Page 25: Changer Control Screen
Displaying the CD/MP3/WMA/JPEG/ MPEG/Disc Changer Control screen You can play the CD/MP3/WMA/JPEG/MPEG/Disc changer using various functions. CD Control screen MENU Direct DVD CD DISP SCRL Track 4 P 2:09 During CD playback 9 Adjusts the volume. p Calls the CD Menu. q Calls the Sound Effects Menu. - Page 26 MP3/WMA/JPEG/MPEG Control screen MENU Direct DVD MEDIA DVD MEDIA Folder Folder Next DISP P 00:03:24 FREP English During MP3/WMA/JPEG/MPEG play / Ejects a disc. z Fast Forwards or Fast Backwards. (Disabled when a JPEG is being played.) x Stops to play. When pressed twice, the disc is played back from SCRL its beginning in the next time.
-
Page 27: Set Disc Name
Disc Changer Control screen MENU Disc Direct CD-CH Disc Next DISP SCRL P 01:24 DREP MRDM CD/MP3/WMA/JPEG/MPEG/Disc Changer Play Control During play by the disc changer I Selects a track. Starts Fast Forward or Fast Backwards when it is held down. O Selects a disc. -
Page 28: Changer Menu Screen
Displaying the CD/MP3/WMA/JPEG/ MPEG/Disc Changer Menu screen You can select menu options using various functions. MENU CD Menu screen Name Set English Selects options from various function menus. Returns to the CD/MP3/WMA/JPEG/MPEG/Disc Changer Control screen. • The available functions vary depending on the source used. MENU MENU... -
Page 29: Set Disc Name
Before Use Set Disc Name Names a CD. Play a CD you wish to name Call the CD/Disc Changer Menu MENU Select the Set Name mode Name Set • The position varies depending on the disc Name Set you are playing. Enter a name For character entry details, see <Character Entry>... -
Page 30: Id3/Wma Tag Display (During Mp3/Wma Play)
WMA play) The ID3/WMA TAG information of MP3/WMA file is listed. Call the MP3/WMA/JPEG/MPEG Menu MENU Display the ID3/WMA TAG Infomation MENU Title: KENWOOD Artist: KENWOOD Album: KENWOOD 1 Scrolls the list. English Disc Select (during play by disc changer) The discs loaded on the disc changer are listed for quick disc selection. -
Page 31: Direct Search
Direct Search Searches for a disc or a track when its number is entered. During play on the built-in disc player Select the Direct Search mode # BS DIRECT The following items can be searched directly each time it is pressed. CD: Track number, Total play time MP3/WMA/JPEG/MPEG: Folder, File Enter a track number... -
Page 32: Tuner Control
Tuner Control Various control screens appear in the Tuner Source mode. Displaying the Easy Control Panel The Tuner Control Panel is displayed in a floating position of the selected picture. Displaying the Easy Control Panel TUNER FM 1 AUTO1 Displaying the Tuner Control screen You can tune in a station using various functions. -
Page 33: Displaying The Tuner Menu Screen
Displaying the Tuner Menu screen You can select menu options using various functions. MENU Tuner Menu screen MENU MENU Preset Select Name Set PTY Search Radio Text o Selects the Program Service Name, Station Name, or Radio Text mode for text display. ;... -
Page 34: Seek Mode
Seek Mode Sets a station selection. SEEK is not shown, touch SEEK Next The mode is switched in following order each time you touch the button. Tunes in a station with good AUTO 1 reception automatically. Tunes in stations in memory one after AUTO 2 another. -
Page 35: Preset Select
Preset Select Lists and tunes in stations in memory one after the other. Call the Tuner Menu MENU Call the Preset Select Menu Preset Select P1 87.9 MHz MENU P2 90.1 MHz DISP P3 98.1 MHz P4 87.9 MHz TUNER P5 87.9 MHz P6 87.9 MHz FM 1... -
Page 36: Direct Search
Direct Search Tunes in a station when its frequency is entered. Select a band – BAND Select the Direct Search mode # BS DIRECT Enter a frequency — 9 WXYZ When you enter frequency, signal reception starts. Example: When you receive FM 92.1 MHz 9 WXYZ 2 ABC 1 . -
Page 37: Search For Program Type
Search for Program Type A program is tuned when you set its program type. (Only when receiving the FM broadcast.) Call the Tuner Menu MENU Call the PTY Search Menu PTY Search MENU NEWS INFORMATION SPORTS TUNER TALK ROCK FM 1 Preset 3 98.1 MHz None... -
Page 38: Tv/ Video Control
TV/ VIDEO Control Various control screens appear in the TV/ Video Source mode. (You can only operate TV with the optional accessory TV Tuner connected.) Displaying the TV Picture screen Various control screens appear in the TV Source mode. Select the TV Pictures. -
Page 39: Displaying The Tv Control Screen
Displaying the TV Control screen You can tune in a TV station using various functions. TV Control screen MENU VIDEO Direct Next SEEK 2 ch AUTO1 r Adjusts the volume. t Calls the TV Menu. y Calls the Sound Effects Menu. (page 90) u Displays the Source Select screen. -
Page 40: Displaying The Tv Menu Screen
Displaying the TV Menu screen You can select menu options using various functions. MENU TV Menu screen Preset Select Name Set English k Selects option from various function menus. l Returns to the TV Control screen. MENU MENU... -
Page 41: Seek Mode
Before Use Seek Mode Sets a TV station selection. SEEK is not shown, touch SEEK Next The mode is switched in following order each time you touch the button. Tunes in a station with good AUTO 1 reception automatically. Tunes in stations in memory one after AUTO 2 another. -
Page 42: Manual Memory
Before Use Manual Memory Stores the current receiving channel in memory. Select a channel you wish to store in memory Store in memory 2sec. 2sec. — are not shown, touch Continue to touch until the memory number appears. English Preset Select Lists and tunes in stations in memory one after the other. -
Page 43: Set Station Name
Set Station Name Names a station. Select a station you wish to name Call the TV Menu (Page 39 t) MENU Select the Set Name mode Name Set Enter a name For character entry details, see <Character Entry> (page 59). Exit the Set Name mode •... -
Page 44: Sirius Tuner Control
SIRIUS Tuner Control Various control screens appear in the SIRIUS Tuner source mode. (with the optional accessory SIRIUS Tuner connected only) Displaying the Easy Control Panel The SIRIUS Tuner Control Panel is displayed in a floating position of the selected picture. Displaying the Easy Control Panel Band SIRIUS... -
Page 45: Displaying The Sirius Tuner Menu
Displaying the SIRIUS Tuner Menu You can select menu options using various functions. MENU SIRIUS Tuner Menu screen Channel Search 10key Direct Information i When channel on memory. For memory of channel stations, see <Channel Memory> (page 46) . o Indicates current Seek mode. ;... -
Page 46: Channel Search
Channel Search The categories and channels are listed for your channel selection. Call the SIRIUS Tuner Menu MENU Start Channel Searching Channel Search The category list appears. Category Selection screen MENU cat.HITS 0 cat.ROCK 1 cat.CTRY 2 SIRIUS cat.R&B 3 cat.JAZZ 4 1 Selects a category. -
Page 47: Direct Channel Search
Direct Channel Search A channel is tuned when you enter its number. Call the SIRIUS Tuner Menu MENU Display the Direct Search screen 10key Direct Direct Search screen SIRIUS 10 Key Direct 999ch 1 Enters a channel number. 2 Returns to the SIRIUS Tuner Menu. 3 Tunes in a channel when you enter is number. -
Page 48: Hd Radio Control
HD Radio Control Various control screens appear in the HD Radio Source mode. (with the optional accessory HD Radio Tuner connected only) Displaying the Easy Control Panel The HD Radio Control Panel is displayed in a floating position of the selected picture. Displaying the Easy Control Panel HD AM HD FM... -
Page 49: Displaying The Hd Radio Menu
Displaying the HD Radio Menu screen You can select menu options using various functions. MENU HD Radio Menu screen MENU MENU Receive Mode Title o When buttons appear, you can recall the stations on memory. For memory of broadcasting stations, see <Auto Memory>... -
Page 50: Seek Mode
Seek Mode Sets a station selection. SEEK is not shown, touch SEEK Next The mode is switched in following order each time you touch the button. Tunes in a station with good AUTO 1 reception automatically. Tunes in stations in memory one after AUTO 2 another. -
Page 51: Receive Mode
Receive Mode The digital or analog program is selected and received. Call the HD Radio Menu MENU Call the Receive mode Menu Receive Mode MENU Receive Mode Auto HD RADIO 1 Switches the Receive mode. 2 Receive mode Display. 3 Returns to the HD Radio Menu. Select the Receive mode Auto: Automatically switches between the... -
Page 52: Dab Tuner Control
DAB Tuner control Various control screens appear in the DAB Tuner source mode. (with the optional accessory DAB Tuner connected only) Displaying the Easy Control Panel The DAB Tuner Control Panel is displayed in a floating position of the selected picture. Displaying the Easy Control Panel BAND DAB 1... -
Page 53: Displaying The Dab Tuner Menu Screen
Displaying the DAB Tuner Menu screen You can select menu options using various functions. MENU DAB Tuner Menu screen MENU MENU Service Select Language Filter PTY Search DAB Information ; When buttons appear, you can recall a service on memory. a Indicates current Seek mode. -
Page 54: Seek Mode
Seek Mode A service selection method can be set. SEEK is not shown, touch SEEK Next The mode is switched in following order each time you touch the button. Tunes in a ensemble with good AUTO 1 reception automatically. Tunes in service in memory one after AUTO 2 another. -
Page 55: Service Select
Service Select The service list of the currently receiving ensemble is displayed for your selection. Call the DAB Tuner Menu MENU Call the Service Select Menu Service Select MENU Service Name Service Name Service Name Service Name Service Name 1 Selects a service. 2 Scrolls the service list. -
Page 56: Search For Program Type
Search for Program Type The services are received when you set its program type. Call the DAB Tuner Menu MENU Call the PTY Search Menu PTY Search MENU News 1 Selects a program type. 2 Searches for the program type. 3 Displays the Language select screen. -
Page 57: Dab Information
DAB Information The DAB information is displayed. Call the DAB Tuner Menu MENU Display the DAB Information screen DAB Information MENU AUDIO QUALITY: 1234567890123456 REGION LABEL: 1234567890123456 1 Displays the DAB information (such as Service label, Ensemble label, Component label, Audio quality, Region label, and Dynamic label). -
Page 58: Weather Band Tuner Control
Weather Band Tuner Control Various control screens appear in the Weather Band Tuner source mode. (with the optional accessory Weather Band Tuner connected only) Displaying the Easy Control Panel The Weather Band Tuner Control Panel is displayed in a floating position of the selected picture. Displaying the Easy Control Panel Displaying the Weather Band Tuner Control screen... -
Page 59: Character Entry
Character Entry How To Use the Character Entry screen When you select the Set Disc Name mode or others, the following screen appears for character entry. Character Entry screen 1 Shifts the cursor. 2 Enters a space. If you erase a character, locate the cursor on it and touch this button. -
Page 60: Source Select
Control screen MENU MENU Direct DVD VIDEO DVD VIDEO Title 1 Chap T 0:05:20 KENWOOD Displaying the Source Select screen Direct Source Select screen STANDBY TUNER VIDEO CD-CH Next English • The Source Select screen can be displayed from the control... -
Page 61: Adjusting The Monitor Display Position And Quality
Adjusting the Monitor Display Position and Quality You can adjust the position and picture quality of the monitor. Displaying the Screen Control screen You can adjust the picture quality using the following keys. Screen Control screen Screen Control CONT BLACK Auto DIM Displaying the Angle Control screen You can set the monitor position and open/close... -
Page 62: Setup Menu
Control screen MENU MENU Direct DVD VIDEO DVD VIDEO Title 1 Chap T 0:05:20 KENWOOD Displaying the Setup Menu screen Setup Menu screen Prev. Touch Clock Security SIRIUS Set Up Next English • You can call the same Setup Menu for the Control screen of each source. - Page 63 English...
-
Page 64: Audio Set Up
Control during DVD Video, DVD Audio or Video CD Playback Audio Set Up (Other than STANDBY mode) You can set up the car type and speaker system you use together with this unit. Displaying the Car Type Set Up screen If your car type is selected, the Digital Time Alignment and Equalizer is set automatically (for timing adjustment of sound output for each... -
Page 65: Displaying The Channel Level Screen
Before Use Displaying the Channel Level screen You can set the volume at each setup position. Channel Level screen MENU Channel Level Channel Level Channel Level r Selects a speaker to be set. (see <Channel Level>, page 67) t Sets the speaker volume. (see <Channel Level>, page 67) y Starts or stops test signal tone output for setup check. -
Page 66: Speaker Set Up
Speaker Set Up You can select a speaker type and its size to get the best sound effects. Select a speaker you wish to adjust (Page 64 8) Speaker Set Up screen MENU Tweeter Speaker Speaker Speaker 1 Center speaker 2 Front speaker 3 Rear speaker 4 Subwoofer... -
Page 67: Channel Level
Before Use Channel Level You can set the volume at each setup position. Select a speaker you wish to adjust (Page 65 r) Channel Level setup screen MENU Channel Level Channel Level Channel Level 1 Center speaker 2 Left front speaker 3 Right front speaker 4 Left rear speaker 5 Right rear speaker... -
Page 68: Dta Setup
Before Use DTA Setup Manually sets the sound output timing of each channel. Display the DTA Setup screen (Page 64 6) DTA Setup screen 1 Selects a speaker to be adjusted. 2 Sets a delay time of the selected speaker. 3 Returns to the Car Type Set Up screen. -
Page 69: Crossover Network Setup
Before Use Crossover Network Setup You can manually set a crossover frequency of speakers. (Page 64 p) X'Over X'Over Subwoofer 100Hz Frequency 80 Hz Slope 12dB/Oct 1 Sets a crossover frequency. 2 Sets a crossover slope. 3 Returns to the Speaker Set Up screen. 4 Sets the phase of subwoofer output (it is displayed when the subwoofer crossover frequency is set). -
Page 70: Dvd Setup
Before Use DVD Setup You can set up the DVD play. Displaying the DVD SETUP 1 screen DVD SETUP DVD SETUP 1 screen MENU Menu Language Subtitle Language Audio Language Original Dynamic Range Control Normal DVD SETUP 1 DVD SETUP 1 DVD SETUP 1 English 1 Adjusts the volume. -
Page 71: Displaying The Dvd Setup 2 Screen
Before Use Displaying the DVD SETUP 2 screen DVD SETUP 2 screen MENU Parental Level Angle Mark Screen Ratio 4:3 LB DVD SETUP 2 DVD SETUP 2 DVD SETUP 2 Displaying the DVD SETUP 3 screen DVD SETUP 3 screen Picture Display Time MENU Middle... -
Page 72: Language Setup
Language Setup Selects a language you use for the speech and menus. Display the Language Setup screen See <Displaying the DVD SETUP 1 screen> (page 70) and select a language you wish to use. Audio Language Set 1 Enters a language code. 2 Cancels the language setup and returns to the DVD SETUP 1 screen. -
Page 73: Parental Level Setup
Before Use Parental Level Setup Sets a parental level. Display the Parental Level code number screen (Page 71 p) Parental Pass Clear 1 Enters a code number. 2 Cancels the current setup and returns to the DVD SETUP 2 screen. 3 Clears the code number. -
Page 74: System Setup
System Setup You can set up the system parameters. Displaying the System 1 screen System Set Up System 1 screen MENU Beep Scroll Manual Remote Sensor System Set UP 1 System Set UP 1 System Set UP 1 English 1 Adjusts the volume. 2 Returns to the Control screen of the previous source. -
Page 75: Displaying The System 2 Screen
Displaying the System 2 screen System 2 screen MENU CD Read Key illumination color Green Display illumination color Blue System Set Up 2 System Set Up 2 System Set Up 2 9 Sets a music CD playback. ( "1": Automatically recognizes and plays back an MP3/WMA disc, a DVD or a music CD. -
Page 76: Av Interface
3 Calls the Sound Effects Menu. (page 90) 4 Calls the Setup Menu. 5 Selects a navigation system connection. ( "RGB": Allows the Kenwood’s Navigation System to connect via its interface cable. "AV-IN1": Allows a third-party navigation system to connect via the AV INPUT1 port. -
Page 77: Displaying The Av I/F 2 Screen
Before Use Displaying the AV I/F 2 screen AV I/F 2 screen MENU R-CAM Interruption R-CAM Mirror Normal AV-OUT AV I/F 2 AV I/F 2 AV I/F 2 Displaying the AV I/F 3 screen AV I/F 3 screen MENU Navigation Interruption Right Guide Volume Level Line Mute... -
Page 78: User Interface
Control during DVD Video, DVD Audio or Video CD Playback User Interface You can set up user interface (IF) parameters. Displaying the User I/F 1 screen User Interface User I/F 1 screen MENU Background Change Light Background Movie Frame Select Pattern2 Demonstration User I/F 1... -
Page 79: Displaying The User I/F 3 Screen
Displaying the User I/F 3 screen User I/F 3 screen MENU Key Information Marker Pattern1 User I/F 3 User I/F 3 User I/F 3 e Sets an on-screen display of the TV screen. Auto) (when the optional accessory TV tuner in connected only) "Auto": Information is displayed for 5 seconds when updated. -
Page 80: Touch Panel Adjustment
Touch Panel Adjustment You can adjust the touch panel operations. Display the Touch Panel Adjust screen Touch is not shown, touch Touch to display it. Next MENU Touch Panel Adjust Touch Touch Touch 1 Adjusts the volume. 2 Returns to the Control screen of the previous source. -
Page 81: Clock
Clock You can adjust the clock time. Display the Clock screen Clock is not shown, touch Clock to display it. Next MENU AM 11:18 RDS Synchronize Clock Clock Clock 1 Adjusts the volume. 2 Returns to the Control screen of the previous source. -
Page 82: Security Code Setup
Before Use Security Code Setup You can set a security code to protect your receiver system against theft. • When the Security Code function is activated, the code cannot be changed and the function cannot be released. Note, the Security Code can be set as the 4 digit number of your choice. - Page 83 Before Use If you have pressed the Reset button or if you have disconnected the Receiver from battery... Enter the correct security code — You must enter the same security code as that you have entered in Step 3 above. Enter the security code Enter Now, you can use your Receiver.
-
Page 84: Set Up Memory
Set Up Memory Audio Set Up and AV Interface settings can be memorized. The memorized settings can be recalled at any time. For example, even when the settings are cleared due to replacement of the battery, the settings can be restored. Display the Set Up Memory screen Set Up Memory is not shown, touch... -
Page 85: Sirius Setup
SIRIUS Setup You can display the SIRIUS ID. (with the optional accessory SIRIUS Tuner connected only) Displaying the SIRIUS Set Up screen SIRIUS Set Up SIRIUS Set Up screen MENU Sirius ID 123456789012 SIRIUS Set Up SIRIUS Set Up SIRIUS Set Up 1 Adjusts the volume. -
Page 86: Dab Set Up
DAB Set Up You can set the DAB reception. (only with the optional accessory DAB Tuner connected) Displaying the DAB Set Up screen DAB Set Up DAB Set Up screen MENU DAB Priority Regional INT PTY Watch PTY Watch Off Announcement Select DAB Set Up DAB Set Up... -
Page 87: Announcement Selection
Announcement Selection You can set various announcement reception parameters. Displays the Announcement Selection screen (Page 86 9) Traffic News Transport News Special Event Warning Radio Info News Sports News Weather Financial News 1 Adjusts the volume. 2 Turns the Announcement Reception function On or Off. -
Page 88: Amp Control
AMP Control Sets the power amp connected via the LX bus. (with the optional accessory LX Power Amp connected only) Displaying the AMP Control screen AMP Control screen MENU AMP 1 VOLT 14.4V AMP Control AMP Control AMP Control English 1 Adjusts the volume. -
Page 89: Muting Audio Volume Upon Reception Of Phone Call
Muting Audio Volume upon Reception of Phone call Muting Audio Volume upon Reception of Phone call When the telephone is called, the system is paused automatically. When the telephone is called... The Phone Call ("CALL") screen appears, and systemis paused. Phone Call ("CALL") screen MENU MENU... -
Page 90: Sound Effects Menu
You can set up the receiver sound effects. Displaying the Control screen Control screen MENU MENU Direct DVD VIDEO DVD VIDEO Title 1 Chap T 0:05:20 KENWOOD Displaying the Sound Effects Menu screen Sound Effects screen Audio Control Equalizer Surround Control SRS WOW Zone Control Position English •... -
Page 91: Audio Control
Before Use Audio Control You can adjust the front and rear and right and left audio balance. Displaying the Audio Control screen Audio Control Audio Control screen Balance / Fader MENU FAD F1 BAL R1 Audio Control Audio Control Audio Control 1 Adjusts the volume. -
Page 92: Equalizer
Control during DVD Video, DVD Audio or Video CD Playback Equalizer You can set up the equalizer. Displaying the Equalizer screen Equalizer Equalizer screen MENU BMS AMP Bass Flat BMS AMP FREQ Normal Top 40 English 1 Adjusts the volume. 2 Returns to the Control screen of the previous source. -
Page 93: Parametric Equalizer
Parametric Equalizer You can manually set the equalizer curve by adjusting the center frequency, gain and Q value. Display the Parametric Equalizer screen P-EQ Parametric Equalizer 80Hz 315Hz 1.6kHz +9dB -7dB +9dB Gain Gain Gain Gain 1.00 0.25 0.50 Band1 Band2 Band3 Band4... -
Page 94: Surround Control
Surround Control You can set up the sound field. Displaying the Surround Control screen Surround Control Surround Control screen Stream Information MENU Dolby Digital 2/0 48kHz Dolby PL Music Surround Control Surround Control Surround Control English 1 Adjusts the volume. 2 Returns to the Control screen of the previous source. -
Page 95: Surround Control Adjustment
Surround Control Adjustment You can adjust the sound field. Display the Surround Control screen Adjust Surround Control Adjust screen If the sound field of "Dolby PLII Music" has been set: PL Adjust Dimention Control Neutral Center Width Control Panorama Mode 1 Adjusts the volume. -
Page 96: Srs Wow Control
SRS WOW Control You can set up the SRS WOW effect. Displaying the SRS WOW Control screen SRS WOW SRS WOW Control screen MENU Middle SRS WOW SRS WOW SRS WOW Table of Sound Effect Menu You can set to sound effect menu to mark " Input Surround Front... -
Page 97: Srs Wow Uesr Setup
SRS WOW User Setup Display the SRS WOW Adjust screen Adjust SRS WOW Adjust screen SRS WOW Adjust 1 Adjusts the volume. 2 Selects a speaker to be set (Front, Rear or Center speaker). 3 Sets the TruBass effect level. 4 Sets the FOCUS effect level. -
Page 98: Position
Position You can adjust the sound effects according to your listening position. Displaying the Position screen Position Position screen MENU English 1 Adjusts the volume. 2 Returns to the Control screen of the previous source. 3 Calls the Setup Menu. (page 62) 4 Calls the Sound Effects Menu. -
Page 99: Position Fine Control
Position Fine Control You can fine-adjust your listening position. Display the Position Fine Control screen Adjust Position Fine Control screen Position Fine Control 1 Adjusts the volume. 2 Selects a speaker to be adjusted. 3 Indicates setup distance. The adjusted distance (Position and Position Fine Control values), and the total of the distance adjusted by Car Type Set Up (page 64) and the adjustment distance for position setup... -
Page 100: Zone Control
Zone Control You can set the front and rear audio source. Displaying the Zone Control screen Zone Control Zone Control screen MENU Zone Rear Vol. 15 Dual Zone Front Area Reverse English 1 Adjusts the volume. 2 Returns to the Control screen of the previous source. -
Page 101: Glossary
Glossary DVD: Digital Versatile Disc A type of disc which contains recording of audio/ video packaged media with high video and audio quality, such as a movie, featuring large recording capacity and digital signal processing capability. VCD: VIDEO CD A type of CD which contains the recording of mov- ing images. -
Page 102: Troubleshooting Guide
Troubleshooting Guide Some system functions are limited to control depending on your setup. • Zone cannot be set. • The "Rear Bass Boost" of Surround Control Adjust cannot be set. • The rear speakers of DTA cannot be set. • The "Position Fine Control" of rear speakers cannot be set. •... - Page 103 What might appear to be a malfunction in your unit may just be the result of slight misopera- tion or miswiring. Before calling service, first check the following table for possible problems. General The power does not turn on. ✔ The fuse has blown.
- Page 104 The sound quality is poor or distorted. ✔ One of the speaker wires is being pinched by a screw in the car. Check the speaker wiring. ✔ The speakers are not wired correctly. Reconnect the speaker wires so that each output terminal is connected to a different speaker.
- Page 105 The specified disc does not play, but another one plays instead. ✔ The specified CD is quite dirty. Clean the CD. ✔ The CD is upside-down. Load the CD with the labeled side up. ✔ The disc is loaded in a different slot from that specified.
- Page 106 Mecha Error The disc player is malfunctioning. ] Eject the disc and try inserting it again. Contact the Kenwood dealer if this indicator continues blinking or the disc cannot be ejected. Disc Error The unplayable discs is inserted. Read Error The disc is upside-down.
-
Page 107: Specifications
Specifications Specifications subject to change without notice. Monitor Section Picture size : 6.95 inches (diagonal) wide 154.1(W)×87.1(H)mm Display system : Transparent TN LCD panel Drive system : TFT active matrix system Number of pixels : 336,960 (480H×234V×RGB) Effective pixels : 99.99% Pixel arrangement : RGB striped arrangement Back lighting... - Page 108 Video section Color system of external video input : NTSC External video input level (RCA jacks) : 1Vp-p/75Ω External audio max input level(RCA jacks) : 1V/22kΩ Analog RGB input : 0.7Vp-p/75Ω Audio section Maximum Power (Front&Rear) : 50Wx4 Full Bandwidth Power (Front&Rear)(at Less than 1%THD) : 22Wx4 Preout level (V) : 5V/10kΩ...
- Page 109 Kenwood CORPORATION 2967-3, ISHIKAWA-MACHI, HACHIOJI-SHI TOKYO, JAPAN Kenwood CORP. CERTIFIES THIS EQUIPMENT CONFORMS TO DHHS REGULATIONS N0.21 CFR 1040. 10, CHAPTER 1, SUBCHAPTER J. Location : Bottom Panel FCC WARNING This equipment may generate or use radio frequency energy. Changes or modifications to this equipment may cause harmful interference unless the modifications are expressly approved in the instruction manual.