Sony HDR-AS15 Handbook
Digital hd video camera recorder
Hide thumbs
Also See for HDR-AS15:
- User manual (4 pages) ,
- Specifications (2 pages) ,
- Operating manual (2 pages)

Subscribe to Our Youtube Channel
Related Manuals for Sony HDR-AS15


Summary of Contents for Sony HDR-AS15
- Page 1 Handbook Digital HD Video Camera Recorder HDR-AS15/AS10 © 2012 Sony Corporation 4-432-600-13(1)
-
Page 2: How To Use This Handbook
How to use this handbook Click on a button on the right to jump to the corresponding page. This is convenient when searching for a function you want to view. Search for information by function. Search for information by operation. Search for information in a listing of Settings items. -
Page 3: Notes On Using The Camera
Pushing the plug forcibly Sony cannot compensate for failure to record or into the terminal will damage the terminal and loss or damage of recorded content due to a may result in a malfunction of the camera. - Page 4 Also, movies recorded on other devices may not play back properly on this camera. On wireless network function • Only the HDR-AS15 is equipped with the Wi-Fi function. • The wireless network function built into this camera has been confirmed to conform with Wi- Fi specifications set forth by the Wi-Fi Alliance (WFA).
-
Page 5: How To Enjoy The Camera
How to enjoy the camera Enjoy more using the accessories Movies are recorded at a maximum of 1920×1080 30p full high definition. Waterproof Head Mount Kit & Waterproof Case Adhesive Mount & Waterproof Case Headband Mount Continued r... - Page 6 Share your life Upload captured moments You can directly upload images and share them by using the wireless network function of this camera (page 39). Connect to TV Connect the camera to a TV with a micro HDMI cable (sold separately), and enjoy images on the big screen (page 38).
-
Page 7: Table Of Contents
Inserting a memory card ····································· 16 Recording Mode·················································· 18 SteadyShot·························································· 19 Field Angle ·························································· 20 Interval Photo Recording····································· 21 Smart Remote Control (HDR-AS15 only)············ 22 Auto Power Off···················································· 23 Date & Time Setting ············································ 24 USB Power Supply·············································· 25 Resetting the Settings ········································· 26 Format·································································... - Page 8 Wireless Network (Wi-Fi) Setting Wi-Fi (HDR-AS15 only)··························· 39 Copying data to a smartphone (HDR-AS15 only) ················································ 41 Computer Useful functions when connecting the camera to your computer ····················································· 42 Preparing a computer (Windows)························ 43 Starting the “PlayMemories Home” software ······ 45 Troubleshooting Troubleshooting ··················································...
-
Page 9: Operation Search
Resetting the Settings ········································ 26 Viewing on TVs Viewing images on a TV ···································· 38 Operating using a Smart Remote Control (HDR-AS15 only) ····· 22 smartphone or tablet Uploading images to a Setting Wi-Fi (HDR-AS15 only) ······················· 39 network service... -
Page 10: Settings Search
Recording Mode VIDEO HQ (1920×1080/30P) SteadyShot STEDY Field Angle ANGLE 120° Interval Photo Recording LAPSE 5sec Smart Remote Control (HDR-AS15 RMOTE only) Auto Power Off A.OFF 10sec Date & Time Setting DATE 2012/1/1 00:00 GMT+0 USB Power Supply USBPw Resetting the Settings RESET —... -
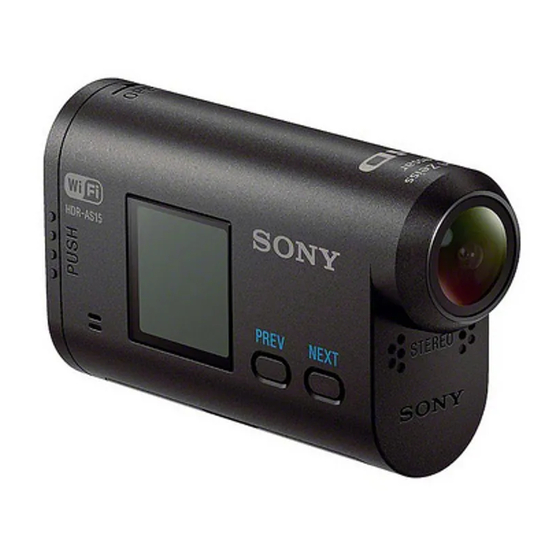
Page 11: Identifying Parts
Identifying parts A REC/access lamp B REC START/STOP button ENTER (Menu execute) button C b HOLD switch* D Display panel E Speaker F PREV button G NEXT button H Microphones I Lens J Connector cover K m (Mic) jack* L Expansion connector* M CHG (Charge) lamp N HDMI OUT jack (USB) jack... -
Page 12: Checking The Bundled Items
Checking the bundled items Make sure that you have following bundled items. The number in parentheses indicates the quantity of that item bundled. • Camera (1) • Micro USB cable (1) • Rechargeable battery pack (NP-BX1) (1) • Battery tray, type X (only for NP-BX1) (1) Attached to the camera. -
Page 13: Inserting The Battery Pack
Inserting the battery pack 1 Slide the Battery pack/memory card cover in the direction of the arrow, then open the cover. 2 Pull out the battery tray from the camera, set the battery pack on the tray, then return it into the camera. Pinch the tab and pull out. -
Page 14: Charging The Battery Pack
Charging the battery pack 1 Turn off the power of the camera. Charging is not possible when the camera is turned 2 Connect the camera to the computer that CHG (Charge) lamp is turned on with the micro USB cable (supplied). - Page 15 Checking the remaining battery charge A remaining charge indicator appears on the upper right of the display panel. High • The displayed remaining charge indicator may not be correct under certain circumstances. • It takes about one minute until the correct remaining charge indicator appears.
-
Page 16: Inserting A Memory Card
Inserting a memory card 1 Slide the Battery pack/memory card cover in the direction of the arrow, then open the cover. 2 Insert the memory card until it clicks. microSD card: Insert in the direction of A. “Memory Stick Micro (M2)” media: Insert in the direction of B. - Page 17 Notes • In order to stabilize memory card operation, it is recommended that you format the memory card when you use it with the camera for the first time (page 27). All data recorded on the memory card will be erased by formatting, and cannot be recovered. •...
-
Page 18: Recording Mode
Recording Mode Setting display You can set the image resolution and frame rate for shooting movies. To make the setting, select [SETUP] first. 1 Press the NEXT button to display [SETUP], then press the ENTER button. 2 While [VIDEO] (Video) is displayed, press the ENTER button. If the camera turns off by the Auto Power Off function while setting, perform the procedure again from step 1. -
Page 19: Steadyshot
SteadyShot Setting display You can activate the camera-shake reduction when shooting. To make the setting, select [SETUP] first. 1 Press the NEXT button to display [SETUP], then press the ENTER button. 2 Press the NEXT button to display [STEDY] (SteadyShot), then press the ENTER button. -
Page 20: Field Angle
Field Angle Setting display You can change the field angle for recording. To make the setting, select [SETUP] first. 1 Press the NEXT button to display [SETUP], then press the ENTER button. 2 Press the NEXT button to display [ANGLE] (Angle), then press the ENTER button. -
Page 21: Interval Photo Recording
Interval Photo Setting display Recording Once recording is started, the camera records photos continuously at regular intervals until recording is stopped. To make the setting, select [SETUP] first. 1 Press the NEXT button to display [SETUP], then press the ENTER button. 2 Press the NEXT button to display [LAPSE] (Interval), then press the ENTER button. -
Page 22: Smart Remote Control (Hdr-As15 Only)
5 Activate a suitable application on the smartphone, and connect to the camera through Wi-Fi. For details on the smartphone setting, see “Setting Wi-Fi (HDR-AS15 only)” on page 39. Notes • The smart remote control function allows you to perform the following using a smartphone: –... -
Page 23: Auto Power Off
Auto Power Off Setting display You can change the setting of the Auto Power Off function. To make the setting, select [SETUP] first. 1 Press the NEXT button to display [SETUP], then press the ENTER button. 2 Press the NEXT button to display [A.OFF] (Auto Power Off), then press the ENTER button. -
Page 24: Date & Time Setting
Date & Time Setting Setting display You can set the year/month/day and region. To make the setting, select [SETUP] first. 1 Press the NEXT button to display [SETUP], then press the ENTER button. 2 Press the NEXT button to display [DATE] (Date Time), then press the ENTER button. -
Page 25: Usb Power Supply
USB Power Supply Setting display When connecting the camera to a computer or USB device with the micro USB cable (supplied), the camera can be set so the connected device supplies power to it. To make the setting, select [SETUP] first. 1 Press the NEXT button to display [SETUP], then press the ENTER button. -
Page 26: Resetting The Settings
Resetting the Settings Setting display You can reset the settings to their defaults. If you activate [RESET], movies are not deleted. 1 Press the NEXT button to display [SETUP], then press the ENTER button. 2 Press the NEXT button to display [RESET] (Reset), then press the ENTER button. -
Page 27: Format
Format Setting display Formatting is the process of deleting all movies in the memory card, and restoring the memory card to its initial state. To make the setting, select [SETUP] first. 1 Press the NEXT button to display [SETUP], then press the ENTER button. 2 Press the NEXT button to display [FORMT] (Format), then press the ENTER button. -
Page 28: Using Accessories
Using Accessories The following explains how to use accessories that can be attached to this camera. Waterproof Case (SPK-AS1) By inserting the camera in the Waterproof Case, you can shoot movies in the rain or at a beach. Case body HOLD lever Cord START/STOP... - Page 29 4 Insert the tab of the case cover into the slot of the case body. 5 Hook the buckle over the tab on the lower part of the case cover 1, then close the buckle in the direction of 2, until it clicks into place. Notes •...
-
Page 30: Notes On Use
Water leakage If water happens to leak in, stop exposing the Waterproof Case to water immediately. • If the camera gets wet, take it to the nearest Sony dealer immediately. Repair costs must be borne by the customer. • In the unlikely event that a malfunction of the Waterproof Case causes damage due to water leakage, Sony does not guarantee against damages to the equipment contained in it (camera, battery pack, etc.) - Page 31 Maintenance • After recording in a location with a sea breeze, wash this unit thoroughly in fresh water with the buckle fastened to remove salt and sand, then wipe with a soft dry cloth. It is recommended that you submerge the Waterproof Case in fresh water for about 30 minutes.
- Page 32 Adhesive Mount (VCT-AM1) The Adhesive Mount is used for fixing the Waterproof Case to an item you intend to use. The Adhesive Mount is a general term for the Attachment Buckle, Flat Adhesive Mount, and Curved Adhesive Mount. Insert the camera in the Waterproof Case before attaching. Attachment Buckle Flat Adhesive Mount Curved Adhesive Mount...
- Page 33 Notes • The Flat Adhesive Mount and Curved Adhesive Mount cannot be used again once they are detached from the location surface. • When detaching, peel off slowly. If peeled off forcibly, the surface on which the mount is fixed might be damaged.
-
Page 34: How To Attach
Handlebar Mount (VCT-HM1) (sold separately) The Handlebar Mount is used for fixing the Waterproof Case on the handlebar of a bicycle. Insert the camera in the Waterproof Case before attaching. For details, refer to the instruction manual of the Handlebar Mount (VCT-HM1) (sold separately). - Page 35 Waterproof Head Mount Kit (VCT-GM1) (sold separately) The Waterproof Head Mount Kit is used for fixing the Waterproof Case to an item you intend to use. The Kit comprises of a Goggle Mount and a Headband. Insert the camera in the Waterproof Case beforehand.
- Page 36 Headband Mount (BLT-HB1) (sold separately) You can fasten the camera to your head using the Headband Mount. Head strap M5 coin screw Holder B Buckle lock Holder A Attachment method 1 Release the buckle lock 1 and open Holder B in the direction of 2.
-
Page 37: Shooting
Shooting Display About the b HOLD switch The b HOLD switch can prevent accidental operation. Slide the b HOLD switch in the direction of b to lock. To release the lock, slide it in the opposite direction of b. • Before recording, release the lock. •... -
Page 38: Viewing Images On A Tv
Viewing images on a TV Display Connect the camera to a TV which has an HDMI terminal using a micro HDMI cable (sold separately). Refer also to the instruction manuals of the TV. 1 Turn off both the camera and the TV. 2 Open the connector cover and connect the camera to the TV with the micro HDMI cable (sold separately). -
Page 39: Setting Wi-Fi (Hdr-As15 Only)
Setting Wi-Fi (HDR-AS15 Setting display only) You can operate the camera by a smartphone, or transfer and display images onto a smartphone. To operate the camera by a smartphone, see page 22 for details. To transfer and display images onto a smartphone, download the application “PlayMemories Mobile”... - Page 40 If the password is lost Connect the camera to a computer with the micro USB cable (supplied). Turn on the power. Display [Computer] t [PMHOME] t [INFO] t [WIFI_INF.TXT] on your computer, then check the user ID and password.
-
Page 41: Copying Data To A Smartphone
Copying data to a smartphone (HDR-AS15 only) You can copy movies and photos shot by the camera to a smartphone. 1 Press the NEXT button to turn on the camera. 2 Press the NEXT button to display [SEND]. 3 Press the ENTER button to display [PREP], then Wi-Fi is activated. -
Page 42: Computer
The “PlayMemories Home” software allows you to import images in the camera to your computer and play them on the computer easily. Visit the following URL to install the software. http://www.sony.net/pm Importing images Playback • Use the micro USB cable (supplied) when connecting the camera to your computer. -
Page 43: Preparing A Computer (Windows)
“PlayMemories Home” software. In this case, you cannot use some functions that were available with “PMB” with this “PlayMemories Home” software. • For details on “PlayMemories Home” select (“PlayMemories Home” Help Guide) on the software or visit the PlayMemories Home support page (http://www.sony.co.jp/pmh-se/). Continued r... - Page 44 To delete the USB connection Windows7 1 Click on the task tray. 2 Click the disconnect icon in Customize. 3 Click the device to remove. Disconnect icon Windows Vista/Windows XP Perform the procedures from step 1 to 3 below before: •...
-
Page 45: Starting The "Playmemories Home" Software
• If the icon is not displayed on the computer screen, click [Start] t [All Programs] t [PlayMemories Home] t the desired item. Please register your product • Sony asks you to register your product for enhanced support. • Proceed to the product registration from the menu on the installation screen of PlayMemories Home. -
Page 46: Troubleshooting
If you experience trouble with the camera, try the following solutions. 1 Check the items on pages 47 to 50. 2 Turn the power off and then on again. 3 Consult your Sony dealer or local authorized Sony service facility. -
Page 47: Memory Card
• When usable battery life becomes half the usual time, even after charging the battery pack fully, the battery pack may need to be replaced. Consult your nearest Sony dealer. Cannot charge the camera. -
Page 48: Viewing Images
Cannot insert dates on images. • The camera does not have a feature for superimposing dates on images. Viewing images Cannot play back images. • The folder/file name has been changed on your computer. • Connect a micro HDMI cable (sold separately). The image does not appear on the TV. - Page 49 Others The lens gets fogged. • Moisture condensation has occurred. Turn off the camera and wait about an hour for the moisture to evaporate. The camera becomes warm when you use it for a long time. • This is not a malfunction. The date or time is incorrect.
-
Page 50: Warning Indicators And Messages
Warning indicators and messages If the following messages appear, follow the instructions. • The battery level is low. Charge the battery pack immediately. ERROR • Turn the power off and then on again. HEAT • The camera temperature has risen. The power may turn off automatically, or you may be unable to record images. -
Page 51: Recordable Time
1205 • In the SLOW/SSLOW setting, the recordable time when shooting differs from when playing back. • When using a Sony memory card. Notes • The recordable time may vary depending on the recording conditions, subjects, and the Recording Mode (page 18). -
Page 52: Estimated Number Of Recordable Photos
• The number of recordable photos for a memory card may vary depending on the shooting conditions. Note • The unique pixel array of the Sony ClearVid CMOS Sensor, and the image processing system BIONZ, allow the still image resolution equivalent to the sizes described. -
Page 53: Battery Pack
Battery pack On charging the battery pack • Charge the battery pack before using the camera for the first time. • We recommend charging the battery pack in an ambient temperature of between 10°C to 30°C (50°F to 86°F) until the CHG (Charge) lamp turns off. The battery pack may not be effectively charged in temperatures outside this range. -
Page 54: Using The Camera Abroad
Using the camera abroad On TV color systems To view images shot by the camera on a TV, you need a TV (or monitor) with an HDMI jack and a micro HDMI cable (sold separately). World time difference Time-zone Area setting Time-zone Area setting differences... -
Page 55: Precautions
Precautions Do not use/store the camera in the following places • In an extremely hot, cold or humid place In places such as in a car parked in the sun, the camera body may become deformed and this may cause a malfunction. -
Page 56: Notes On Optional Accessories
(after about 1 hour). Notes on optional accessories • Genuine Sony accessories may not be available in some countries/regions. Note on disposal/transfer of the memory card Even if you delete data in the memory card or format the memory card on the camera or a computer, you may not delete data from the memory card completely. -
Page 57: Specifications
Specifications Camera Power consumption: 1.7 W (when the movie image size is [1920×1080 30P]) Operating temperature: 0°C to 40°C (32°F to [System] 104°F) Video signal Storage temperature: –20°C to +60°C (–4°F to NTSC color, EIA standards +140°F) HDTV 1080/60i, 1080/60p specification Dimensions: Approx. - Page 58 Mass: Approx. 14 g (0.5 oz) Curved Adhesive Mount Dimensions: Approx. 50.0 mm × 16.0 mm × 58.5 mm (2 in. × 21/32 in. × 2 3/8 in.) (W/H/D, excluding protrusions) Mass: Approx. 16 g (0.6 oz) Waterproof Head Mount Kit (VCT-GM1) (sold separately) Goggle Mount Dimensions: Approx.
- Page 59 Micro,” “MagicGate,” “ ,” “MagicGate Memory Stick” and “MagicGate Memory Stick Duo” are trademarks or registered trademarks of Sony Corporation. • HDMI, the HDMI logo and High-Definition Multimedia Interface are trademarks or registered trademarks of HDMI Licensing LLC in the United States and other countries.
-
Page 60: Index
Index RMOTE ................22 A.OFF ..................23 ANGLE .................20 SEND ..................39 Settings ..................10 Shooting Battery pack ................53 Movies ................37 Still image ..............37 STEDY ..................19 Charging ................14 CHG (Charge) lamp ............14 Troubleshooting ..............46 DATE ..................24 ..................14 USB jack ................43 ENTER (Menu execute) button ........10 USBPw ..................25... - Page 61 La fonction Wi-Fi est disponible uniquement sur le HDR-AS15. Mettez l’appareil en marche à l’aide de la touche NEXT/PREV. La función Wi-Fi está disponible solo en el modelo HDR-AS15. Encienda la cámara con el botón NEXT/PREV. A função Wi-Fi está disponível apenas no HDR-AS15.
- Page 62 Batería recargable, cc de 3,6 V (NP-BG1) A aplicação para a PlayStation 3 requer uma conta PlayStation Network e a Be sure to charge the battery pack using a genuine Sony battery charger or a device that N’incinérez pas la batterie et ne la jetez pas au feu.
- Page 63 “PlayMemories Home,” refer to “PlayMemories Home Help Guide (Additional Help Online).” Copyright 2011 Sony Corporation Notes The contents of “PlayMemories Home Help Guide” may differ depending on the version of the software you are using. If you have already been using “PlayMemories Home,” when you connect a new camera, new functions are added to the software, and the software is updated if there are additional features available.
- Page 65 About this “PlayMemories Home Help Guide” “PlayMemories Home” is a software suite that enables you to import videos and photos to a computer, and then browse and manage them. This “PlayMemories Home Help Guide” describes basic operation of this software. For more advanced advice, refer to “PlayMemories Home Help Guide (Additional Help Online).”...
- Page 66 What you can do with “PlayMemories Home” Using “PlayMemories Home,” you can perform the following operations. Importing videos and photos from your camera to a computer You can import videos and photos recorded on your camera by connecting your camera to a computer. Viewing videos and photos You can manage videos and photos recorded on your camera by date, and select videos or photos you want to view as thumbnails.
- Page 67 Starting/Exiting the program Starting the program You can use the following procedure to start the program. Select [Start] - [All Programs] - [ PlayMemories Home]. Exiting the program You can use one of the following procedures to exit the program. Click the [File] menu, and click [Exit].
- Page 68 Importing videos and photos from your camera to a computer You can import videos and photos recorded on your camera by connecting your camera to a computer. 1. Turn on your camera, and connect it to the computer. The video/photo import window is displayed on the screen of the computer. 2.
- Page 70 Viewing videos and photos You can browse videos and photos imported to a computer sorted by the date and time they were taken (Calendar view). 1. In [Media file locations] (A) on the main window, click the drive, folder, or camera connected, where the videos or photos you want to view are saved.
- Page 71 Hints Click at the bottom left of the window to switch the window to Folders view that sorts videos and photos by specified folders. For details on the main window, see Parts and controls of the main window. When you double-click a video or photo in [Cameras and media], the video or photo is enlarged in another window.
-
Page 72: Printing Photos
Printing photos You can print selected photos. You can also print photos with the date information. 1. In the main window, select the photo you want to print. You can also print photos while the display is enlarged. 2. Click (Print) at the top of the window. - Page 73 Copyright 2011 Sony Corporation The contents of “PlayMemories Home Help Guide (Additional Help Online)” are subject to change without notice.
- Page 75 Parts and controls of the import window When you connect your camera to a computer, “PlayMemories Home” starts, and the video/photo import window is displayed. A Import The model name of the camera source connected is displayed. By clicking you can select other connected devices from the drop-down list.
- Page 76 using Wi-Fi, or whether to retain a GPS track log, etc. Functions that your camera supports may differ depending on the model. Back to top...
- Page 77 Parts and controls of the main window A Tool area B Media file locations C Display switching area D Thumbnail icons A Tool area (Main) Click to display the main window. (Import Click to import videos or photos to a computer. Media Files) (Print) Click to print a photo.
- Page 78 Click to display the Map View. [Year]/[Month]/[Day] Click to sort videos or photos by the year, month, or day they were taken. Click to display videos as a series of thumbnail images made up of individual frames selected at a predetermined time interval.
- Page 79 About this “PlayMemories Home Help Guide (Additional Help Online)” “PlayMemories Home” is a software suite that enables you to import videos and photos to a computer, and then browse and manage them. This “PlayMemories Home Help Guide (Additional Help Online)” describes basic to advanced use of this software.
Need help?
Do you have a question about the HDR-AS15 and is the answer not in the manual?
Questions and answers