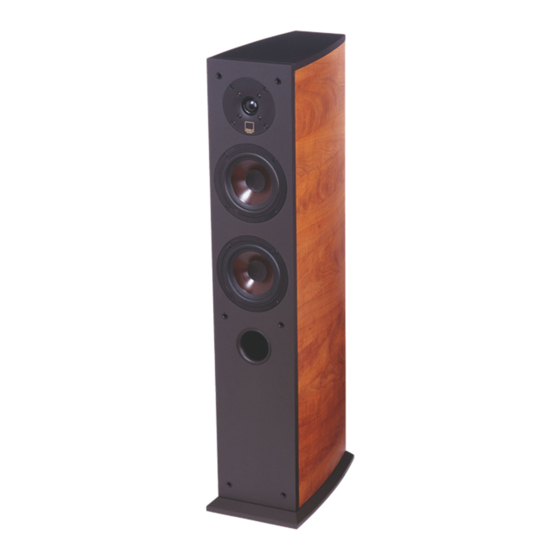
Dali Suite Manual
Hide thumbs
Also See for Suite:
- Brochure (2 pages) ,
- Owner's manual (9 pages) ,
- Owner's manual (8 pages)
Advertisement
Advertisement
Table of Contents

Summary of Contents for Dali Suite
- Page 1 MANUAL www.dali.dk...
- Page 2 English Safety Safety CAUTION RISK OF ELECTRIC SHOCK DO NOT OPEN CAUTION: TO REDUCE THE RISK OF ELRCTRIC SHOCK, DO NOT REMOVE THE BACK PANEL. NO USER-SER- VICEABLE PARTS INSIDE. REFER SERVICING TO QUALIFIED PERSONNEL. The lightning flash within an equilateral The exclamation point within an equila- triangle is intended to alert you to the pres- teral triangle is intended to alert you to...
- Page 3 To recreate sound experiences in your home that will carry you away, making you forget time and place... It is important to us that your new DALI speakers be set up and con- nected optimally. This manual contains our recommendations for setup, connection and maintenance.
-
Page 4: Standard Accessories
Suite C 0.7 and 0.8 are supplied with self-adhesive rubber feet to ensure a stable and vibration-free set-up, when positioning the speakers above a TV, for example. Suite R 0.7 and 0.8 are also supplied with rubber buffers to ensure stable and vibration-free support against the wall on which the speakers are mounted. - Page 5 Like any other mechanical system, a speaker needs to be "run in", so you can look forward to a gradual improvement in sound quality over the ini- tial period. Unlike other mechanical systems, a DALI speaker does not wear out - in fact, regular use will extend its lifetime.
- Page 6 This means that the cable will not push the speaker away from the wall. Using inferior cables for your new DALI speakers is just the same as putting cheap tyres on a thoroughbred racing car. Using cables from DALI, which have been specially designed, will ensure a perfect sound experience every time.
- Page 7 English Bi-wiring og Bi-amping Bi-wiring og Bi-amping Bi-wiring or bi-amping improves the sound quality significantly and is highly recommended. Bi-wiring provides greater openness in the sound image and reduces distortion. Bi-amping provides even greater openness in the sound image and adds to increased dynamism. Bi-wiring The top terminal pair are connected to the high frequency section of the crossover network, and...
- Page 8 LFE input terminal on Suite S 1.2. If the LFE input terminal is selected, the crossover network in Suite S 1.2 is not active. The LFE input terminal should therefore only be used together with a special subwoofer output terminal in which the signal has already been filtered, so the subwoofer only receives the lowest frequencies.
- Page 9 English Connection to a stereo pre-amplifier (Fig. 6) If you want to use Suite S 1.2 to supplement the bass reproduction of a stereo system, connect the subwoofer "Line in, Left/Right" to a stereo signal on the pre-amplifier with full frequency content. The built-in crosso- ver network in Suite S 1.2 then ensures that the subwoofer only reproduces...
- Page 10 Please note that the actual location of the subwoofer greatly affects its contribution to the total acoustic image. For example, if you put Suite S 1.2 in a corner, the bass will be considerably stronger than if it had been placed midway between two corners.
- Page 11 - neither more nor less. When connecting to a surround sound system it may be an advantage to select a fixed setting for Suite S 1.2 and only adjust the level via the surround amplifier’s separate adjustment of the subwoofer output level.
- Page 12 English Overloading If Suite S 1.2 is intensely overloaded, the built-in safety circuit may com- pletely disconnect the subwoofer. If this happens, turn down the volume. Suite S 1.2 will reconnect after a short time. Positioning Positioning Once you have connected your new Suite speakers, you need to begin the...
- Page 13 TV. We recommend fitting the enclosed rubber feet to ensure a stable, vibration-free set-up The Suite R 0.7/0.8 rear speaker has been designed to be vertically mounted 1.2 to 2 metres off the floor, ideally on a side wall slightly behind the lis- tening position (bracket A).
-
Page 14: The Listening Room
Once you are happy with the positioning of your speakers, it is important to ensure that they are completely stable. For floor models it is essential that you use the accompanying spikes. Do not cover the heat sink on Suite S 1.2 subwoofer. -
Page 15: Power And Acoustic Pressure
On a good sound system tone controls should only be used to compensate for poor record- ings and not to permanently compensate for weaknesses elsewhere in the system. So, DALI recommends that the tone controls generally be set to the neutral position, and you achieve your desired sound image through correct positioning of the speakers. - Page 16 English Surround set-ups Surround set-ups 5.1 surround set-up with Suite 5.1 surround set-up with Suite R 0.7/0.8 mounted on side wall R 0.7/0.8 mounted on rear wall 7.1 surround set-up with Suite Side wall mounting R 0.7/0.8 mounted on rear and...
-
Page 17: Dali - More Than Meets The Eye
At DALI the cabinet is both a piece of furniture and the speaker's sound base, and is therefore constructed from acoustically-correct materials. -
Page 18: Specifications
It is up to the indi- vidual to decide whether one speaker sounds better than another. So we only give you the specifications that are of real value to you. The DALI Suite range has been designed to reproduce music as honestly as possible - and we know we have succeeded.


Need help?
Do you have a question about the Suite and is the answer not in the manual?
Questions and answers