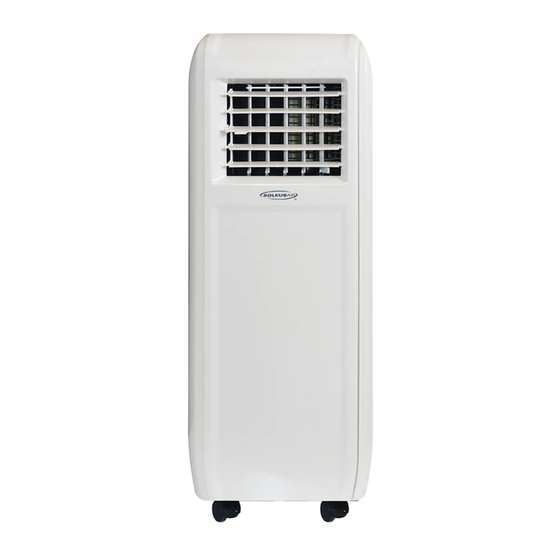
Summary of Contents for Soleus Air FE-08BA
- Page 1 8,000 BTU Portable Air Conditioner Operating Instructions 3092402 V021014 Model No.: FE-08BA...
-
Page 2: Important Instructions
Thank you for choosing a Soleus Air Portable Air Conditioner. This owner’s manual will provide you with valuable information necessary for the proper care and maintenance of your new product. Please take a few moments to thoroughly read the instructions and familiarize yourself with all the operational aspects of your new Soleus Air Portable Air Conditioner. -
Page 3: Package Contents
These specifications are for reference only. For actual data, please refer to the rating label on the back of the unit. If the environment temperature is higher than the max operating temperature or lower than the minimum operat- ing temperature, the air conditioner may not work properly. FE-08BA MODEL NUMBER COOLING CAPACITY 8,000 BTU/H... -
Page 4: Lcdi Power Cord And Plug
LCDI POWER CORD AND PLUG This air conditioner is equipped with an LCDI (Leakage Current Detection and Interruption) power cord and plug as required by US National Electric Code 440.65. This cord consists of a length of shielded flexi- ble cord with no termination on the load side and a LCDI attachment plug on the line side. The LCDI power cord and plug will remove the supply source via electrical disconnect (circuit trip) if the nominal current leakage between the cord shield and either load conductor exceeds a predetermined value. -
Page 5: Product Diagram
PRODUCT DIAGRAM Remote Control Control Panel (on top) Louvers Remote Control Signal Receptor Casters Filter Compartment Condenser Air Outlet Evaporator Air Intake Condenser Air Intake Drain Hole Drain Port Rubber Plug... -
Page 6: Parts & Assembly
PARTS & ASSEMBLY PARTS EXHAUST HOSE WINDOW KIT ASSEMBLY & INSTALLATION INSTALLATION When the unit is operating as an air conditioner or dehumidifier, the unit draws in fresh outdoor air and exhausts hot air out of the room to complete the air exchange. When the unit is operating in fan mode no outdoor air exchange takes place. -
Page 7: Window Kit Installation
NOTE: The Portable Air Conditioner above may differ from the unit described in this manual. The above directions and images show general directions for Soleus Air hose portable air conditioners. -
Page 8: Window Kit Assembly
WINDOW KIT ASSEMBLY 1.Parts: A) 2 Track Screws B) 2 Wing Nuts C1 & C2) 2 Hose Panels, one Exhaust Hose Openings D) 1 Sliding Track Panel 5. Next, take the other Hose Panel (C2) and connect it to Hose Panel (C1) by placing the Sliding Track Panel (D) over the Track Screw (A) on Hose Panel (C2). -
Page 9: Control Panel Buttons
CONTROL PANEL, DISPLAY, & OPERATING INSTRUCTIONS CONTROL PANEL TEMPERATURE AND TIMER INDICATOR DEHUMIDIFIER MODE AIR CONDITIONER MODE BUCKET FULL FAN MODE POWER BUTTON MODE BUTTON TIMER/TEMP DECREASE TIMER/TEMP INCREASE OPERATING INSTRUCTIONS CONTROL PANEL BUTTONS 1) Power On and Off - Press the POWER button once to manually turn the unit on. Press the POWER button once more to turn the unit off. -
Page 10: Operating The Unit Using The Remote Control
OPERATING THE UNIT USING THE REMOTE CONTROL REMOTE CONTROL LCD DISPLAY MODE BUTTON POWER BUTTON FAN SPEED TEMP SETTING TIMER ON SLEEP BUTTON TIMER OFF MINUTE SELECTER HOUR SELECTER * Remote Colors may differ from the image above. -
Page 11: Remote Control Operating
REMOTE CONTROL OPERATING INSTRUCTIONS 1) Power On and Off - If the unit is already on, press the POWER (I/O) button on the remote while pointing the remote away from the unit. This will turn the remote on. If the unit is off, now press the POWER (I/O) button once to manually turn the unit on. -
Page 12: Air Conditioner Mode
NOTE: you can set either T-ON or T-OFF, also can set both T-ON and T-OFF . If you set both T-ON and T-OFF simultaneously, the timer will always cycle effectively unless removed either T-ON or T-OFF. Caution: a) Do Not Mix Old And New Batteries. Do Not Mix Alkaline, Standard (Carbon - Zinc), Or Rechargeable (Nickel - Cadmium) Batteries. -
Page 13: Fan Mode
Fan Mode 1) Plug the Power Cord into an electrical outlet. 2) Turn on the unit by pressing the POWER button on the control panel. 3) Press the MODE button until the fan mode icon light up on the control panel display. 4) Select the fan speed by pressing the FAN button by using the Remote control. -
Page 14: Maintenance
MAINTENANCE Note: Make sure power is off and the power cord is not plugged into an electrical outlet prior to performing any maintenance on the unit. Clean or replace filter - If the air filter is blocked with a dust, the airflow volume may reduce. It is recommended to clean the filter once every two weeks or as needed. -
Page 15: This Warranty Does Not Cover
WARRANTY One Year Limited Warranty Soleus Home Comfort warrants the accompanying Soleus Air Portable Air Conditioner to be free of defects in material and workmanship for the applications specified in its operation instruction for a period of ONE (1) year from the date of original retail purchase in the United States.


Need help?
Do you have a question about the FE-08BA and is the answer not in the manual?
Questions and answers