Sony HT-CT660 Operating Instructions Manual
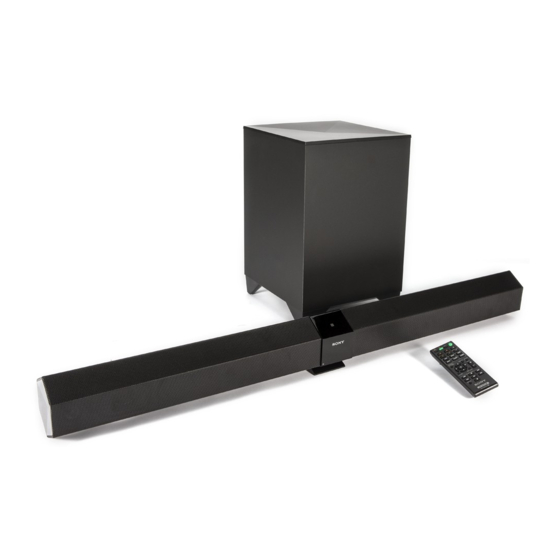
Home theatre system
Hide thumbs
Also See for HT-CT660:
- Operating instructions manual (112 pages) ,
- Troubleshooting manual (13 pages) ,
- Specifications (3 pages)

Related Manuals for Sony HT-CT660


Summary of Contents for Sony HT-CT660
- Page 1 4-452-002-22(1) Home Theatre Getting Started System Operations and Features BLUETOOTH Function Operating Instructions Surround Function Advanced Settings Additional Information HT-CT660...
- Page 2 This product has been manufactured by or on behalf of Sony Corporation, 1-7-1 To reduce the risk of fire, do not cover the Konan Minato-ku Tokyo, 108-0075 Japan. ventilation opening of the appliance with Inquiries related to product compliance newspapers, tablecloths, curtains, etc.
- Page 3 Disposal of Old By ensuring these batteries are disposed of correctly, you will help prevent Electrical & potentially negative consequences for Electronic the environment and human health Equipment which could otherwise be caused by (Applicable in inappropriate waste handling of the the European battery.
-
Page 4: Precautions
buildup and prolong the life of the system. Precautions Do not place the system near heat sources, or in a place subject to direct On safety sunlight, excessive dust, or mechanical Should any solid object or liquid fall into shock. -
Page 5: Technology
HDMI Licensing LLC in the be delayed from that on the United States and other countries. BLUETOOTH device because of the characteristics of the BLUETOOTH “BRAVIA” logo is a trademark of Sony wireless technology. Corporation. “x.v.Colour” and “x.v.Colour” logo are trademarks of Sony Corporation. - Page 6 performing communication using BLUETOOTH technology. Locations where other Sony cannot be held liable in any way electromagnetic waves occur for damages or other loss resulting Effects of other devices from information leaks during communication using BLUETOOTH BLUETOOTH devices and wireless LAN technology.
-
Page 7: Table Of Contents
Table of contents Precautions ....... 4 Additional Information BLUETOOTH wireless Troubleshooting ..... 30 technology ......5 Specifications ......33 Index ........36 Getting Started Unpacking ......... 8 Index to parts and controls ..9 Connecting a TV, player, etc........13 Positioning the system ... -
Page 8: Unpacking
Getting Started Unpacking Subwoofer (SA-WCT660) (1) Inserting batteries into the remote control Insert two R6 (size AA) batteries (supplied) by matching the and ends on the batteries to the diagram inside the battery compartment of the remote control. To use the remote ... -
Page 9: Index To Parts And Controls
Index to parts and controls For more information, see the pages indicated in parentheses. Sound Bar (on/standby) button Message display area PAIRING button (page 22) Displays volume, selected input source, etc. INPUT button NIGHT (page 27) Press to select the input source to Lights up in NIGHT mode. - Page 10 Jacks (on the rear of Sound Bar) AC power cord (mains lead) OPTICAL IN jack (page 13, 14) (page 13) HDMI TV OUT (ARC) jack HDMI IN 1/IN 2 jacks (page 13) (page 13) ANALOG IN jack (page 14) ...
-
Page 11: Remote Control
To control the system Remote control (input) (page 18) Press to select the equipment you This section describes how to operate want to use. the subwoofer, Sound Bar, and (on/standby) connected equipment using the SOUND FIELD +/ (page 25) remote control supplied. -
Page 12: Setting Manufacturer Of Controllable Tvs
While holding down the TV button, press the button corresponding to the manufacturer. Manufacturer Button TV + SONY TV PROG + Samsung SOUND FIELD + GAME SOUND FIELD + TV ... -
Page 13: Connecting A Tv, Player, Etc
Connecting a TV, player, etc. Before connecting the AC power cord (mains lead) to a wall outlet (mains), connect all other equipment and a TV to the system. No cable connection is required between the Sound Bar and the subwoofer because they can be connected wirelessly. -
Page 14: Connecting Audio Equipment
Even if the system is turned off (active standby mode), the HDMI signal will be sent from the connected equipment to the TV via the HDMI connection. You can enjoy image and sound from the equipment on the TV. Connecting equipment with an HDMI jack HDMI OUT HDMI cable... -
Page 15: Positioning The System
Positioning the system The illustrations below are examples of how to install the Sound Bar. Installing the Sound Bar Installing the Sound Bar on a rack Installing the Sound Bar on a wall (page 16) (page 16) Notes ... -
Page 16: Installing The Sound Bar On A Wall
Sony dealers or licensed contractors and pay special attention to safety Center during the installation. stand Sony is not responsible for accidents or damage caused by improper installation, insufficient wall strength, improper screw installation or natural calamity, etc. -
Page 17: Setting Up The Wireless System
Prepare screws (not supplied) Hang the Sound Bar onto the that are suitable for the holes on screws. the back of the Sound Bar. Align the holes on the back of the Sound Bar to the screws, then hang the Sound Bar onto the 4 mm 2 screws. -
Page 18: Operations And Features
Using the Control for Operations and Features HDMI function Operating the system By enabling the Control for HDMI using the supplied function (CTRL, page 27), and connecting equipment that is remote control compatible with the Control for HDMI function via an HDMI cable, operation is simplified with the features below. -
Page 19: Using "Bravia" Sync Features
Standard HDMI cable, 1080p, Deep Color, or 3D/4K images may not be displayed properly. We recommend that you use an HDMI authorized cable or a Sony HDMI cable. We do not recommend using an HDMI-DVI conversion cable. -
Page 20: Setting Up The Sound Output Of The Connected Equipment
HDMI jack may be suppressed by the connected equipment. Setting up the sound Sound may be interrupted when the output of the connected sampling frequency or the number of channels of audio output signals equipment from the playback equipment is switched. -
Page 21: Bluetooth Function
When the detected devices are connected devices, refer to the operating instructions supplied with the listed on the BLUETOOTH devices. device, check that “HT-CT660” is The BLUETOOTH devices to be listed. connected must support A2DP On some BLUETOOTH devices, the (Advanced Audio Distribution Profile). - Page 22 Once a pairing operation is performed, If you wish to pair with several it does not have to be performed again. BLUETOOTH devices, perform the However, you must repeat pairing in the procedure from steps 1 to 3 individually cases listed below.
- Page 23 Fees may be charged for To disconnect the system, touch it downloading the app. with the smartphone again. Use a two-dimensional code Tips reader app. If you cannot connect the system, try the following. Start the app on the smartphone, and move the smartphone slowly over the N mark of the Sound Bar.
- Page 24 Start playback on the Finishing the BLUETOOTH BLUETOOTH device. connection For details on operation, see “To control a BLUETOOTH device” Terminate the BLUETOOTH (page 12). connection by any of the operations Adjust the volume. listed below. Operate the BLUETOOTH device to Set the volume of the BLUETOOTH terminate the connection.
-
Page 25: Surround Function
Available sound fields Surround Function Sound field Effect Suits various sources. (Standard) Enjoying the surround MOVIE Recreates powerful and effect realistic sound, along with clear dialog. DRAMA Recreates the clear dialog This system can create multi-channel of TV dramas. surround sound. You can select one of NEWS Recreates the clear speech system’s optimized pre-programmed... -
Page 26: Advanced Settings
Advanced Settings Settings and adjustments using the AMP menu Using the AMP menu You can set the following items with AMP MENU on the remote control. The default settings are underlined. Your settings are retained even if you disconnect the AC power cord (mains lead). Press AMP MENU to turn on the AMP menu. - Page 27 Menu items Function AUDIO SYNC You can delay the sound using this function when the image (AV SYNC) is slower than the sound. ON: Adjusts the difference between picture and sound. OFF: No adjustment. DUAL You can enjoy multiplex broadcast sound when the system (DUAL MONO) receives a Dolby Digital multiplex broadcast signal.
- Page 28 Menu items Function SET BT BT.STBY When the system has pairing information, the system is in (BT STANDBY) BLUETOOTH standby mode even when it is turned off. ON: BLUETOOTH standby mode is enabled. The illumination LED flashes in blue slowly when the system is turned off.
-
Page 29: Linking The System (Link)
Linking the system (LINK) You can link the Sound Bar and the subwoofer again to enable wireless transmission between them. Press AMP MENU. Select “WS” with (select), or (proceed). then press Select “LINK,” then press (proceed). “START”... -
Page 30: Additional Information Bluetooth Wireless Troubleshooting
Audio Return Channel (ARC) requesting repairs. Should any technology, connect the digital problem persist, consult your nearest optical cable in addition to the HDMI Sony dealer. cable (page 13) in order to output sound. POWER The sound is output from both the The system is not turned on. - Page 31 (page 29). When you are watching movies, you Flashes in green quickly: may hear the sound with a slight Consult your nearest Sony delay from the image. dealer. The BLUETOOTH connection cannot Sound skips or has noise.
- Page 32 Change the Wi-Fi frequency of the “PROTECT” appears on the front Wi-Fi router, computer, etc., to panel display. 5 GHz band. Press to turn off the system. After “STBY” disappears, disconnect OTHERS the AC power cord (mains lead), The remote control does not then check that nothing is blocking function.
-
Page 33: Specifications
Specifications Formats supported by this system Dolby Digital DTS-HD Master Audio* Dolby Digital Plus* DTS-HD High Resolution Audio* Dolby TrueHD* DTS-HD Low Bit Rate* Linear PCM 2ch 48 kHz or less DTS 96/24 Linear PCM Maximum 7.1ch 192 kHz or less* * It is possible to input these formats only with HDMI connection. - Page 34 Sound Bar (SA-CT660) 2) BLUETOOTH standard profiles indicate the purpose of BLUETOOTH communication between devices. Amplifier section 3) Codec: Audio signal compression and POWER OUTPUT (rated) conversion format Front L + Front R: 50 W + 50 W (at 3 ohms, 1 kHz, 1 % THD) 4) Subband Codec POWER OUTPUT (reference) 5) Advanced Audio Coding...
- Page 35 Dimensions (approx.) 271 mm × 404 mm × 271 mm (w/h/d) Mass (approx.) 8.6 kg Wireless transmitter/receiver Communication system Wireless Sound Specification version 2.0 Frequency band 2.4 GHz band (2.4000 GHz - 2.4835 GHz) Modulation method Pi/4 DQPSK Design and specifications are subject to change without notice.
-
Page 36: Getting Started Index
Index Symbols 9 NIGHT 27 11 9, 11 P. THRU 27 Positioning the system 15 A. STBY 28 PROTECT 32 AAC 28 AAV 27 AMP menu 26 Remote control ARC 27 operating 11 preparing 8 Reset 32 BASS 26 RF CHK 28 BLUETOOTH 5, 21... - Page 40 4-452-002-22(1) ©2013 Sony Corporation Printed in Malaysia...
Need help?
Do you have a question about the HT-CT660 and is the answer not in the manual?
Questions and answers