Table of Contents
Advertisement
Advertisement
Table of Contents

Related Manuals for Breville Halo


Summary of Contents for Breville Halo
- Page 1 ® halo health fryer instruction booklet selection of recipes included...
- Page 2 product safety IMPORTANT SAFETY INSTRUCTIONS. READ CAREFULLY AND KEEP FOR FUTURE REFERENCE This product must not be used by children under the age of 8. This product can be used by children aged from 8 years and above if they are continuously supervised. This product can be used by other persons who require supervision, provided: • they are familiar with the hazards associated with the...
- Page 3 ! Never use this appliance for anything other than its intended use. This appliance is for household use only. Do not use this appliance outdoors. ! Always ensure that hands are dry before handling the plug or switching on the appliance.
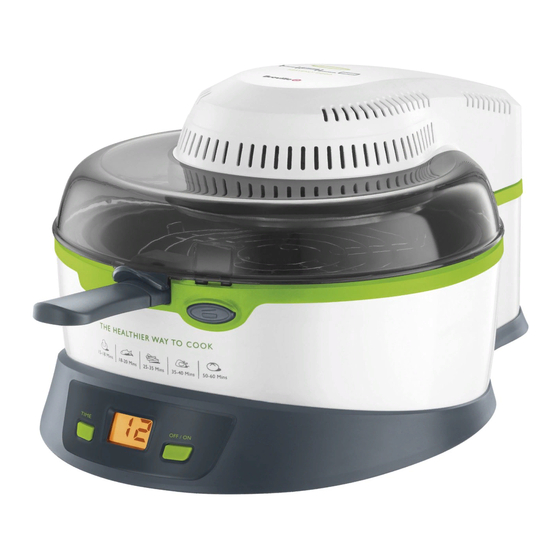
- Page 4 parts 1. Lid 2. Halogen heater and fan assembly 3. Lid release button 4. Display 5. Timer setting button 6. On/off button 7. Paddle 8. Oil measure (approximately equal to 15ml) 9. Dual height wire rack 10. Removable non-stick bowl 11.
- Page 5 Due to our policy of continuous improvement, the actual product may differ slightly from the one illustrated in these instructions.
-
Page 6: Before First Use
1. Place the bowl roller assembly centrally into the bottom of your Halo Health Fryer. 2. Place the bowl into the body of your fryer as shown in figure 2 below. -
Page 7: Bowl Handle
bowl handle During cooking the removable bowl rotates so only use the handle to remove the bowl after cooking has finished. Remember the bowl will be very hot! Don’t set the bowl down on a surface that may be damaged by heat. After cooking, you can use the detachable bowl handle to remove the bowl and its contents safely. -
Page 8: Cooking Chips
Care is required when using the appliance on surfaces that may be damaged by heat. The use of an insulated pad is recommended. Your Halo fryer can be used to cook fresh or frozen chips, however, for the healthiest option, we suggest you try our perfect homemade chips on page 17. - Page 9 MA X...
-
Page 10: Cooking Methods
Your Halo Health Fryer comes complete with a dual height rack that can be used for a variety of foods e.g. sausage, chicken, chips, fish, etc. Foods can also be cooked directly in the removable bowl with or without the paddle. Use whichever method gives you the best results. - Page 11 LOW POSITION HIGH POSITION...
- Page 12 Using your Halo Health Fryer to cook food will help you to reduce the amount of oil needed in some recipes, which may benefit your diet. The table below lists some of the more widely available, popular oils. All of them can be used in your Halo Health Fryer.
- Page 13 There is nothing quite like a plate of homemade chips—especially with your Halo Health Fryer doing all the hard work for you. Did you know there are hundreds of varieties of potatoes grown around the world with about 80 different varieties grown commercially in the UK.
-
Page 14: Cooking Time And Accessories Table
cooking popular, convenience and frozen foods Food Approx. Instructions Time (minutes) Jacket potatoes 50-55 Prick and space evenly apart 1kg of fresh chips 40-55 Wash and dry 800g of fresh chips 30-35 Wash and dry 500g of fresh chips 30-35 Wash and dry 1kg of frozen chips 35-40... - Page 15 Accessory Required Lightly oil the skins for crispy Bowl only results Paddle 1 measure Paddle 1 measure Paddle ½ measure Paddle None Paddle None Paddle None Grill rack in low position None Paddle 1 measure Grill rack in low position None Grill rack in low position Oil the grill rack only...
-
Page 16: Care And Cleaning
Always unplug your Halo Health Fryer and allow it to cool completely before cleaning it. NEVER immerse the body, power cord or plug in water or any other liquid. Never use harsh abrasive cleaners or cleaning materials. -
Page 17: Recipes
• Salt to serve 1. Fit the paddle into your Halo Health Fryer. 2. Peel the potatoes and chip them into approximately 11-13 mm wide chips with a sharp knife. 3. Rinse them twice to remove the starch and completely cover them with water until you are ready to cook them. - Page 18 • Sour cream, salsa and Guacamole to serve 1. Remove the paddle form your Halo Health Fryer and lightly oil the removable bowl. 2. Evenly scatter the nachos over the bottom of the bowl. 3. Sprinkle the nachos with cheese and the green chilli and then cook them for approximately 2-3 minutes until the cheese has melted.
- Page 19 7. Spoon the mixture back into the potato skins and sprinkle with the remaining cheese and a dash of Worcestershire sauce. 8. Remove the paddle from your Halo Health Fryer then gently place the potatoes back into the bowl and cook for a further 10 minutes until the cheese turns crispy and...
- Page 20 • of olive oil 1. Remove the paddle from your Halo Health Fryer. Place the rack into the bowl at its low height so the food is furthest away from the halogen heater. 2. Place the ciabatta on its side and carefully cut it in half lengthways as you would a sandwich.
- Page 21 Stir until the prawns are well coated then cover the bowl with cling film. Leave to marinate in the fridge for 2-3 hours. 3. Add the prawns to your Halo Health Fryer removable bowl along with the remaining marinade and the groundnut oil and cook for 5 minutes. The prawns are cooked when they turn pink.
- Page 22 • 2 tablespoon of fresh chopped parsley 1. Fit the paddle into your Halo Health Fryer. 2. Using a sharp knife, carefully slice the haddock fillets into 2cm wide strips. 3. Place the bread crumbs, eggs and flour separately into individual dishes, season the flour and sprinkle the bread crumbs with the herbs.
- Page 23 • Salt and freshly ground black pepper 1. Remove the paddle from your Halo Health Fryer and insert the rack at its low height so the food is furthest away from the halogen heater. Lightly oil the rack. 2. Place the bread, garlic, parmesan cheese and herbs into a food processor or mini chopper and process into a fine bread crumb consistency.
- Page 24 • Handful of torn basil leaves 1. Remove the paddle from your Halo Health Fryer and insert the rack at its low height so the food is furthest away from the halogen heater. 2. Cut each chicken breast in half lengthways, and add some lemon zest to each breast.
- Page 25 • ½ a lemon 1. Fit the paddle into your Halo Health Fryer. 2. Rinse the rice and boil it in a pan with a dash of olive oil (this prevents the rice from sticking together). Allow it to cook for 10 minutes or until tender. Once the rice is cooked, drain and immediately rinse it under cold water.
- Page 26 2. First, boil the rice in a pan along with the cardamom pods and bay leaf for 10 minutes or until the rice is tender. 3. Whilst the rice is cooking add the oil and chicken to your Halo Health Fryer and cook for 12 minutes or until the chicken is cooked through.
- Page 27 Leave overnight if possible, stirring occasionally to keep the chicken coated. 3. Remove the paddle from your Halo Health Fryer. 4. Carefully remove the chicken from the marinade and place evenly into the bowl.
- Page 28 1 tablespoon of fresh thyme, stalks removed • Salt and freshly ground black pepper 1. Remove the paddle from your Halo Health Fryer. 2. Add the sausages, bacon and onions to the removable bowl and cook for 10-12 minutes until they are browned.
- Page 29 • 300g Fuselli pasta 1. Fit the paddle into your Halo Health Fryer 2. Add the pasta to a pan of boiling water along with the olive oil and stir well. Leave to cook for approximately 8-10 minutes or until it is tender. Drain well.
- Page 30 Handful of coriander leaves, chopped To serve Bread rolls, cheese slices, sliced tomatoes, lettuce and ketchup 1. Remove the paddle from your Halo Health Fryer and insert the rack at its low height so the food is furthest away from the halogen heater.
- Page 31 • 1 cucumber, finely chopped 1. Remove the paddle from your Halo Health Fryer and insert the rack at its low height so the food is furthest away from the halogen heater. 2. In a bowl work together the lamb mince with the beaten egg.
- Page 32 • 25g butter, diced 1. Fit the paddle into your Halo Health Fryer. 2. Pour in the olive oil and add the garlic and the onion and close the lid. Cook for approximately 5 minutes until the onions are golden.
- Page 33 • Freshly ground black pepper 1. Remove the paddle to your Halo Health Fryer. Lightly oil the removable bowl. 2. Mix together half of the oil with the onions, bread crumbs, garlic and crumbled goat’s cheese with some freshly ground pepper in a bowl 3.
- Page 34 • Raspberries to decorate 1. Remove the paddle from your Halo Health Fryer 2. Pour the cream into a saucepan. If you are using a vanilla pod split it lengthways and scrape the seeds into the cream. Then chop the pod into small pieces and add to the cream.
- Page 35 • 2 passion fruits (pulp and seeds) 1. Remove the paddle from your Halo Health Fryer and insert the rack at its low height. 2. Have a bowl of iced water ready. 3. In a small pan on a low to medium temperature, heat the orange juice, sugar, vanilla, orange zest and passion fruit until the sugar has dissolved.
- Page 36 2. Remove the paddle from your Halo Health Fryer and line the base of the bowl with baking parchment. Cut a hole in the centre of the parchment large enough to fit over the paddle drive spindle (approx.
- Page 37 2. Remove the paddle from the Halo 3. Place the filled moulds inside the Halo tin, close the lid and set the timer for 10 minutes. 4. Once cooked, carefully remove the Halo tin, placing it onto a cooling wire. After 5 minutes remove the cakes from the tin and cool for a further 15 minutes before decorating.
- Page 38 connection to the mains supply This appliance must be earthed. This appliance is fitted with either a moulded or rewirable BS1363, 13 amp plug. The fuse should be rated at 13 amps and be ASTA approved to BS1362. If the fuse in a moulded plug needs to be changed, the fuse cover must be refitted. The appliance must not be used without the fuse cover fitted.
-
Page 39: After Sales Service
after sales service These appliances are built to the very highest of standards. There are no user serviceable parts. Follow these steps if the unit fails to operate: 1. Check the instructions have been followed correctly. 2. Check that the fuse has not blown. 3. - Page 40 guarantee Please keep your receipt as this will be required for any claims under this guarantee. This appliance is guaranteed for 1 year after your purchase as described in this document. During this guaranteed period, if in the unlikely event the appliance no longer functions due to a design or manufacturing fault, please take it back to the place of purchase, with your till receipt and a copy of this guarantee.
- Page 41 weee Waste electrical products should not be disposed of with Household waste. Please recycle where facilities exist. E-mail us at enquiries info@pulse-uk.co.uk for further recycling and WEEE information.
- Page 44 VDF065_VDF084_Iss_5 04/13 93381-4...
Need help?
Do you have a question about the Halo and is the answer not in the manual?
Questions and answers