
Related Manuals for TeleEye MX810-HD


Summary of Contents for TeleEye MX810-HD
-
Page 1: Installation Guide
MX Series HD Network Camera MX810-HD / MX820-HD MX833-HD / MX873-HD / MX763-HD Installation Guide... - Page 2 Signal Communications Limited. TeleEye is a trademark of Signal Communications Limited and is registered in China, European Communities, Hong Kong, US and other countries. All other trademarks are the property of their respective owners.
-
Page 3: Table Of Contents
Contents Package Contents ....................6 1.1. MX810-HD .................... 6 1.2. MX820-HD / MX823-HD ..............7 1.3. MX833-HD .................... 8 1.4. MX873-HD .................... 9 1.5. MX763-HD ..................10 Hardware Installation ................... 11 2.1. MX810-HD ..................11 2.1.1. Features ..................11 2.1.2. - Page 4 6.2. Specifications ..................38 6.3. Dimension .................... 40 6.3.1. MX810-HD .................. 40 6.3.2. MX820-HD .................. 40 6.3.3. MX823-HD .................. 40 6.3.4. MX833-HD .................. 41 6.3.5. MX873-HD .................. 41 6.3.6. MX763-HD .................. 41...
-
Page 5: Safety Cautions
MX User Guide PAGE 5 Introduction TeleEye MX Series is a complete portfolio of professional and practical HD network camera utilizing our proprietary HD SMAC-M compression technology. The MX series offers the balanced combination of high-quality video, mobility, scalability and cost effectiveness. -
Page 6: Package Contents
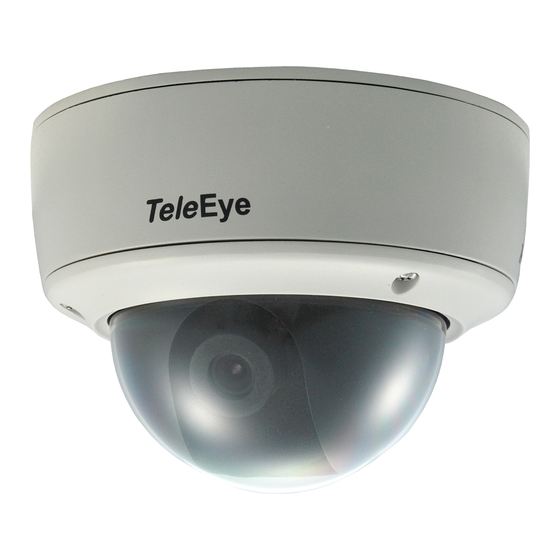
MX User Guide PAGE 6 1. Package Contents After removing the package, make sure you have the following items: 1.1. MX810-HD MX810-HD High Definition Fixed Dome Package Contents Description Package Description Contents MX810-HD Warranty network camera Card Registration Code Installation... -
Page 7: Mx820-Hd / Mx823-Hd
MX User Guide PAGE 7 1.2. MX820-HD / MX823-HD MX820-HD Outdoor & Vandal Resistant Fixed Dome Package Contents Description Package Description Contents MX820-HD Warranty network camera Card Registration Code Installation Sheet Guide Software CD RJ-45 Ethernet Adapter Label Wall Mount Screws and plastic wall plugs... -
Page 8: Mx833-Hd
MX User Guide PAGE 8 1.3. MX833-HD MX833-HD IR Vandal Resistant HD CCTV Camera Package Contents Description Package Contents Description MX833-HD Warranty network Card camera Registration Installation Code Sheet Guide Software CD RJ-45 Ethernet Adapter Screw driver, wall mount screws and plastic wall plugs... -
Page 9: Mx873-Hd
MX User Guide PAGE 9 1.4. MX873-HD MX873-HD IR Vari-focal HD CCTV Camera Package Contents Description Package Contents Description MX873-HD Warranty network Card camera Registration Installation Code Sheet Guide Software CD RJ-45 Ethernet Adapter Hexagon Wall hole Wrench label, Wall mount screws and plastic wall... -
Page 10: Mx763-Hd
MX User Guide PAGE 10 1.5. MX763-HD MX763-HD Day & Night HD CCTV Camera Package Contents Description Package Contents Description MX763-HD CS mount network CCTV Lens camera (Optional) Power Warranty Converter Card Cable Registration Installation Code Sheet Guide Software... -
Page 11: Hardware Installation
2. Hardware Installation In this chapter, it will show you how to setup and adjust the MX series cameras. 2.1. MX810-HD 2.1.1. Features MX810-HD High Definition Fixed Dome Weather Proof and Vandal Resistance 1/3.2” CMOS sensor f=3.6mm or 6mm fixed iris lens ... - Page 12 MX User Guide PAGE 12 There is an alternate hole for the power cable, Ethernet cable and alarm cable. When this hole is used, the upper hole has to be sealed with the plastic cork. These 4 plastic corks should never be removed when waterproof is a critical requirement.
- Page 13 12VDC supply and connect the Ethernet cable to the LAN adapter as the follows: MX810-HD Run sureSIGHT or Web browser (Please refer to chapter 5 for more details) to start the live video monitoring in order to tune the camera. Then loose the screws to adjust the camera‟s direction (pan/tilt).
-
Page 14: Mx820-Hd / Mx823-Hd
MX User Guide PAGE 14 2.2. MX820-HD / MX823-HD 2.2.1. Features MX820-HD / MX-823-HD Outdoor & Vandal Resistant Fixed Dome Outdoor and Vandal Resistant 1/3.2” CMOS sensor f=3.6mm or 6mm fixed iris lens 720p, 15fps Max. Resolution: 1600 x 900p ... - Page 15 MX User Guide PAGE 15 These 4 plastic corks should never be removed when waterproof is a critical requirement. Drill a ф25mm hole on the ceiling for video and power connector cable to pass through. Take off the dome cover from the camera.
- Page 16 MX User Guide PAGE 16 MX820-HD Run sureSIGHT or Web browser (Please refer to chapter 5 for more details) to start the live video monitoring in order to tune the camera. Then loose the screws to adjust the camera‟s direction (pan/tilt). Loose this screw for adjusting tilt position Loose this screw for adjusting pan position Tighten the screws to fix the direction of the camera module.
-
Page 17: Mx833-Hd
MX User Guide PAGE 17 2.3. MX833-HD 2.3.1. Features MX833-HD IR Vandal Resistant HD CCTV Camera HD CCTV Camera with Focus Assist Function 1/3.2” CMOS sensor f=2.7 - 9mm Vari-focal auto-iris IR lens 720p, 15fps Max. Resolution: 1600 x 900p ... - Page 18 MX User Guide PAGE 18 There is an alternate hole for the power cable, Ethernet cable and alarm cable. When this hole is used, the upper hole has to be sealed with the plastic cork. These 4 plastic corks should never be removed when waterproof is a critical requirement.
- Page 19 MX User Guide PAGE 19 After mounting the camera on the wall or ceiling, connect the power cable with a 12VDC supply and connect the Ethernet cable to the LAN adapter as the follows: MX833-HD Run sureSIGHT or Web browser (Please refer to chapter 5 for more details) to start the live video monitoring in order to adjust the camera focus, zoom ratio and view area.
-
Page 20: Mx873-Hd
MX User Guide PAGE 20 2.4. MX873-HD 2.4.1. Features MX873-HD IR HD CCTV Camera Ultra-high Resolution Recording in Darkness. 1/3.2” CMOS sensor f=2.7 - 9mm, Vari-focal auto-iris lens 720p, 15fps Max. Resolution: 1600 x 900p ~15m IR illumination range ... - Page 21 MX User Guide PAGE 21 Power cable (DC12V IN) Ethernet cable Alarm cable Finally, run sureSIGHT or Web browser (Please refer to chapter 5 for more details) to start the live video monitoring in order to adjust the camera focus, zoom ratio and view area.
- Page 22 MX User Guide PAGE 22 For adjusting the zoom ratio and focus: 1. Open the back cover. 2. Use the screwdriver to adjust the focus and the zoom ratio. 3. Close the back cover after adjusting the camera Adjust Zoom Adjust Focus...
-
Page 23: Mx763-Hd
MX User Guide PAGE 23 2.5. MX763-HD 2.5.1. Features MX763-HD Day/Night Box Camera Day & Night Box Camera 1/3” SONY CMOS sensor 720p, 25fps CS-mount True day & night operation with auto IR-cut filter Power over Ethernet – IEEE 802.3af ... - Page 24 MX User Guide PAGE 24 Run sureSIGHT or Web browser (Please refer to chapter 5 for more details) to start the live video monitoring in order to tune the camera according to the steps listed as below: 1. Use the Zoom Ring to adjust the viewing angle of the camera 2.
-
Page 25: Software Installation
MX User Guide PAGE 25 3. Software Installation In this chapter, it will guide you how to install the sureSIGHT software. 3.1. PC Requirements sureSIGHT sureSIGHT Lite sureSIGHT Pro Business Intel® Core™ 2 Duo Processor: Intel® Core™ 2 Quad Processor Processor Memory: 2 GB or above... - Page 26 [Next >] button. Step 5: [Browse] the installation path for sureSIGHT, [Disk Cost…] is available for user to check the available space for installation, then click the [Next >] button. [Note] The default path “C:\Program Files\TeleEye\TeleEye sureSIGHT\” is recommended...
- Page 27 MX User Guide PAGE 27 Step 6: Click the [Next >] button to confirm the installation. Step 7: When the installation is completed, click the [Close] button to close the window. Step 8: If the PC does not have Java runtime installed, return to the installation menu and click the [Install] button next to “Java Runtime”...
-
Page 28: Network Configuration
In this chapter, it will guide you how to setup the target camera IP address. 4.1. Connect Camera to the Network Before setting the IP address, please make sure the network connection is correct as following diagram: MX810-HD / MX820-HD / MX833-HD MX873-HD... -
Page 29: Change The Ip Address
Step 1: Before running the IP Setup Utility, turn on the IP camera and make sure the connection is correct. Step 2: Select the “Run TeleEye IP setup utility” from the start menu. Step 3: By comparing the serial number, select the corresponding row from the list table on the left window. - Page 30 "sureLINK enable" to enable sureLINK and input the registered sureLINK address and the refresh rate. For example, if the registered sureLINK address is “www.rx.teleeye.teleeye.net” and the refresh rate is 15 minutes, please input them to the corresponding textbox as follows: [Note] If user dose not know any sureLINK address, please go to http://www.teleeye.com/softreg/customer/s_domainreg.jsp...
-
Page 31: Video Monitoring
MX User Guide PAGE 31 5. Video Monitoring In this chapter, it will guide you how to do the video monitoring in a few steps. For more detailed procedures or operations, please refer to the relevant documents. 5.1. sureSIGHT Step 1: Turn on the IP camera and make sure the connection is correct. Then select the "Run sureSIGHT Lite"... - Page 32 MX User Guide PAGE 32 Step 4: Select the target camera by its serial number or site name from the list table on the left. Step 5: After selecting the camera, choose the connection type from the list. [Notes] TCP/IP LAN is recommended. Step 6: There are two security modes for user to make a connection: Mode 1: For normal security mode, only password is required.
- Page 33 MX User Guide PAGE 33 Mode 2: For advanced security mode, both password and user name are required. Select the "Use advanced security mode". Then input the user name and password in the corresponding textboxes. Step 7: Click the button to confirm all the site information. And then the sureSIGHT will connect to the target camera.
-
Page 34: Web Browser
MX User Guide PAGE 34 5.2. Web Browser Step 1: Run a web browser such as Internet Explorer. Enter the IP address or the sureLINK address in the address bar. [Note] Java Runtime Environment (JRE) is required for the web browser to run the application. If the PC does not have JRE, please go to the http://www.java.com to download the latest version. - Page 35 MX User Guide PAGE 35 Step 3: Click the [Connect] button to connect the video stream. And the video stream will be displayed on the browser as below: There are several buttons on the top of the video screen. The function of each button is described as follows: In normal display mode, enlarge the video resolution.
-
Page 36: Appendix
Recording 29% longer than H.264 16:9 Aspect Ratio Providing Wider View TeleEye MX Series records the HD video with the aspect ratio of 16:9. There is a significant advantage over conventional camera, which provides the 4:3 aspect ratio of video. The wide screen format of TeleEye MX provides 33% more viewing area than conventional cameras with much better clarity. - Page 37 CAT5 cable, Wi-Fi or mobile network. Total Solution for HD Video Surveillance TeleEye MX is capable of HD live video recording and multi-site viewing by using TeleEye sureREC HD Video Recording Solution and sureSIGHT Integrated Video Management Solution.
-
Page 38: Specifications
MX User Guide PAGE 38 6.2. Specifications MODEL MX810-HD MX820-HD / MX823-HD MX833-HD Outdoor & Vandal Resistant IR Vandal Resistant High Definition Fixed Dome Fixed Dome Vari-focal Dome VIDEO IMAGE SENSOR 1/3.2”, 2 megapixel CMOS Sensor RESOLUTION 1600x1200 pixels (UXGA) MINIMUM ILLUMINATION 0.5 Lux @ F1... - Page 39 MX User Guide PAGE 39 MODEL MX873-HD MX763-HD IR Vari-Focal Day/Night Box Camera VIDEO IMAGE SENSOR 1/3.2”, 2 megapixel CMOS Sensor 1/3”, 1.3 megapixel CMOS Sensor RESOLUTION 1600x1200 pixels (UXGA) 1280x720 pixels MINIMUM ILLUMINATION 0.0 Lux (~15m) 0.1Lux f=2.7-9mm LENS Depends on Lens used Vari-focal auto-iris lens (CS mount)
-
Page 40: Dimension
MX User Guide PAGE 40 6.3. Dimension 6.3.1. MX810-HD 6.3.2. MX820-HD 6.3.3. MX823-HD... -
Page 41: Mx833-Hd
MX User Guide PAGE 41 6.3.4. MX833-HD 6.3.5. MX873-HD 6.3.6. MX763-HD...
Need help?
Do you have a question about the MX810-HD and is the answer not in the manual?
Questions and answers