Table of Contents
Advertisement
Advertisement
Table of Contents

Related Manuals for Backyard PRO


Summary of Contents for Backyard PRO
-
Page 1: Grill Assembly
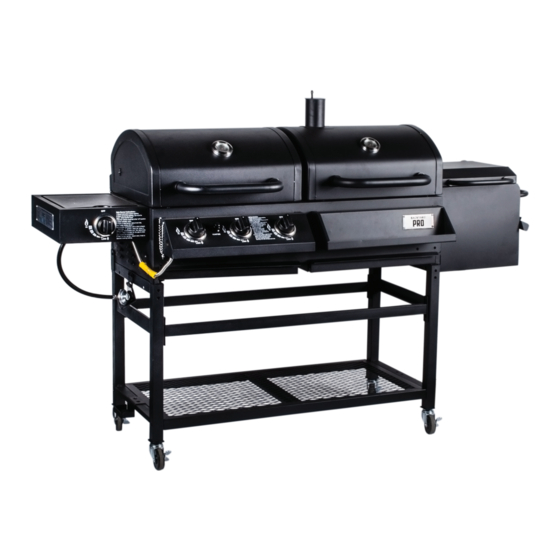
LP GAS AND CHARCOAL GRILL ASSEMBLY INSTRUCTIONS 10/2014 THIS INSTRUCTION MANUAL CONTAINS INFORMATION NECCESSARY FOR SAFETY, ASSEMBLY AND USE OF THIS APPLIANCE. DO NOT USE THE APPLIANCE UNTIL YOU HAVE READ THIS MANUAL. KEEP THIS MANUAL FOR FUTURE REFERENCE. -
Page 2: Safety Precautions
Warnings FOR YOUR SAFETY: 1. Read all instructions before assembling or operating your grill. 2. Follow all safety instructions, even if you purchased this grill assembled. 3. This guide is intended for the end user. Retain for future reference. 4. This grill is intended for outdoor use only. Do not attempt to use indoors. 5. -
Page 3: Table Of Contents
Table of Contents 1. Tools and Parts 2. Hardware 3. Assembly Instructions 4. Care and Maintenance 6. Frequently Asked Questions 5. Warranty Information... -
Page 4: Hardware
Required Tools Description Adjustable wrench (Not Included) Philips head screwdriver (Not Included) Screwdriver (not provided) Hardware List... - Page 5 Parts List...
-
Page 6: Assembly Instructions
Assembly Instructions Step 1 Assemble the bottom shelf (23) to the legs (20) using BOLT M6*50 (AA) - 4 PCS and NUT M6 FLANGE LOCK (EE) - 4 PCS. Step 2 Assemble the long fence rails (21) to both legs using BOLT M6*12 (BB) - 8 PCS. - Page 7 Assembly Instructions Step 3 Assemble the threaded casters (22) to legs by twisting clockwise until tight. Turn over the bottom assembly when completed and lock all casters to prevent from moving. Step 4 Assemble the bottom hinges (14) - 4 PCS to the back of body (15) using BOLT M6*40 (CC) - 8 PCS.
- Page 8 Assembly Instructions Step 5 Align and place body on top of the legs. Using BOLT M6*12 (BB) - 10 PCS, attach the triangular bracket left (19) and right (18) to back of body and legs as shown in Fig. 1. Secure front of body to legs using M6*12 (BB) - 2 PCS with M6 SPACER (JJ) - 2 PCS.
- Page 9 Assembly Instructions Step 7 Assemble gas tank holder (24) and gas tank hook (25) on the left leg using BOLT M6*12 (BB) - 4 PCS. Step 8 Screw in BOLT M6*12 (BB) - 2 PCS halfway on the upper corners of the side burner body (27) as shown in Fig.
- Page 10 Assembly Instructions Step 9 Mount knob base (26) to front of side burner body using BOLT M4*8 (HH) - 2 PCS. Push knob (36) into side burner controller. Step 10 Assemble the side burner (29) by sliding it on the top center of the side burner body.
- Page 11 Assembly Instructions Step 11 Assemble back panel (1) to back side of gas side using BOLT M6*12 (BB) - 3 PCS. Step 12 Assemble lid hinges (8) - 2 PCS on charcoal lid (4) using M6*40 (CC) - 4 PCS. and NUT M6 FLANGE LOCK (EE) - 4 PCS.
- Page 12 Assembly Instructions Step 13 Assemble lid hinges (8) - 2 PCS on gas lid (3) using M6*40 (CC) - 4 PCS and NUT M6 FLANGE LOCK (EE) - 4 PCS. Step 14 Assemble the firebox handles (32) and handle bases (31) to firebox lid and body (right) using BOLT M6*25 (DD) - 4 PCS.
- Page 13 Assembly Instructions Step 15 Screw in BOLT M6*12 (BB) - 2 PCS halfway on the firebox (35) as shown in Fig. 5a. Slide in the two screws in opening (Fig. 5b) to hold the firebox in position. Using M6*12 (BB) - 9 PCS, fasten the firebox in place and tighten all screws.
- Page 14 Assembly Instructions Step 17 Attach lifting handles (12) - 2 PCS to charcoal pan (13). Lower lifting system to body (charcoal side) as on Fig. 6. Attach flame tamers (11) - 3 PCS to gas side of body. Step 18 Assemble the warming rack (9) - 2 PCS by inserting the top two ends into the lids and the bottom side...
- Page 15 Assembly Instructions Step 19 Place cooking grates (33) - 2 PCS and charcoal pan (34) into firebox. Step 20 Insert cooking grates (10) - 4 PCS into body. Attach “S” hooks (5) - 4 PCS to accessory holder.
- Page 16 Assembly Instructions Step 21 Slide drip trays (16) - 2 PCS underneath each side of the body. Connect battery to ignition button by gently removing the cap, placing battery (II) and putting back the cap. FULLY ASSEMBLED...
-
Page 17: Care And Maintenance
Care and Maintenance: Gas Grill GENERAL INFORMATION AND INSTRUCTIONS: Your new Outdoor Gourmet Grill has been designed and manufactured to high quality standards. It will provide you with many years of enjoyment with a minimal amount of maintenance. Please keep in mind the following FOR YOUR SAFETY. OPERATION: 1. - Page 18 Care and Maintenance: Gas Grill LP CONTAINER CAUTIONS: 1. Do not attempt to attach this cylinder to any non-compatible hoses 2. Do not attempt to use a cylinder that does not meet the above criteria LP CYLINDER FILLING AND EXCHANGE: If you are in an area that permits cylinder refills: 1.
- Page 19 Care and Maintenance: Gas Grill TRANSPORTATION: 1. Always transport in an upright position 2. Ensure your cylinder is secure 3. Do not smoke when transporting your cylinder REGULATOR AND LP CYLINDER CONNECTIONS : 1. A regulator must be used when a cylinder is connected to your grill 2.
- Page 20 Care and Maintenance: Gas Grill LIGHTING: 1. Always visually inspect your grill before lighting and replace any components as needed 2. Look for ventilation blocks or other harmful debris 3. After lighting, inspect flames along burner 4. If burner will not light in 5 seconds, turn off burner, wait five minutes, and try again a.
- Page 21 Care and Maintenance: Gas Grill 6. Press and turn burner control knob to High; hold down for five seconds 7. If burner doesn’t light, close lid, wait five minutes, and try again 8. When lit, turn control knob to desired setting MANUAL SIDE BURNER IGNITION 1.
- Page 22 Care and Maintenance: Gas Grill GRATES, RACK, AND DIFFUSERS: 1. Wash with warm water and mild dish soap as needed 2. Use a stiff brass brush 3. Dry GREASE PAN AND TRAY: 1. Check after each use 2. Remove and empty tray when half full 3.
- Page 23 Care and Maintenance: Gas Grill BURNER FLAMES: 1. Always inspect flame after lighting for a healthy burn a. See image for reference b. New burners may have oil residue, which will burn yellow 2. Keep grilling area clean and free of combustible materials 3.
- Page 24 Trouble Shooting Guide: BURNER WILL NOT LIGHT: 1. Gas supply is turned off. Turn on at gas and LP tank 2. Out of fuel. Check tank to be sure 3. Regulator is not properly sealed with tank. Remove and reattach. Hand tighten only 4.
- Page 25 Care and Maintenance: Charcoal Grill and Smoker CURING YOUR GRILL: 1. Lightly coat interior surfaces with vegetable oil a. Do not coat charcoal grates or ash tray 2. Build a fire with charcoal and / or wood a. Soak in charcoal lighter fluid, wait three minutes, and light flame b.
- Page 26 Care and Maintenance: Charcoal Grill and Smoker PROPER CARE AND MAINTENANCE: 1. Cure grill periodically to protect against rust 2. Cover grill when not in use 3. Wash cooking grills and grates with hot, soapy water a. Rinse well and dry b.
-
Page 27: Frequently Asked Questions
Frequently Asked Questions CAN I CONVERT MY GAS GRILL FROM ONE FUEL SOURCE TO ANOTHER? No. Your gas grill is manufactured to specific standards developed by the CSA and ANSI for your safety and grilling performance. We do not offer conversion kits nor do we recommend you change the fuel type. -
Page 29: Warranty Information
CUSTOMER SERVICE: Thanks for purchasing this Backyard Pro gas and charcoal grill. We’re here to help you maximize your enjoyment and appreciation of your new grill. Please don’t hesitate to contact us should you have any questions regarding assembly, performance, warranty, or accessories. We will be happy to order any replacement parts needed.
Need help?
Do you have a question about the PRO and is the answer not in the manual?
Questions and answers