Table of Contents
Advertisement
Advertisement
Table of Contents

Related Manuals for HCL Laptop


Summary of Contents for HCL Laptop
- Page 1 User’s Manual...
-
Page 3: Notational Conventions
Notational Conventions Throughout this manual, the following conventions are used to distinguish elements of text. Note: identifies additional information that requires special attention. Warning : identifies additional information that requires special attention. Tip : identifies additional information that requires special attention. Caution: identifies important information that, if not followed, may result in loss of data or damage to the computer. - Page 4 Overview Chapter - 1 Introducing the Notebook Chapter - 2 Knowing the Parts Chapter - 3 Getting Started Chapter - 4 Using the Notebook PC...
-
Page 5: Taking Care Of Your Notebook Pc
TAKING CARE OF YOUR NOTEBOOK PC DO NOT use your notebook computer under To prevent possible overheating of the computer's DO NOT place on uneven or unstable work DO NOT press or touch the display panel. harsh conditions. processor, make sure you don't block the openings surfaces. - Page 6 Avoid sudden changes in temperature or humidity DO NOT tamper with the batteries. Keep them DO NOT expose the computer to rain or DO NOT place near fire or other sources of heat. by keeping it away fromA/C and heating vents. away from children.
-
Page 7: Introducing The Notebook
User's Guide Introducing the Notebook PC Chapter - 1 Introducing the Notebook Transportation Precautions To prepare the Notebook PC for transport, you should turn it OFF and disconnect all external peripherals to prevent damage to the connectors. The hard disk drive's head retracts when the power is turned OFF to prevents scratching of the hard disk surface during transport. -
Page 8: Airplane Precautions
User's Guide Introducing the Notebook PC Airplane Precautions Contact your airline if you want to use the Notebook PC on the airplane. Most airline will have restrictions for using electronic devices. Most airline will allow electronic use only between and not during take off and landings. - Page 9 User's Guide Introducing the Notebook PC Preparing you Notebook PC These are only quick instructions for using your Notebook PC. Read the later pages for detailed information on using your notebook PC. 1. Install the battery pack 2. Connect the AC Power Adapter 3.
-
Page 10: Knowing The Parts
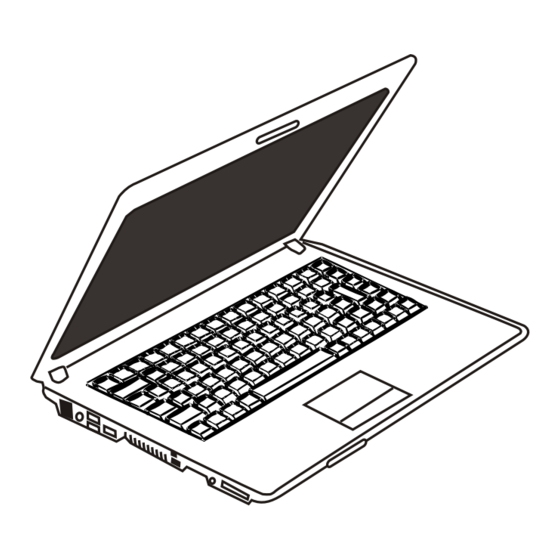
User's Guide Knowing the Parts Chapter - 2 Knowing the Parts Basic sides of the Notebook PC Top Side Refer to the diagram to identify the components on this side of the Notebook PC. - Page 11 User's Guide Knowing the Parts Before you Start Camera (on selected models) The built-in camera allows picture taking or video recording. Can be used with video conferencing and other interactive applications. Microphone (Built-in) The built-in mono microphone can be used for video conferencing, voice narrations, or simple audio recordings.
- Page 12 User's Guide Knowing the Parts Instant Keys Instant keys allow you to launch frequently used applications with one push of a button. Details are described in chapter- 3. Keyboard The keyboard providers full-sized keys with comfortable travel (depth at which the keys can be depressed) the palm rest for both hands.
-
Page 13: Bottom Side
User's Guide Knowing the Parts Bottom Side Refer to the diagram below to identify the components on this side of the Notebook PC. Warning : The bottom of the Notebook PC can get very hot. Be careful when handling the Notebook PC while it is in operation or recently been in operation. - Page 14 The cooling fan is activated to remove excess heat depending on temperature threshold settings. Hard disk drive Compartment. The hard disc drive is secured in a compartment. Hard disk drive upgrades are to be done by HCL authorized service centers only.
- Page 15 Notebook PC when AC power is not connected. This allows us moving temporarily between locations, battery time varies by usage and by the specifications for this Notebook PC. The battery pack cannot be disassembled and must be replaced as a single unit through HCL authorized dealer. Shutdown Button(Emergency) In case your operating system cannot properly turn OFF or restart ,the shutdown button can be pressed with a straightened paper clip to shut down the Notebook PC.
-
Page 16: Right Side
User's Guide Knowing the Parts Right Side Refer to the diagram below to identify the components on this side of the Notebook PC. Headphone Output Jack The stereo headphone jack (1/8inch ) is used to connect the Notebook PC’S audio out signal to amplified speakers or headphones.Using this jack automatically disables the built-in speakers. - Page 17 User's Guide Knowing the Parts IEEE 1394 Port IEEE1394 is a high speed serial bus like but has simple connections and hot-plugging capabilities like USB. The interface IEEE1394 has a bandwidth of 100-400 Mbits/sec can handle up to 63 units on the same bus. IEEE1394 is also used in high-end digital equipment and should be marked "DV"...
-
Page 18: Left Side
User's Guide Knowing the Parts Left Side Refer to the diagram below to identify the components on this side of the Notebook PC. Optical Drive(Type of optical drive depends upon your ordering) The Notebook PC's optical drive may support compact discs (CD) and/or digital video discs (DVD) and have recordable (R) or re-writable (RW) capabilities. -
Page 19: Front Side
User's Guide Knowing the Parts “ Optical Drive Emergency Eject. The emergency eject is used to eject the optical drive tray in case the electronic eject does not work. Do not use the emergency eject in place of the electronic eject. Front Side Refer to the diagram below to identify the components on this side of the Notebook PC. -
Page 20: Audio Speakers
User's Guide Knowing the Parts Audio Speakers The built-in stereo speaker system allows you to hear audio without additional attachments. The multimedia sound system features an integrated digital audio controller that produces rich, vibrant sound (results improved with external stereo headphone or speakers). Audio features are software controlled. Display Panel Latch One spring-loaded latch on the front of the Notebook PC looks the display panel in the closed position when the Notebook PC is not in use.To open the display panel ,move the latch with your thumb and lift up the display... -
Page 21: Rear Side
User's Guide Knowing the Parts Rear Side Refer to the diagram below to identify the components on this side of the Notebook PC. TV-Out Port The TV-Out port is an S-Video connector that allows routing the Notebook PC's display to a television or video projection device. - Page 22 User's Guide Knowing the Parts LAN Port The RJ-45 LAN port with eight pins is larger than the RJ-11 Modem port and supports a standard Ethernet cable for connection to a local network. The built-in connector allows convenient use without additional adapters.
- Page 23 User's Guide Knowing the Parts Air Vents The air vents allow cool air to enter and warm air to exit the Notebook PC . Important : Make sure that paper,books,clothing,cables.or other objects do not block any of the air vents or else overheating of the Notebook PC may occur.
-
Page 24: Getting Started
User's Guide Getting Started Chapter - 3 Getting Started Power System Using AC Power The Notebook PC power is comprised of two parts, the power adapter and the battery power system. The power adapter converts AC power from a wall outlet to the DC power required by the Notebook PC. Your Notebook PC comes with a universal AC-DC adapter. -
Page 25: Using Battery Power
User's Guide Getting Started Important : Damage may occur if you use a different adapter to power the Notebook PC or use the Notebook PC's adapter to power other electrical devices. If there is smoke, burning scent, or extreme heat coming from the AC-DC adapter, seek servicing. -
Page 26: Installing And Removing The Battery Pack
User's Guide Getting Started Installing and Removing the battery Pack Your Notebook PC may or may not have its battery pack installed. If your Notebook PC does not have its battery pack installed, use the following procedures to install the battery pack. Important : Never attempt to remove the battery pack while the Notebook PC is turned ON, as this may result in the loss of working date. -
Page 27: Battery Care
User's Guide Getting Started Battery Care The Notebook PC's battery pack, like all rechargeable batteries, has a limit on the number times it can be recharged. Fully draining and charging the battery once a day every day will last over a year but how long beyond that will depend on your environment temperature, humidity, and how your Notebook PC is used. - Page 28 User's Guide Getting Started The Power - On Self Test (POST) When you turn ON the Notebook PC, it will first run through a series of software-controlled diagnostic tests called the Power-On self Test (POST).The software that controls the POST is installed as a permanent part of the Notebook PC's architecture.
-
Page 29: Checking Battery Power
User's Guide Getting Started Checking Battery Power The battery system implements the Smart Battery standard under the Windows environment, which allows the battery to accurately report the amount of charge left in the battery. A fully-charged battery pack provides the Notebook PC a few hours of working power. -
Page 30: Charging The Battery Pack
User's Guide Getting Started Charging the Battery Pack Before you use your Notebook PC you will have to charge the battery pack. The battery pack begins to charge as soon as the Notebook PC is connected to external power using the power adapter. Fully charge the battery pack before using it for the first time. -
Page 31: Emergency Shutdown
User's Guide Getting Started Important : To protect the hard drive, wait at least 5 seconds after turning OFF your Notebook PC before turning it back ON. Emergency Shutdown In case your operating system cannot properly turn OFF or restart, there are two additional ways to shutdown your Notebook PC : (1) Hold the power button over 4 seconds, or (2) Press the shutdown button. -
Page 32: Special Keyboard Functions
User's Guide Getting Started Special Keyboard Functions Colored Hot keys The following define the colored hot keys on the Notebook PC's keyboard. The colored commands can only be accessed by first pressing and holding the function key while pressing a key with a colored command. Note: The Hot Key locations on the function keys may vary depending on model but the functions should remain the same. - Page 33 User's Guide Getting Started LCD/ Monitor Icon (F8): Toggles between the Notebook PC's LCD display and an external monitor in this series: Notebook PC LCD->External Monitor-> Both. (This function does not work in 256 Colors, select High Color in Display property Settings.) IMPORTANT : Connect an external monitor before booting up the Notebook Pc.
- Page 34 User's Guide Getting Started Keyboard as a Numeric Keypad The numeric keypad is embedded in the keyboard and consists of 15 Keys that make number intensive input more convenient. These dual-purpose keys are labeled in Blue on the key caps. Numeric assignments are located at the upper right hand corner of each key as shown in the figure.
-
Page 35: Switches And Status Indicators
User's Guide Getting Started Switches and Status Indicators Switches Power switch The power switch allows powering ON and OFF the Notebook PC and recovering from STD.Use the switch once to tun ON and once to turn OFF the notebook PC.In Windows XP,this button can also be used to safely turn OFF the Notebook PC.The power switch only works when the display panel is opened. - Page 36 User's Guide Getting Started Wireless Switch Wireless Models only: Toggles the internal wireless LAN OR Bluetooth (on selected models)ON or OFF with an on-screen display. When enabled, the corresponding wireless indicator will light.Windows software settings are necessary to use the wireless LAN or Bluetooth. Status indicators Power Indicator The power indicator lights when the notebook PC is turned ON and blinks slowly when the notebook PC is in...
- Page 37 User's Guide Getting Started Drive Activity Indicator Indicates that the Notebook PC is accessing one or more storage device(s) such as the hard disk. The light flashes proportional to the access time. Wireless LAN connector This is only applicable on models with internal Wireless LAN.When the internal wireless LAN is enabled,This indicator will light.(Windows software settings are necessary to use the wireless LAN).I Number Lock Indicator Indicates that number lock (Num Lk) is activated when lighted.
-
Page 38: Using The Notebook Pc
User's Guide Using the Notebook PC Chapter - 4 Using the Notebook PC Operating System This Notebook PC may offer (depending on territory) its customers the choice of a pre-installed operating system such as Microsoft Windows XP or Windows Vista. The levels of hardware and software support may vary depending on the installed operating system. - Page 39 User's Guide Using the Notebook PC A recovery CD is optional and includes an image of the original operating system installed on the hard drive at the factory. The recovery CD provides a comprehensive recovery solution that quickly restores the Notebook PC's operating system to its original working state provided that your hard disk drive is in good working order.
- Page 40 User's Guide Using the Notebook PC Pointing Device The Notebook PC's integrated touchpad pointing device is fully compatible with all two/three-button and scrolling knob PS/2 mouse. The touchpad is pressure sensitive and contains no moving parts: therefore, mechanical failures can be avoided.
-
Page 41: Moving The Cursor
User's Guide Using the Notebook PC Moving The Cursor Place your finger in the center of the touchpad and slide in a direction to move the cursor. Scrolling (on selected models) Slide your finger up or down on the right side to scroll a window up or down. Touchpad Usage Illustrations Clicking/Tapping-With the cursor over an item, press the left button or use your fingertip to touch the touchpad lightly, keeping your finger on the touchpad until the item is selected. - Page 42 User's Guide Using the Notebook PC Double-clicking/Double-tapping - This is a common skill for launching a program directly form the corresponding icon you select. Move the cursor over the icon you wish to execute, press the left button or tap the pad twice in rapid succession, and the system launches the corresponding program.
- Page 43 User's Guide Using the Notebook PC Dragging - Dragging means to pick up an item and place it anywhere on the screen you wish. You can move the cursor over the item you select, and while keeping the left button depressed, moving the cursor to the desired location, then release the button.
-
Page 44: Caring For The Touchpad
User's Guide Using the Notebook PC Caring for the Touchpad The touchpad is pressure sensitive. If not properly cared for, it can be easily damaged. Take note of the following precaution: Make sure the touchpad does not come into contact with dirt, liquids or grease. Do not touch the touchpad if your fingers are dirty or wet. - Page 45 User's Guide Using the Notebook PC PC Card (PCMCIA) Socket The Notebook PC supports PC Cards (or sometimes referred to as PCMCIA cards) to allow expansion like PCI cards on desktop computers. This allows you to customize your Notebook PC to meet wide range of application needs.
- Page 46 User's Guide Using the Notebook PC Inserting a PC Card (PCMCIA) 1. If there is a PC Card socket protector, remove 3. Carefully connect any cable or adapter it using the "Removing a PC Card" instructions needed by the PC Card. Usually connectors below.
- Page 47 User's Guide Using the Notebook PC Removing a PC Card (PCMCIA) To remove the PC card, first remove all cables or adapters attached to the PC card, then double-click the PC card icon on the Windows taskbar and stop the PC card you want to remove. 1.
-
Page 48: Optical Drive
User's Guide Using the Notebook PC Optical Drive Inserting an optical disc 1. While the Notebook PC's power is ON, press 2. Gently pull on the drive's front panel and slide the drive's eject button and the tray will eject the tray completely out. - Page 49 User's Guide Using the Notebook PC 1. Hole the disc by the edge and face the disc's 2. Slowly push the drive's drive's tray back in. printed side up. Push down on both sides of The drive will begin reading the table of the disc's center until the disc snaps onto the contents (TOC) on the disc.
-
Page 50: Using The Optical Drive
User's Guide Using the Notebook PC Optical Drive (Cont') Removing an optical disc Emergency eject Eject the tray and gently pry the edge of the disc The emergency eject is located in a hole on the upwards at an angle to remove the disc from the optical drive and is used to eject the optical drive hub. -
Page 51: Listening To Audio Cd
User's Guide Using the Notebook PC Warning : If the CD disc is not properly locked onto the center hub, to CD can be damaged when the tray is closed. Always watch the CD closely while closing the tray slowly to prevent damage. A CD drive letter should be present regardless of the presence of a CD disc in the drive. -
Page 52: Hard Disk Drive
User's Guide Using the Notebook PC Important : Never remove cards while or immediately after reading, copying, formatting or deleting data on the card or else data loss may occur. Hard Disk Drive Hard disk drives have higher capacities and operate at much faster speeds than floppy disk drives and optical drives. -
Page 53: Modem Connection
User's Guide Using the Notebook PC Important : Poor handling of the Notebooks PC may damage the hard disk drive. Handle the Notebook PC gently and keep it away form static electricity and strong vibrations or impact. The hard disk drive is the most delicate component and will likely be the first or only component that is damaged if the Notebook PC is dropped. - Page 54 User's Guide Using the Notebook PC Example of the Notebook PC connected to a telephone jack for use with the built-in modem : 4-17...
-
Page 55: Network Connection
User's Guide Using the Notebook PC Network Connection Connect a network cable, with RJ-45 connectors on each end, to the modem/network port on the Notebook PC and the other end to a hub or switch. For 100 BASE-TX speed, your network cable must be category 5 or better (not category 3) with twisted-pair wiring. - Page 56 User's Guide Using the Notebook PC Example of the Notebook PC connected to a Network Hub or Switch for use with the built-in Ethernet controller. 4-19...
- Page 57 User's Guide Using the Notebook PC Wireless LAN Connection (on selected models) The optional built-in wireless LAN is a compact easy-to-use wireless Ethernet adapter. Implementing the IEEE 802.11 standard for wireless LAN (WLAN), the optional built-in wireless LAN is capable of fast data transmission rates using Direct Sequence Spread Spectrum (DSSS) and Orthogonal Frequency Division Multiplexing (OFDM) technologies on 2.4 GHz frequencies.
- Page 58 User's Guide Using the Notebook PC Infrastructure mode The Infrastructure mode allows the Notebook PC and other wireless devices to join a wireless network created by an Access Point (AP) (sold separately) that provides a central link for wireless clients to communicate with each other or with a wired network.
- Page 59 User's Guide Using the Notebook PC Bluetooth-enabled computers or PDAs You can wireless connect to another computer or PDA and exchange files, share peripherals, or share Internet or network connections. You may also make use of Bluetooth-enabled wireless keyboard or mouse. Pairing with Bluetooth-enabled devices You first need to pair your Notebook PC with a Bluetooth-enabled device before you can connect to it.
-
Page 60: Stand By And Hibernate
User's Guide Using the Notebook PC Stand by and Hibernate Power management settings can be found in the Windows control panel. The following shows the power options properties in Windows. You can define “Stand By” or “Shut down” for closing the display panel, pressing the power button, or activating sleep mode. -
Page 61: Power Management Modes
User's Guide Using the Notebook PC “Hibernate” is the same as Suspend-to-Disk (STD) and stores your current data and status on the hard disk drive. By doing this, RAM does not have to be periodically refreshed and power consumption is greatly reduced but not completely eliminated because certain wake-up components like LAN needs to remain powered. -
Page 62: Suspend Mode
User's Guide Using the Notebook PC Full Power Mode & Maximum Performance The Notebook PC operates in Full Power mode when the power management function is disabled by configuring Windows power management and Speed Step. When the Notebook PC is operating in Full Power Mode, the Power LED remains ON. -
Page 63: Power Savings
User's Guide Using the Notebook PC Power Savings In addition to reducing the CPU clock, this mode puts devices including the LCD back light in their lower active state. The Notebook PC enters “Stand by” mode (low priority) when the system remains idle for a specified amount of time. -
Page 64: Thermal Power Control
User's Guide Using the Notebook PC Thermal Power Control There are three power control methods for controlling the Notebook PC’s thermal state. These power control cannot be configured by the user and should be known in case the Notebook PC should enter these states. The following temperatures represent the chassis temperature (not CPU).
Need help?
Do you have a question about the Laptop and is the answer not in the manual?
Questions and answers