Table of Contents
Advertisement
Quick Links
Download this manual
See also:
User Manual
Advertisement
Table of Contents

Related Manuals for JAI GO-5000M-PGE


Summary of Contents for JAI GO-5000M-PGE
- Page 1 User Manual GO-5000M-PGE GO-5000C-PGE 5M Digital Progressive Scan Monochrome and Color Camera Document Version: Preliminary GO-5000-PGE_Preliminary_Aug2014 1056E-1408...
- Page 2 JAI Ltd., Japan and may only be used by the purchasers of the product. JAI Ltd., Japan makes no warranty for the use of its product and assumes no responsibility for any errors which may appear or for damages resulting from the use of the information contained herein.
- Page 3 GO-5000M-PGE Supplement The following statement is related to the regulation on “ Measures for the Administration of the control of Pollution by Electronic Information Products “ , known as “ China RoHS “. The table shows contained Hazardous Substances in this camera.
- Page 4 GO-5000C-PGE Supplement The following statement is related to the regulation on “ Measures for the Administration of the control of Pollution by Electronic Information Products “ , known as “ China RoHS “. The table shows contained Hazardous Substances in this camera. mark shows that the environment-friendly use period of contained Hazardous Substances is 15 years.
-
Page 5: Table Of Contents
Lens used .....................- 12 - Recommended PC to be used ..............- 13 - About the network card to be used ..............- 13 - JAI SDK and Control Tool software ...............- 14 - Cables to be used ...................- 14 - AC Adapter ...................- 14 - Camera Default Settings ................- 14 -... - Page 6 1X-1Y..................... - 27 - GigE Vision Pixel Format ................- 27 - 7.3.1 Pixel Format ..................- 27 - 7.3.2 GO-5000M-PGE Pixel Type ..............- 28 - 7.3.2.1 GVSP_PIX_MONO8 8-bit output ............- 28 - 7.3.2.2 GVSP_PIX_MONO10 16-bit output ............ - 28 - 7.3.2.3...
- Page 7 Shading Correction .................- 55 - 9.6. Blemish compensation................- 56 - ALC ....................- 56 - HDR (High Dynamic Range) (GO-5000M-PGE only) ..........- 57 - Camera setting ............... - 58 - 10.1 Camera Control Tool ................- 58 - External appearance and dimensions .......... - 59 - Specifications.................
-
Page 8: Introduction
Software installation The JAI GigE Vision SDK & Control Tool can be downloaded from the JAI web site at www.jai.com. The JAI SDK is available for Windows XP, Vista, and Windows 7, 32-bit and 64-bit. For the details of software installation, please refer to the “Getting Started Guide” supplied on the JAI SDK download page. -
Page 9: Emva 1288
GO-5000M-PGE / GO-5000C-PGE EMVA 1288 With regard to signal to noise ratio in this manual, specifications measured by EMVA 1288 are used together with specifications by a traditional measurement method. EMVA 1288 is a more complete measurement that considers multiple noise sources, including random noise, pattern noise, and shading. -
Page 10: Camera Operation Manual
The latest version of this manual can be downloaded from: www.jai.com The latest version of the Camera Control Tool for the GO-5000M-PGE and GO-5000C-PGE can be downloaded from: www.jai.com For camera revision history, please contact your local JAI distributor. -
Page 11: Main Features
Various readout modes, including horizontal and vertical binning (GO-5000M-PGE only), and ROI (Region Of Interest) for faster frame rates 0 dB to +24 dB gain control for both GO-5000M-PGE and GO-5000C-PGE 10 μs (1/100,000) to 8 seconds exposure control in 1 μs step ... -
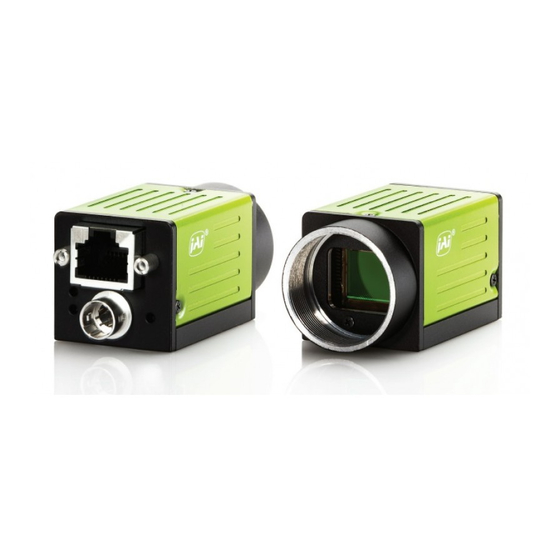
Page 12: Locations And Functions
GO-5000M-PGE / GO-5000C-PGE Locations and functions Locations and functions Lens mount C-mount (Note *1) RJ45 connector Gigabit Ethernet connection LED Indicator for power and trigger input 6-pin connector DC and trigger input LED (ACT) GigE network indication (ACT) ... -
Page 13: Rear Panel
GO-5000M-PGE / GO-5000C-PGE Rear panel The rear panel mounted LEDs provide the following information: POWER/TRIG Amber: Power connected – initiating This light goes OFF after initiating. Steady green: Camera is operating in Continuous mode Flashing green: The camera is receiving external triggering ... -
Page 14: Installation And Preparation
GO-5000M-PGE / GO-5000C-PGE 5. Installation and preparation Before starting operation, check to make sure that all equipment is appropriate and is connected in the right manner. ④ JAI SDK Connecting to PC ② PC ③ NIC ① Lens 1-inch, C mount ➄ LAN Cable Hirose 6P ➅... -
Page 15: Recommended Pc To Be Used
When the jumbo frame size is set at a larger number, the load on the CPU will be decreased. Additionally, as the overhead of the packet is decreased, the transmission will have more redundancy. Table-1 JAI confirms the following network cards. PCI-Express Type... -
Page 16: Jai Sdk And Control Tool Software
Camera Default Settings When the camera is connected to a PC and JAI SDK 2.0 is started up, an XML file which stores default settings of the camera is downloaded to the JAI_SDK camera control tool. -
Page 17: Input And Output
GO-5000M-PGE / GO-5000C-PGE 6. Input and output Connectors and pin assignment 6.1.1 Output connector for Gigabit Ethernet Type: RJ-45 Fig.4 RJ-45 connector The digital output signals follow the Gigabit Ethernet interface using an RJ-45 conforming connector. The following table shows pin configuration. -
Page 18: Digital In/Out Interface
GO-5000M-PGE / GO-5000C-PGE Digital IN/OUT interface In the GO-5000M-PGE and GO-5000C-PGE, the digital IN/OUT capability in the software control tool can assign the necessary signals needed for the system. 6.2.1 Line Selector In the Line Selector, the following input and output signals can be assigned. -
Page 19: Line Mode
GO-5000M-PGE / GO-5000C-PGE 6.2.3 Line Mode Indicates the status of the interface, input or output. 6.2.4 Line Inverter Sets the polarity of the selected input or output. 6.2.5 Line Status Indicates the status of the selected signal, input or output (True=High or False=Low) 6.2.6... -
Page 20: Basic Block Diagram
GO-5000M-PGE / GO-5000C-PGE 6.2.7.1 Basic block diagram Sel Bit (5,0) Sel Bit (7) Soft Trigger Trigger 0 (Acquisition Start) LVAL IN Trigger 1 (Acquisition Stop) FVAL IN Trigger 2 (Frame Start) Exposure Active Trigger 3 (Transfer Start) Sel Bit (7) -
Page 21: In And Out Matrix Table
GO-5000M-PGE / GO-5000C-PGE 6.2.7.2 IN and OUT matrix table The following table shows the input and output matrix table. Table-7 GPIO IN and OUT matrix table Selector (Cross Trigger Pulse Generator Line Selector point switch output) Selector Selector Source signal (Cross point switch input) ... -
Page 22: Recommended External Input Circuit Diagram For Customer
GO-5000M-PGE / GO-5000C-PGE Fig.7 Photo coupler 6.3.1 Recommended External Input circuit diagram for customer Fig.8 Example of external input circuit 6.3.2 Recommended External Output circuit diagram for customer +3.3V Fig.9 Example of external output circuit - 20 -... -
Page 23: Characteristics Of Optical Interface
GO-5000M-PGE / GO-5000C-PGE 6.3.3 Characteristics of optical interface The relationship of the input signal to the output signal through the optical interface is as follows. User Power(VCC) GO-5000 3.3V User Power Output line Time Delay Rise TDR (us) 0.54 0.54 0.62... -
Page 24: Clock Pre-Scaler
GO-5000M-PGE / GO-5000C-PGE 6.4.1 Clock Pre-scaler Clock pre-scaler (Divide Value) can set the dividing value of the frequency divider (12-bit length) and the pixel clock is used for this. Two built-in pulse generators work by the same clock. In the GO-5000-PGE, the pixel clock is set at 48 MHz. -
Page 25: Pulse Generator Repeat Count
GO-5000M-PGE / GO-5000C-PGE 6.4.6 Pulse Generator Repeat Count Set the repeating number of the pulse for the selected pulse generator. After Trigger Clear signal is input, the pulse generator starts the count set in Repeat Count. Accordingly, an active pulse which has a start point and end point can be output repeatedly. -
Page 26: Pulse Generator Clear Source
GO-5000M-PGE / GO-5000C-PGE 6.4.9 Pulse Generator Clear Source The following clear source can be selected as the pulse generator clear signal. Table-10 Pulse generator clear source Pulse Generator Clear Source Description item Connect Low level signal to Clear Source for the selected pulse generator. -
Page 27: Pulse Generator Inverter
GO-5000M-PGE / GO-5000C-PGE 6.4.10 Pulse Generator Inverter Clear Source Signal can have polarity inverted. 6.4.11 Pulse Generator Setting Parameters Table-11 Pulse Generator setting parameters Display Name Value Clock Pre-scaler 1 to 4096 Pulse Generator Clock (MHz) [Pixel Clock:48 MHz]÷[Clock Pre-scaler]... -
Page 28: Sensor Layout, Output Format And Timing
GO-5000M-PGE / GO-5000C-PGE Sensor layout, output format and timing Sensor layout CMOS sensors used in the GO-5000M-PGE and GO-5000C-PGE have the following tap and pixel layout. 7.1.1 Monochrome sensor 2560 Pixels Fig.14 Monochrome sensor layout 7.1.2 Bayer color sensor Adress(0,0) 2560 Pixels Fig.15... -
Page 29: Camera Output Format
GO-5000M-PGE / GO-5000C-PGE 7.2. Camera output format The following table shows the relationship between camera output and sensor readout system. Camera output format Sensor readout system Reference figure 1X–1Y 1-tap readout 6.2.1 Note: The description of camera output format is based on GenICam SFNC Ver.1.5.1. -
Page 30: Go-5000M-Pge Pixel Type
GO-5000M-PGE / GO-5000C-PGE 7.3.2 GO-5000M-PGE Pixel Type 7.3.2.1 GVSP_PIX_MONO8 8-bit output 0 1 2 3 4 5 6 7 0 1 2 3 4 5 6 7 0 1 2 3 4 5 6 7 7.3.2.2 GVSP_PIX_MONO10 16-bit output 0 1 2 3 4 5 6 7 8 9 X X X X X X 0 1 2 3 4 5 6 7 X X X X X X 7.3.2.3... -
Page 31: Gvsp_Pix_Baygr10 16-Bit Output
GO-5000M-PGE / GO-5000C-PGE 7.3.3.2 GVSP_PIX_BAYGR10 16-bit output Odd Line 0 1 2 3 4 5 6 7 8 9 X X X X X X 0 1 2 3 4 5 6 7 X X X X X X Even Line... -
Page 32: Pixelsize
GO-5000M-PGE / GO-5000C-PGE 7.3.4 PixelSize Table-12 Pixel size Bit per Pixel Pixel Format GO-5000M-PGE GO-5000C-PGE Bpp8 Mono8 BayerGR8 Bpp12 Mono10Packed BayerGR10Packed Mono12Packed BayerGR12Packed Bpp16 Mono10 BayerGR10 Mono12 BayerGR12 7.4 Output timing 7.4.1 Horizontal timing The horizontal timing of the SP-5000-USB is described below. Although the SP-5000-USB has the horizontal binning function, its horizontal frequency does not change if it is ON. - Page 33 GO-5000M-PGE / GO-5000C-PGE Table - 13 Timing parameters in Continuous Trigger mode Binning 1: OFF Binning 2: On Camera Settings LVAL LVAL H-Offset Active Non-Active Binning Offset Heigh Offset Horizo Vertic [Unit: [Unit: [Unit: Width Clock] Clock] Clock] ntal 1060...
-
Page 34: Vertical Timing
GO-5000M-PGE / GO-5000C-PGE 7.4.2 Vertical timing The vertical timing of the SP-5000-GE2 is described below. FVAL Active (A) Internal FVAL (C) V-Offset 0 Line Internal LVAL Internal DVAL DVAL Active (A) Internal DATA (F) Exposure End to FVAL Active Start... -
Page 35: Roi (Region Of Interest) Setting
GO-5000M-PGE / GO-5000C-PGE 7.4.3 ROI (Region Of Interest) setting In the GO-5000-PGE, a subset of the image can be output by setting Width, Height, Offset-X, and Offset-Y. If the height is decreased, the number of lines read out is decreased and as the result, the frame rate is increased. -
Page 36: Operating Modes
GO-5000M-PGE / GO-5000C-PGE Operating modes 8.1. Acquisition control (change the frame rate) 8.1.1 Acquisition Mode In the GO-5000-PGE, the following three acquisition modes are available. Single frame : One frame can be output by AcqusitionStart command Multi frames : The number of frames which is specified in Acquistion Frame Count, are... -
Page 37: Multi Frames
GO-5000M-PGE / GO-5000C-PGE 8.1.1.2 Multi Frames In this mode, the AcquisitionStart command captures the number of frames which are specified by AcquisitionFrameCount. If JAI_PIV is configured, it is necessary to set an even number. ◆ Normal multi-frame operation 1) AcquisitionStart command is input 2) AcquisitionTriggerWait becomes effective 3) AcquisitionActive becomes “TRUE”(accepts capture) -
Page 38: Continuous
8.1.1.3 Continuous In this mode, when the AcquisitionStart command is set, the image is continuously output at the current frame rate. This is the default setting for the GO-5000M-PGE and GO-5000C-PGE. ◆ Normal continuous operation 1) AcquisitionStart command is input 2) AcquisitionTriggerWait becomes effective 3) AcquisitionActive becomes “TRUE”... -
Page 39: Acquisition Frame Rate
GO-5000M-PGE / GO-5000C-PGE 8.1.4 Acquisition frame rate With Trigger OFF (free running mode – see section 7.2.1), the default frame rate of the camera is based on the specified ROI. The smaller the ROI, the faster the default frame rate. However, it is possible to specify a free-running frame rate (i.e., no trigger needed) that is slower than the default... -
Page 40: Exposure Time
8 seconds (Note – noise may make image unusable after seconds) 8.2.3 Exposure Auto This is a function to control the exposure automatically. It is effective only for Timed. JAI ALC Reference controls the brightness. There are three modes, OFF, Once and Continuous. OFF: No exposure control Once:... -
Page 41: Trigger Control
GO-5000M-PGE / GO-5000C-PGE High High High High Mid-left Mid-right Right Left Mid-High Mid-High Mid-High Mid-High Left Mid-left Mid-right Right Mid- Mid-Low Mid-Low Mid-Low Mid-left Mid-right Left Right Mid-left Mid-right Right Left Fig. 25 ALC Channel Area 8.3. Trigger Control The following 6 types of Trigger Control are available by the combination of Trigger Selector, Trigger Mode, Exposure Mode and Trigger Option. -
Page 42: Trigger Mode
GO-5000M-PGE / GO-5000C-PGE 8.3.2 Trigger Mode Select either free-running operation or external trigger operation. OFF: Free-running operation External trigger operation 8.3.3 Trigger Source The following signals can be used as the trigger source signal. Table-21 Trigger source Trigger Source Description... -
Page 43: Normal Continuous Operation (Timed Exposure Mode/Trigger Mode Off)
GO-5000M-PGE / GO-5000C-PGE 8.4. Normal continuous operation (Timed Exposure Mode/Trigger Mode OFF) This is used for applications which do not require triggering. Primary settings to use this mode Trigger Mode: Off 8.5. Timed mode This mode allows a single image frame to be captured with a preset exposure time by using the external trigger. -
Page 44: If The Overlap Setting Is "Readout
GO-5000M-PGE / GO-5000C-PGE 8.5.2 If the overlap setting is “Readout” Trigger CMOS Exposure Exposure Active Exposure Period FVAL 2L (Min) 218clk 10.13 µs 8L to 9L (18.142 µs) Fig.27 Readout - 42 -... -
Page 45: Trigger Width Mode
GO-5000M-PGE / GO-5000C-PGE 8.6. Trigger width mode In this mode, the exposure time is equal to the trigger pulse width. Accordingly, longer exposure times are supported. Additional settings determine if the trigger pulse can be accepted during the exposure period. -
Page 46: Rct Mode
GO-5000M-PGE / GO-5000C-PGE 8.7. RCT mode Until the trigger is input, the camera operates continuously. At this moment, the video signal, FVAL and LVAL are output but DVAL is not output. When the trigger is input, the fast dump is activated to read out the electronic charge very quickly, after which the accumulation and the readout are performed. -
Page 47: Sequence Roi Trigger
GO-5000M-PGE / GO-5000C-PGE 8.8. Sequence ROI Trigger This mode allows the user to define a preset sequence of up to 10 images, each with its own ROI, exposure time and gain values. Primary settings to use this mode Exposure Mode: Timed... -
Page 48: Sequence Roi Setting Parameters
GO-5000M-PGE / GO-5000C-PGE Frame Start Trigger In Sequence Index 0 Index 1 Index 2 Index 3 Index 4 behavior Frame count Frame count Frame count Frame count Frame count Next Index = Next Index = Next Index = Next Index =... - Page 49 In Sequence ROI Gain Selector, the gain settings for each index are available. GO-5000C-PGE: Gain (ALL), Red and Blue can be set. GO-5000M-PGE: Only Gain is displayed and can be set. (7) Sequence ROI Black Level Black Level setting is available for each index.
-
Page 50: Multi Roi Function
GO-5000M-PGE / GO-5000C-PGE Multi ROI function This function divides one frame image into a maximum of 8 images vertically and reads out all areas in one frame. In this function, as 8 images are read out as one frame, the height can be set individually but the width becomes common for all images. - Page 51 GO-5000M-PGE / GO-5000C-PGE Index 4 Offset X ndex 2 Offset X Index 1 Offset X Index 3 Offset X Index 1 Offset Y Index 1 Height Index 2 Offset Y Index 3 Index 2 Height Offset Y Index 3 Height...
-
Page 52: Operation And Function Matrix
1 ○ ○ ○ ○ ○ × ○ × × Timed (RCT) 2 2 × × ○ × × × × × × Note 1. Only GO-5000M-PGE Note 2: Only GO-5000C-PGE Note 3: Trigger Overlap is OFF - 50 -... -
Page 53: Other Functions
In the GO-5000-PGE, the gain control uses Analog Base Gain and Digital Gain. Analog Base Gain can be set at 0dB, +6dB or +12dB for both GO-5000M-PGE and GO-5000C-PGE. In the GO-5000C-PGE, R, G and B channel can be adjusted individually or simultaneously. -
Page 54: Gain Selector
Digital Blue All:-2238~+5620 9.2.3 Gain RAW Gain RAW can be set in the following range. GO-5000M-PGE: Gain Raw Digital All:100 ~ 1600 (0dB~24dB) GO-5000C-PGE: Gain Raw Digital All:100 ~ 1600(0dB~24dB) Gain Raw Digital Red: -3659~37847 Gain Raw Digital Blue: -3659~37847 9.2.4... -
Page 55: Balance White Auto
GO-5000M-PGE / GO-5000C-PGE There are three modes. OFF: Adjust manually. Once: Operate only one time when this command is set Continuous: Operate the auto gain continuously The following detailed settings are also available. ALC Speed: The rate of adjustment of GainAuto can be set (Common with ExposureAuto). -
Page 56: Lut Value
GO-5000M-PGE / GO-5000C-PGE 9.3.3 LUT value This is the “adjusted” or “output” pixel value for a given LUT index. It has a range of 0 to 4095 (12-bit) and is automatically scaled to the bit depth of the current operating mode (8-bit, 10-bit, or 12-bit). -
Page 57: Shading Correction
GO-5000M-PGE / GO-5000C-PGE 9.5. Shading Correction This function compensates for shading (non-uniformity) caused by the lens or the light source used. This compensation can be performed even if shading issues are not symmetrical in horizontal and/or vertical directions. There are two methods of correction. -
Page 58: Blemish Compensation
GO-5000M-PGE / GO-5000C-PGE 9.6. Blemish compensation The GO-5000-PGE has a blemish compensation circuit. This function compensates blemishes on the CMOS sensor (typically pixels with extremely high response or extremely low response). This applies to both monochrome and color versions. Pixels that fulfill the blemish criteria can be compensated... -
Page 59: Hdr (High Dynamic Range) (Go-5000M-Pge Only)
Please note that ALC function is available only in continuous mode, as well as RCT mode. HDR (High Dynamic Range) (GO-5000M-PGE only) HDR sensing mode can be set when HDR Mode is set to ON while Exposure Mode is Timed. -
Page 60: Camera Setting
10.1 Camera Control Tool In the GO-5000M-PGE and GO-5000C-PGE, control of all camera functions is done by the JAI SDK and Control Tool software. All controllable camera functions are stored in an XML file inside of the camera. The JAI SDK and Control Tool software can be downloaded from www.jai.com. -
Page 61: External Appearance And Dimensions
GO-5000M-PGE / GO-5000C-PGE External appearance and dimensions Dimensions tolerance: ± 0.3mm Unit: mm Fig.43 Outside dimensions - 59 -... -
Page 62: Specifications
GO-5000M-PGE / GO-5000C-PGE Specifications 12.1 Spectral response 80.00 70.00 60.00 50.00 40.00 30.00 20.00 10.00 0.00 1000 wavelength (nm) Fig.44 Spectral response (GO-5000M-PGE) Fig.45 Spectral response (GO-5000C-PGE) Note: Full sensor response. IR-cut filter not shown. - 60 -... -
Page 63: Specifications Table
GO-5000M-PGE / GO-5000C-PGE 11.2 Specifications table Specifications GO-5000M-PGE GO-5000C-PGE Scanning system Progressive scan, 1-tap Synchronization Internal Interface 1000Base-T Ethernet (GigE Vision 2.0), IEEE 802.3af Image sensor 1 inch Monochrome CMOS 1 inch Bayer color CMOS Aspect Ratio Image size(Effective Image) 12.8 (h) x 10.24 (v) mm, 16.39 mm diagonal... - Page 64 GO-5000M-PGE / GO-5000C-PGE Mono8, Mono10, Mono10 Packed BayerGR, BayerGR10, BayerGR10 Packed, Bit assignment BayerGR12, BayerGR12 Packed Mono12, Mono12 Packed Continuous / Single Frame / Multi Frame (1 ~255) Acquisition mode Acquisition Frame Rate 22 fps (Max) ~ 0.125 fps (Min), at 8-bit output...
- Page 65 GO-5000M-PGE / GO-5000C-PGE Lens mount C mount Rear protrusion of the lens is less than 10 mm Flange back 17.526 mm, Tolerance: 0 to -0.05 mm Optical filter Protection glass: Not provided IR cut filter (Half value is 670 nm) Operating temperature/Humidity -5C to +45C / 20 –...
-
Page 66: Appendix
GO-5000M-PGE / GO-5000C-PGE Appendix 1. Precautions Personnel not trained in dealing with similar electronic devices should not service this camera. The camera contains components sensitive to electrostatic discharge. The handling of these devices should follow the requirements of electrostatic sensitive components. -
Page 67: Caution When Mounting The Camera
5. Exportation When exporting this product, please follow the export regulation of your own country. 6. References 1. This manual can and datasheet for GO-5000M-PGE / GO-5000C-PGE can be downloaded from www.jai.com 2. Camera control software can be downloaded from www.jai.com... -
Page 68: Manual Change History
GO-5000M-PGE / GO-5000C-PGE Manual change history Date Revision Changes August 2014 Preliminary New Release - 66 -... -
Page 69: User's Record
Company and product names mentioned in this manual are trademarks or registered trademarks of their respective owners. JAI A-S cannot be held responsible for any technical or typographical errors and reserves the right to make changes to products and documentation without prior notification.
Need help?
Do you have a question about the GO-5000M-PGE and is the answer not in the manual?
Questions and answers