Table of Contents
Advertisement
Advertisement
Table of Contents

Related Manuals for Robe ClubScan 150CT


Summary of Contents for Robe ClubScan 150CT
- Page 1 Version 2.3...
-
Page 2: Table Of Contents
ClubScan 150 CT Table of contents 1. Safety instructions ......................3 2. Operating determinations....................4 3. Description of the device....................5 4. Installation........................6 4.1Fitting/Exchanging the lamp..................6 4.2 Rigging the fixture ...................... 7 4.3 Changing the power supply settings ................9 4.4 Connection to the mains .................. -
Page 3: Safety Instructions
CAUTION! Keep this device away from rain and moisture! Unplug mains lead before opening the housing! FOR YOUR OWN SAFETY, PLEASE READ THIS USER MANUAL CAREFULLY BEFORE YOU INITIAL START - UP! 1. Safety instructions Every person involved with installation and maintenance of this device have to: - be qualilfied - follow the instructions of this manual CAUTION! -
Page 4: Operating Determinations
2. Operating determinations This device was designed for indoor use only. If the device has been exposed to drastic temperature fluctuation (e.g. after transportation), do not switch it on immediately. The arising condensation water might damage your device. Leave the device switched off until it has reached room temperature. -
Page 5: Description Of The Device
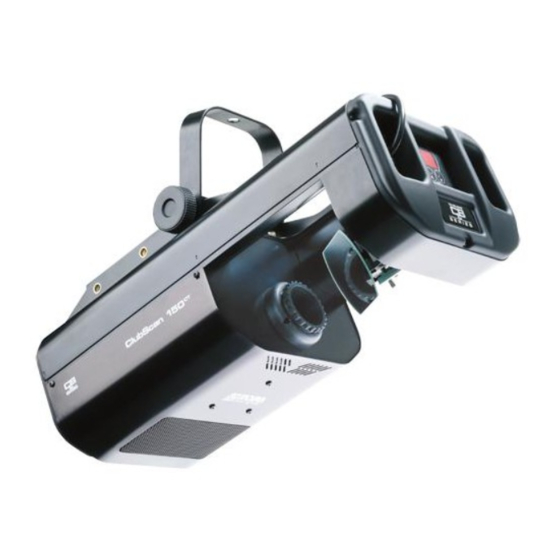
3. Description of the device 1 - Mirror 2 - Objective 3 - Top cover 4 - Mounting base 5 - Bracket 6 - Bracket screw Front panel: 1 - Fuseholder 2 - Powercord 3 - DMX input 4 - DMX output Control board: 1 - Enter-button 2 - Up,Down buttons... -
Page 6: Installation
4. Installation 4.1Fitting/Exchanging the lamp DANGER ! Install the lamps with the device switched off only. Unplug from mains before ! Screw "A" Screw "B" To insert the lamp open the small cover at the rear panel (see the drawing) by loosening the 2 screws "A" and "B"... -
Page 7: Rigging The Fixture
4.2 Rigging the fixture The installation of the projector has to be built and constructed in a way that it can hold 10 times the weight for 1 hour without any harming deformation. The installation must always be secured with a secondary safety attachment, e.g. an appropriate catch net. This secondary safety attachment must be constructed in a way that no part of the installation can fall down if the main attachment fails. - Page 8 2.Mounting via a mounting plate. Mount the mounting plate (it is not standard part of delivery) on the wall using appropriate screws. The 4 mount- ing holes in the mounting plate have a diameter of 8 mm.Put the scan on the mounting plate and secure it with the 2 bracket screws.
-
Page 9: Changing The Power Supply Settings
4.3 Changing the power supply settings Both the transformer and the ballast must be connected correctly for the local AC voltage and frequency. The wrong settings can cause poor performance or demage of the fixture head.The factory settings are printed next to the power cord on the front panel. -
Page 10: Connection To The Mains
4.4 Connection to the mains The earth has to be connected! Connect the fixture to the mains with the enclosed power plug. The occupation of the connection-cables is as follows: Cable (EU) Cable (US) International Brown Black Live Light blue White Neutral Yellow/Green... -
Page 11: Club Scan 150 - Dmx Protocol,Version 1.0
5.Club Scan 150 CT - DMX PROTOCOL,version 1.0 Channel Value Function Type of control 0-255 Control of the pan movement proportional Tilt 0-255 Control of the tilt movement proportional Colour wheel Open/white step 10-21 Turquoise step 22-33 step 34-45 Cyan step 46-57 Light green... - Page 12 Pulse movement between two gobos ,from slow to fast 154-157 Hole --> blackout proportional 158-161 blackout --> Gobo 1 proportional 162-165 Gobo 1 --> Gobo 2 proportional 166-169 Gobo 2 --> Gobo 3 proportional 170-173 Gobo 3 --> Gobo 4 proportional 174-177 Gobo 4 -->...
-
Page 13: Controller Mode
6. Controller mode The fixtures are individually addressed on a data link and connected to the controller.The fixtures respond to the DMX signal from the controller. 6.1 DMX addressing The control panel on the front panel of the fixture allows you to assign the DMX fixture address, which is defined as the first channel from which the ClubScan 150 will respond to the controller. -
Page 14: Control Menu Map
7.Control menu map Default settings=Bold print 001 (001-507) MI.S. (01..10..20) St.A. St.M. Aut (OFF,On) C.S.A tiM. Au.P. Au.r. Pr.E. E.01 E.30 PAn (0-255) tiM.(0-25.5) COP. SPE. r.PA. (OFF,On) r.til. (OFF,On) PA.M. (PA.1,PA.2) VEr. UPd. Adj. (0-255) CoL. (0-255) Gob (0-255) A.rE. -
Page 15: Functions Of The Control Panel
8. Functions of the control panel The control panel situated on the front cover of the scan offers several features. You can simply set the DMX address or master (slave) mode,switch On and Off the lamp,run a test,make a reset and also use other func- tions for setting fixture behaviour. -
Page 16: Fixture Reset
To update software in the fixture: 1.Installation of DMX Software Uploader: 1.DMX Software Uploader program is available from the ROBE web site at WWW.robe.cz. 2.Make a new directory ( e.g. Robe_Uploader) on your hard disk and download the software to it. - Page 17 3.Unpack the program from the archive. Program file has name:DSU_name of corresponding fixture_SoftwareID.If the Robe fixture is produced in magnetic and electronic ballast version, the name of DMX Software Uploader is the same for both versions. SoftwareID describes the versions of fixture software included in DMX Software Uploader. Higher number means later software versions.
-
Page 18: Stand - Alone Mode
9. Stand - alone mode The fixtures on a data link are not connected to the controller but can execute pre-set program which can be different for every fixture."Stand-alone operation" can be applied to the single fixture (the fixture may be set to the master or slave mode ) or to multiple fixtures operating synchronously.Effect actions are triggered by sound,using built-in microphone, or automatically using an internal timer. -
Page 19: Error And Information Messages
For time control of the fixtures select item "tiM" on the master and all slaves. For audio control of the fixtures select item "Au.P." on the master and all slaves. For audio random selection of effects ,select item "Au.r" on the master and all slaves Note: Master-slave operation is only possible among fixtures: ClubScan 150,ClubScan 250,Fusion, Funky and Trance. - Page 20 Colours: - 11 dichroic-filters plus white - UV-filter - 3 dichroic semicolours filters - Colour-wheel with variable rotation speed Static gobos: - 13 static gobos plus open Strobe: - Strobe effect with variable speed Motor: - 4 high quality stepping-motors controlled by microprocessors Electronics: - Intelligent control panel with 3-digit LED display allowing: addressing, pan and tilt reverse, effect calibration,reset of the unit and built-in demo sequences running...
-
Page 21: Maintenance And Cleaning
Weight: EU version: 11 kg US version: 14 kg Optional acesories: Flash cable RS232/DMX ..No.13050624 Mounting plate CT.....No.10980023 12. Maintenance and cleaning DANGER TO LIFE! Disconnect from mains before starting maintenance operation! It is absolutely essential that the fixture is kept clean and that dust, dirt and smoke-fluid residues must not build up on or within the fixture.
Need help?
Do you have a question about the ClubScan 150CT and is the answer not in the manual?
Questions and answers