Table of Contents
Advertisement
INSTRUCTIONS
LPT0887-001A
Dear Customer,
Thank you for purchasing the JVC S-VHS video cassette
recorder. Before use, please read the safety information and
precautions to ensure safe use of your new VCR.
CAUTIONS
The lightning flash with arrowhead symbol, within
an equilateral triangle, is intended to alert the user
to the presence of uninsulated "dangerous voltage"
within the product's enclosure that may be of
sufficient magnitude to constitute a risk of electric
shock to persons.
The exclamation point within an equilateral triangle
is intended to alert the user to the presence of
important operating and maintenance (servicing)
instructions in the literature accompanying the
appliance.
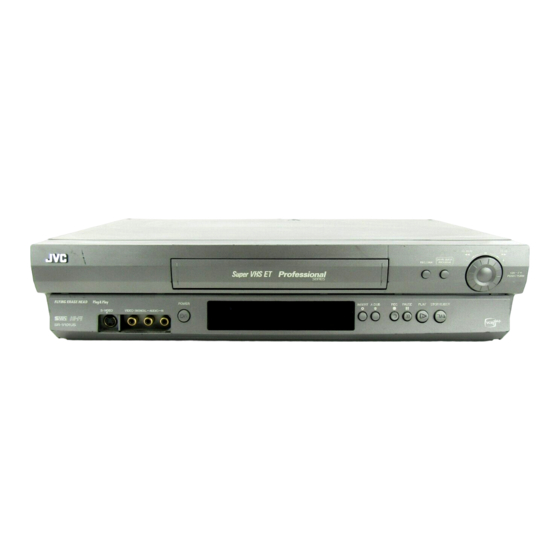
VIDEO CASSETTE RECORDER
SR-V101US
POWER
S-VIDEO
24HR QUICK
REC LINK
PROGRAM
INSERT A.DUB
WARNING:
TO PREVENT FIRE OR SHOCK HAZARD, DO NOT EXPOSE
THIS UNIT TO RAIN OR MOISTURE.
CAUTION:
This video cassette recorder should be used with AC 120V
60Hz only.
To prevent electric shocks and fire hazards, DO NOT use any
other power source.
CAUTION:
TO PREVENT ELECTRIC SHOCK, MATCH WIDE BLADE OF
PLUG TO WIDE SLOT, FULLY INSERT.
ATTENTION:
POUR ÉVITER LES CHOCS ÉLECTRIQUES, INTRODUIRE LA
LAME LA PLUS LARGE DE LA FICHE DANS LA BORNE
CORRESPONDANTE DE LA PRISE ET POUSSER JUSQU'AU
FOND.
Note to CATV system installer:
This reminder is provided to call the CATV system installer's
attention to Article 820-40 of the NEC that provides guidelines
for proper grounding and, in particular, specifies that the cable
ground shall be connected to the grounding system of the
building, as close to the point of cable entry as practical.
For Customer Use:
Enter below the Model No. and Serial No. which are located
on the rear of cabinet. Retain this information for future
reference.
Model No.
Serial No.
REW
FF
,
d
Advertisement
Table of Contents

Related Manuals for JVC SR-V101US


Summary of Contents for JVC SR-V101US
- Page 1 INSTRUCTIONS LPT0887-001A Dear Customer, Thank you for purchasing the JVC S-VHS video cassette recorder. Before use, please read the safety information and precautions to ensure safe use of your new VCR. CAUTIONS The lightning flash with arrowhead symbol, within an equilateral triangle, is intended to alert the user to the presence of uninsulated “dangerous voltage”...
- Page 2 NOTE: Changes or modifications not approved by JVC could void the user’s authority to operate the equipment. This equipment has been tested and found to comply with the limits for a Class B digital device, pursuant to Part 15 of the FCC Rules.
- Page 3 On placing the VCR: Some TVs generate strong magnetic fields. ● Make sure to place the VCR at least 20 cm (7 or 8 inches) away from a TV. ● DO NOT place the VCR close to a TV as it may cause noise, picture disturbance or malfunctions (power off, etc.) to occur.
-
Page 4: Table Of Contents
TV Brand Setting... 21 Cable Box or DBS Receiver Brand Setting ... 21 Changing Remote Control Code ... 22 Editing... 22 Editing with Another VCR ... 22 Audio Dubbing... 23 Insert Editing and AV Dubbing... 24 Specifications... 25 Index ... 26 List of Terms... -
Page 5: Buttons, Connectors And Indicators
AC power cord Cassette loading slot POWER S-VIDEO VIDEO/AUDIO input Remote connectors sensor Start Time/Mode Stop Time/Mode Lock indicator Lock indicator VCR mode S-VHS indicator indicator Counter/Remain display — 5 — Advanced JOG dial 24HR QUICK REC LINK PROGRAM INSERT A.DUB... - Page 6 If you press OSD (OK) on the Remote when “ON SCREEN (REC) and ON SCREEN (PLAY)” are set to “ON” ( the current VCR status on the TV screen. The indications are not recorded even if the VCR is in the recording mode. Channel and...
-
Page 7: Connections And Plug&Play Setting
● The VCR channel is preset to “3CH”. Set to “4CH” if 3CH is used for broadcasting in your area. Turn on the VCR and the TV, and select the VCR channel 3 or 4 (or AV mode) on the TV. You can now perform basic playback or basic recording. -
Page 8: Initial Settings
Initial Settings Clock Setting Turn on the VCR and TV, and select the VCR channel (or AV mode). Perform clock setting only if the clock has not been set correctly by the Plug&Play setting. Preparations Access Main Menu screen, then Initial Set screen Press MENU on the Remote. -
Page 9: Tuner Setting
Tuner Setting Turn on the VCR and TV, and select the VCR channel (or AV mode). Number keys Setting channels automatically — Auto Channel Set Perform Auto Channel Set only if channels have not been set correctly by the Plug&Play setting. -
Page 10: Playback
Playback Basic Playback Turn on the VCR and TV, and select the VCR channel (or AV mode). Load a cassette Make sure the window side is up, the rear label side is facing you and the arrow on S-VIDEO the front of the cassette is pointing towards the VCR. -
Page 11: Playback Features
VCR. Locating beginning of timer recordings — Instant Review After ensuring that the VCR is turned off and that the timer mode is disengaged, press REVIEW. ● The VCR turns on, and rewinds to the index code indicating the ●... -
Page 12: Recording
If the tape reaches its end during recording, the recording stops and “ ” and “ $” on the display panel blink. Press STOP/EJECT (0) on the VCR to eject the cassette or press REW (3) on the Remote to rewind the tape. -
Page 13: Series Playback And Recording
POWER S-VIDEO Using two sets (or more) of SR-V101US, you can play back two (or more) cassettes alternately as many times as you want. You can select the returning point for Series Playback ( Use the buttons and controls on the VCR’s front panel for the Series Playback operations (except when using Mode Lock). -
Page 14: Series Recording
TV instruction manual. Load cassettes Insert the playback cassette into each SR-V101US. Set SR-V101US-2 to “AUX”. Press CH + or – to select the input mode depending on the connector being used: ● “L-1” for the rear AUDIO/VIDEO IN connector, or ●... -
Page 15: Timer Recording
Make connections Connect two sets of SR-V101US to other equipment, antenna or cable as shown in the illustration. ● The mini-plug cable is a mono 3.5 mm mini-plug to mono 3.5 mm mini-plug connector. ● When connecting a camcorder or another VCR with an... -
Page 16: Vcr Plus+ ® Timer Programing
To use the VCR while it is in timer recording standby mode Press TIMER, then press POWER 1. After you use the VCR, press TIMER again to put the VCR into timer recording standby mode. PROGRAM 1 START STOP –... -
Page 17: Checking, Canceling Or Changing Program Settings
Press PROG. CHECK repeatedly until no Program screen is shown. Reengage timer recording standby mode Press TIMER. The VCR turns off automatically and “ displayed on the display panel. ● When “AUTO TIMER” is set to “ON” ( recording standby mode automatically resumes when you turn off the VCR. - Page 18 ● If you select a channel on which no signal is received, the channel number is displayed regardless of this function setting. ● The setting you have made is kept in memory. Even if the VCR is unplugged or the power failure occurs, it will resume every time you turn on the VCR.
- Page 19 ● To use this function, be sure to set “ON SCREEN (REC)” to “ON”. (( ● The setting you have made is kept in memory. Even if the VCR is unplugged or the power failure occurs, it will resume every time you turn on the VCR.
-
Page 20: Satellite Auto Recording
Satellite Auto Recording You can automatically record a satellite program which is timer- programed on your DBS receiver. Turn on the VCR and TV, and select the VCR channel (or AV mode). POWER S-VIDEO Connect a DBS receiver to the AUDIO/VIDEO IN or S-VIDEO IN connectors* on the rear panel. -
Page 21: Multi-Brand Remote Control
This Remote can control some functions of remote controllable TVs, cable boxes or DBS (Direct Broadcast Satellite) receivers listed below. Without setting, you can control a JVC TV. NOTES: ● Some unit’s brands have more than one code. If the unit does not function with a specified code, try other codes. -
Page 22: Changing Remote Control Code
VCR is initially set to respond to A code signals. You can easily modify your VCR and the Remote to respond to B code signals. When using two JVC VCRs, set two VCRs and their Remotes to different codes, so that you can operate these VCRs separately. -
Page 23: Audio Dubbing
Locate start point, and engage Audio Dubbing mode Load a cassette and press PLAY (4) on the VCR. Press PAUSE (9) at the point where you want to start dubbing, then press A.DUB. -
Page 24: Insert Editing And Av Dubbing
● On this VCR, set “PICTURE CONTROL” to “EDIT” ( Locate end point A Load the cassette to be edited into the VCR and press PLAY (4). B Press PAUSE (9) when you find the end of the scene for which you want to edit. -
Page 25: Specifications
Specifications GENERAL Power requirement : AC 120 V Power consumption Power on : 19 W Power off : 1.6 W Temperature Operating : 5°C to 40°C (41°F to 104°F) Storage : –20°C to 60°C (–4°F to140°F) Operating position : Horizontal only Dimensions (W x H x D) : 435 mm x 94 mm x 242 mm (17-3/16"... -
Page 26: Index
VIDEO CALIBRATION ...18 VIDEO STABILIZER ...18 Watching one program while recording another ...12 When the tape is not running ...10 Eject the cassette ... 10 Rewind/fast-forward ... 10 Turn off the VCR ... 10 2ND AUDIO RECORD ...19 — 26 —... -
Page 27: Troubleshooting
Troubleshooting Before requesting service, use this chart and see if you can repair the trouble yourself. Small problems are often easily corrected, and this can save you from the trouble of sending your VCR off for repair. Power SYMPTOM ● The AC power cord is disconnected. - Page 28 Printed in China 0104 ASR-PR-BJ COPYRIGHT © 2004 VICTOR COMPANY OF JAPAN, LTD.