Table of Contents

Summary of Contents for Auralic VEGA
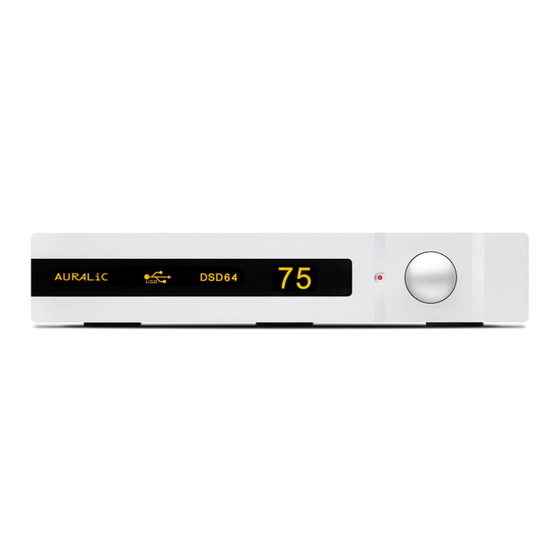
- Page 1 VEGA Digital Audio Processor USER’S GUIDE For Software Version 1.3 and Above Revision 1.2 AURALIC LIMITED RM 19C, LOCKHART CENTRE, 301-307 LOCKHART ROAD, HK Phone: +852 6852 3312. Fax: +852 8199 9198 Email: support@auralic.com Website: www.auralic.com...
- Page 2 AURALiC in the Hong Kong and/or other countries. AURALiC's trademarks may not be used in connection with any product or service that is not AURALiC's, in any manner that is likely to cause confusion among customers or in any manner that disparages or dis- credits AURALiC.
- Page 3 AURALiC ORFEO Class-A Output Module In order to drive various loads and to match with different power amplifiers, VEGA is equipped with AURALiC's patented ORFEO Class-A module. The principle of this module is to use a mass of small signal components with best linear characteristics.
-
Page 4: Table Of Contents
Contact ....................22 Troubleshooting ................... 23 No Power ....................23 No Sound or Low Output ................. 23 Distorted or Partial Sound ................ 23 Noise/Hum ....................23 Specifications....................24 EC Declaration of Conformity ..............25 AURALiC Product Registration Form ............27 4 ... - Page 5 IMPORTANT SAFETY INSTRUCTIONS All safety and operating instructions must be read before actual operation, and re- tained for future reference. This product should be connected only to the type of power source indicated on the back of the unit. If you are not sure of the type of your mains power supply, please consult your dealer or local power company.
-
Page 6: Warranty
Costs associated with the return of this product are the sole responsibility of the owner. All repair work must be done by AURALiC or by an authorized AURALiC repair agency. Work done by unauthorized persons will avoid any and all warranty coverage. -
Page 7: Placement And Cabling
Placement and Cabling Placement VEGA should be placed on a solid and stable surface with good ventilation condition. Do not install this product near any heat sources such as radiators or other products (such as amplifiers) that produce heat. Site the product so that its location or position does not in- terfere with its proper ventilation. -
Page 8: Cabling
ALWAYS POWER OFF VEGA BEFORE CABLING! Analog Outputs The balanced and single-ended analog outputs of VEGA are individually buffered so as to be used simultaneously, however, it is still strongly recommended to disconnect unused ports to avoid any potential electromagnetic interference induced by cables. - Page 9 The power consumption of VEGA is less than 20W, so a heavy gauge power cord is not recommended as the weight of the power cord connector may damage the power cord socket on the back of the unit.
-
Page 10: Operation
Output Volume Power On/Off VEGA will power on when the power switch (11 on the rear of the unit) is toggled to ‘I’ position and will power off when the power switch is at ‘O’ position. As soon as VEGA is powered on, it will go to standby or sleep mode based on different settings. - Page 11 Start Work/Resume After power on, VEGA will be in standby or sleep (default) mode depending on your setting. To start or resume the unit, just press POWER (01) button, VEGA will run self-test and start. This operation is only available at main screen and is disabled in menu.
- Page 12 EXIT (03) or POWER (01). Any previous operation will not be saved except for balance setting (see page 17) after an exit operation is applied. If no operation is applied for 15 seconds, VEGA will quit to main screen automatically.
-
Page 13: Operation By Rotary Switch
Operation by Rotary Switch VEGA uses also a Rotary Switch (7) to make all operations if you don't want to use the remote control. The rotary switch can be rotated in clockwise or anti-clockwise order at 20 steps for a full cycle and be pushed for confirmation. - Page 14 (32 or 64bit) and a spare USB 2.0 / 3.0 port is required. Connect your VEGA to the mains supply with a power cord; connect VEGA to PC with a USB cable; start VEGA and switch to USB input channel.
- Page 15 'Browse…' if required, or use the default (rec- ommended); click ‘Install’. Installation will start. Since VEGA’s drivers have not been submitted for Windows Logo testing, warnings may show up during installation. Select 'Install this driver software anyway' when this notice appears.
- Page 16 When you see this notice, the driver installation is finished, press 'Next' to continue. You will see the Windows pop-up notice after VEGA has been in- stalled successfully. Click ‘Finish’ to close the setup program. The device should now be visible in Windows and any applications as both ASIO and WDM audio device.
-
Page 17: Operation Menu
Operation Menu 1. INPUT 1. AES (Default) Switch to AES/EBU input channel. The AES/EBU input channel indicator: will be on main screen. 2. COAX 1 Switch to COAXIAL #1 input channel. The COAX#1 input channel indicator: will be on main screen. 3. -
Page 18: Filter
3. BACK Back to previous menu 4. FILTER 1. MODE 1 MODE 1 offers best measurement performance with flat frequency response well extended to treble. This mode has very small in-band ripple and best stop-band attenuation performance. MODE 1 is best for the playback of orchestral music. 2. -
Page 19: System
Femto clock active. If this function is enabled, you don't need to warm up the unit every time you use it as VEGA will stay in the best sounding conditions after resume. Power led will display at low brightness in sleep mode to remind 19 ... - Page 20 BACK Back to previous menu. 4. CLOCK AUTO (default) VEGA will use the best possible internal clock precision to lock on any inputs. This function provides perfect balance between sound quality and locking stability. COARSE VEGA will use higher input lock bandwidth, allowing itself to lock on most dig- ital sources even with aggressive jitter noise.
-
Page 21: System
5. NEXT Go to SYSTEM menu page 2. 6. BACK Back to previous menu. 1. SYSTEM (PAGE 2) 1. REMOTE VOL- / + (Default) Use VOL- or VOL+ on the remote control to set the volume. DOWN / UP Use DOWN or UP button on the remote control to set the volume. Since TAURUS PRE (our balanced preamplifier) uses VOL- or VOL+ to control the volume, this setting separates volume operations from different units. -
Page 22: Maintenance & Service
Cleaning Only clean the enclosure with a soft, dry cloth. Extended Non-use Disconnect VEGA from mains power when it will be left unattended or unused for an extended period of time. Service If your VEGA encounters a problem, contact your dealer or AURALiC. Do not void the warranty by allowing unauthorized personnel to attempt to repair. -
Page 23: Troubleshooting
Try rebooting the VEGA (power off the VEGA, then power on again). Distorted or Partial Sound Check the output cables between the VEGA and the preamplifiers / power amplifiers / active loudspeakers, make sure all are well connected. ... -
Page 24: Specifications
1*Single-ended RCA(output impedance 50ohm) All PCM from 44.1KS/s to 384KS/s in 32Bit** Supported Digital Format DSD64( 2.8224MHz) and DSD128(5.6448MHz)*** Output Voltage 4Vrms at Max. with dynamic-loss-free volume AURALiC RC-1 remote control User Interface 512*64 pixels OLED Display Standby: <2W Sleep: <10W Power Consumption Playback: 15W at max. -
Page 25: Ec Declaration Of Conformity
EC Declaration of Conformity AURALIC LIMITED declares this product is in conformity with the Low Voltage Directive 73/23/EEC and Electromagnetic Compatibility 89/336/EEC as amended by 92/31/EEC and 93/68/EEC. The conformity of the designated product with the provisions of Directive number 73/23/EEC (LVD) is proved by full compliance with the following... - Page 26 26 ...
-
Page 27: Auralic Product Registration Form
AURALiC Product Registration Form Owner Information Your Name Address City Zip Code Country Email Telephone Product Information Product Name Serial Number Dealer Name Purchase Date Purchase Price Currency 27 ... - Page 28 28 ...
Need help?
Do you have a question about the VEGA and is the answer not in the manual?
Questions and answers