Table of Contents
Advertisement
Advertisement
Table of Contents

Related Manuals for SHOWTEC Showmaster 24


Summary of Contents for SHOWTEC Showmaster 24
- Page 1 Showmaster 24 ORDERCODE 50335...
- Page 2 For more information: iwant@showtec.info You can get some of the best quality, best priced products on the market from Showtec. So next time, turn to Showtec for more great lighting equipment. Always get the best -- with Showtec ! Thank you!
-
Page 3: Table Of Contents
Showtec Showtec Showmaster 24 Product Guide ™ Warning..…...................…………………………………………. Safety-instructions………………………………………………………………………………………….…. Operating Determinations……………………………………………………………………………………. Description..…................……….………………………………… Features…….……………………………………………………………………………………….……...…. Overview……………………………………………………………………………………………………….. Back side..………………………………………………………………………………………..……….…… Installation................…...……………………………………..…. Installation............………………………………………..………..... Set Up and Operation..............……..…………………………….….. Operation ……………...............……….…………………………… - Begin Programming...................……………………..- Record Enable....................…....……… - Program Scenes......................………. Editing........……..................……..- Edit Enable..........……………......……………………..- Erase a Program..................…..……….. -
Page 4: Warning
WARNING CAUTION! Keep this device away from rain and moisture! FOR YOUR OWN SAFETY, PLEASE READ THIS USER MANUAL CAREFULLY BEFORE YOUR INITIAL START-UP! SAFETY INSTRUCTIONS Every person involved with the installation, operation and maintenance of this device has to: be qualified follow the instructions of this manual CAUTION! Be careful with your operations. -
Page 5: Operating Determinations
The arising condensation water might damage your device. Leave the device switched off until it has reached room temperature. If your Showtec device fails to work properly, discontinue use immediately. Pack the unit securely • (preferably in the original packing material), and return it to your Showtec dealer for service. -
Page 6: Description
Description of the device Features Showmaster 24 is a lightcontroller from Showtec. • 24 channels • 48 scenes or 48 chaser programs with 999 steps • program a loop with a total of 11988 steps. • 2 independent dipless crossfaders •... -
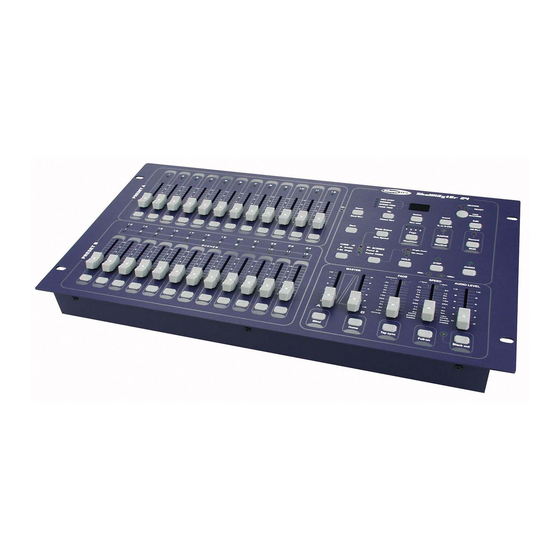
Page 7: Controller Front
Controller Front 1) Preset A LEDs: Show the current intensity of the relevant channel numbered from 1-12. 2) Channel sliders 1-12: These 12 sliders are used to control and /or program the intensities of channels 1-12. 3) Flash-buttons 1-12: These 12 buttons are used to bring an individual channel, to full intensity. 4) Preset B LEDs: Show the current intensity of the relevant channel numbered from 13-24. -
Page 8: Back Side
Controller Backside Fig. 2 35) DC Input: DC 12-20V, 500 mAMin. 36) MIDI Thru: MIDI port for connection to a sequencer or MIDI device. 37) MIDI Out: MIDI port for connection to a sequencer or MIDI device. 38) MIDI In: MIDI port for connection to a sequencer or MIDI device. -
Page 9: Set Up And Operation
Set Up and Operation Before plugging the unit in, always make sure that the power supply matches the product specification voltage. Do not attempt to operate a 120V specification product on 230V power, or vice versa. 2.1 Begin Programming 2.1.1 Record Enable 1) Press and hold down the Record button. - Page 10 Select a chase bank or scene master to store your program. Tap the Page button to select a page(Page 1-4) to store your scenes. Press a Flash button between 13-24 while holding down the Record button. All LED will flash indicating the scenes have been programmed into memory. You can continue programming or exit.
-
Page 11: Editing
2.2 Editing 2.2.1 Edit Enable 1) Record enable. 2) Use the Page button to select the page the program you wish to edit is on. 3) Tap the Mode Select button to select CHASE SCENES. 4) Press and hold down the Edit button. 5) While holding down the Edit button, tap the Flash button that corresponds to the program you wish to edit. -
Page 12: Erase All Programs
2.2.3 Erase All Programs Tap 2X 1) Record enable. 2) Press and hold the Record button. 3) Tap the Flash buttons 1, 4, 2 and 3 in sequence while holding the Record button. All LEDs will flash, indicating all programs stored in memory have been erased. 2.2.4 Clear a Scene or Scenes 1) Record enable. -
Page 13: Insert A Step Or Steps
Example: Delete the third step of the program on Flash button 15 on Page 2. 1) Record enable 2) Tap the Mode Select button to selectCHASE SCENE-Mode. 3) Tap the Page button until Page 2 LED lights. 4) Tap the Flash button 15 while pressing and holding down the Edit button, the Scene LED lights. 5) Tap the Step button to scroll to the third step. -
Page 14: Modify A Step Or Steps
2.2.7 Modify a Step or Steps 1) Enter EDIT-mode. 2) Tap the Step button to scroll to the step you wish to modify. 3) Press and hold the Up button if you want to raise the intensity. If you want to lower the intensity, press and hold down the Down button. 4) While holding down the Up or Down button, tap the Flash button corresponding to the DMX channel of the scene you wish to modify until you reach the desired intensity value read from the Segment Display. -
Page 15: Running
2.3 Running 2.3.1 Running Chase Programs 1) Tap the Mode Select button to select CHASE SCENE-Mode indicated by the red LED. 2) Tap the Page button to select the correct page the program you wish to run is located. 3) Push Master Slider B to its maximum position(fully down). 4) Move the desired Channel slider (13-24) to its maximum position to trigger the program, and the program will fade in depending upon current fade time. -
Page 16: Running A Program With The Speed Slider
4) Use the Audio Level slider to adjust the music sensitivity. 5) To return to normal mode, tap the Audio button a second time causing its LED goes out, the Audio mode is disengaged. 2.3.3 Running a Program With the Speed Slider 1) Be sure the Audio mode is disengaged, that is, the Audio LED goes out. -
Page 17: Change The Speed Mode Between 5 Minutes And 10 Minutes
2.4 Change the Speed Mode between 5 Minutes and 10 Minutes 1) Press and hold the Record button. 2) Tap the Flash button 5 or 10 three times while holding down the Record button. 3) The 5MIN or 10MIN should light up indicating the Speed slider is set to run in the 5 or 10-minute mode. -
Page 18: Exit Midi Setting
3.3 Exit MIDI Setting Press and hold down the Record button. While holding down the Record button tap the Rec Exit button to exit MIDI setting. 3.4 Receiving MIDI File Dump Tap the Flash button #3 three times while holding down the Record button, the Segment Display reads "IN"... -
Page 19: Brief Of Main Functions
4) There are two types of file dump mode described as below: 5) The controller will send and receive Note On and Note Off data via the Flash buttons. Note No. Velocity Functions 22-69 Program master turn on or off program 1-48 70-93 Channel intensity Activate Channel 1-24... - Page 20 Tap-Sync-Button 1) The Tap Sync button is used to set and synchronize the chase rate (the rate at which all scenes will sequence) by taping the button several times. The chase rate will synchronize to the time of the last two taps.
- Page 21 Park 1) In CHASE SCENES Mode, press down the button you can change the chasing mode of programs between Single Mode and Mix Mode. 2) In Double Preset Mode, pressing down this button is equal to pushing Master Slider B to the top. 3) In Single Preset Mode, this button could temporally record current output, with Master Slider B to adjust.
-
Page 22: Maintenance
2. Check power from the wall, all cables, the fuse, the settings (return to default), etc. 3. If all of the above appears to be O.K., plug the unit in again. 4. If nothing happens after 30 seconds, unplug the device. 5. Return the device to your Showtec dealer. -
Page 23: Product Specifications
Product Specification Modell: Showtec Showmaster 24 Power input : DC 12V-20V 500 mA Min. DMX-Output: 3-pin female XLR MIDI-Signal: 5-pin standard interface Audio Input: 100 mV~1 Vpp Fuse: F0.5A 250V 5x20 mm Dimensions : 19” / 6 HE ; 482 x 264 x 85 mm (LxWxH) Weight : 4,8 kg Design and product specifications are subject to change without prior notice.
Need help?
Do you have a question about the Showmaster 24 and is the answer not in the manual?
Questions and answers