Table of Contents
Advertisement
Quick Links
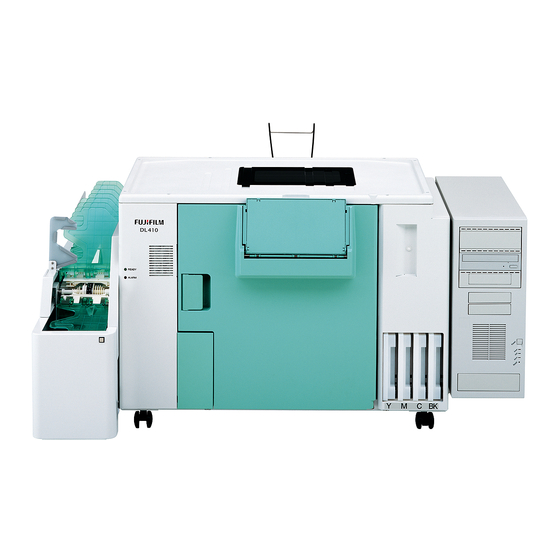
DL410
Starting Guide
2
This manual explains precautions and other information you need to know before
operating this product.
1.
For your safety
2.
Getting Started
3.
Turning power on/off
4.
Emergency operation
5.
Mastering basic operations
6.
Printer maintenance
7.
How to access the HELP display
8.
Appendix
English
Ver. 3
Advertisement
Table of Contents

Related Manuals for FujiFilm DL410


Summary of Contents for FujiFilm DL410
- Page 1 DL410 Starting Guide This manual explains precautions and other information you need to know before operating this product. For your safety Getting Started Turning power on/off Emergency operation Mastering basic operations Printer maintenance How to access the HELP display Appendix English Ver.
- Page 2 This page is intentionally blank.
- Page 3 Preface We greatly appreciate your purchase of this product. Before using this product, read the manual carefully, and make sure that you understand the procedures described. Be sure to store the manual near the system so it can be consulted immediately should you have questions or should any problems arise. If you should lose or heavily damage the manual, contact your place of purchase.
- Page 4 Microsoft, MS-DOS and Windows are registered trademarks of Microsoft Corporation in the United States and/or other countries. UNLHA(32).DLL is free software published by Micco. This software is based in part on the work of the Independent JPEG Group. Other product and company names mentioned herein may be the trademarks of their respective owners. Trademark symbols, ™...
-
Page 5: Explanation Of Manual
Explanation of manual Manual types/contents The following manuals are supplied with this product. Manual type Main contents Specifications • Processing capacity • Standard equipment/Standard accessories • Installation requirements Starting Guide " For your safety MPORTANT • This section explains general safety precautions. Read these precautions thoroughly and carefully. -
Page 6: Symbols Used In This Manual
Manual type Main contents Operator's Manual (options) This manual explains how to operate each option. The Operator's Manual is supplied for each option. Installation Manual This manual explains procedures to install the product, install various software and configure various settings. Symbols used in this manual This section explains the definitions of the symbols used in this manual. - Page 7 The symbols shown below are used in this manual. Confirm the meaning of each of them before reading the manual. This is called the alert symbol. Text following this symbol contains particularly important information concerning safety. Be sure to heed this information. This symbol is used in conjunction with the words DANGER, WARNING and CAUTION, according to the possible degree of injury to people or damage to physical property.
-
Page 8: Table Of Contents
TABLE OF CONTENTS Preface Explanation of manual ........................... iii Manual types/contents ........................iii Symbols used in this manual ......................iv 1. For your safety Description of warnings (signal words) ................1 - 2 Location of warning labels ....................1 - 3 Safety precautions for operation .................. - Page 9 Replacing ribbon cassettes................... 5 - 18 6. Printer maintenance Maintenance items and timing ..................6 - 2 Weekly Checks ....................... 6 - 3 6.2.1 Cleaning the paper supply section ....................6 - 3 6.2.2 Cleaning the printing mount ......................6 - 4 Three-month checks .......................
- Page 10 This page is intentionally blank.
-
Page 11: For Your Safety
1. For your safety This section explains general safety precautions. Read these precautions thoroughly and carefully. 1 – 1... -
Page 12: Description Of Warnings (Signal Words)
1.1 Description of warnings (signal words) 1.1 Description of warnings (signal words) • Signal words identify the level of injuries that can potentially occur. • The signal words used in this manual and found on labels, DANGER, WARNING and CAUTION, are assigned according to the level of potential risk. -
Page 13: Location Of Warning Labels
1.2 Location of warning labels 1.2 Location of warning labels The following shows the locations and types of warning labels on this product. Follow the instructions on the labels carefully in order to operate the system safely and avoid accidents. Do not remove the labels. If a label becomes illegible or comes off completely, contact your place of purchase for a replacement label using the part number shown. -
Page 14: Safety Precautions For Operation
1.3 Safety precautions for operation 1.3 Safety precautions for operation ! ! ! ! General precautions • Do not modify, remove or install any non-specified parts without our permission. Doing so may cause severe personal injury or damage this product. It also voids any quality guarantee. •... -
Page 15: Additional Precautions
1.4 Additional precautions 1.4 Additional precautions ! ! ! ! Precautions in operating this product • Do not suddenly change the temperature of the room in which this product is installed. Rapid changes in room temperature may cause condensation in the system and adversely affect its performance. •... - Page 16 This page is intentionally blank.
-
Page 17: Getting Started
2. Getting Started This section explains topics you need to know before using this product. 2 – 1... -
Page 18: Component Names And Functions
2.1 Component names and functions 2.1 Component names and functions ! ! ! ! Printer exterior Front door Maintenance door • Open this to load paper. • Open this to clean the printing mount. • Adjust this according to the size of sheet paper. -
Page 19: Printer Interior
2.1 Component names and functions ! ! ! ! Printer interior Spindle unit • Load paper. CVP (Correction Value Printing Unit) • Prints print information on the back of paper. (option) G087119 2 – 3... -
Page 20: Paper
2.2 Paper 2.2 Paper Use the specified paper. Using paper other than that specified may adversely affect finished prints and cause problems. • For details about the specified paper, see 8.1 Consumable parts and accessories. 2.2.1 Handling paper • Do not bend paper or scratch the printing surface. •... - Page 21 2.2 Paper • Keep roll paper dry. ! ! ! ! Storing sheet paper Store sheet paper in a place where there is no direct sunlight, with the following condition. The storage environment for unopened packs of sheet paper and that for opened packs of sheet paper are different. Unopened sheet paper Store it in a place where the relative humidity is from 20% to 80% and the room temperature is from 15°C to 25°C.
-
Page 22: Ink Cartridge
2.3 Ink cartridge 2.3 Ink cartridge Use the specified ink cartridge. Using ink cartridges other than those specified may adversely affect finished prints and cause problems. • For details about the specified ink cartridge, see 8.1 Consumable parts and accessories. MPORTANT •... -
Page 23: Turning Power On/Off
3. Turning power on/off This section explains how to turn the product's power on and off. 3 – 1... -
Page 24: Turning On The Power Supply
3.1 Turning on the power supply 3.1 Turning on the power supply There are two methods to turn on the power supply. If turning on the power supply by using the Controller • For details, see the Operator's Manual of the Controller. MPORTANT •... -
Page 25: Turning Off The Power Supply
3.2 Turning off the power supply 3.2 Turning off the power supply There are two methods to turn off the power supply. If turning off the power supply by using the Controller • For details, see the Operator's Manual of the Controller. MPORTANT •... -
Page 26: Operation After Turning The Power Supply Off
3.2 Turning off the power supply Shut down the printer. Select the printer. Click Shutdown. End Display is shown. M5501-001-1 Click Printer off. M5516-001 If the printer will not be used for two or more days Wind the roll paper tightly, and put it in the bag that originally contained the paper. Then store it in the cardboard box or an optional paper case. - Page 27 3.2 Turning off the power supply Procedure Open the maintenance door. G087565 Clean the absorbers with a cotton swab. Clean all the absorbers that were used (correspond to the paper widths processed) on the day. MPORTANT • Belts may cut your hands. Perform the operation carefully. •...
- Page 28 This page is intentionally blank.
-
Page 29: Emergency Operation
4. Emergency operation This section explains the procedure to turn off the power supply in an emergency or corrective actions to perform if the printer makes abnormal sounds. 4 – 1... -
Page 30: Turning Off The Power Supply In An Emergency
4.1 Emergency operation 4.1 Emergency operation 4.1.1 Turning off the power supply in an emergency If you need to immediately turn off the power supply, perform the procedure below. Procedure Disconnect the power supply cable. Turn off the main power supply of the location where the system is installed. -
Page 31: Mastering Basic Operations
5. Mastering basic operations This section explains how to print images and how to load paper. 5 – 1... -
Page 32: Printer Information Display And Maintenance Display
5.1 Printer Information display and Maintenance display 5.1 Printer Information display and Maintenance display 5.1.1 Accessing the Printer Information display and Maintenance display There are two methods to access the Printer Information display and Maintenance display as shown below. Before printing, access the Printer Information display and confirm that the paper to be used is selected. If accessing the display from the Controller •... - Page 33 5.1 Printer Information display and Maintenance display ! ! ! ! Printer Information display Serial number of the selected printer is shown. Closes the Printer Information display. M5511-001 Item Explanation Version Information Shows the version information of the system. Paper information Shows information on the paper to be used.
- Page 34 5.1 Printer Information display and Maintenance display Item Explanation Printer Information " Ink Remaining Shows the remaining amount of ink in the ink cartridges that are attached to the printer. When the ink is run out, or if the ink cartridges are not attached, an indication among those below will be shown.
- Page 35 5.1 Printer Information display and Maintenance display *1. For details about how to view the Operator's Manual, see 7.1 Accessing the HELP display. ! ! ! ! Maintenance display Closes the Maintenance display. M5521-001 Item Setting Print Nozzle Check Pattern Makes a test print to check whether the printhead nozzles clog.
-
Page 36: Making Prints
5.2 Making prints 5.2 Making prints 5.2.1 Starting printing Procedure Confirm that the paper to be used is loaded in the printer. • For details about how to load paper, see 5.3 Loading paper. Place an order for printing on the operation PC. Operation PC G087612 •... -
Page 37: Loading Paper
5.3 Loading paper 5.3 Loading paper Both roll paper and sheet paper can be loaded on this system. Select whichever meets the circumstances or purpose of use. Loading paper Reference Loading roll paper 5.3.1 Loading sheet paper 5.3.2 5.3.1 Loading roll paper MPORTANT •... - Page 38 5.3 Loading paper Remove the spindle unit from the printer. Hold the reel plates and remove the unit. Spindle unit G086982 To replace the loaded paper with different paper Wind paper and then remove the spindle unit. Wind paper. Remove the spindle unit (paper). G086980 5 –...
- Page 39 5.3 Loading paper Remove one reel plate and the roll paper core from the spindle. Release the lock of the reel plate. Remove the reel plate. Remove the paper core. G086983 To replace the loaded paper with paper of different width Remove the paper and adjust the reel plate position.
- Page 40 5.3 Loading paper Take paper out of the bag. Paper G089295 Insert the spindle into the roll paper. Insert the spindle. Align the circles on the reel plate and the spindle. Attach the reel plate and lock it in place. G086985 Attach the spindle unit to the printer.
- Page 41 5.3 Loading paper If the new paper is with a different paper width from the old paper, adjust the paper width guides. Adjust the paper width guides, slightly pulling them toward you, to the width of the paper to use. Line the triangle up with the appropriate location on the scale.
- Page 42 5.3 Loading paper Turn the spindle unit to remove any paper slack. MPORTANT • Using slack paper may adversely affect the print finish or cause a paper jam. Be sure to take up the paper slack. Spindle unit G089320 Close the front door. •...
-
Page 43: Loading Sheet Paper
5.3 Loading paper Select the paper type. If the paper remaining amount shown onscreen is incorrect, enter the correct amount here. M5532-001 *1. Generally, it is not necessary to enter the remaining amount of paper because the system manages the remaining amount of paper of each type and width. - Page 44 5.3 Loading paper Load the sheet paper. Open the paper supply tray. Pull out the guide of the paper supply tray according to the sheet paper size. G087606 Do not load the sheet paper more than the maximum amount that is indicated with the red line.
- Page 45 5.3 Loading paper Select the paper type. M5532-002 • For details, see 3.2 Selecting paper to use [Paper Setting] in the Operator's Manual. • For details about how to view the Operator's Manual, see 7.1 Accessing the HELP display. This completes loading sheet paper. 5 –...
-
Page 46: Replacing Ink Cartridges
5.4 Replacing ink cartridges 5.4 Replacing ink cartridges MPORTANT • If using ink cartridges for the first time, read 2.3 Ink cartridge before the operation. • Keep the used ink cartridge attached until you have a replacement cartridge ready to use. The printheads may clog if the printer is left without an ink cartridge. - Page 47 5.4 Replacing ink cartridges Attach the ink cartridge. Insert it as far as it will go. MPORTANT • While inserting the ink cartridge as far as it will go, hold the printer with your hand so that it does not move. G089379 This completes replacing the ink cartridge.
-
Page 48: Replacing Ribbon Cassettes
5.5 Replacing ribbon cassettes 5.5 Replacing ribbon cassettes This section only applies to systems equipped with CVP (Correction Value Printing unit). Replace the ribbon cassette if back prints are faint. • You may get burnt. Do not touch areas near the print outlet while prints are being ejected or immediately after prints are ejected. - Page 49 5.5 Replacing ribbon cassettes Remove the CVP unit. Turn the wing screw to the left and release the lock. MPORTANT • Hold the CVP unit securely so as not to drop it, as it can fall rapidly. Lower the CVP unit, and then pull it to remove.
- Page 50 5.5 Replacing ribbon cassettes Reattach the CVP unit. Fit these pins into the CVP unit. Lock it into position. Try to move it back and forth to confirm that it is securely locked. G087570 MPORTANT • Attach the CVP unit tightly. If not, density of the back print becomes low. If the density of the back print is low, reattach the CVP unit.
-
Page 51: Printer Maintenance
6. Printer maintenance This section explains maintenance procedures of this product. To use this product in good condition, periodically maintain it. 6 – 1... -
Page 52: Maintenance Items And Timing
6.1 Maintenance items and timing 6.1 Maintenance items and timing Perform cleaning and maintenance according to the table below. Timing Part Operation Reference Weekly Checks Paper supply section Cleaning 6.2.1 Printing mount Cleaning 6.2.2 Every three months Sensors, rollers Cleaning, checking 6.3.1 •... -
Page 53: Weekly Checks
6.2 Weekly Checks 6.2 Weekly Checks This chapter explains the checks that should be done every week. 6.2.1 Cleaning the paper supply section Paper particles on the paper supply section adversely affect the print quality. Procedure Prepare the following items. •... -
Page 54: Cleaning The Printing Mount
6.2 Weekly Checks Clean the roller using a firmly-squeezed damp cloth. Wipe the roller with a dry cloth. MPORTANT • Do not print until the roller is dry. If the roller is wet, it will adversely affect the finished print. Roller Clean all circumference of the roller turning it with your hand. - Page 55 6.2 Weekly Checks Open the maintenance door. G087565 Clean parts stained with ink (round holes and their peripheral parts) on the printing mount with a cotton swab. MPORTANT • Belts may cut your hands. Perform the operation carefully. • While cleaning, be sure not to touch the absorption materials. Absorbers Absorbers Printing mount...
-
Page 56: Three-Month Checks
6.3 Three-month checks 6.3 Three-month checks This chapter explains checks to perform every three months. 6.3.1 Cleaning sensors and rollers Sensors are used to operate each unit and check whether the system has problems. They are installed in the paper path and each unit. - Page 57 6.3 Three-month checks Wind paper. G086980 Clean the advance grid roller using the blower brush. Confirm that the parts are not damaged or deformed. Clean the paper end sensor using the blower brush. Turn the knob and clean all around the advance grid roller. Clean paper end sensor 2 using the blower brush.
- Page 58 6.3 Three-month checks Clean the roller in the sheet supply section. Clean the sheet advance roller using the blower brush. Close the front door. G087573 Clean the sensor in the paper feed section. • You may get burnt. Do not touch areas near the print outlet while prints are being ejected or immediately after prints are ejected.
-
Page 59: Cleaning The Air Filter
6.3 Three-month checks Clean the paper sensor using the blower brush. Reattach the dryer heater unit and tighten the two knob screws. Close the rear door. G089384 This completes cleaning sensors and rollers. 6.3.2 Cleaning the air filter The air filter is attached to the air intake section for cooling the heating part and removing dust. If dust accumulates on the air filter, air intake and exhaust cannot be performed normally, and it adversely affects the system. - Page 60 6.3 Three-month checks Rear door side Air filter G090516 Vacuum dust using a vacuum cleaner. If the dust cannot be removed, face the dust-covered surface down and wash it under running water. MPORTANT • Do not rub it when washing it. •...
-
Page 61: How To Access The Help Display
7. How to access the HELP display You can view the built-in manuals (HELP) on the display. This section explains how to access the HELP display. 7 – 1... -
Page 62: Accessing The Help Display
7.1 Accessing the HELP display 7.1 Accessing the HELP display 7.1.1 Accessing the HELP display from the Maintenance display Click Maintenance on the Printer Information display. The Maintenance display is shown. Click Help. M5521-001 The HELP display is shown. ! ! ! ! HELP display Example: S089259 The numbers in the table below correspond to those in the illustration above. -
Page 63: Closing The Help Display
7.1 Accessing the HELP display Item Explanation Contents Allows you to use the functions Search from Contents, Search from Index, Index Search from all texts with a keyword and Add to Favorite. For details, see Search HELP Functions and how to use HELP (No. 2) . Favorites Bookmark Shows the contents or the search results. - Page 64 This page is intentionally blank.
-
Page 65: Appendix
8. Appendix 8 – 1... -
Page 66: Consumable Parts And Accessories
8.1 Consumable parts and accessories 8.1 Consumable parts and accessories Consumable parts, accessories and other supplied parts are shown in the following tables. To order the consumable parts, confirm the following items and consult your technical representative. • Model name •...
Need help?
Do you have a question about the DL410 and is the answer not in the manual?
Questions and answers