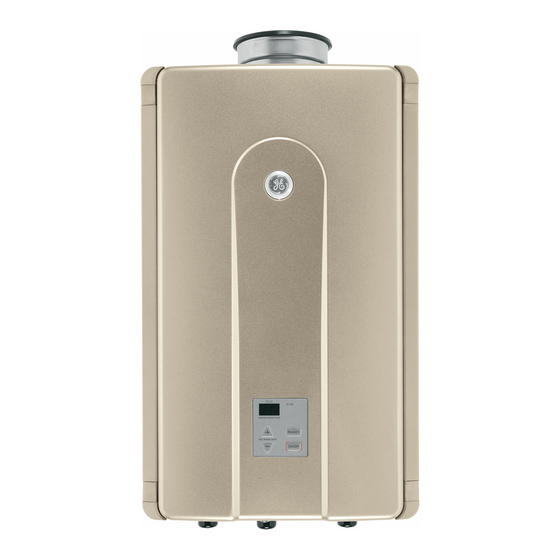
GE GN75DNSRSA Installation Instructions Manual
Indoor direct vent tankless water heater
Hide thumbs
Also See for GN75DNSRSA:
- Installation instructions manual (28 pages) ,
- Owner's manual (16 pages)
Table of Contents
Advertisement
Quick Links
Installation
Instructions
Questions? Call 888.HOTWTER (888.468.9837) or Visit our website at ge.com
WARNING:
injury or property damage.
• Check with your state and/or local public works department for plumbing codes. You must follow their
guides as you install the Water Heater.
NOTE: Failure to comply with these installation instructions will void the product warranty, and the
installer will be responsible for any service, repair or damages caused thereby.
BEFORE BEGINNING INSTALLATION
Read these instructions completely and carefully.
IMPORTANT
•
for local inspector's use.
IMPORTANT
•
codes and ordinances.
• Note to Installer – Be sure to leave these
instructions with the Consumer.
• Note to Consumer – Keep these instructions
for future reference.
• Proper installation is the responsibility of the
installer.
• Product failure due to improper installation
is not covered under the Warranty.
Recognize this symbol as an indication
of Important Safety Information!
49-50229-1 03-08 JR
Indoor Direct Vent Tankless Water Heater
Models GN75DNSRSA, GN94DNSRSA, GP94DNSRSA
Read entire manual. Failure to follow all guides and rules could cause personal
— Save these instructions
— Observe all governing
FOR INDOOR APPLICATIONS ONLY
SAFETY PRECAUTIONS
WARNING:
instructions is not followed exactly, a fire or explosion
may result, causing property damage, personal injury
or death.
FOR YOUR SAFETY!
– Do not store or use gasoline or other
flammable vapors or liquids or other
combustible materials in the vicinity of this
or any other appliance. To do so may result
in an explosion or fire.
– WHAT TO DO IF YOU SMELL GAS
• Do not try to light any appliance.
• Do not touch any electrical switch;
do not use any phone in your building.
• Immediately call your gas supplier from a
neighbor's phone. Follow the gas supplier's
instructions.
• If you cannot reach your gas supplier,
call the fire department.
• Do not return to your home until authorized
by the gas supplier or fire department.
– Improper installation, adjustment, alteration,
service or maintenance can cause property
damage, personal injury or death. Refer to
this manual. Installation and service must
be performed by a qualified installer, service
agency or the gas supplier.
• This water heater must be vented outdoors
using approved ducting materials.
• Service information and wiring diagram are
located behind front panel.
• Service must be performed by a qualified
service agency.
• This appliance must be properly grounded and
installed as described in these instructions.
1
If the information in these
Advertisement
Table of Contents

Related Manuals for GE GN75DNSRSA


Summary of Contents for GE GN75DNSRSA
-
Page 1: Installation Instructions
Indoor Direct Vent Tankless Water Heater Instructions Models GN75DNSRSA, GN94DNSRSA, GP94DNSRSA FOR INDOOR APPLICATIONS ONLY Questions? Call 888.HOTWTER (888.468.9837) or Visit our website at ge.com WARNING: Read entire manual. Failure to follow all guides and rules could cause personal injury or property damage. - Page 2 GE highly recommends that installers • Keep the air intake (at the flue terminal external attend a product knowledge class to ensure to the home) location free of chemicals, such as customer satisfaction and warranty coverage.
-
Page 3: Parts Provided
Installation Instructions PARTS PROVIDED Locate the parts packed with the Water Heater. 4 #10 x 1 ⁄ ″ Wood Screws Gas Valve 3/4″ FNPT Ball Valve TOOLS YOU WILL NEED OTHER TOOLS THAT MIGHT BE REQUIRED • Pipe Wrenches (2) •... - Page 4 Installation Instructions DIMENSIONS GN75/GN94/GP94DNSRSA DIM. DESCRIPTION IN. (MM) Width 14 (355.6) Depth ⁄ (244.5)* Height – Unit ⁄ (582) Height – with brackets ⁄ (647.7) Hot Water Outlet – from wall ⁄ (91)* Hot Water Outlet – from center ⁄ (110) Cold Water Inlet –...
- Page 5 Installation Instructions PLANNING FOR VENTING INTAKE/EXHAUST GUIDELINES Refer to the specific instructions on your vent • Venting should be as direct as possible with product for additional installation requirements. a minimum number of pipe fittings. • This water heater is a direct vent water heater and •...
-
Page 6: Flue Terminal Clearances
Installation Instructions FLUE TERMINAL CLEARANCES U.S. INSTALLATIONS CLEARANCES PER DESCRIPTION ANSI Z21.10.3 Clearance above grade, veranda, porch, deck or snowline 36 inches (91 cm) Clearance to window or door that may be opened 12 inches (30 cm) Clearance to permanently closed window Vertical clearance to ventilated soffit, located above the terminal within a horizontal distance of 2 feet (61 cm) from the center line of the terminal Clearance to unventilated soffit... -
Page 7: Additional Clearances - Vent Terminal
Installation Instructions ADDITIONAL CLEARANCES – VENT TERMINAL These clearances are applicable to both concentric terminations and nonconcentric vent exhaust terminations. Local codes supersede these clearances. • Avoid termination locations near a dryer vent. • Avoid termination locations near commercial cooking exhaust. -
Page 8: Vertical Termination
Installation Instructions FLUE INSTALLATION – CONDENSATE DRAIN HORIZONTAL TERMINATION WITH VERTICAL TERMINATION (condensate collector A CONDENSATE DRAIN required in all installations) 3 in (75 mm) minimum... - Page 9 Installation Instructions PLANNING FOR PLUMBING (shown with optional pipe cover) Optional Pipe Cover ( GTPCM) shown shaded. Unit Pipe cover not required, However, consideration should be taken in the design of the rough plumbing to allow installation of unit and pipe cover. ⁄...
-
Page 10: Mounting The Water Heater
Installation Instructions CLEARANCES FOR WATER HEATER MOUNTING THE WATER HEATER WARNING: CAUTION: Combustible Reinforcement of the construction refers to adjacent walls and ceiling wall is required in case the wall is not strong and should not be confused with combustible or enough to hold the water heater. - Page 11 Installation Instructions MOUNTING THE WATER HEATER (cont.) MOUNTING THE WATER HEATER (cont.) FINISHED WALLS (Drywall) Option 1: ON MASONRY OR CEMENT WALL: Mount Mount boards over drywall directly to studs 4 wall anchors (not supplied) in a wall suitable in the wall. When attaching the unit to a finished to carry 200 lbs minimum tensile load each.
-
Page 12: Gas Piping
Installation Instructions CONNECTING THE WATER HEATER TO GAS AND WATER GAS PIPING GAS PIPING (cont.) GENERAL INSTRUCTIONS PIPE SIZING PROCEDURE • Make sure gas supply is off prior to making The gas supply to the home must be capable any connections to the water heater. A manual of handling the entire gas load of the home, gas control valve, provided with this water calculated by adding the BTU rating of each gas... - Page 13 Installation Instructions CONNECTING THE WATER HEATER TO THE GAS SUPPLY Connect the gas supply to the system following state and local plumbing codes. Use the supplied ball valve at the inlet to the system. Make sure the gas supply line to the water heater fits in the diagram shown on page 9.
-
Page 14: Water Piping General Instructions
Do not plug the relief valve. in the lines. The inlet water filter should be cleaned immediately after initial use. • Neither GE nor the American National Standard (ANSI Z21.10.3)/Canadian Standard (CSA 4.3) CAUTION: Hot Water outlet pipes leaving requires a combination temperature and unit can be hot to touch. - Page 15 Installation Instructions CONNECTING THE WATER HEATER SUPPLEMENTAL FREEZE PROTECTION TO THE WATER SUPPLY If the unit is installed in an environment that can freeze, follow state and local codes and apply heat trace to ALL water pipe and fittings located outside (attic, crawl space or building structure).
-
Page 16: Recommended Piping For Basic Installation
Installation Instructions RECOMMENDED PIPING FOR BASIC INSTALLATION NOTE: If unit is installed in an environment that can freeze, follow state and local codes and apply heat trace to LL water pipes and fittings located outside (attic, crawl space or building structure). This is not an engineered drawing;... - Page 17 Installation Instructions FREEZE PROTECTION FOR EXTERNAL PIPING IMPORTANT! With electrical power supplied to the water heater, it will not freeze in environments as cold as -30°F, when protected from direct wind exposure. In the event of a power failure at temperatures below freezing, the water heater should be drained of all water to prevent freezing damage.
-
Page 18: Electrical Connection Information
Installation Instructions ELECTRICAL CONNECTION INFORMATION WARNING – To reduce the risk of fire, electrical shock and personal injury: • Do not use an extension cord or an adapter plug with this appliance. • The water heater must be electrically grounded in accordance with local codes and ordinances or, in the absence of local codes, in accordance with the NATIONAL ELECTRICAL CODE, ANSI/NFPA... -
Page 19: Venting Instructions
Installation Instructions VENTING INSTRUCTIONS VENTING INSTRUCTIONS (cont.) Refer to the specific instructions on your vent MAXIMUM VENT LENGTH product for additional installation requirements. Maximum System performance is achieved at a vent length of 21 equivalent feet or less. The CONDENSATE system is capable of 41 equivalent feet vent length Regions of cold climate will create more if required, but this reduces system performance. -
Page 20: Flue Installation - Concentric Venting
4 screws at the bracket. with one self-tapping screw at the hole located above the condensate collector. VENTING INSTRUCTIONS (cont.) VENT PRODUCTS Listed and Tested Vent Products for GN75DNSRSA, GN94DNSRSA and GP94DNSRSA (concentric venting) MANUFACTURER PRODUCT PARTS Refer to the manufacturer’s technical literature Ubbink Rolux Vent System for specific part numbers and instructions. -
Page 21: High Altitude Installations
Installation Instructions HIGH ALTITUDE INSTALLATIONS WARNING: Set dip switches 2 and 3 to the values shown in the Do not adjust the other dip switches unless specifically instructed to do so. table below for your altitude. The default setting for the appliance is 0-2000 ft (0-610 m) with switches If unsure of the altitude in your location, call No. -
Page 22: Remote Controller Installation
Installation Instructions REMOTE CONTROLLER INSTALLATION REMOTE CONTROLLER INSTALLATION (cont.) LOCATION MOUNTING THE CONTROLLER • The controller should be out of reach of small Determine a suitable location for children. the controller. • Avoid locations where Mount a single gang outlet box in the wall the controller may where the remote control is indicated. -
Page 23: Installation Checklist
Installation Instructions REMOTE CONTROLLER INSTALLATION (cont.) CLEANING THE INLET FILTER (cont.) Use pressurized air to remove dust from the main MOUNTING THE CONTROLLER (cont.) burner, heat exchanger and fan blades. Do not use a Replace the plastic cover over the PCB, and then wet cloth or spray cleaners on the burner. -
Page 24: Technical Data
Installation Instructions TECHNICAL DATA PRESSURE DROP CURVE GN75 GN94/GP94 OUTLET FLOW DATA GN94/GP94 GN75... -
Page 25: Ladder Diagram
Installation Instructions LADDER DIAGRAM... - Page 26 Notes...
- Page 27 Notes...
- Page 28 Notes...