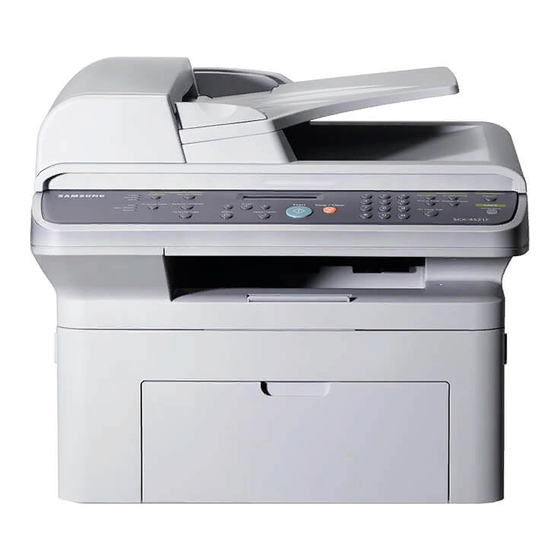
Samsung SCX-4521F Series Service Manual
Digital laser mfp
Hide thumbs
Also See for SCX-4521F Series:
- Service manual (154 pages) ,
- User manual (120 pages) ,
- Specifications (2 pages)
Table of Contents
Advertisement
Quick Links
SERVICE
DIGITAL LASER MFP
SCX-4521F Series
DIGITAL LASER MFP
SCX-4521F Series
SCX-4321/XEV
Basic Model : SCX-4521F
Manual
The keynote of Product
- Machine Life: 50,000Pages
- Cpu: Chorus2
- Device Memory: 16MB
- Resolution: 600*600dpi
- Option: N/A
- Printing Speed: 22ppm/LTR,20ppm/A4
- Print Memory: 10MB
- Print Language: SPL
- Path Type: C-Path
- Cassette Capa.: 150sheets
- Outlet Stacking Capa.: 50sheets
- Toner Cartridge: initial(1K), sales(3K)
- ADF Capacity: 30sheets
- Scan Method: 600 dpi Color CIS
- Copy Speed: SDMC: 22Cpm/Ltr,
MDMC: 7Cpm/Ltr
- Interface: USB1.1, IEEE1284
Advertisement
Chapters
Table of Contents

Related Manuals for Samsung SCX-4521F Series


Summary of Contents for Samsung SCX-4521F Series
- Page 1 DIGITAL LASER MFP SCX-4521F Series SCX-4321/XEV Basic Model : SCX-4521F SERVICE Manual DIGITAL LASER MFP The keynote of Product - Machine Life: 50,000Pages - Cpu: Chorus2 - Device Memory: 16MB - Resolution: 600*600dpi - Option: N/A - Printing Speed: 22ppm/LTR,20ppm/A4...
- Page 2 ELECTRONICS * This service manual is a property of Samsung Electronics Co., Ltd. Any unauthorized use of Manual can be punished under applicable international and/or domestic law. Samsung Electronics Co.,Ltd. Aug. 2005 * This service manual is also provided on the web, the ITSELF Printed in Korea.
-
Page 3: Table Of Contents
Contents 1. Precautions 1.1 Safety Warning 1.2 Safety Caution 1.3 ESD Precautions 2. Product Specification 2.1 Product Overview 2.2 Specifications 2.3 Model Comparison Table 3. System Overview 3.1 System Outline 3.2 H/W Structure and Descriptions 3.3 S/W Structure and Descriptions 3-19 3.4 Initial Product Installation 3-24... - Page 4 Continued 5. Disassembly and Reassembly 5.1 General Precautions on Disassembly 5.2 Disassembly and Reassembly 6. Troubleshooting 6.1 Checking Symptoms 6.2 Bad discharge 6.3 Malfunction 6.4 Bad software environment 6-13 6.5 Bad Image 6-17 7. Exploded Views & Parts List 7.1 Exploded Views and Parts List 8.
- Page 5 Continued 11. Reference Information 11.1 Troubleshooting Tools 11-1 11.2 Acronyms and Abbreviations 11-2 11.3 Selecting printer locations 11-4 11.4 Sample Tests Patterns 11-5 12. Circuit Description 12.1 Engine Controller 12-1...
-
Page 6: Precautions
High voltages and lasers inside this product are dangerous. This printer should only be serviced by a suitably trained and qualified service engineer. (2) Use only Samsung replacement parts There are no user serviceable parts inside the printer. Do not make any unauthorized changes or additions to the printer, these could cause the printer to malfunction and create electric shock or fire hazards. -
Page 7: Caution For Safety
Take care not to cut or damage the power cable or plugs when moving the machine. (9) Use caution during thunder or lightening storms. Samsung recommend that this machine be disconnected from the power source when such weather conditions are expected. Do not touch the machine or the power cord if it is still connected to the wall socket in these weather conditions. -
Page 8: Handling Precautions
1.2.4 Assembly / Disassembly Precautions Replace parts carefully, always use Samsung parts. Take care to note the exact location of parts and also cable routing before dismantling any part of the machine. Ensure all parts and cables are replaced correctly. -
Page 9: Disregarding This Warning May Cause Bodily Injury
Failure to do so could cause the printer to tip or fall possibly causing personal injury or damaging the printer. (5) Do not install the printer on a sloping or unstable surface. After installation, double check that the printer is stable. Service Manual Samsung Electronics... -
Page 10: Esd Precautions
2. Be sure to replace the battery with the same or 4. Dispose of used batteries according to the equivalent type recommended by the manufacturer. manufacture’s instructions. Service Manual Samsung Electronics... -
Page 11: Product Specification
- up to 22ppm/A4(Up to 22ppm/Letter) - 150 sheets Multi-Purpose type paper input/50 sheets Paper Output - 3,000pages toner capacity - 600dpi Print/Copy Resoulusion - Samsung Print Language - 16MB System memory - 30 ADF - 33.6 Kbps Fax Modem... -
Page 12: Specifications
ADF : 30,000 Pages, Platen : 20,000 Pages Operation Temperature 10°C ~ 32 °C (50°F ~ 89°F) conditions Humidity 20 % ~ 80 % RH Approval Class B Device Memory 16MB Page Counter Print Configuration Sheet(System Data) Service Manual Samsung Electronics... -
Page 13: Print Specifications
Letter/Legal: 208mm(8.2")A4: 202mm Letter/Legal: 208mm(8.2")A4: 202mm Scan-to Button Application Scan Depth Color 24 bit 24 bit Mono 1bit for Line art, Halftone, 8 Bit for Gray scale 1bit for Line art, Halftone, 8 Bit for Gray scale Service Manual Samsung Electronics... -
Page 14: Copy Specifications
Report & List Tx/Rx Journal Print out Confirmation Help List Auto Dial List System Data List all user setting List all user setting Sound Control Ring Volume Yes(Off,Low,MED,HIGH) Key Volume Yes(On,Off) Alarm Volume Yes(On,Off) Speaker Yes(On,Off, Comm) Service Manual Samsung Electronics... -
Page 15: Fax Specifications
Max locations to store 99 locations to 1 Group Dial Fax Forward Yes(On/Off) Broadcasting 109 locations(Max locations) Cover page Delayed fax Memory RX Functions Voice Request Polling Earth/Recall Auto Reduction Junk Fax barrier Security Receive Memory Back-up Max. 72hours Service Manual Samsung Electronics... -
Page 16: Paper Handling Specifications
Items SCX-4321 SCX-4521F Compatibility Win 3.x Win 95 Win 98/ME Win NT 4.0 Win 2000 Win XP Yes (10.3 ) Yes (10.3 ) Linux Driver Printer TWAIN ScanToPC PC-FAX Yes (Send only) Application Status monitor SmarThru4 Service Manual Samsung Electronics... - Page 17 Single Cartridge How to install Front door open and front loading Front door open and front loading Toner Yield 3,000 pages at ISO 19752 Std. Coverage(Ships with 1,000 pages Starter Toner Cartridge) Code SCX-4521D3 SCX-4521D3 Level Sensor Service Manual Samsung Electronics...
-
Page 18: System Overview
CPU(ASIC) and 1 Board. Scanner part is composed of ADF and Platen and is connected with Main by Harness. Scanner part ADF ROLLER PICK-UP ROLLER COVER OPEN EXIT ROLER ADF-UPPER FEED ROLLER ADF-LOWER SCAN UPPER SCAN UPPER SCAN UPPER WHITE BAR ADF-GLASS Engine Part BIN PATH Service Manual Samsung Electronics... - Page 19 The surface of the Heat Roller is heated by the Heat Lamp. As the paper passes between the Heat and Pressure rollers the toner is melted and fixed permanently to the paper. The surface of the roller is coated with Teflon. This ensures that toner does not adhere to the roller surface. Service Manual Samsung Electronics...
-
Page 20: Pressure Roller
- The temperature of the fuser cover's surface is maintained at less than 80°C to protect the user and a caution label is attached where the customer can see it easily when the rear cover is opened. Service Manual Samsung Electronics... - Page 21 [Case part figure] STACKER COVER-M_MIDDLE COVER-M-SIDE R COVER-M_JAM EXTEND-SMALL EXTEND-LARGE COVER-M_REAR TRAY CASSETTE FIXING BKT SPEKER COVER-M_DEVE COVER-M-SIDE-L [Scan part figure] MOTOR ASS’Y SCAN UPPER SCAN TIMING LOWER BELT GLASS SCAN GLASS SLIDER -CIS KEY & OPE COVER Service Manual Samsung Electronics...
- Page 22 1.8V for internal Core, 3.3V for I/O Pad with 4KByte Cache. Image Processor included. On-Chip clock generator with PLL. Memory and External Bank Control. DMA Control (5-Channel) Interrupt Control. 2-port USB Host/1-port USB device(ver 1.1) interface control. Parallel interface control. UART(2-Channel) Service Manual Samsung Electronics...
-
Page 23: Scan Part
Summary of the Image sensor interface is as below; - Minimum Scan Line Time :1.5ms - Scan Resolution : 600*600 dpi - Scan Width : 208mm - Function White Shading Correction Gamma Correction CIS Interface 256 Gray Scale Service Manual Samsung Electronics... - Page 24 Analog Switch(MC14053BD) makes a path for FAX Tone, Ring, Key click sound and Analog MUX (MC14051) makes a different signal level so that the the Speaker driver chip(MC34119) can driving the Speaker with different sound volume. Service Manual Samsung Electronics...
- Page 25 17) Paper Exit Type : Face Down 18) Feed Roller Force : TBD Kg.f or more. 19) Spring Feed Tensile Force : TBD gf 20) Feed roller Velocity : mm/sec 21) Feed Roller Material 22) Exit Sensor : Photo Sensor Service Manual Samsung Electronics...
- Page 26 3st protecting device : Thermostat cuts off the power - Safety device The power of Fuser is cut-off after front cover is open. The overheating safety device for customer The surface temperature of the Fuser Cover is under 80°C Service Manual Samsung Electronics...
- Page 27 - Gray : 4.5msec/line - Mono : 4.5msec/line 5) Scanning Width - MAX SCAN WIDTH : 216 mm (8.5 inches) - Effective Scan Width: 208mm 6) ADF Motor (a) Motor Spec : 24VDC : 0.6A(Peak) Service Manual 3-10 Samsung Electronics...
- Page 28 (c) LED : - Max current : 50mA - Max Voltage : 3.3V (d) Output - Logic "H" : Off(No Position), No Paper - Logic "L" : On (Doc Position), Paper (e) LEVER - SENSOR SCAN : Scan Lower Torsion Spring Service Manual 3-11 Samsung Electronics...
- Page 29 [scan to PC], [scan to FAX], [scan to E-mail] function. 3) LCD Part - Number of Characters : 16 Characters x 2 line Clock, Date display System Status display Alarm, Error Message display Function Dialog Message display Service Manual 3-12 Samsung Electronics...
- Page 30 3.5A ~ 4.5A range. overflowing current 3) Consumption Power Item CH1(+5V) CH2(24V) System Stand-By 0.6 A 1.3 A AVG : 65Wh Printing 0.8 A 1.9 A AVG : 350Wh Sleep-Mode 0.5 A 0.3 A AVG : 10Wh Service Manual 3-13 Samsung Electronics...
- Page 31 - Out Voltage Rising Time : 50 ms Max - Out VoltageFalling Time : 50msMax - Out Voltage Range : 30 ~ 1000 - Output Control Signal(MHV-PWM) : Active Low PWM signal for controlling MHV Service Manual 3-14 Samsung Electronics...
-
Page 32: Fuser Ac Power Control
1) Triac feature : 12A, 600V SWITCHING 2) Phototriac Coupler (PC102) - Turn OnIf Current : 15mA~50mA(Design : 16mA) - High Repetive Peak Off State Voltage : Min 600V Service Manual 3-15 Samsung Electronics... -
Page 33: Alignment And Adjustments
00-00-0000 (only SCX-4521F) 00:00(AM) Clock Mode 12, 24 hours 12hours (only SCX-4521F) Language [English/FRANCAIS/Espanol/ English Portugues/Deutsch/Italiano/ Pycckn/Norsk/Polski/ Suomi/Magyar/Dansk/ cestina/Svenska/Turkse - 15 language Power Save 5, 10, 15, 30, 45 min. Ignore Toner USB Mode Fast/Slow Fast Service Manual Samsung Electronics... - Page 34 Autofit 2 side in 1 Pg 2 UP 4 UP Poster 4. Copy Feature Clone Copy Collate Autofit ID Card Copy 2 UP This will set to 2UP 4 UP This will set to 4UP Poster Service Manual Samsung Electronics...
- Page 35 System Data Scheduled Jobs (only SCX-4521F) MSG Confirm (only SCX-4521F) Junk Fax List (only SCX-4521F) 10 ea 9. Sound/Volume Speaker On, Off, Comm. Comm. Speaker Ringer Off, Low,Med,High Key Sound On, Off Alarm Sound On, Off Service Manual Samsung Electronics...
- Page 36 Clean Drum On,Off Clean Drum Notify Toner On,Off Clear Memory Clear All Mem. Paper setting Machine Setup Copy Setup Fax Setup Fax Feature Advanced Fax Sound/Volume Sent Report RCV Report Phone Book Remote Test (only SCX-4521F) Service Manual Samsung Electronics...
- Page 37 ‘TECH’, the machine has entered service (tech) mode. To enter the Tech mode (SCX-4321) To enter the Tech mode press in sequence and the LCD briefly displays ‘TECH’, the machine has entered service (tech) mode. Service Manual Samsung Electronics...
- Page 38 Local Remote Silence Time Off/ 12 Sec/Unlimited (only SCX-4521F) Machine Test Switch Test Modem Test (only SCX-4521F) Dram Test Rom Test Pattern Test Shading Test Report Protocol(only SCX-4521F) System Data Key History Error Info New Cartridge Service Manual Samsung Electronics...
-
Page 39: Changing The Display Language
If you want to insert a space in the name, you can also use the button to move the cursor to skip the position. Press Enter when the name on the display is correct. To return to Standby mode, press Stop/Clear. Service Manual Samsung Electronics... -
Page 40: Setting The Date And Time
) until you see “Clock Mode” on the bottom line and press Enter. The clock mode currently set for the machine displays. Press the scroll button ( ) to select the other mode and then press Enter to save the selection. To return to Standby mode, press Stop/Clear. Service Manual Samsung Electronics... -
Page 41: Setting The Paper Size And Type
“Off,” “Low,” “Med,” and “High”. Setting “Off” means that the ringer does not sound. The machine works normally even if the ringer is turned off. Press Enter to save the selection. The next sound option appears. If necessary, repeat steps 2 through 4. To return to Standby mode, press Stop/Clear. Service Manual Samsung Electronics... -
Page 42: Speaker Volume
Press the scroll button ( ) until the time setting you want appears. The available options are 5, 10, 15, 30, and 45 (minutes). Press Enter to save the selection. To return to Standby mode, press Stop/Clear. Service Manual 4-10 Samsung Electronics... -
Page 43: Flash Upgrade
1. The Sending and Receiving fax machines MUST be the same model. 2. The sending fax must be set up in ECM mode and the Receiving fax memory must be 100%. If not the function will not work. Service Manual 4-11 Samsung Electronics... -
Page 44: Switch Test
4. If the printed image is different to the sample image shown the CIS is defective. NOTICE : When you test the CIS, make sure that the cover is closed. MAX=241 Min=179 Avg=204 Diff=14 PRNU=4 MAX=240 Min=176 Avg=202 Diff=15 PRNU=6 Service Manual 4-12 Samsung Electronics... -
Page 45: Protocol List
SYSTEM DATA This list provides a list of the user system data settings and tech mode settings. KEY HISTORY This list shows th input key history. ERROR INFO This list display the detail machine error list. Service Manual 4-13 Samsung Electronics... -
Page 46: Control Panel
Alignment and Adjustments 4.3 Control Panel 4.3.1 Control Panel Functions (SCX-4521F) SCX-4521F Service Manual 4-14 Samsung Electronics... - Page 47 Alignment and Adjustments Service Manual 4-15 Samsung Electronics...
- Page 48 Alignment and Adjustments 4.3.2 Control Panel Functions (SCX-4321) SCX-4321 Service Manual 4-16 Samsung Electronics...
-
Page 49: Led Status Error Messages
When the machine has encountered the Laser Beam Scanning unit could not reach the READY state, TONER LOW [Toner Low] When the machine has encountered the Toner Low, TONER EMPTY [Toner Empty] When the machine has encountered the Toner Empty, Service Manual 4-17 Samsung Electronics... -
Page 50: Lcd Display
When the machine detected the toner cartridge has not [No Catridge] been installed, or detected jam1 in warmup state. Memory Dial Full Memory Dial Full During Auto dial transmission when all 15 jobs are configured and try to add 16th job Service Manual 4-18 Samsung Electronics... -
Page 51: To Enter The Engine Test Mode
1 : On, 2 : Off (+1300V ± 20V) THV ADC 1300V 1 : On, 2 : Off (ADC Value : 101 ± 5) THV ADC 600V~3500V 1 : On, 2 : Off (Compare each ADC Value) Service Manual 4-19 Samsung Electronics... - Page 52 42.Dev Bias Test control of the HVPS is functioning correctly. Dev Bias On/Off 43.THV EN/NEG Test THV EN/NEG On/Off 44.THV ON(1300V) THV On/Off 45.THV ADC 1300V ADC value displayed. 46.THV ADC 600V~3500 ADC value displayed. Service Manual 4-20 Samsung Electronics...
-
Page 53: Paper Path
Alignment and Adjustments 4.6 Paper Path and Clearing Paper Jams 4.6.1 Copy & Scan Document Path Service Manual 4-21 Samsung Electronics... -
Page 54: Printer Paper Path
4) The paper then passes through the paper exit sensor and out of the set. (Jam 2 occurs if the trailing edge of the paper does not pass the exit sensor within a certain time of the paper leading edge activating the exit sensor) Service Manual 4-22 Samsung Electronics... -
Page 55: Clearing Paper Jams
To avoid tearing the paper, pull out the jammed paper gently and slowly. Follow the instructions in the following sections to clear the jam. 4.6.3.1 In the Tray 2. Open and close the front door to resume printing. 1. Remove the jammed paper in the tray by gently pulling it straight out. Service Manual 4-23 Samsung Electronics... - Page 56 1. Open the front door and pull the toner cartridge out, 3. Replace the toner cartridge and close the front lightly pushing it down. door. Printing automatically resumes. 2. Remove the jammed paper by gently pulling it straight out. Service Manual 4-24 Samsung Electronics...
-
Page 57: In The Paper Exit Area
5. Close the rear door. in the output tray, open the rear door by pulling the tab on it. 6. Open and close the front door to resume printing. Service Manual 4-25 Samsung Electronics... -
Page 58: Tips For Avoiding Paper Jams
• Do not use creased, damp, or highly curled paper. • Do not mix paper types in the tray. • Use only recommended print materials. See “Paper Specifications”. • Ensure that the recommended print side of print materials is facing up in the tray. Service Manual 4-26 Samsung Electronics... -
Page 59: Disassembly And Reassembly
3. Unplug the power cord. 4. Use a flat and clean surface. 5. Replace only with authorized components. 6. Do not force plastic-material components. 7. Make sure all components are in their proper posi- tion. Service Manual Samsung Electronics... - Page 60 Disassembly and Reassembly 5.2 MP Tray 1. Open the Front Cover. 3. Hold the MP Tray and pull it to the arrow direction. MP Tray Front Cover 2. Release the Toner Cartridge. Toner Cartridge Service Manual Samsung Electronics...
-
Page 61: Pick Up Roller
5.4 Front Cover 1. Open the Front Cover. 2. To remove the Front Cover, first pull the part below the right side of the Front Cover with a light pressure to the direction of arrow(left). Front Cover Service Manual Samsung Electronics... -
Page 62: Cassette Tray
5.5 Cassette Tray 1. Open the Cassette Tray. 2. As shown below, to remove the Cassette Tray, lift the nob to the direction of the arrow with a light pressure while holding the Set(left). Cassette Tray Service Manual Samsung Electronics... -
Page 63: Rear Cover
Power Switch doesn't get jammed to the Rear Cover, as shown below. Rear Cover 2. Open the Jam Cover. 4. If necessary, remove the Jam Cover in the direction of arrow, as shown below. Jam Cover Jam Cover Rear Cover Service Manual Samsung Electronics... -
Page 64: Right Cover
- Front Cover (Refer to the 5.4) as shown below. - Rear Cover (Refer to the 5.6) 2. Remove the one screws securing the Right Cover. Right Cover Service Manual Samsung Electronics... -
Page 65: Left Cover
Speaker and remove it. 3. Apply light pressure to the back of the Left Cover and pull it to the leftt side in the direction of arrow, as shown below. Left Cover Left Cover Fixing Bracket Speaker Service Manual Samsung Electronics... - Page 66 2. Remove the two screws from the Middle Cover and remove the screw securing the Ground Cable. Middle Cover Middle Cover 3. Unplug the three Connectors(ADF, Scan Motor, OPE) and Flat Cable-CIS, as shown below. Scan Motor Flat Cable Service Manual Samsung Electronics...
- Page 67 TX Stacker Ass'y and remove it, as shown below. 3. Remove the ADF Housing from the Platen Housing. At that time, carefully release the ADF Motor Harness from the Platen Housing, as shown below. TX Stacker Ass’y ADF Housing Platen Cover Scan Motor Harness Service Manual Samsung Electronics...
- Page 68 9. Unplug the Connector from the ADF PBA and remove the four screws securing the ADF Motor Housing and remove it in the direction of arrow, as shown below. ADF Motor Housing Bush Pick Up Unit Bearing Service Manual 5-10 Samsung Electronics...
-
Page 69: Ope Unit
2. Unplug the three Connectors(Battery, OPE, Full Rubber-Tel Sensor), as shown below. OPE PBA Full Sensor 5. Release the Keys, as shown below. Battery Copy Scroll Resolution Start Stop Toner Save Scan To OPE Cover Service Manual 5-11 Samsung Electronics... - Page 70 2. Remove the five screws from the Scan Upper and Belt remove it from the Scan Lower, as shown below. Scan Upper 5. Release the Belt and Flat Cable from the CIS. Scan Lower 3. Take out the Battery. Belt Battery Flat Cable Service Manual 5-12 Samsung Electronics...
- Page 71 8. Using a flat-blade screwdriver remove the Full Ass'y and remove it. Sensor, as shown below. Scan Motor Ass’y Full Sensor 7. If necessary, remove the two screws securing the Scan Motor and remove it. Scan Motor Bracket Scan Motor Service Manual 5-13 Samsung Electronics...
-
Page 72: Middle Cover
- Scan Ass'y (Refer to the 5.9) 2. Remove the five screws securing the Middle Cover, as shown below. Stacker Main 3. Carefully release the Middle Cover from the Main PBA, as shown below. Middle Cover Service Manual 5-14 Samsung Electronics... - Page 73 - Middle Cover (Refer to the 5.13) 2. Remove the three screws securing the Sheet and remove it. HVPS 3. Remove the three screws securing the HVPS and remove it with the HVPS Ground, as shown below. HVPS Ground HVPS Service Manual 5-15 Samsung Electronics...
-
Page 74: Main Pba
- Scan Ass'y (Refer to the 5.9) - Middle Cover (Refer to the 5.13) Main PBA 2. Unplug the all Connectors from the Main PBA, as shown below. Thermister DEVE Clutch SMPS/HVPS Main Motor Service Manual 5-16 Samsung Electronics... - Page 75 Frame then remove the RX Drive in the direction of arrow, as shown below. 6. Remove the four screws securing the Motor Bracket and remove it. Then remove the two screws securing the Motor and remove it. Gear Bracket RX Motor Motor Bracket Service Manual 5-17 Samsung Electronics...
- Page 76 2. Unplug the two Connectors from the SMPS and Main PBA, as shown below. Thermister Fuser 5. Remove the Cover-M-Safty, as shown below. Cover-M-Safty 3. Remove the four screws securing the Fuser and remove it, as shown below. Fuser Service Manual 5-18 Samsung Electronics...
- Page 77 10. Remove the screw securing the Harness and remove it. Then take out the Thermistor, as shown below. NOTICE: If you don't follow the direction above the Thermistor Spring will come out forcing the Roller_Main, Roller_FR, F/Down Holder inside the Frame Ass'y. Service Manual 5-19 Samsung Electronics...
- Page 78 Lamp and remove the two screws securing the and remove it. Halogen Lamp, as shown below. Cover-M 13. Take out the Halogen Lamp in the direction of arrow, as shown below. Heat Roller Halogen Lamp Service Manual 5-20 Samsung Electronics...
- Page 79 3. Remove the six screws securing the Engine Shield PBA as shown below. and release the Harness, as shown below. Then carefully release the Engine Shield from the Actuator Feed Sensor Lever. LIU PBA Engine Shield (W/LIU PBA, SMPS) Actuator Feed Sensor Lever Service Manual 5-21 Samsung Electronics...
- Page 80 1. Before you remove the LSU, you should remove: - Scan Ass'y (Refer to the 5.9) - Middle Cover (Refer to the 5.13) 2. Remove the three screws securing the LSU and remove it. Then unplug the two Connectors from the LSU. Service Manual 5-22 Samsung Electronics...
- Page 81 2. Remove the four screws securing the Paper Path Frame and remove it in the direction of arrow, as shown below. Solenoid-MP Paper Path Frame 3. Remove the Transfer Roller from the Frame, as shown below. Bush Transfer Roller Bush(L) Service Manual 5-23 Samsung Electronics...
-
Page 82: Troubleshooting
- Power Module error OP Panel - Main PBA error - LCD Panel error Refer to Indicate Ready or Error Massage Error Massage Power save <Chapter 4.4> Test Print printing Refer to "Solution Quality is of Image Problem" Nomal? Service Manual Samsung Electronics... -
Page 83: Basic Check List
•Is there are a Print Quality Problem? --> Refer to section 6.5 6. Check consumables (toner etc.). •Using the keys print the Test Pattern. --> Expected life of various consumable parts, compare this with the figures printed and replace as required Service Manual Samsung Electronics... - Page 84 1. Use only paper which is of a suitable quality, weight and size? See the user guide. 4. Check the overall condition of the printer 1. Is the printer properly maintained ? Clean the Paper Transport Passages. Any rollers with dirt surfaces should be cleaned or replaced. Service Manual Samsung Electronics...
-
Page 85: Bad Discharge
3. Clean with soft cloth dampened with IPA(Isopropyl ter. Alcohol) or water. 4. If the paper feeds into the printer rand Jam 0 occurs, 4. Replace the SMPS, HVPS or Sensor. perform Engine Test Mode-Feed Sensor Test. Service Manual Samsung Electronics... - Page 86 3. Remove the jammed paper after disassembling the fuser : Clean the surface of the pressure roller with dry gauze. • Remove the toner particles stained on the rib. • Check the assemblage and performance of the exit. Service Manual Samsung Electronics...
-
Page 87: Malfunction
2. If there is heavy background, repair it by the ted. background troubleshooting method. 3. The surface of the heat roller with IPA or water 4. Check the warp or separation of the sprint claw and the holder plate claw, and then man- age it. Service Manual Samsung Electronics... - Page 88 1. Recommend to use normal paper. 2. The face of paper is curled. 2. How to remove the rolled in the OPC Drum. • Remove the paper while turning the OPC Drum against the ongoing direction. Service Manual Samsung Electronics...
- Page 89 2. Check that there is an audible key click when a key is 2. If the fault remains replace the OPE Ass’y and the pressed. Main board in sequence. Service Manual Samsung Electronics...
-
Page 90: Paper Empty
The paper empty message does not appear in the LCD when the paper cassette is empty. Check and Cause Solution 1. Deformed paper sensor actuator or faulty sensor. 1. Replace the defective actuator. 2. SMPS PBA or Main PBA is defective 2. Replace the SMPS PBA or MAIN PBA as appropriate Service Manual Samsung Electronics... -
Page 91: Cover Open
1. Use TECH mode(“cover sensor test”) to check cover switch operation. Check and replace switch if necessary. 2. Check the connector and cables between HVPS and main PBA. 2. Replace the Main Control board or HVPS S/W as necessary. Service Manual 6-10 Samsung Electronics... -
Page 92: Defective Motor Operation
When printing, vertical lines are not straight. Check and Cause Solution 1. Check stability of 24V supply to LSU. 1. 24V stable - Replace LSU. 24V unstable replace SMPS, if the problem persists replace the main PBA. Service Manual 6-11 Samsung Electronics... -
Page 93: Bad Software Environment
4. If the scanner needs to be connected to the printer, 4. Check if the printer cable is directly connected to periph- first the remove the scanner from the PC to see if the eral devices printer is properly working alone. Service Manual 6-12 Samsung Electronics... - Page 94 Turn the PC and printer off, and reboot the system to print again. If not solved, double-click the printer in my computer If the regular fonts are not printed this time again. the cable must be defective so replace the cable with new one. Service Manual 6-13 Samsung Electronics...
-
Page 95: Abnormal Printing
3. Delete the unnecessary files to secure enough (The printing job sometimes stops or due to insufficient space of the hard disk and start printing job again. virtual memory, but it actually comes from the insuffi- cient space of the hard disk.) Service Manual 6-14 Samsung Electronics... -
Page 96: Spool Error
Before choosing the document, the menu is still inactive. Or put the document out of the list and repeat the routine as in the above or finish the spool manager. Service Manual 6-15 Samsung Electronics... -
Page 97: Bad Image
4. No. 4. : Open the front cover and check odically at the top of a black image. ribs that corresponds to the position of the voids. Remove if found. 5. If the problems are not solved, replace the developer cartridge. Service Manual 6-16 Samsung Electronics... -
Page 98: Horizontal Black Band
1, take measures as to replace the develop- er cartridge and try to print out. 5. Clean the inside of the set against the paper particles and foreign matter in order not to cause the trouble. Service Manual 6-17 Samsung Electronics... -
Page 99: Light Image
HVPS. Digital Printer in the side of the Developer and charge terminal of HVPS. 3. Replace the HVPS if not solved by the above direction 1 and 2. Service Manual 6-18 Samsung Electronics... -
Page 100: Uneven Density
4. Is the movement(Up and Down) of 4. Clean the bushing part of the transfer the transfer roller smooth? roller. 5. Is the HVPS normal? 5. If the problem is still not solved, replace the developer. Service Manual 6-19 Samsung Electronics... - Page 101 Digital Printer mal paper or transparencies such as OHP, the software application and after using return- Digital Printer higher transfer voltage is required. ing to the original mode is recommended. Digital Printer Digital Printer Digital Printer Service Manual 6-20 Samsung Electronics...
-
Page 102: Stains On The Face Of Page
2. If the transfer roller is contaminated, run on the face of page will occur. DRUM Cleaning Mode Print 2 or 3 times. Digital Printer And perform Self-Test 2 or 3 times to remove contamination. Service Manual 6-21 Samsung Electronics... - Page 103 Mode to check if the Solenoid is normal.(refer to code 06) 3. If not solved by the above directions 1-2, Replace the engine board. 4. Turn the power off, delete the data of PC and try printing again. Service Manual 6-22 Samsung Electronics...
-
Page 104: No Dial Tone
4. Check that the SPEAKER is connected correctly. 4. Use Tech mode / Modem Test to check that the speaker and amplifier are working. Replace the LIU and Main B'd in sequence Notes: Product supports MF DIAL type only. Service Manual 6-23 Samsung Electronics... -
Page 105: Defective Fax Forward
2. Replace LIU. forwarded faxes by using a different sending fax machine (preferably from the same wall socket). 3. Check the cable between the set and the wall 3. Replace the line cord. socket for damage. Service Manual 6-24 Samsung Electronics... - Page 106 Solution Check that the RECEIVE Mode is set to FAX MODE. If the fault persists even when the RECEIVE Mode is changed to FAX MODE then replace the LIU and the Main B'd in sequence. Service Manual 6-25 Samsung Electronics...
-
Page 107: Defective Automatic Receiving
1. If the RECEIVE Mode is set to the TEL MODE, reset it MODE. to the FAX MODE. 2. Even after the RECEIVE Mode is changed to the FAX Mode, the problem persists then try to replace the LIU and the Main B'd in sequence. Service Manual 6-26 Samsung Electronics... -
Page 108: Copy Problems
Black page is printed out when Copying. Check and Cause Solution 1. Check for CIS problem on the Main PBA. 1. Check the CIS FFC Cable is properly connected. 2. Check shading profile. 2. Redo shading profile in the tech mode. Service Manual 6-27 Samsung Electronics... -
Page 109: Defective Image Quality
2. Check the gap between original and scanner 2. A gap of more than 0.5 mm can cause a blurred glass. image. Ensure rollers and cover close correctly. Replace as necessary. 3. Check printing quality. 3. See "Print" troubleshooting. Service Manual 6-28 Samsung Electronics... -
Page 110: Pc Scanning Problems
CIS Ass'y. 2. Check if the resolution is set too low in PC Scan 2. Teach the user about scanner resolution – refer to options. (Refer to User's Manual.) the User Guide. Service Manual 6-29 Samsung Electronics... -
Page 111: Redistributing Toner
Troubleshooting 6.9 Toner Cartridge Service Only toner cartridges supplied by Samsung should be used. Printing defects or set damage caused by the use of non-approved toner cartridges or un-licensed toner refills are not covered by the guarantee. 6.9.1 Precautions on Safe-keeping of Toner Cartridge Excessive exposure to direct light for more than a few minutes may cause damage to the cartridge. -
Page 112: Toner Low
It is therefore necessary to replace the cartridge even though there may be toner left in it. When this message occurs there are approximately 1,000 pages left. 6.9.4.4 Replace Drum - Explanation: The toner cartridge mechanical life is expired. - Solution: Replace the cartridge. Service Manual 6-31 Samsung Electronics... - Page 113 If you are using a USB hub try connecting directly to the back of the PC instead. Service Manual 6-32 Samsung Electronics...
- Page 114 Turn the PC and printer off, and reboot the system to print again. If not solved, double-click the printer in my computer If the regular fonts are not printed this time again. the cable must be defective so replace the cable with new one. Service Manual 6-33 Samsung Electronics...
- Page 115 2. Ensure that the correct driver is loaded. Use the driver supplied on the CD or downloaded from the Samsung web site. DO NOT use the Microsoft driver supplied with the Windows operating system. If the printer is a GDI or SPL type printer ensure that...
- Page 116 If there is a problem with the printer (out of toner, offline, out of paper etc.) the job may take a long time to delete as it must wait for a time out. Service Manual 6-35 Samsung Electronics...
-
Page 117: Windows Problems
If not check that the printer drivers are installed correctly 2. If the printer can print via a local connection check Printer Properties / Ports and ensure that a TCP/Ip port has been allo- cated to the printer. Service Manual 6-36 Samsung Electronics... -
Page 118: Syncthru Installation Problems
"sammon.dll" file in the windows\system32 directory then restart the spooler service and reinstall SyncThru. 'Unable to add the Port list of Samsung ports' Verify that your PC restarts after installing SyncThru. message appears when you add a port. - Page 119 This format is used throughout Samsung on all product ranges. Typically it is used for small components and electronic parts. This format is controlled by individual Samsung Divisions and is used on specific products, typically for mechanical parts. Type 2 format part numbers fall into 2 categories: Assemblies consisting of 2 or more parts.
-
Page 120: Main Exploded Views
Exploded Views & Parts List 7.1 Main Exploded Views Service Manual Samsung Electronics... -
Page 121: Exploded Views & Parts List
Exploded Views & Parts List 7.2 ADF Assembly Exploded Views Service Manual Samsung Electronics... -
Page 122: Exploded Views And Parts List
Exploded Views & Parts List 7.3 Platen Cover Assembly Exploded Views Service Manual Samsung Electronics... -
Page 123: Adf Platen Assembly Exploded Views
Exploded Views & Parts List 7.4 ADF Platen Assembly Exploded Views Service Manual Samsung Electronics... -
Page 124: Ope Unit Exploded Views
Exploded Views & Parts List 7.5 OPE Unit Exploded Views Service Manual Samsung Electronics... - Page 125 Exploded Views & Parts List 7.6 Pick-Up Unit Exploded Views Service Manual Samsung Electronics...
-
Page 126: Main Frame Assembly Exploded Views
Exploded Views & Parts List 7.7 Main Frame Assembly Exploded Views Service Manual Samsung Electronics... -
Page 127: Mp Tray Assembly Exploded Views
Exploded Views & Parts List 7.8 MP Tray Assembly Exploded Views Service Manual Samsung Electronics... -
Page 128: Fuser Unit Exploded Views
Exploded Views & Parts List 7.9 Fuser Unit Exploded Views Service Manual 7-10 Samsung Electronics... -
Page 129: Paper Path Assembly Exploded Views
Exploded Views & Parts List 7.10 Paper Path Assembly Exploded Views 11-3 11-2 11-1 Service Manual 7-11 Samsung Electronics... - Page 130 Parts List Service Parts List (Model code : SCX-4321/XEV) SA : SERVICE AVAILABLE SNA : SERVICE not AVAILABLE DNA : DELIVERY not AVAILABLE Drawer# SEC-Code Description & Specification Location Service 7.1-1 JC96-03392A ELA HOU-FRAME LOWER;SCX-4521F,SEC,WHITNE 7.1-2 JC59-00023A UNIT-LSU;ML-1610,-,-,16,20PPM,1 LIGHT SO L7012 7.1-3 JC39-00321A CBF HARNESS-LSU;SF-755P,#26,UL 1061,5/7/...
- Page 131 Parts List SA : SERVICE AVAILABLE SNA : SERVICE not AVAILABLE DNA : DELIVERY not AVAILABLE Drawer# SEC-Code Description & Specification Location Service 7.2-1-2-8 JC66-00556A IMPELLER-ADF;SCX-4216F,NYLON66,-,-,-,-,V 7.2-1-2-9 JC61-01178A BRACKET-M-GEAR;SCX-4521F,PC,2.7,110.76,7 7.2-1-3 JC92-01618A PBA SUB-ADF;SCX-4920N,DELL,-,ADF,-,-,-,1 7.2-1-4 JC63-00667A GROUND-P-ADF;SCX-4521F,C5210P,0.2,98.1,1 7.2-1-5 JC39-00407A CBF HARNESS-ADF;SCX-4521F,CBF,UL2835,16P 7.2-1-6 JC66-00560A ROLLER-DRIVE;SCX-4216F,CR+SUM24L,14,-,-, 7.2-1-7...
- Page 132 JC39-00408A CBF SIGNAL-CIS FFC;SCX-4521F,12PIN,FFC,8 7.4-1-5 JC66-00838A SHAFT-CIS;SCX-4521F,SUM,414.3,6,-,-,- 7.4-1-7 JB72-01136A PMO-HOLDER BELT;SCX-1105,POM,WHITE,T=2.0 7.4-1-8 JB72-00763A PMO-PULLEY;SCX-1110/XRX,-,POM,WHT,-,-,- 7.4-1-9 JB61-00109A SPRING ETC-BELT;SCX-1105,SUS304WPB,¥Õ0.8 7.4-1-12 JB96-01381A ELA UNIT-CORE;SCX-1100,SAMSUNG,CORE ASS' 7.4-1-14 6602-001067 BELT-TIMING GEAR;HIBER GLASS,T3.2,T80-40 7.4-2 JC97-02207A MEA-SCAN UPPER;SCX-4521F,SEC,-,SCAN UPPE 7.4-2-1 JC63-00661A COVER-M-SCAN UPPER;SCX-4521F,HIPS,2.5,43 7.4-2-2 JB68-00644A LABEL(P)-SHADING;COMMON,YOOPO PAPER ,T0. Z4177 7.4-2-3...
- Page 133 JC63-00623A GROUND-P-THV;ML-1610,SUS304CSP 1/2H,0.2, W3078 7.10-8 JC63-00626A GROUND-P-SAW;ML-1610,C5210P,0.2,27.9,49. W3079 7.10-9 JC97-02217A MEA UNIT-HOLDER_PAD;ML-1610,SAMSUNG,-,-, P0015 7.10-9-1 JC61-70911A SPRING ETC-EXIT ROLL FD;ML-165,SUS304 WP S0021 7.10-9-2 JC69-00846A PAD-FRICTION;ML-1610,NBB,1,5,39,-,GRAY,0 7.10-9-3 JC61-01169A HOLDER-M-PAD;ML-1610,PC,1.7,39.5,33.4,BL H4029 7.10-10 JC66-00815A LEVER-M-KICKER P/U;ML-1610,POM,-,10.5,31 R1120 7.10-11 JC97-02179A MEA UNIT-PICK UP GEAR;ML-1610,SAMSUNG,-, P2093...
- Page 134 G0448 7.10-26 JC61-01281A BRACKET-P-BAR_PICK_UP;ML-1610,SECC,T1.0, #N/A JC68-00638A MANUAL-(CARD)WARRANTY;COMMON,SER,RUSSIAN #N/A JC68-01508A MANUAL INSTALL-QIG;COMMON,XAA,9 LANGUAGE #N/A JC69-00822H BOX(P)-MAIN;SCX-4321,SC9,A1,FLEXO,SW,438 #N/A JC96-03352P ELA UNIT-DEVE INITIAL;SCX-4521F,SAMSUNG, #N/A JC96-03377C ELA HOU-COVER_3IN1;SCX-4321,SEC,WHITNEY, #N/A JC96-03523A ELA HOU-ENGINE;SCX-4321,SEC,-,ENGINE ASS #N/A JC99-01865B PAA WOOD-MATERIAL(A4);SCX-4521F,SEC,-,MA #N/A JC99-01866G INA-ACESSORY-XEV;SCX-4321,XEV,RUSSIA,WHI #N/A JC99-01872A PAA-PACKING;SCX-4521F ,SEA,-,PACKING,-,- #N/A JC99-01873H PAA-LABEL;SCX-4321,RU,-,LABEL ASS'Y,-,-...
- Page 135 Parts List SA : SERVICE AVAILABLE SNA : SERVICE not AVAILABLE DNA : DELIVERY not AVAILABLE Drawer# SEC-Code Description & Specification Location Service #N/A 6002-000440 SCREW-TAPPING;PWH,+,-,2,M3,L8,ZPC(BLK),S #N/A 6003-000196 SCREW-TAPTITE;PWH,+,B,M3,L10,NI PLT,SWRC Z4198 #N/A 6003-000261 SCREW-TAPTITE;BH,+,B,M3,L6,ZPC(YEL),SWRC #N/A 6003-000269 SCREW-TAPTITE;BH,+,-,S,M3,L6,ZPC(YEL),SW Z4170 #N/A 6003-000301 SCREW-TAPTITE;BH,+,S,M4,L6,ZPC(YEL),SWRC #N/A 6502-001093 CABLE CLAMP;DAWS-3NE,ID11*L34.8,-,NYLON6 C0002...
- Page 136 Parts List SA : SERVICE AVAILABLE SNA : SERVICE not AVAILABLE DNA : DELIVERY not AVAILABLE Drawer# SEC-Code Description & Specification Location Service #N/A 1003-001535 IC-MOTOR DRIVER;A3977SLP,TSSOP,28P,9.6X4 #N/A 1006-001224 IC-LINE TRANSCEIVER;74LVX161284,TSSOP,48 #N/A 1103-001183 IC-EEPROM;24C04,512x8,SOP,8P,5x4mm,2.5/5 #N/A 1105-001464 IC-DRAM;K4S641632,4MX16BIT,TSOP(II),54P, #N/A 1107-001286 IC-FLASH MEMORY;29LV160,2MX8/1MX16BIT,TS #N/A 1202-000164 IC-VOLTAGE COMP.;393,SOP,8P,150MIL,DUAL, #N/A...
- Page 137 Parts List SA : SERVICE AVAILABLE SNA : SERVICE not AVAILABLE DNA : DELIVERY not AVAILABLE Drawer# SEC-Code Description & Specification Location Service #N/A 2203-002398 C-CER,CHIP;22nF,10%,50V,X7R,1608 #N/A 2203-005249 C-CER,CHIP;100nF,10%,50V,X7R,1608 #N/A 2203-005819 C-CER,CHIP;1000nF,+80-20%,16V,Y5V,-,1608 #N/A 2402-001042 C-AL,SMD;100uF,20%,16V,GP,TP,6.6x6.6x5.4 #N/A 2402-001106 C-AL,SMD;33UF,20%,50V,WT,TP,8.3X8.3X6.3M #N/A 2402-001178 C-AL,SMD;10uF,20%,16V,WT,TP,4.3x4.3x5.8m #N/A 3301-000317 BEAD-SMD;120ohm,2012,TP,-,- #N/A...
- Page 138 Parts List SA : SERVICE AVAILABLE SNA : SERVICE not AVAILABLE DNA : DELIVERY not AVAILABLE Drawer# SEC-Code Description & Specification Location Service #N/A JC62-00148A SEAL-CAP SIDE;ML-1610,POLYURETHANE FOAM, #N/A JC62-00153A SEAL-BRKT CLEANING;ML-1610,POLYURETHANE #N/A JC62-00154A SEAL-OPC CLEAN_L;ML-1610,PTFE FELT+URETH #N/A JC62-00155A SEAL-OPC CLEAN_R;ML-1610,PTFE FELT+URETH #N/A JC62-00156A SEAL-BOSS_R;ML-1610,CR,BLACK,T5,-,D7.5,- #N/A...
- Page 139 Parts List SA : SERVICE AVAILABLE SNA : SERVICE not AVAILABLE DNA : DELIVERY not AVAILABLE Drawer# SEC-Code Description & Specification Location Service #N/A JC72-01329A PMO-AGITATOR_DOUBLE;ML-6060,ABS+GF20%,BL #N/A JC72-10924A PPR-FILM AGITATOR;ML-5000,PET T0.1,NTR,- #N/A JC72-10925A PPR-FILM SUPPORT AGI;ML-5000,PET T0.3,NT #N/A JC72-41191A PMO-BEARING SHAFT;ML-6000,POM,WHT,-,M90- #N/A JC73-00201A REX-BLADE CLEANING;ML-1610,POLYURETHANE #N/A...
-
Page 140: Block Diagram
Block diagram 8. Block Diagram 8.1 System Block Diagram Service Manual Samsung Electronics... -
Page 141: Connection Diagram
Connection Diagram 9. Connection Diagram Service Manual Samsung Electronics... -
Page 142: Schematic Diagram
Schematic Diagram 10. Schematic Diagrams 10.1 Main Board (1/12) Service Manual 10-1 Samsung Electronics This Document can not be used without Samsung’s authorization. -
Page 143: Main Board
Schematic Diagram Main Board (2/12) Service Manual 10-2 Samsung Electronics This Document can not be used without Samsung’s authorization. - Page 144 Schematic Diagram Main Board (3/12) Service Manual 10-3 Samsung Electronics This Document can not be used without Samsung’s authorization.
- Page 145 Schematic Diagram Main Board (4/12) Service Manual 10-4 Samsung Electronics This Document can not be used without Samsung’s authorization.
- Page 146 Schematic Diagram Main Board (5/12) Service Manual 10-5 Samsung Electronics This Document can not be used without Samsung’s authorization.
- Page 147 Schematic Diagram Main Board (6/12) Service Manual 10-6 Samsung Electronics This Document can not be used without Samsung’s authorization.
- Page 148 Schematic Diagram Main Board (7/12) Service Manual 10-7 Samsung Electronics This Document can not be used without Samsung’s authorization.
- Page 149 Schematic Diagram Main Board (8/12) Service Manual 10-8 Samsung Electronics This Document can not be used without Samsung’s authorization.
- Page 150 Schematic Diagram Main Board (9/12) Service Manual 10-9 Samsung Electronics This Document can not be used without Samsung’s authorization.
- Page 151 Not Us e d BASI BASIC CHIN CHINA/ KO REA MICOM (U1) MICOM (U1) JB JB13-00004A 13-00004A JB JB13-00035A 13-00035A LC LCD JC07-00003A JC07-00003A JC07-00008A JC07-00008A Service Manual 10-10 Samsung Electronics This Document can not be used without Samsung’s authorization.
- Page 152 Schematic Diagram Main Board (11/12) Service Manual 10-11 Samsung Electronics This Document can not be used without Samsung’s authorization.
- Page 153 Schematic Diagram Main Board (12/12) Service Manual 10-12 Samsung Electronics This Document can not be used without Samsung’s authorization.
- Page 154 R115 KPI-512 50V103 4.7K D GND D GND Title WHITNEY PLUS-V1 SUN-KOREA ELECTRONIC CO.,LTD DESIGNED CHECKED APPROVED Drw.No SMPS Rev. .rev. Ref. No Size Date 2005/04/19 Service Manual 10-13 Samsung Electronics This Document can not be used without Samsung’s authorization.
- Page 155 R115 KPI-512 50V103 4.7K D GND D GND Title WHITNEY PLUS-V2C SUN-KOREA ELECTRONIC CO.,LTD DESIGNED CHECKED APPROVED Drw.No SMPS Rev. .rev. Ref. No Size Date 2005/04/19 Service Manual 10-14 Samsung Electronics This Document can not be used without Samsung’s authorization.
- Page 156 12KF (2012) (2012) (2012) R518 24VS2 MGR1W15MF R123 Q103 B1151-Y R121 (2012) 3.9K 24VS2 U103 (2012) KA7818 Q104 R124 KST2222A 1W1.2K (SMD) R122 C113 25V47uF (2012) Service Manual 10-15 Samsung Electronics This Document can not be used without Samsung’s authorization.
- Page 157 150KF (2012) 1/4W4.7 D304 C305 D305 THV READ (2012) R308 1N4148 104J 1N4148 CN1-#12 (2012) THV_READ ZD302 C307 IC102/A 2.7B 2A473J R310 SOP-14 (2012) 150J (2012) Service Manual 10-16 Samsung Electronics This Document can not be used without Samsung’s authorization.
- Page 158 +5V_______ P_EXIT____ THV_PWM___ THV_EN____ MHV_PWM___ (2012) (2012) THV_READ___ BIAS_PWM___ FAN_______ LED1 P_EMPTY____ (2012) (2012) CRU_DET___ KEY_IN____ (2012) TONER_SAVE 10nF LED2 10nF ERROR_____ (2012) READY______ TNR101 07N561K Service Manual 10-17 Samsung Electronics This Document can not be used without Samsung’s authorization.
- Page 159 Schematic Diagram LD B’d (1/1) Service Manual 10-18 Samsung Electronics This Document can not be used without Samsung’s authorization.
-
Page 160: Reference Information
• Spring Hook Standard : For general use • Tweezers Standard : For general home use, small type. • Cotton Swab Standard : For general home use, for medical service. • Software (Driver) installation CD ROM Service Manual 11-1 Samsung Electronics... -
Page 161: Service Manual
Host Based Printing Hard Disk Drive High temperature and high marshy place high voltage HVPS High Voltage Power Supply interface Input and Output integrated circuit Intelligent Drive electronics or Imbedded Drive Electronics Service Manual 11-2 Samsung Electronics... - Page 162 Quick Printer Initiating Device Q ty quantity Random Access Memory Read Only Memory Second Cassette Feeder SMPS Switching Mode Power Supply SPGP Samsung Printer Graphic Processor Samsung Printer Language Spool Simultaneous Peripheral Operation Online switch sync synchronous or synchronization Universal Serial Bus WECA...
-
Page 163: Selecting Printer Locations
• Provide the proper environment : - A firm, level surface - Away from the direct airflow of air conditioners, heaters, or ventilators - Free of extreme fluctuations of temperature, sunlight, or humidity - Clean, dry, and free of dust Service Manual 11-4 Samsung Electronics... -
Page 164: Sample Tests Patterns
The life of the toner cartridge, developer cartridge and printing speed are measured with the pattern shown below. The A4 ISO 19752 standard pattern samples are reproduced reduced to 70% of the actual A4 size. A4 ISO 19752 Standard Patterns Service Manual 11-5 Samsung Electronics... - Page 165 System Overview SCX-4517F is made of Main Control part, Operation Panel part, PC Interface part, Scan part, Line Interface part, Power part. Each part is independent with each other and the design concept is common use/standard design rule. Chorus2 ASIC which is made for only printer is used in the Main Control part, and another Micom which can communicate with Chorus2 through UART for Key-Scan, LCD display, LED control, etc..
- Page 166 2. Main Board Control Part Main control part of SCX-4517F is made of ASIC(CPU, Image processor, PC I/F part include, Scan interface part, FAX Modem part and Printing process I/F part. CPU handles the BUS control, I/O interface, scan interface, PC interface and other miscellaneous driver circuit.
- Page 167 -SDRAM : SDRAM is used for Print Buffer, Scan buffer when scanning, ECM Buffer when FAX Receiving, and system working memory. .Capacity : 16 Mbyte .Access Time : 66MHz based on system bus clock. .Data Backup : 48 Hours .Backup Battery Charging Time : 100hours when completely discharged. 3.
- Page 168 - Phase : 2-2 Phase 2000PPS at Quick Scan, 2-2 Phase 1000PPS AT Fine Scan, 2-2 Phase 667PPS AT Super Fine Scan 4. Fax Modem Part 1) Modem Part The modem part is consist of FM336(FAX Modem chip), LIU(Line Interface Unit) and modem analog front end(AFE) functional part.
- Page 169 6. Line Interface Part Line interface part helps the machine connect to the PSTN or PABX Line and is made of almost primary circuit. Its main function is Line connection, Line state monitoring and TAD interface that enables a extension telephone or TAD machine to connect to the SCX-4517F machine. 7.
- Page 170 8. Deverope Process ▶ Developing Method : Non magnetic 1 element contacting method ▶ Toner : Non magnetic 1 element shatter type toner ▶ Toner Qty : 35 gf / 60gf (1k / 3k) ▶ The life span of toner 1k/3k sheets (ISO 5% Coverage ) ▶...
- Page 171 (b) When Copy : Vertial: 11.8 Line/mm, Horizontal: 23.6 Pels/mm :600x300dpi(ADF) Vertial: 23.6 Line/mm, Horizontal: 23.6 Pels/mm :600x600dpi(Platen) 3) Half Tone (Gray Scale) : 256 Levels 4) Scan Line Time (a) Tx ▶ Normal : 1.5 ms/Line ▶ Fine : 1.5 ms/Line ▶...
- Page 172 10) Document Scan sensor (a) Type : Photo interrupt (b) Position : ADF PBA (c) LED - Max current : 50mA - Max Voltage : 3.3V (d) Output - Logic "H" : Off(No Position),No Paper - Logic "L" : On (Doc Position),Paper (e) LEVER-SENSOR SCAN : Scan Lower Torsion Spring 10.
- Page 173 3) LCD Part -Number of Characters : 16 Characters x 2 line ▶ Clock, Date display ▶ System Status display ▶ Alarm, Error Message display ▶ Function Dialog Message display...
Need help?
Do you have a question about the SCX-4521F Series and is the answer not in the manual?
Questions and answers