
Related Manuals for Dimplex DAC12004RC


Summary of Contents for Dimplex DAC12004RC
- Page 1 Model DAC12004RC Please read this manual carefully before use and keep it for future reference.
-
Page 2: Table Of Contents
Warranty ............14 Introduction. Thank you for choosing a Dimplex portable reverse cycle air conditioner. This manual contains information, regulations and warnings which are of fundamental importance if the appliance is to be installed correctly and the highest performance, in the safest possible conditions is to be obtained.We suggest that you read the manual carefully before installing... -
Page 3: Features
Reverse cycle operation transforms your air conditioner into a room heater. Specifications. DAC12004RC Cooling Capacity 12000BTU/hr 3024 Kcal/hp 3529 watts... -
Page 4: Important Safeguards
IMPORTANT SAFEGUARDS. • The air conditioning unit must always be stored and transported upright, otherwise you may cause irreparable damage to the compressor; in case of doubt we suggest you wait for at least 24 hours before you start the air-conditioning unit. •... -
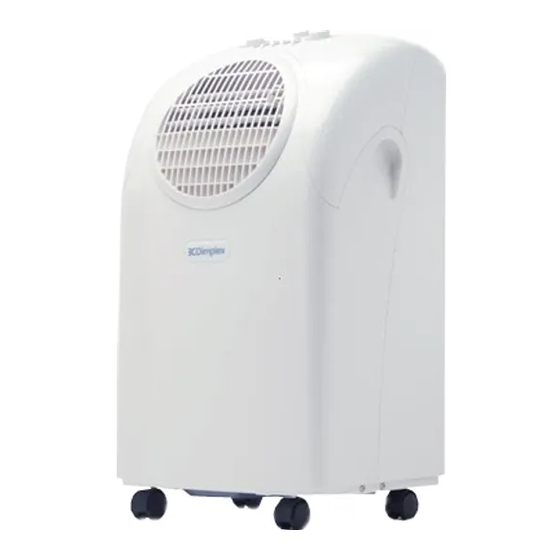
Page 5: Parts
• Please read the instructions carefully and save them in a safe place for future reference. Know your Air Conditioner. 1. Control panel 7. Exhaust air outlet 2. Air outlet 8. Cord storage 3. Handle 9. Water stopper (rubber plug inside) 4. -
Page 6: Accessories
ACCESSORIES. 1. Adaptor - for insertion over hose and into back of the air conditioner 2. Exhaust hose 3. Foam strip - for filling the open window space and with hole for connection to exhaust hose 4. Foam strip - for filling the open window space 5. -
Page 7: Installation
INSTALLATION Positioning of the unit This unit is a PORTABLE AIR CONDITIONER. It can be moved from room to room, so the cooling or heating can follow you anywhere.The installation is easy, beneath a window or wall. Foam Please refer to either of the following ways – strips 1. -
Page 8: Mounting Of The Exhaust Pipe
Mounting of the exhaust pipe 1. The supplied exhaust hose can be extended from 50cm to 150cm for mounting. It is recommended that you use the hose in the shortest possible length. 2. Take care to prevent any bow or bend in the middle of the exhaust hose, as this will trap hot exhaust air, which will radiate into the room and cause this unit to shut itself... -
Page 9: Adding Water
Adding Water. An added feature of these models. Humidity absorbed from the air condenses at the Evaporator, turns into water and is collected in the internal tank.When enough water is collected it is pumped up and over the condenser, assisting the cooling of the refrigerated gas, increasing the COOLING CAPACITY. -
Page 10: Operation
OPERATION. 1. Power indicator 2. Fan operating indicator 3. Cooling operating indicator 4. FULL WATER indicator 5. Heating Operation Indicator. 6. Thermostat. 7. Selection switch. Fan Only, 8. Low fan Cool, High fan Cool, 9. Low Fan Heat, High Fan Heat. 10. - Page 11 Regulating air flow direction Push the lever up or down to direct the air flow direction. NOTICE! To prolong the compressor’s life, the compressor will only work 3 minutes after you switch the unit on or re-switch on. The cooling system will switch off if the ambient temperature is lower than the set one.
-
Page 12: Drainage
DRAINAGE. During the process of cooling, water will be generated from the air and collected in the water tank inside the unit.When the tank is full, the compressor will stop and the Full Water indicator on the control panel will come on to remind you to empty the water tank. -
Page 13: Maintenance
MAINTENANCE. Always unplug the unit from the mains before beginning the cleaning. Cleaning the housing • Use a soft, damp cloth to wipe the body clean. • Never use aggressive chemicals, gasoline, detergents, chemically treated cloths, or other cleansing solutions.These all could possibly damage the cabinet. Cleaning the filter •... -
Page 14: Trouble Shooting Guide
TROUBLE SHOOTING GUIDE. If the product is treated in the right manner, you should encounter no problems. In case of difficulties, please check the following points before consulting the maintenance service. Product does not work • Check whether the product is plugged in. No cool air •... -
Page 15: Warranty
Please note - When heating function is selected the system may need 15 minutes before warm air is expelled.
Need help?
Do you have a question about the DAC12004RC and is the answer not in the manual?
Questions and answers