Table of Contents
Advertisement
Quick Links
Advertisement
Table of Contents

Related Manuals for Kathrein UFS 903 si


Summary of Contents for Kathrein UFS 903 si
- Page 1 Operating manual English UFS 903 si/sw...
-
Page 2: Preface
We want you a good reception and hope you will enjoy using your new HDTV receiver. Your KATHREIN team The difference between PAL and HDTV High-resolution TV is characterised by a signifi cantly higher number of picture lines on the TV set. -
Page 3: Table Of Contents
List of contents Preface............................ 2 List of contents ........................3 Safety instructions - Important Information ................ 6 Important Information ......................8 Receiver features/scope of supply ..................10 Features..........................11 Connection and setup ......................12 First installation ........................18 General operating instructions ..................46 Alphanumeric Inputs ...................... - Page 4 List of contents Editing the channel list ....................... 71 Calling up the “Edit TV Channellist” menu ................71 Selecting the channel list/favourites list to be edited ............71 Selecting the channels to be edited ..................72 Editing channels (channel lists) ................... 72 Move ..............................
- Page 5 List of contents Main menu - Service menu ....................103 Software update ........................ 103 Software Update over air ......................... 104 Software updating via the USB port ....................106 Auto Software update ........................107 Factory Reset ........................108 USB Device Management ....................108 Manage data carrier .........................
-
Page 6: Safety Instructions - Important Information
Safety instructions - Important Information These two pages contain important information about operation, installation location and connection of the unit. Read these instructions carefully before setting up the unit. Mains cable Moisture, direct sunlight, heat, naked fl ames Make sure that the mains cable Protect the unit against moisture, (power supply cable) is not damaged. - Page 7 Safety instructions - Important Information Do not place any objects on top of Installation location the unit. Unless stated to the contrary All electronic equipment generates in the “Connection and Set-Up” and heat, However, the heating of this “Installation” sections in the manual unit lies within the permissible range.
-
Page 8: Important Information
Important Information The channels available on the satellites and transponders are subject to continual change. In such cases, it is necessary to reset the channels as the factory preset programming corresponds to the situation at the date of manufacture. The information for these settings can be found on the Internet or in relevant magazines. - Page 9 This unit makes use of legally protected technologies, which are protected by patents in the USA and also by other intellectual property rights in other countries. KATHREIN-Werke KG has obtained licences from Audio MPEG Inc. and Societa‘ Italiana per lo sviluppo dell‘elettronica, S.I.SV.EL, S.P.A to use these technologies. These licences carry certain restrictions, which apply also to you as the customer.
-
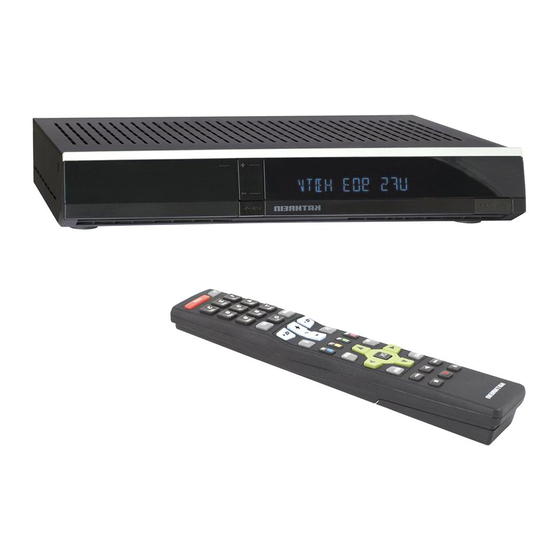
Page 10: Receiver Features/Scope Of Supply
Dolby Digital data stream AC 3 to a Dolby Digital system. The integrated Kathrein Convenience EPG is not only a clearly laid out electronic TV guide, but also enables programmes to be copied directly from the related EPG view to the timer. -
Page 11: Features
12-character alphanumerical display shows channel names (TV and radio) Videotext decoder with 800 page memory capacity and Videotext generation (only via Kathrein Convenience EPG with Scart) intuitive timer programming ¹ Language selection for multilingual Common Interface for one broadcasts CA module ²... -
Page 12: Connection And Setup
Connection and setup Electrical data stream output (SPDIF/Sony LNB loop-through output Philips Digital Interface Format) for Dolby LNB input Digital AC 3 audio Optical data stream output (SPDIF/Sony Video output (composite colour) Philips Digital Interface Format) for Dolby Scart socket for TV connection Digital AC 3 audio Data interface (for service/optional IR sensor) 1 x USB 2.0 port (USB-A connectors) - Page 13 Connection and setup To open the front fl ap, please apply light pressure here On/Off switch Front fl ap swung down 12 character alphanumeric display Common Interface for one CA module for Pay-TV cards Channel selection buttons Ejection button for CA module TV/R button (switching between TV and radio mode) The unit is not completely disconnected from the power supply (see chapter „Safety Instructions - Important...
- Page 14 Connection and setup Connect the Sat IF input on the receiver to the satellite reception system. Use a coaxial cable with a standard F connector. If the F standard connectors have not yet been fi tted on the cables, strip the insulation from the cables as shown in the following illustration and carefully screw the F standard connectors on to the ends of the cables to form a secure attachment.
- Page 15 Connection and setup For recording a broadcast you need an external USB storage medium (such as an external hard disk with a USB connection), which you can connect to the USB 2.0 interface at the rear of the receiver. The USB storage medium must be formatted in the format “FAT” or “FAT 32”. Instructions on how to format an external USB storage medium can be found in the section “Main menu”, “Service menu”, “USB device management”.
- Page 16 Connection and setup Dolby Digital system External hard disk Hi-fi system...
- Page 17 Connection and setup Connect the satellite receiver (HDMI or alternatively TV Scart socket) and the TV set using an HDMI or Scart cable (see “Connection example”). If your TV is stereo, you can receive the sound in stereo via the HDMI or Scart connection. For system reasons, the same video signals are present at both the TV Scart socket and also the video cinch output.
-
Page 18: First Installation
Connection and setup Before you start to use the UFS 903, read the chapters “Safety Instructions - Important Instructions”, “Important Information” and “Connection and Getting Started” through to the item “First Installation”. Do not connect the unit to the mains until all installation work has been properly carried out. - Page 19 Connection and setup Use the buttons to select whether to replace the factory pre-programmed channel list by a pre-sorted channel list for a specifi c country (at present only a limited number of pre-sorted channel lists are available). If you prefer to use the factory pre-programmed channel list, choose “No”...
- Page 20 Connection and setup Show 4:3 event Picture format Here you can select the type of screen display Select the type of screen display, depending mode for 4:3 broadcasts on a 16:9 TV set: on your setting for the TV format: - normal (pillarbox) - TV format “4:3”: Pan &...
- Page 21 Connection and setup When selecting satellite(s), make sure that your reception position is aligned to the desired satellite(s)! Number of Satellites Use the buttons to select how many satellites (max. 4) you would like to receive with your reception system. The following display appears (example): Use the buttons to select the fi...
- Page 22 Connection and setup LNB type (settings) Here use the buttons to select the LNB type used in your system. The selections available are “Universal” and “user-defi ned” (the selection “Wideband” is required only for single-cable feed systems). Universal: No further input is required, since all necessary frequency ranges are covered by a universal LNB. user-defi...
- Page 23 Connection and setup When selecting satellite(s), make sure that your reception position is aligned to the desired satellite(s)! Satellite selection Use the buttons and the button to select which satellites (max. 64) you would like to receive with your reception system. The following display appears (example): To deactivate a satellite, use the buttons to select it and then press button.
- Page 24 Connection and setup Position Use the buttons here to select the correct setting for your reception system (1, 2, 3 or 4). For the fi rst satellite on the tuner (item A on the system) For the second satellite on the tuner (item B on the system) For the third satellite on the tuner (item C on the system) For the fourth satellite on the tuner (item D on the system) Repetition...
- Page 25 Connection and setup You have now completed all settings for the fi rst satellite. Press the button to return to the “Satellite Selection Menu” and perform the settings in the same way for the remaining satellites. When you have fi nished confi guring the satellite, press the (green) button.
- Page 26 Connection and setup Confi gure satellites Press the button to call up the menu. Use the buttons and the button to select which satellites (max. 64) you would like to receive with your reception system. The following display appears (example): To deactivate a satellite, use the buttons to select it and then press button.
- Page 27 Connection and setup Use the buttons to select the frequency range to be changed (low, high or limit frequency). Use the buttons or the number keys to set the exact frequency for which your LNB was confi gured. Then press the button to save your LNB selection.
- Page 28 Connection and setup Use the buttons to select “Move to the null position” and then press button. The turntable will be instructed to move to its null position. Longitude Use the buttons to select the “Longitude” line, and use the number keys here to input your actual longitude.
- Page 29 Connection and setup Confi gure satellites Press the button to call up the menu. Use the buttons and the button to select which satellites (max. 64) you would like to receive with your reception system. The following display appears (example): To deactivate a satellite, use the buttons to select it and then press button.
- Page 30 Connection and setup user-defi ned: If you choose not to use a universal LNB, you must here set the frequency ranges for which your LNB was confi gured. Use the buttons to select the frequency range to be changed (low, high or limit frequency). Use the buttons or the number keys to set the exact frequency for which your LNB was confi...
- Page 31 “user- defi ned” (the selection “Wideband” is required only for single-cable feed systems such as the UAS 481 from Kathrein). Universal and Wideband: No further input is required, since all necessary frequency ranges are covered by a Universal/ Wideband LNB.
- Page 32 Connection and setup When selecting satellite(s), make sure that your reception position is aligned to the desired satellite(s)! Number of Satellites Use the buttons to select how many satellites (max. 2) you would like to receive with your reception system. Then use the buttons to select “Confi...
- Page 33 LNB type used in your system. The selections available are “Universal” and “user-defi ned” (the selection “Wideband” is required only for single-cable feed systems such as the UAS 481 from Kathrein). Universal and Wideband: No further input is required, since all necessary frequency ranges are covered by a Universal/ Wideband LNB.
- Page 34 Connection and setup The following display appears: Use the buttons to select the one cable system used in your reception system: KATHREIN UAS 481 (single-cable LNB) KATHREIN EXR 551 KATHREIN EXR 552 KATHREIN EXU 908 KATHREIN EXR 4 subscriber KATHREIN EXR 8 subscriber User-defi...
- Page 35 Connection and setup Transmission channel Use the buttons to switch to “Transmission channel” line use the buttons to select a free available transmission channel (0, 1, 2 or 3). Test connection Use the buttons to switch to the “Test connection” line and then press the button to test your settings.
- Page 36 Connection and setup Transmission channel Use the buttons to switch to the “Transmission channel” line and use buttons to select a free and available transmission channel (0 = 1400, 1 = 1516, 2 = 1632 or 3 = 1748). Test connection Use the buttons to switch to the “Test connection”...
- Page 37 Connection and setup Transmission channel Use the buttons to switch to “Transmission channel” line use the number keys to enter a free and available transmission channel (0 = 1400 or 1 = 1516). Test connection Use the buttons to switch to the “Test connection” line and then press the button to test your settings.
- Page 38 Connection and setup Transmission channel Use the buttons to switch to the “Transmission channel” line and use buttons to select a free and available transmission channel (0 = 1284, 1 = 1400, 2 = 1516, 3 = 1632, 4 = 1748, 5 = 1864, 6 = 1980 and 7 = 2096).
- Page 39 Connection and setup Transmission channel Use the buttons to switch to the “Transmission channel” line and use buttons to select a free and available transmission channel (0 = 1284, 1 = 1400, 2 = 1516 or 3 = 1632). Test connection Use the buttons to switch to the “Test connection”...
- Page 40 Connection and setup Transmission channel Use the buttons to switch to the “Transmission channel” line and use buttons to select a free and available transmission channel (0 = 1284, 1 = 1400, 2 = 1516, 3 = 1632, 4 = 1748, 5 = 1864, 6= 1980, 7 = 2096).
- Page 41 Connection and setup Refer to the documentation supplied with your system for the settings for the SCRs, frequencies and any PIN assigned to the tuner. You will fi nd there a printed list showing the assignment between the various SCRs and the respective transmission frequencies.
- Page 42 Connection and setup The following display appears: Press the button to confi rm the displayed Press the button to confi rm the displayed message. If no connection can be established to the single-cable system, check your settings message. Then press the button.
- Page 43 Connection and setup If you do not want to perform a channel search, press the (green) button and continue with the “Date and Time” section. If you want to perform a channel search, use the buttons to select “Yes”. The following display appears: Channel Search Mode Use the buttons to select the type of channels that are to be searched for.
- Page 44 Connection and setup Network search Use the buttons (On/Off) to select whether a network search should be performed. If you set the network search to “Off”, only the factory default transponders for the satellite(s) you previously selected will be searched for new as yet unsaved channels. If you set the network search to “On”, the transponder network enables additional transponders that have not yet been stored to be located.
- Page 45 Connection and setup Local time offset (UTC) Here you can use the buttons to select the local time offset to UTC (formerly GMT) (e.g. for Germany: + 1 hour). You can set the offset in 1 hour steps. The maximum offset is 12 hours (+ and -). Automatic clock change (summer/winter time) Here you can use the buttons to select whether the receiver should automatically change over...
-
Page 46: General Operating Instructions
General operating instructions In this chapter we would like to offer you a few basic tips and explanations about using the UFS 903. These are not specifi c to any one menu, rather they can be used as help and orientation in practically all menus. -
Page 47: Editing And Selection Options In The Menus
General operating instructions Confi rm the term input Cancel input without saving Cancel input without saving After you have input the desired expression, press the button in order to load the name/search expression or the button to abort the input. In some menus/displays this box is shown with a particular colour gradation. -
Page 48: Remote Control Code
3 for remote control code 4 If you have another Kathrein receiver in use that was supplied with the RC 660 remote control, you can use the UFS 903 remote control to operate that other receiver also. On the UFS 903 remote control, the codes for remotely controlling the RC 660 begin with “5”:... -
Page 49: Basic Operation In Tv Or Radio Mode (Live Operation)
Basic operation in TV or Radio mode (live operation) Currently unavailable Operation (on)/Standby (off) Select Teletext Numeric keypad Select main menu Volume “+” (louder) Volume “-” (softer) Mute Channel selection = Call up favourites list Call up Channel Information (Info Banner and Detail Information) = 1 x display of 4:3 broadcast = 2 x HDMI format... -
Page 50: Switching Between Tv And Radio Operation
Basic operation in TV or Radio mode (live operation) To switch between TV and radio mode, press the (blue) button. The volume is adjusted using the buttons. These settings can also be made at any time in the menu “Settings”, “TV, Video and Audio”. Show 4:3 event Press the (green) button. -
Page 51: Channel Selection From The Channel List
Basic operation in TV or Radio mode (live operation) Press the button to open the channel list. The following display appears: Information on selecting favourites lists: You can also call up the favourites lists directly from TV screen, using the (red) button. - Page 52 Basic operation in TV or Radio mode (live operation) Now use the respective coloured button to select the category in which you wish to open a channel list: (red) button: Call up the “Favourites lists” category Contains the following channel lists: - Favourites lists 1-8 (green) button: Call up the “Complete List”...
-
Page 53: Channel Messages
Basic operation in TV or radio mode (live operation) Channel information is shown for a few seconds each time the channel is changed (this can be changed under “Settings”, “Customize screen menu”) or displayed continuously by pressing the button. Press the button for the TV picture twice to view further information on the current broadcast, insofar as this is broadcast by the channel provider (see example screenshot below). -
Page 54: Calling Up The Options Channel
Basic operation in TV or Radio mode (live operation) If the channel OSD contains the following icon , this is a portal channel. Press the (yellow) button. The following display then appears (example): Use the buttons to select your desired channel option, and press the button to confi... -
Page 55: Select Subtitle
Basic operation in TV or Radio mode (live operation) If the channel banner includes the following symbol for subtitles , you can call up the “Subtitle” function as follows: Press the (yellow) button twice. The following display then appears (example): Use the buttons to select the desired subtitles and confi... -
Page 56: One-Touch Recording (Otr)
Basic operation in TV or Radio mode (live operation) To start recording directly to the hard disk, press the (red dot) button. The following display appears (example): recording will start automatically after fi ve seconds provided no changes to the start time/end time of the recording have been made. -
Page 57: Epg (Electronic Programme Guide)
EPG (Electronic Programme Guide) The EPG data is not available immediately after fi rst installation. The EPG data is only updated after the fi rst EPG update at night or the fi rst time you switch the receiver to standby mode. The EPG is opened by pressing the button. -
Page 58: Selection Options (Remote Control Buttons In The Epg)
EPG (Electronic Programme Guide) (red) button Open the recording schedule (display of all pre-programmed recordings/ reminders) button Navigation in the individual views (e.g. 15 minutes skip forward in the “Current” view) (yellow) button Open a preview of the currently selected channel (programme listings) (blue) button Open the category selection (sorting the programs by categories such as movies, sport, series ...) -
Page 59: Views Using The Epg
EPG (Electronic Programme Guide) The “Current” view can be called up at any time in EPG by pressing the (green) button. In the “Current” view you can see all channels displayed in the order of the overall channel list. Provided that EPG data has been supplied by the channel provider, the receiver shows for each channel the current program being shown, with start time, fi... -
Page 60: Preview View (Programme Listings)
EPG (Electronic Programme Guide) The “Preview” view can be called up at any time in EPG by pressing the (yellow) button. In the “Preview” view you will see all the programmes that will be shown on the channel previously selected in the “Current” view. Provided that EPG data has been supplied/transmitted by or by the channel provider, the receiver displays the programme lists for two weeks in advance. -
Page 61: Categories View
EPG (Electronic Programme Guide) The “Categories” view can be called up at any time in EPG by pressing the (blue) button. In the “Categories” view you can see all programmes sorted by category and starting time. The following categories are available for selection: Movies, Series, Sport, Children’s programs, Chat shows, News, Reportage, Art &... -
Page 62: Search Function
EPG (Electronic Programme Guide) The search function can be called up in EPG at any time by pressing the button. The following display appears (see screenshot on the right). button allows you to delete your entry. Search expressions are input using the number keys as described in “General Operating Instructions”,... -
Page 63: Recording Settings (Programming The Timer)
EPG (Electronic Programme Guide) (red dot) button allows you to set a programme for recording at any time. The programme to be recorded can be selected in any of the EPG views, provided (red dot) button appears at the bottom of the screen display. Programme appears in EPG: Select the desired programme and press (red dot) button. - Page 64 EPG (Electronic Programme Guide) Then press the buttons to access the “Recording” line. Use the buttons to select the desired recording mode. The following recording mode options are available: Once The recording will be performed once Daily The recording will be performed daily at the time you specify Weekly The recording will be performed once a week on the same day and at the same time...
-
Page 65: Recording "Once
EPG (Electronic Programme Guide) Use the buttons to select the “once” recording mode (see screenshot on the right). Use the buttons to switch to the “Date” fi eld and use the buttons to select the desired recording day. Then use the buttons to switch to the selection fi... -
Page 66: Recording "Weekly
EPG (Electronic Programme Guide) Remember that the day of the week for the desired programme is loaded in the recording schedule and you can make no further manual corrections to it! Therefore, before pressing button, select the programme on the day of the week that you will want to make the weekly recording in future. -
Page 67: Series Recording
EPG (Electronic Programme Guide) the selection fi eld “Start” and use the buttons or the number keys to select the desired recording start time. Then use the buttons to switch to the selection fi eld “End” and use the buttons or the number keys to select the desired recording end time. -
Page 68: Reminder Function (Switch Over To Programme)
EPG (Electronic Programme Guide) If you want to be reminded that a programme is about to start, you can activate the reminder function for the desired programme. reminder function is set up in exactly the same way as programming a recording. The only difference is that in the “Target”... -
Page 69: Timer List View
EPG (Electronic Programme Guide) The “Timer list” view can be called up at any time in EPG by pressing the (red) button. The following display appears (example): The recording schedule view shows you all the recordings and reminders that are scheduled (marked green). buttons allow recordings to be sorted into “Once”... -
Page 70: Editing A Recording
EPG (Electronic Programme Guide) Editing options for the reminder function: • Reminder is deleted • Edit the reminder When editing the target, you can change all parameters apart from the recording mode. Make the changes using the cursor ( ) buttons and the number keys. -
Page 71: Editing The Channel List
Editing the channel list All changes to the channel lists and favourites lists which you can make as described in the following chapter are not saved by the receiver unless, when you exit the menu by pressing the button, you answer “Yes, save changes” to the question “Save changes?”, using the button. -
Page 72: Selecting The Channels To Be Edited
Editing the channel list Select a channel in the selected channel list/favourites list using the cursor ( buttons (see example screenshot on the right). To select several channels that are listed directly following each other in the selected channel list, you can start block selection (see “Edit channels”... -
Page 73: Delete
Editing the channel list Channels that are deleted from a list other than a favourites list are deleted irrevocably and can only be restored by performing a new channel search. Deletion of channels from a favourites list is the only circumstance in which the channels remain present in the complete list;... -
Page 74: Lock
Editing the channel list Use the buttons to select “Lock” and confi rm your selection with the button. To lock the channel you must now enter your four-digit PIN code (factory setting: 0000). The following display appears (see example screenshot on the right): The locked channel is now displayed in the channel list with a padlock on the... -
Page 75: Start Blockselection
Editing the channel list Use the buttons to select “Start Blockselection” and confi rm your selection with the button. You can now use buttons to start block selection previously selected channel. This selects channels sequence in which they appear in the previously selected channel... -
Page 76: Lock
Editing the channel list See “Edit channels (channel lists)” “Lock”. See “Edit channels (channel lists)” “Start Blockselection”. buttons select “Rename favoritelist” and confi rm your selection with the button. You can now rename the favourites list you selected. The following display appears (see example screenshot on the right). -
Page 77: Recording Archive (Play Back/Edit Recordings)
Recording archive (play back/edit recordings) This function can be used only when an external USB storage medium (such as an external hard disk with USB connection) is connected and is formatted in the format “FAT” or “FAT32”. The recording archive is called up by pressing the button or the button. -
Page 78: Selection Options (Remote Control Buttons In The Recording Archive)
Recording archive (play back/edit recordings) (red) button Calling up the recording list (EPG) (green) button Call up ordering of recordings (ordered by date, ordered by title and ordered by duration) (yellow) button Display the recordings by channel (blue) button Display the recordings by categories (e.g. movies, news, sport, series ...) buttons Changes to the sorting in each selected category... -
Page 79: Views Of The Recording Archive (Sorting The Recordings)
Recording archive (play back/edit recordings) Navigation within each view of the recording archive is always performed using the cursor buttons ( buttons allow you to select individual recordings, and the buttons allow you to scroll from page to page in the currently selected list. Pressing the or the button exits the recording archive and returns to the TV picture. - Page 80 Recording archive (play back/edit recordings) (blue) button Ordered by categories/genres (you can choose between the available categories using buttons). Only those categories for which a recording is available are shown (red) button Recording list (see section “EPG”, item “Timer list view”)
-
Page 81: Playback Of A Recording
Recording archive (play back/edit recordings) Use the buttons to select the desired recording. Confi rm selection of the desired recording by pressing the button. Pressing the button again exits the recording archive and allows the desired recording to be viewed in full-screen mode. The playback starts at the last playback position. If playback is started by pressing the button, playback of the recording starts from the beginning and in full-screen mode. - Page 82 Recording archive (play back/edit recordings)
-
Page 83: Selecting The Recordings To Be Edited
Recording archive (play back/edit recordings) To select a recording, select the desired recording in the selected sort list, using the cursor ( ) buttons (see example screenshot on the right). After selection of the recording(s) to be edited, press the (red dot) button. -
Page 84: Lock
Recording archive (play back/edit recordings) Use the buttons to select “Lock” and confi rm your selection with the button. In order to activate the lock you must input your four-digit PIN code (factory setting: 0000). following display appears (see example screenshot on the right): The locked recording is displayed in the recording archive with a padlock on the right hand side, and in future can only be viewed by inputting the four-digit PIN code (factory setting: 0000). -
Page 85: Main Menu
Main Menu The main menu is opened by pressing the button. The following display appears: The programme showing on the currently selected channel always appears in the top right-hand corner of the main menu. The selected menus, sub-menus and items, as well as the parameters to be set, are each marked in colour. -
Page 86: Menu Overview
Main Menu Main Menu (call up by pressing the button) Edit Channel Parental Service Language Settings Channel List search Control Menu Setting First Installation Automatic (see section Locking (see the section Software Channel Edit channel list) Mainmenu “Connection and Update Search Set-Up”, “First installation”) -
Page 87: Main Menu - Channel Search
Main menu - Channel search After calling up the menu you will see the following display: You have three different search options: - Automatic Channel Search - Manual Channel Search - Search with service ID Use the buttons to select the Automatic All transponders for the satellite desired search type and confi... - Page 88 Main menu - Channel search - “free & scrambled” All channels are searched for - “only free” Only free-to-air channels are searched for - “only scrambled” Only encrypted channels are searched for To view encrypted channels you need an appropriate CA (Conditional Access) module and a valid smart card together with a valid subscription to the relevant Pay TV provider.
-
Page 89: Manual Channel Search
Main menu - Channel search You will be asked whether you wish to save the changes or not. Use the buttons to make the selection and confi rm with the button. If you select “Yes, save changes”, the newly found channels will be added to the end of the channel list. - Page 90 Main menu - Channel search Transponder Frequency Use the buttons (transponder frequency already saved) or the number keys (transponder frequency not yet saved) to select the transponder frequency on which the channel being sought is broadcast. The selection items: DVB Type, FEC, Polarisation and Symbol Rate need be entered only if the transponder has yet to be saved.
- Page 91 Main menu - Channel search Note: You can cancel the search at any time by pressing the button. After completion of the search, you will see the following display (example): Press the button. You will be asked whether you wish to save the changes or not. Use the buttons to make the selection and confi...
-
Page 92: Search With Service Id
Main menu - Channel search After calling up the menu you will see the following display: buttons allow you to select different sets of parameters for the search. Satellite Use the buttons to select the satellite that is transmitting the channels to be searched. Make sure your reception system is aligned to the selected satellite. - Page 93 Main menu - Channel search Then use the buttons to switch to the fi eld “Start search”. Pressing the button starts the search. Note: You can cancel the search at any time by pressing the button. After completion of the search, you will see the following display (example): Press the button.
-
Page 94: Main Menu - Parental Control
Main menu - Parental control After calling up the menu you will see the following display: In order to access this menu, you must input the four-digit PIN code (factory setting: “0000”). The following display then appears: In this menu you can set various restrictions/parental controls. - Page 95 Main menu - Parental control Defi ne new PIN Code Confi rm the selection with the button. The following display appears: Use the number keys to input your new four-digit PIN code. When the fourth digit has been input, the receiver will automatically skip to the next line “Confi...
-
Page 96: Main Menu - Settings
Main menu - Settings After calling up the menu you will see the following display: Use the buttons to select the desired menu and confi rm your selection using the button. See the section “Connection and Set-Up”, “First installation”. After calling up the menu you will see the following display: The individual items are selected using buttons. - Page 97 Main menu - Settings SCART HDMI TV aspect ratio HDMI Format Here you select the TV's picture format. Either Here you can select the picture resolution that will be sent to your TV set. Either 4:3 or 16:9 1080i (resolution 1920 x 1080, half-screen images) Picture format 576p (resolution 720 x 576, full-screen...
-
Page 98: Customize Screen Menu
Main menu - Settings After calling up the menu you will see the following display: The individual items are selected using buttons. The changes to the current settings can be performed using buttons or the number keys. Scope of functions Here you can confi... -
Page 99: Date And Time
Main menu - Settings Front display brightness Use the buttons to set the brightness of the receiver front display. Select the most comfortable setting for the ambient lighting. Loopthrough in standby Use the buttons (On/Off), to select whether the satellite signal present at the input to the receiver (IF input) should be looped through to the output from the receiver (IF output) when the receiver is in standby mode. -
Page 100: Common Interface
Main menu - Settings Always follow the operating instructions from your Pay-TV provider and the instructions supplied with the Smartcard and the CA module! Smartcards and CA modules are not included with this product! The cards and modules are issued by the respective pay TV providers, and contain the subscriber data and details of the channels for which the subscriber has paid. - Page 101 Main menu - Settings You can fi nd out from the “Main menu” under “Settings”, and the “Common Interface” menu which Conditional Access module is in the CI slot on the UFS 903 and which Smartcard is in which CA module. Confi...
-
Page 102: Antenna Configuration
Main menu - Settings Information for Conax, SECA, Viaccess and CryptoWorks users: Note that with monthly activation intervals, the channel providers have different procedures for activating pay TV cards. Activation may therefore be a few days before or after the beginning of a new month. During this activation period, the CA module and card must be in the slot, and the receiver must be turned on a set to the booked Pay TV channel. -
Page 103: Main Menu - Service Menu
Main menu - Service menu After calling up the menu you will see the following display: You can choose between various different menus: - Software update - Factory Reset - USB Device Management - Activate sleep timer addition, following additional information is displayed in the service menu under the “Activate sleep timer”... -
Page 104: Software Update Over Air
Main menu - Service menu After calling up the menu you will see the following display: receiver searches available updates. The search for available updates may take a few minutes. following display then appears (example): Update Software If new software is available (but only then), use the buttons (No/Yes) to select whether you wish to load the new software that is available. - Page 105 Main menu - Service menu The following display appears (example): download software channel lists may take up to an hour. Use the buttons to select from the displayed options and press button to confi rm your selection: • “Load in standby”: When the receiver is switched to “Standby” mode the new software is loaded •...
-
Page 106: Software Updating Via The Usb Port
∟ Subfolder: channellist You can also download the updates from the Internet. The address is: http://www.kathrein.de You will fi nd the software at “Service” → “Software and Download” → “Receiver” → “UFS 903” Press the button to start updating via the USB. -
Page 107: Auto Software Update
Main menu - Service menu Use the buttons to select the desired setting (Yes/No). Setting “No” The receiver does not search automatically every day for newly available software or channel lists when performing the EPG data update. You can however perform a software update manually at any time, as described in this section under “Software updating”. -
Page 108: Factory Reset
Main menu - Service menu After calling up the menu you will see the following display: You can here restore the channel list and the installation settings to the factory settings. Confi rm start pressing button. All settings will be reset to the status at the delivery of the unit. - Page 109 Main menu - Service menu Formatting When a partitioned USB storage medium is formatted, all the data saved on the storage medium, and all the partitions, are deleted and the entire hard disk is formatted with a single “FAT32” partition. The storage capacity of the USB storage medium to be formatted must not exceed two terabytes.
-
Page 110: Manage Channel List
Main menu - Service menu Use the buttons to select “Manage channel list”. Use the buttons to switch to the “USB data carrier” line. If several data carriers are connected to the receiver, you can use the buttons here to select the USB data carrier on which the channel list to be loaded is held, or the USB data carrier on to which the current channel list for your receiver should be stored/saved. -
Page 111: Activate Sleep Timer
Main menu - Service menu You can use the buttons to activate the sleep timer. Sleep Timer You can use the “Sleep Time” function to set an inactive time period after which the receiver will automatically switch into “Stand-by” mode. To do this, use the buttons to select “Yes”. -
Page 112: Operation Without The Remote Control
Operation without the remote control If you have misplaced your remote control, or if the batteries are fl at, you can still operate your receiver from the front panel. There are four buttons on the front of the receiver. Power switch (On/Off): The power switch allows you to switch the receiver on (operation) and off again. -
Page 113: Software Updating Via The Usb Port
Subfolder: ufs903 You can also download the updates from the Internet. The address is: http://www.kathrein.de You will fi nd the software at “Service” → “Software and Download” → “Receiver” → “UFS 903” 1. Use the remote control to switch the receiver into standby mode 2. -
Page 114: Troubleshooting
Troubleshooting In the event of a malfunction, fi rst check all the cable connections and operating states: 1. Receiver and TV set power plugs are connected to wall socket 2. Antenna cables are connected to the receiver input 3. Receiver and TV set are correctly connected to each other by a HDMI or Scart or cinch cable 4. -
Page 115: Technical Appendix
Technical appendix Type UFS 903si UFS 903sw Order no./colour 20210149/silver 20210137/black RF section Sat IF band 950-2150 Input level band dBµV 44-83 TV system, video Modulation, FEC, demultiplexer DVB-S/DVB-S2 standard CCIR 601 (720 x 576 lines), 576i, 576p, Video resolution 720p, 1080i Video decryption MPEG-2, MPEG-4-compatible... -
Page 116: Sat If Connections
Technical appendix Overvoltage protection KAZ 11/KAZ 12... -
Page 117: Party Systems (8 X Sat-If), Multifeed
Technical appendix Overvoltage protection KAZ 11/KAZ 12... -
Page 118: Single-Cable Systems
Technical appendix Overvoltage protection KAZ 11/KAZ 12... - Page 119 Technical appendix Overvoltage protection KAZ 11/KAZ 12...
-
Page 120: Short Technical Guide
Short technical guide AC 3 DiSEqC™ components Output for Dolby Digital signal If DiSEqC™ switching matrices are cascaded, the master receiver must transmit the DiSEqC™ ASTRA signal several times, so that all DiSEqC™ multi- SES (Société Européene des Satellites) satellite switches in the cascade receive their commands. - Page 121 Short technical guide HDCP – High-bandwidth Digital Content Pay TV Protection Television channels available on subscription Encryption system which protects the HDMI and (e.g. Sky). Encrypted transmitters which can DVI interfaces for secure transmission of video only be decrypted by using the appropriate and audio data.
- Page 122 Short technical guide VCR/PVR connection Connection for an external recorder (such as a Video signal made up of three individual colour video or DVD recorder) signals (red, green, blue) Video-Bit-Rate SAT IF signal The video bit rate describes the quantity of data Receiver input signal from the digitised video signal that is transmitted per second.
-
Page 123: Service
Service If, despite studying this operating manual, you still have questions about getting started with the unit or using it correctly, or if unexpected problems occur, please contact your specialist dealer. The UFS 903 device label is located on the bottom side of the unit. The label features the following information: type description (e.g. - Page 124 Internet: http://www.kathrein.de KATHREIN-Werke KG • Anton-Kathrein-Straße 1 - 3 P.O. Box 100 444 • 83004 Rosenheim • GERMANY...
Need help?
Do you have a question about the UFS 903 si and is the answer not in the manual?
Questions and answers