Table of Contents
Advertisement
Advertisement
Table of Contents

Related Manuals for Simmons SD7K


Summary of Contents for Simmons SD7K
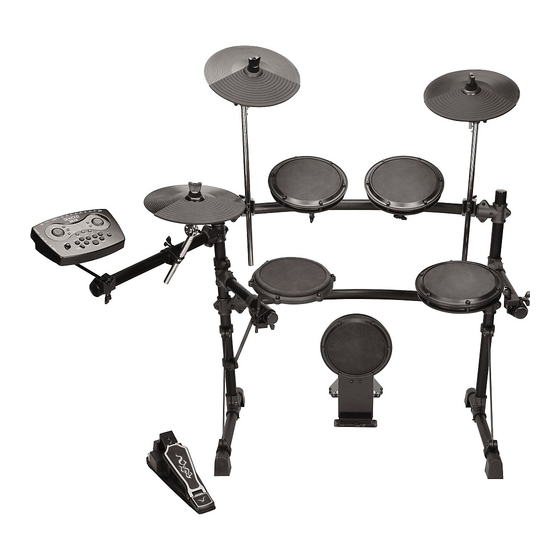
- Page 1 SD7K Digital Drum Kit User Manual www.simmonsdrums.net...
- Page 2 FCC Statements 1. Caution: Changes or modifications to this unit not expressly approved by the party responsible for compliance could void the user’s authority to operate the equipment. 2. Note: This equipment has been tested and found to comply with the limits for a Class B digital device, pursuant to Part 15 of the FCC Rules. These limits are designed to provide reasonable protection against harmful interference in a residential installation.
- Page 3 Power Supply • Turn the power switch OFF when the SD7K is not in use. • The AC adapter should be unplugged from the AC outlet if the SD7K is not to be used for an extended period of time.
- Page 4 SD7K Setup Setup your SD7K kit following the included assembly instruction sheet. SD7K User’s Manual...
-
Page 5: Table Of Contents
Side Panel Connections Pads and Pedals Audio Equipment Headphones MP3/CD Player Power Supply Power Switch Using the SD7K Pads Playing the Pads Metronome Kit Mode Selecting a Drum Kit Global reverb Voice Mode Selecting the Drum Voice Adjusting Pad Level... -
Page 6: Panels
3-digit LED In Kit mode, the buttons can play the pad voices. This LED is the main display device of the SD7K, In Voice Mode, they select the pad to be edited which will show the parameters of the current menu. -
Page 7: Rear Panel
Line output jacks Stereo output connection to an audio system or drum amplifier such as the Simmons DA50 or DA200S. AUX input jack This stereo input jack is for an external sound source such as an MP3 or CD player. -
Page 8: Connections
Pads and Pedals CAUTION! To avoid damage, turn OFF the SD7K’s power switch and all related devices prior to connecting or disconnecting cables. Pads and Pedal: Using the provided cables, connect each pad to its corresponding trigger input jack, following the marking on the cables. -
Page 9: Audio Equipment
SD7K audio equipment When using an amplifier such as the Simmons DA50 or DA200S, connect the Output L/MONO and R jacks on the rear panel to the input of the amplifier. (For mono playback, use the L/MONO jack; for stereo playback, connect both L/MONO and R jacks.) -
Page 10: Using The Sd7K Pads
• Splash: Step fully on the pedal and release it immediately metronome The SD7K includes a Metronome feature with two types of sounds: Click (Bell sound on the first beat, and click sound on the other beats) or Vocal Counting (“one”, “two”, “three”, “four”, …). -
Page 11: Kit Mode
SD7K kit mode If the SD7K is not yet in KIT Mode, Press the [KIT] button to enter the Kit Mode. The Kit indicator will light up. In the KIT Mode, you can select the Drum or Percussion Kit to play. -
Page 12: Voice Mode
If the SD7K is not yet in VOICE Mode, press the [VOICE] button to enter the Voice Menu. The Voice indicator lights up. Now the [VOICE] button will page through the Voice Menu. In the VOICE Mode, you can select the voice for each pad and adjust the level, pan and tuning of the pad. -
Page 13: Adjusting Pad Level
Make sure you save your customized kit; otherwise, your changes will be lost when you select another kit or turn off the SD7K. Kits 001 ~ 020 are factory presets. Customized kits can be saved in User kits 021 ~ 050. -
Page 14: Utility Menu
‘o’ displayed on the first digit of the LED. Hitting one pad may trigger the sound from another pad unintentionally. This effect can be eliminated by setting this parameter to a higher value on the pad that is mistriggering. SD7K User’s Manual... -
Page 15: Curve
Restoring the factory preset can be implemented by the following operation: Hold down both TEMPO+ and TEMPO- when the SD7K is powered up. This function will replace the current settings of the following parameters by their default preset values: •... -
Page 16: Song Mode
Song mode If the SD7K is not yet in SONG Mode, press the [SONG] button to enter the Song Menu. Now the [SONG] button will page through the Song Menu. The Song indicator lights up. In the SONG Mode, you can select the song number, and adjust the volume of the song’s accompaniment and drum part. -
Page 17: Accompaniment Volume
There are two choices: “LoC” for local machine (50 internal songs, default setting) or “EtN” for controlling an external sequencer connected to the MIDI Out of the SD7K using MIDI Clock. See the MIDI section of the manual for details. -
Page 18: Midi And Usb
The sound module receives MIDI messages via MIDI input only, not from the pads anymore. However, the pad trigger data is still sent to the MIDI Output, therefore looping externally the MIDI Out of the SD7K back to its MIDI In will enable the pads to play the voices from the sound module. - Page 19 Start/Stop button. 1. Connect the MIDI Out of the SD7K to the MIDI In of your sequencer. If you are using a software sequencer on a computer, you can simply connect the USB port of the SD7K to a USB port of your computer using a single USB A-B cable.
-
Page 20: Voice List
Electronic Bass Drum ‘60’s Snare Edge Simmons Snare 2 122 Funk Tom 2 House Kick 1 ‘60’s Snare 100 Simmons Snare 3 123 Funk Tom 3 House Kick 2 506 Snare Simmons Snare 4 124 Fusion Tom 1 House Kick 3... - Page 21 228 TR808 Cymbal 2 287 Guiro Short Simmons V1 Tom 1 229 TR808 Cymbal 3 288 Guiro Long 182 Simmons V1 Tom 2 230 TR909 Cymbal 1 289 Claves 183 Simmons V1 Tom 3 231 Junkyard Cymbal 1 290 Woodblock...
-
Page 22: Drum Kit List
User 7 - Cartoon (User 17 - 808) Metal House User 8 - Voice Orchestral (User 18 - House) User 9 - Simmons 3 Fusion (User 19 - Fusion) Studio Brush User 10 - Simmons 4 Junkyard (User 20 - Brush) (User 21 - 60’s) -
Page 23: General Midi Voice List
SD7K General MIDI voice list SYNTH PAD PIANO STRINGS Acoustic Grand Piano Violin Pad 1 (new age) Bright Acoustic Piano Viola Pad 2 (warm) Electric Grand Piano Cello Pad 3 (polysynth) Pad 4 (choir) Honky-Tonk Piano Contrabass Electric Piano 1... -
Page 24: Percussion Set List
High Agogo Low Agogo Cabasa Maracas Short Whistle Long Whistle Short Guiro Long Guiro Claves Hi Wood Block Low Wood Block Mute Cuica Open Cuica Mute Triangle Open Triangle Shaker Jingle Bell Belltree Castanets Mute Surdo Open Surdo SD7K User’s Manual... - Page 25 SD7K Percussion Set list cont... Jazz Brush Orchestra Effects Ch 10 PC Ch 9,16 PC Closed Hi-Hat 2 Buzz Pedal Hi-Hat Gong Open Hi-Hat 2 Scratch FX1 Ride Cymbal 1 Scratch FX2 Scratch FX3 Scratch FX4 Gtr.Cut Noise Gtr.Cut Noise 2 (up)
-
Page 26: Midi Implementation Chart
: Song Select : Tune System : Clock Real Time : Commands START and STOP only : Local ON/OFF : All Notes OFF Messages : Active Sense : Reset 0: YES * Valid RPN # 0,1,2 X: NO SD7K User’s Manual... - Page 27 Two (2) Year Limited Warranty Subject to the limitations set forth below, Simmons® hereby represents and warrants that the components of this product shall be free from defects in workmanship and materials, including implied warranties of merchantability or fitness for a particular purpose, subject to normal use and service, for two (2) year to the original owner from the date of purchase.
- Page 28 www.simmonsdrums.net...
Need help?
Do you have a question about the SD7K and is the answer not in the manual?
Questions and answers