Table of Contents
Advertisement
Quick Links
Advertisement
Table of Contents

Related Manuals for JVC XA-MP101B/W

Summary of Contents for JVC XA-MP101B/W
-
Page 1: Digital Audio Player
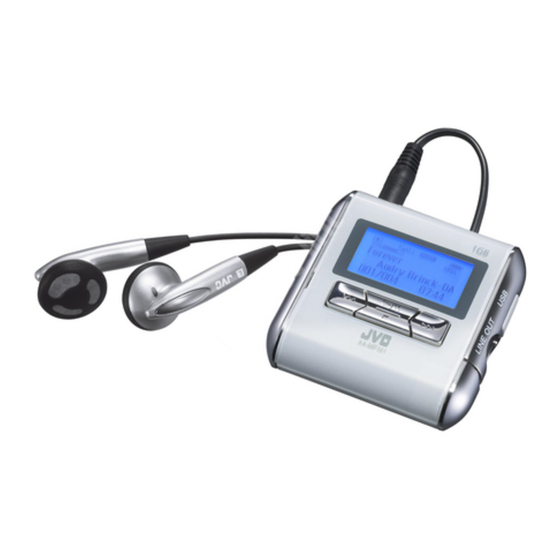
DIGITAL AUDIO PLAYER XA-MP51A/W/S XA-MP101B/W Thank you for purchasing this JVC product. Please read these instructions carefully before starting operation to be sure to obtain optimum performance and a longer service life from the unit. INSTRUCTIONS LVT1431-002B [J, C, B, US]... -
Page 2: Cautions
CAUTIONS Listening precautions • Do not play your Headphones at a high volume. • Hearing experts advise against continuous extended play. • If you experience a ringing in your ears, reduce volume or discontinue use. • Do not use while operating a motorized vehicle. It may create traffic hazard and is illegal in many areas. - Page 3 Avoid using the player in the following locations since they can cause malfunctioning. 1. Bathrooms and other moisture-prone places 2. Warehouses and other dusty places 3. Very hot places near heating appliances, etc. XA-MP51A/W XA-MP101B JVC Americas Corp. 1700 Valley Road, Wayne New Jersey 07470 973-317-5000 CAUTIONS...
- Page 4 CAUTIONS Do not leave the player exposed to direct sunlight for long periods of time This may deform or discolor the player and may also cause malfunctioning. CAUTION: • Do not place any naked flame sources, such as lighted candles, on the apparatus.
-
Page 5: Table Of Contents
TABLE OF CONTENTS CAUTIONS ... 1 TABLE OF CONTENTS ... 4 GETTING STARTED... 5 INSTALLING BATTERY ... 5 INSTALLING USB DRIVER (FOR WINDOWS 98SE ONLY) ... 6 CONNECTING TO PC... 7 CONNECTING EXTERNAL AUDIO EQUIPMENT ... 8 PARTS OF THE DIGITAL AUDIO PLAYER ... 9 TURNING POWER ON/OFF ... -
Page 6: Getting Started
GETTING STARTED INSTALLING BATTERY Remove the battery compartment cover and insert one LR03 (AAA) alkaline battery (not supplied) matching the polarities (+ and -) indicated on the rear side of the player, then replace the compartment cover. Battery indicator The battery indicator shows the remaining battery level. When the battery level becomes low, "Low Battery"... -
Page 7: Installing Usb Driver (For Windows 98Se Only)
INSTALLING USB DRIVER (FOR WINDOWS 98SE ONLY) Follow these instructions to load software that enables a computer to recognize the Digital Audio Player. Make sure that no programs, such as games or anti-virus software, are running on the PC. If programs are open, close and exit from the programs before proceeding. -
Page 8: Connecting To Pc
GETTING STARTED CONNECTING TO PC You can transfer MP3 and WMA format music files from the PC to your Digital Audio Player through USB port. USB2.0 (480Mbps speed is not supported.) For Windows 98SE user: Before connecting your player to the computer for the first time, you need to install the USB driver from the supplied CD-ROM into your computer. -
Page 9: Connecting External Audio Equipment
NOTE • When you transfer a WMA-DRM file from the PC, use Windows Media© Player 9 or later. If you transfer it by drag and drop, it cannot be played with the player. Disconnecting from PC For Windows 2000/Me/XP users: Left-click the icon in the task bar, and follow the on-screen instructions. -
Page 10: Parts Of The Digital Audio Player
GETTING STARTED PARTS OF THE DIGITAL AUDIO PLAYER 1 Headphone jack 2 VOL+/- (Volume) buttons 3 MIC 4 Display 5 6 (Play/Pause) button 6 ¢ (Forward) button 7 7 (Stop) button 8 4 (Reverse) button 9 REC button 0 MENU button - Hold switch = Battery compartment cover ~ Line output jack... -
Page 11: Turning Power On/Off
Connect the headhones to the (headphones) jack on the player. TURNING POWER ON/OFF To turn power ON Press and hold 6 button till "welcome" appears. After a while, the following screen appears. DIGITAL AUDIO PLAYER To turn power OFF Press and hold 7 (Stop) button. NOTES •... -
Page 12: Display Overview
GETTING STARTED DISPLAY OVERVIEW MUSIC mode/ VOICE mode FM mode ∗ If the file information is long and displayed over two lines, it scrolls. During scrolling, the file name may not be correctly displayed. 1 Play indicator 2 Volume level 4 5 6 7 3 Play mode indicator 4 EQ (sound mode) -
Page 13: Basic Operations
BASIC OPERATIONS USING THE MAIN MENU There are number of modes you can operate using MAIN MENU. MAIN MENU MUSIC Types of modes MUSIC mode Select to play music. (See page 13.) VOICE mode Select to record and play messages and recorded FM broadcast. (See pages 14, 15 and 18.) FM mode Select to listen to and record FM broadcast. -
Page 14: Playing Music
BASIC OPERATIONS PLAYING MUSIC You can play the music files. Before playing music, adjust the volume level with the volume +/- buttons. To play music After turning on the player, press MENU button and ¢ / 4 button to select MUSIC mode from Main Menu, and then press 6 button to enter that mode. -
Page 15: Recording Voice Messages
RECORDING VOICE MESSAGES You can store your voice as voice files by talking into built-in microphone. To record voice messages After turning on the player, press MENU button and ¢ / 4 button to select VOICE mode from Main Menu, and then press 6 button to enter that mode. -
Page 16: Playing Messages
BASIC OPERATIONS PLAYING MESSAGES You can play the recorded messages (voice files and recorded FM broadcasts). (Voice message) To play messages After turning on the player, press MENU button and ¢ / 4 button to select VOICE mode from Main Menu, and then press 6 button to enter that mode. -
Page 17: Listening To Fm Broadcasts
LISTENING TO FM BROADCASTS You can listen to a preset (registered) FM station after presetting FM stations. The following two operation modes are available: Scan mode: Used to tune in to a station. A.Scan, M.Scan and S.Scan modes are available for tuning and then presetting. Radio mode: Used to listen to a preset (registered) FM station. - Page 18 BASIC OPERATIONS After turning on the player, press MENU button and ¢ / 4 button to select FM mode from Main Menu, and then press 6 button to enter that mode. ("Radio" appears.) Press 7 button to enter scan mode. ("Scan" appears.) To manually scan: Press ¢...
-
Page 19: Recording Fm Broadcasts
RECORDING FM BROADCASTS To record FM broadcasts After turning on the player, tune to the desired FM station for recording, referring to "LISTENING TO FM RADIO BROADCASTS" on page 16. Press and hold REC button until "Recording" appears. To pause: Press 6 button. To stop: Press 7 button. -
Page 20: Deleting Files
BASIC OPERATIONS DELETING FILES (DELETE submenu) To delete files After turning on the player, press MENU button and ¢ / 4 button to select DELETE mode from Main Menu, and then press 6 button to enter that mode. Press ¢ / 4 button to select types of files you want to delete from the DELETE menu. -
Page 21: Advanced Features
ADVANCED FEATURES SET MENU ITEMS In SET mode, you can set the following SET MENU items: EQ SET (Equalization Set), PLAYMODE, SLEEP TIMER, A.POWER OFF (Auto Power OFF), BACKLIGHT, CONTRAST, MENU LANG (Menu Language) and FONTS To set each item, see the relevant later page. -
Page 22: Equalizer
ADVANCED FEATURES EQUALIZER You can select from one of 6 different preset sound modes or one customized sound mode. High Types of sound modes NORMAL No sound effect applies. CLASSICAL Good for classical music JAZZ Good for jazz music ROCK Boosts low and high frequency. - Page 23 To select sound mode After turning on the player, press MENU button and ¢ / 4 button to select SET mode from Main Menu, and then press 6 button to enter that mode. Press ¢ / 4 button to select “EQ SET”. Press 6 button.
-
Page 24: Playmode
ADVANCED FEATURES PLAYMODE You can select various play modes. However, for voice file playback, only NORMAL, REPEAT ONE and REPEAT ALL are selectable. Types of playback modes NORMAL Normal play REPEAT ONE Repeats one track. REPEAT ALL Repeats all tracks. RANDOM Plays all tracks in random order. -
Page 25: Sleep Timer
SLEEP TIMER Use the sleep timer to turn off the player after a certain period of time during playback. You can set the period of time to 15, 30, 45, 60 minutes, or OFF (default). The sleep timer works temporarily. Once it has worked, it is canceled. -
Page 26: Auto Power Off
ADVANCED FEATURES AUTO POWER OFF Use the auto power off to turn off the player after a certain period of time when no operation is made. You can set the period of time to 2, 5, or 10 minutes, or OFF (default). To set auto power off After turning on the player, press MENU button and ¢... -
Page 27: Backlight
BACKLIGHT Use to adjust the backlighting extension time (0 to Max) after finishing the last operation. (Default: 5 seconds) When "Max" is set, the backlighting remains on for approx. two hours. To set back light After turning on the player, press MENU button and ¢ / 4 button to select SET mode from Main Menu, and then press 6 button to enter that mode. -
Page 28: Contrast
ADVANCED FEATURES CONTRAST Use to adjust the contrast of the display. To set contrast After turning on the player, press MENU button and ¢ / 4 button to select SET mode from Main Menu, and then press 6 button to enter that mode. -
Page 29: Menu Languages
MENU LANGUAGES Use to set the language for the menu. You can select English (default), simplified Chinese or traditional Chinese. To set menu language After turning on the player, press MENU button and ¢ / 4 button to select SET mode from Main Menu, and then press 6 button to enter that mode. -
Page 30: Fonts
ADVANCED FEATURES FONTS Use to set the language for the file name and ID3 tags. You can select one of 27 languages (default: English). To set fonts After turning on the player, press MENU button and ¢ / 4 button to select SET mode from Main Menu, and then press 6 button to enter that mode. -
Page 31: About
ABOUT Use to display firmware version and status of the player. To display: After turning on the player, press MENU button and ¢ / 4 button to select ABOUT mode from Main Menu, and then press 6 button to enter that mode. To exit ABOUT mode: Upgrading firmware version: To upgrade the firmware of your player, please visit our website. -
Page 32: Resetting The Unit
ADVANCED FEATURES RESETTING THE UNIT Use to reset all the settings you have made to default. To reset the unit After turning on the player, press MENU button and ¢ / 4 button to select RESET mode from Main Menu, and then press 6 button to enter that mode. -
Page 33: Navigate
NAVIGATE Use to display the hierarchical tree structure of music folders and files ). From this tree structure, you can easily locate a desired music file and play it back. To locate a music file After turning on the player, press MENU button and ¢ / 4 button to select NAVIGATE mode from Main Menu, and then press 6 button to enter that mode. - Page 34 ADVANCED FEATURES Music file playing order in Music mode: From the hierarchical tree structure, you can easily understand the playing order of music files when you normally play them in Music mode. You will see that the music files are played back in the order from the higher hierarchy to the lower one.
-
Page 35: Locking Buttons (Hold)
LOCKING BUTTONS (HOLD) Slide the HOLD switch to the right to lock all controls. When the hold function is activated, the the display. To unlock: Slide the HOLD switch to the left. NOTE • When the player is turned on with the HOLD switch set to ON position, "HOLD"... -
Page 36: Troubleshooting
TROUBLESHOOTING Problem The player does not function. • Make sure the HOLD switch is off. There is no sound or a lot of noise. The player suddenly stops working. The display is too dark or too bright. The player automatically shuts off. -
Page 37: Specifications
SPECIFICATIONS Model Name Type Built-in memory size Display FM radio Voice recording Music playback format Bit rate Maximum number of tracks∗2 Frequency response Output terminal Line output Power supply Continuous playback time Dimensions (Approx.) Mass (Approx.) ∗1 WMA-DRM: A WMA file with reproduction restriction for copyright protection of digital data. -
Page 38: Accessories
SPECIFICATIONS ACCESSORIES Headphones USB CABLE CD-ROM (USB Driver for Windows 98SE) NECK STRAP... - Page 39 (Business users) If you wish to dispose of this product, please visit our web page www.jvc-europe.com to obtain information about the take-back of the product. [Other Countries outside the European Union] If you wish to dispose of this product, please do so in...
- Page 40 0705KMMCREBET © 2005 Vicotr Company of Japan, Limited...