Blodgett Mark V Series Service And Repair Manual
Hide thumbs
Also See for Mark V Series:
- User manual (72 pages) ,
- Maintenance manual (66 pages) ,
- Installation operation & maintenance (45 pages)
Table of Contents
Advertisement
Advertisement
Table of Contents
Troubleshooting

Related Manuals for Blodgett Mark V Series


Summary of Contents for Blodgett Mark V Series
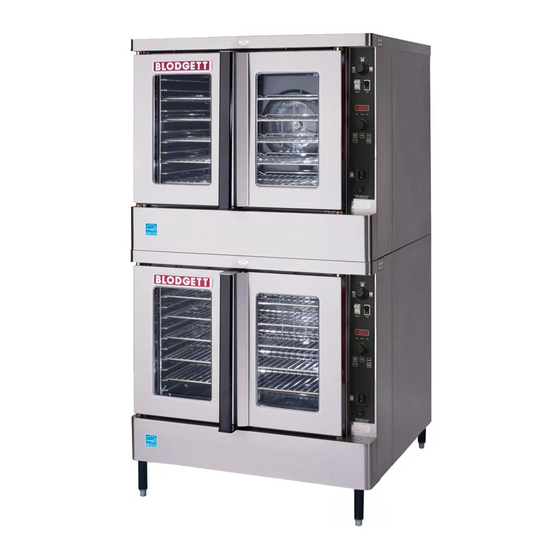
- Page 1 MARK V SERIES CONVECTION OVEN SERVICE AND REPAIR MANUAL BLODGETT OVEN COMPANY...
- Page 2 TABLE OF CONTENTS 1. INTRODUCTION 2. OPERATION 3. CALIBRATION AND ADJUSTMENT 4. TROUBLESHOOTING...
- Page 3 TABLE OF CONTENTS 5. PARTS REPLACEMENT...
- Page 4 CHAPTER 1 INTRODUCTION...
-
Page 5: Oven Specifications
MARK V OVEN SPECIFICATIONS ELECTRICAL SPECIFICATIONS General Export Installations Installations within the U.S. and Canada CE approved installations ELECTRICAL SPECIFICATIONS (per section) Volts Phase Amps Electrical Connection ( i i (minimum size) U.S. and Canadian installations General Export installations CE installations... - Page 6 CHAPTER 2 OPERATION...
-
Page 7: Sequence Of Operations
MARK V SEQUENCE OF OPERATIONS NOTE: The following instructions represent the most common controllers. For questions regarding other options call the Blodgett Service Department at (800)331 5842. COOK ONLY - 18459 REV D Component Reference temperature control board (4) and the solid state potentiometer (8). - Page 8 OPERATION FIGURE 1...
- Page 9 MARK V CE APPROVED COOK ONLY - 33339 REV C Component Reference NOTE: Refer to FIGURE 2 page 2-4 for compo nent locations. NOTE: Put the timer in the home position to si lence the buzzer. NOTE: Turn the mode selector switch to cool down to bypass the door microswitch.
- Page 10 OPERATION FIGURE 2...
-
Page 11: Cook And Hold
MARK V COOK AND HOLD - 18791 Component Reference reaches full speed. If found faulty do not bypass, the whole motor should be NOTE: Refer to FIGURE 3 page 2-7 for compo replaced. nent locations. NOTE: The temperature control system con sists of the temperature probe (9), the temperature control board (3) and the solid state potentiometer (10) - Page 12 OPERATION NOTE: The hold temperature control system NOTE: Turn the mode selector switch to cool consists of the temperature probe (19), down to bypass the door microswitch. This the hold temperature control board (4) allows the convection fan motor to operate and the solid state potentiometer (20).
- Page 13 MARK V FIGURE 3...
- Page 14 OPERATION SOLID STATE DIGITAL - 30070 REV B Component Reference NOTE: Refer to FIGURE 4 page 2-9 for compo nent locations. NOTE: The relay in the time and temperature controller is not field repairable. If diagnosed as defective, the entire board must be replaced.
- Page 15 MARK V FIGURE 4...
- Page 16 OPERATION CE APPROVED SOLID STATE DIGITAL - 33345 REV C Component Reference NOTE: Refer to FIGURE 5 page 2-11 for compo nent locations. NOTE: Turn the mode selector switch to cool down to bypass the door microswitch. This allows the convection fan motor to operate even when the doors are open.
- Page 17 MARK V FIGURE 5...
- Page 18 OPERATION FAN DELAY WITH PULSE PLUS - 18466 REV D Component Reference temperature control board (3) and the solid state potentiometer (10) NOTE: Refer to FIGURE 6 page 2-13 for compo nent locations. NOTE: By setting the ten minute fan delay timer (4) power is interrupted to the thirty min ute cook timer (5) making it inoperative.
- Page 19 MARK V FIGURE 6...
- Page 20 OPERATION HUMIDAIRE - 1846 REV M Component Reference NOTE: Refer to FIGURE 7 page 2-16 for compo nent locations. NOTE: Put the timer in the home position to si lence the buzzer. NOTE: The thermal switch is located in the rear of the oven.
- Page 21 MARK V NOTE: The resistive values for the probes used in NOTE: Reference page 4-2 of the Troubleshoot this oven have descending temperature co ing section for the reistive values of the efficients. As the temperature increases the heating elements. The reading should be resistive values decrease.
- Page 22 OPERATION FIGURE 7...
- Page 23 MARK V INTELLIHOLD AND INTELLIPLUS - 22027 REV A Component Reference changed due to the difference in amp draw. Reference detail inset in FIGURE 8. NOTE: Refer to FIGURE 8 page 2-18 for compo nent locations. NOTE: The resistive values for the probe (11) used in this oven have ascending temperature coefficients.
- Page 24 OPERATION FIGURE 8...
- Page 25 MARK V INTELLITOUCH - 19361 REV A Component Reference allows the convection fan motor to operate even when the doors are open. NOTE: Refer to FIGURE 9 page 2-20 for compo nent locations. NOTE: This oven may be converted from single to three phase, however, contactors must be changed due to the difference in amp draw.
- Page 26 OPERATION FIGURE 9...
- Page 27 MARK V BLODGETT IQ CONTROL - 33078 REV A Component Reference NOTE: Reference page 4-2 of the Troubleshoot ing section for the reistive values of the NOTE: Refer to FIGURE 10 page 2-22 for compo heating elements. The reading should be nent locations.
- Page 28 OPERATION FIGURE 10...
- Page 29 MARK V This page intentionally left blank.
- Page 30 CHAPTER 3 CALIBRATION AND ADJUSTMENT...
- Page 31 MARK V DOORS For units manufactured after August 1984 For units manufactured prior to August 1984. NOTE: The doors are properly adjusted if the right door is fully closed when the left door (the door with the handle) has 1/2" 1" of travel remaining. FIGURE 2 FIGURE 1 FIGURE 3...
- Page 32 CALIBRATION AND ADJUSTMENT DOOR BLOWER SWITCH THERMOSTAT BULB AND CAPILLARY THERMOSTAT For units manufactured prior to August 1984 For units manufactured after August 1984. FIGURE 4...
- Page 33 MARK V FIGURE 5 For units manufactured prior to December 1987. NOTE: Do not allow the main stem of the ther mostat to turn when adjusting the cal ibration screw. FIGURE 6...
-
Page 34: Solid State Manual
CALIBRATION AND ADJUSTMENT SOLID STATE MANUAL LIGHT OFF OVEN READY THERMOSTAT TIMER FIGURE 7... - Page 35 MARK V SELECTOR SWITCH CALIBRATION NOTE: It is possible for all 8 positions to be out of calibration but highly unlikely. NOTE: The 8 individual positions are each set for a temperature of the customer's choosing. For example, if position 1 is set for 350_F (177_C) the red indicator light should go out when it gets to with in 10 degrees of setpoint.
-
Page 36: Solid State Digital Control
CALIBRATION AND ADJUSTMENT SOLID STATE DIGITAL CONTROL To Initiate Programming DISPLAY SCALE EXAMPLES DIGITS To Access Second Level Programming 2NdL To Change the Temperature Offset OFFS To Set the Display Scales FIGURE 9 To Return to Normal Operating Mode NOTE: If the control is set for minutes and seconds the first digit will be blank. - Page 37 MARK V INTELLIHOLD AND INTELLIPLUS CONTROLS NOTE: For error code display information see Temperature Display Scales page 4-3 of the Troubleshooting section. Temperature Calibration NOTE: During operation, the temperature Time Display Scales control is based on the measured tem perature and the temperature offset which is programmed into the control.
- Page 38 CALIBRATION AND ADJUSTMENT INTELLITOUCH CONTROL NOTE: For error code display information see NOTE: Use product keys 1 7 for numerals 1 7. page 4-3 of the Troubleshooting section. Use load keys 1 3 for numerals 8,9 and 0 respectively. To access 2nd level programming Programming the 2nd level parameters LED(s) Parameter...
-
Page 39: Intellitouch Ii Control
MARK V INTELLITOUCH II CONTROL To access 2nd level programming and diagnos Temperature offset tics SELECT POS * OFFSET NEG * OFFSET NOTE: POS OFFSET is displayed if a value has been programmed in for a positive off set. NEG OFFSET is displayed if a val ACCESS ue has been programmed for a nega To run LED diagnostics... - Page 40 CALIBRATION AND ADJUSTMENT BLODGETT IQ CONTROL NOTE: For error code display information see Programming the setback mode page 4-3 of the Troubleshooting section. SEtb 2ND LEVEL PROGRAMMING Entering the programming mode If no is chosen: CodE If yes is chosen:...
- Page 41 MARK V PROGRAMMING THE OFFSET Entering the offset programming mode CodE Exiting the offset programming mode Programming the temperature offset oFST -xxF...
- Page 42 CALIBRATION AND ADJUSTMENT BLODGETT IQ2T CONTROL FACTORY LEVEL PROGRAMMING Entering the programming mode Enabling/Disabling the fan error detection circuit FanC. T CodE Fact Programming the oven configuration Appl Programming fan speed option FanS Programming the maximum temperature setpoint NOTE: Mark V and DFG 100 are full sized tELt ovens.
- Page 43 MARK V IQ VVC 208 CONTROL COMPONENT DESCRIPTION Holds are not used for KFC applications. FIGURE 11...
- Page 44 CALIBRATION AND ADJUSTMENT OPERATIONAL TEST PROCEDURE NOTE: AP and Mark V computer is unpowered if off. The XCEL is powered if plugged in. NOTE: This scrolling can be bypassed by pressing SCAN. RECIPE REVIEW COOL DOWN WARNING!! THE FAN IS STILL MOVING. DO NOT REACH INTO THE OVEN.
- Page 45 MARK V SYSTEM PROGRAMMING (6647) KEY PRESS DISPLAY ACTION Enter Program mode Enter pass code Confirm or Select Appliance Type NOTE: Changing appliance type clears all current recipe programs. Select Language NOTE: 'Other' is download able.
- Page 46 CALIBRATION AND ADJUSTMENT SYSTEM PROGRAMMING (continued) KEY PRESS DISPLAY ACTION Set Tone Level Set Temperature Mode Program Setback Time NOTE: 0:00 is default to dis able Setback. Program Setback Temperature Set Hold Time Set Hold Temperature...
- Page 47 MARK V SYSTEM PROGRAMMING (continued) KEY PRESS DISPLAY ACTION Set Hold Done Set Hold Fan Speed Set Preheat Time Exit Program Mode...
- Page 48 CALIBRATION AND ADJUSTMENT PROBE RESISTANCE VS HEATING ELEMENTS Element Resistance TABLE 2 PROBE RESISTANCE VS TEMPERATURE Solid State Manual and Digital Controllers Intellitouch II Controller (probe P/N 18588) (probe P/N 32289) Ohms Ohms Ohms Ohms TABLE 3 TABLE 4...
- Page 49 MARK V Intellitouch (probe P/N 20360) and Intellitouch (probe P/N 20360) and Blodgett IQ Controllers (probe P/N 33074 Blodgett IQ Controllers (probe P/N 33074 Ohms Ohms Ohms Ohms TABLE 5...
- Page 50 CALIBRATION AND ADJUSTMENT Intellihold and Intelliplus Controllers (probe P/N 23392) Ohms Ohms Ohms Ohms Ohms Ohms...
- Page 51 MARK V Intellihold and Intelliplus Controllers (probe P/N 23392) Ohms Ohms Ohms Ohms Ohms Ohms TABLE 6...
- Page 52 CALIBRATION AND ADJUSTMENT This page intentionally left blank.
-
Page 53: Troubleshooting
CHAPTER 4 TROUBLESHOOTING... - Page 54 MARK V HEAT SYSTEM POSSIBLE CAUSE(S) SUGGESTED REMEDY Symptom #1 - Oven heaters and motor do not run Symptom #2 - Convection fan motor does not operate...
- Page 55 TROUBLESHOOTING POSSIBLE CAUSE(S) SUGGESTED REMEDY Symptom #3 - Heat system does not recover quickly Symptom #4 - Heat system does not heat, but motor operates...
- Page 56 MARK V POSSIBLE CAUSE(S) SUGGESTED REMEDY TABLE 1 DISPLAY ERROR CODES INTELLITOUCH BLODGETT IQ CONTROL HELP NOTE: The error codes will appear in the top dis play. All error codes are accompanied by HELP PROB an audible alarm. PROB Prob...
- Page 57 CHAPTER 5 PARTS REPLACEMENT...
- Page 58 MARK V DOOR ASSEMBLY DOOR DOOR ARM SUPPORT ASSEMBLY Replacement FIGURE 1 Rebuilding...
- Page 59 PARTS REPLACEMENT COMPARTMENT LINER BOTTOM WINDOW ASSEMBLY NOTE: The window insertion tool is provided with the window assembly. NOTE: To install the door front start at the cor ner closest to the hinge pin. FIGURE 2 FIGURE 1...
- Page 60 MARK V MOTOR AND BLOWER ASSEMBLY BLOWER WHEEL MOTOR For units with built in wheel puller: If access to the rear of the oven is available: If access to the rear of the oven is not available: For wheels with slot on hub: See View A View A FIGURE 3...
- Page 61 PARTS REPLACEMENT ELECTRICAL COMPONENTS ELECTRICAL COMPONENTS LOCATED NOTE: A test cord is available to allow removal of the control module from the oven while re IN THE CONTROL MODULE taining electrical connections. BULB AND CAPILLARY THERMOSTAT NOTE: Refer to the wiring diagram to ensure cor rect connection of the wires.
- Page 62 MARK V This page intentionally left blank.
Need help?
Do you have a question about the Mark V Series and is the answer not in the manual?
Questions and answers