Table of Contents
Advertisement
Advertisement
Table of Contents

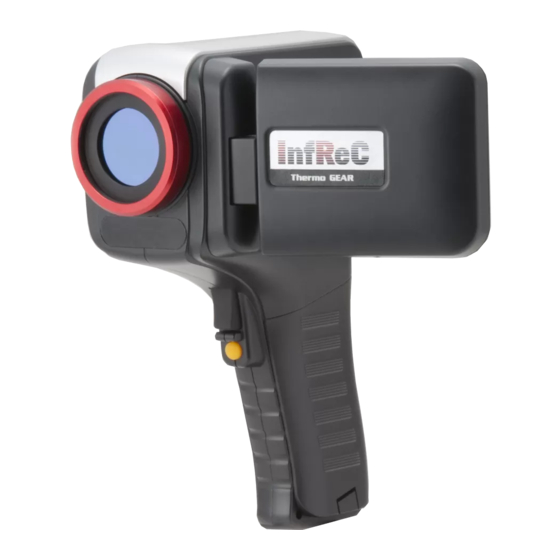
Summary of Contents for InfRec Thermo Gear G100
- Page 1 Thermo Gear G100/G120 Operation Manual NEC Avio Infrared Technologies CO., Ltd.
- Page 2 Thermo Gear G100/G120 Operation Manual Attention G100/G120 is controlled by the export law. When you reexport this product from your country, the export license of your country is required. - Disposing of your used our product - In the European Union EU-wide legislation as implemented in each Member State requires that used electrical and electronic products carrying the mark(left) must be disposed of separately from normal...
- Page 3 NEC Avio Infrared Technologies Co., Ltd.
-
Page 4: Table Of Contents
Contents CONTENTS PREFACE ············································································································ 1 MEASURES FOR SAFETY··············································································· 3 PRODUCT DETAILS························································································· 13 OVERALL CONSTRUCTION·········································································· 14 ICON DISPLAYS AND NAMES······································································· 17 1. PREPARATION CHARGING BATTERIES·················································································· 1-1 INSERTING BATTERIES·················································································· 1-2 INSERTING THE SD CARD ············································································· 1-3 SETTING THE CLOCK ····················································································· 1-4 ATTACHING STANDARD ACCESSORIES··················································· 1-5 CONFIRMING THE SETTINGS ······································································... - Page 5 Contents 4. ADVANCED MENU ····················································································································4-1 SAVE MODE – SINGLE IMAGE ······································································4-2 SAVE MODE – INTERVAL ···············································································4-2 SAVE MODE – MOVING IMAGE····································································4-4 SAVE MODE – PANORAMA ············································································4-6 SCALE – COLOR PALETTE ············································································4-12 SCALE – COL TONE··························································································4-12 SCALE – TMP UNIT ···························································································4-13 SCALE –...
- Page 6 Contents 4. ADVANCED CONNECTING TO PC ······················································································· 4-54 SEEING IMAGES ON THE MONITOR ·························································· 4-55 ALARM OUTPUT ······························································································· 4-56 5. MAINTENANCE INSPECTION / MAINTENANCE ····································································· 5-1 WHAT IS TO BE DONE····················································································· 5-2 6. LIMITED WARRANTY LIMITED WARRANTY ····················································································· 6-1 7. SPECIFICATIONS SPECIFICATIONS ······························································································...
- Page 7 Contents 95691-2935-0000...
-
Page 8: Preface
Preface ◎ PREFACE ▼ GREETING We thank you for your purchase of the Thermo Gear Model G100/G120. Please use it correctly after reading this manual. This manual provides information necessary to operate it correctly. Please let us or our distributor know if there’s anything unclear. Please check the product condition and verify that no obvious shipping damage has occurred. - Page 9 Battery charger ····································································· 1 Power cable (for Battery charger) ········································ 1 SD memory card ···································································· 1 Wristband··············································································· 1 USB cable ·············································································· 1 Carrying case ········································································· 1 InfRec Analyzer NS9500LT (PC soft were) ·························· 1 Thermo Gear G100/G120 Operation manual ························· 1 95691-2935-0000...
-
Page 10: Measures For Safety
Preface ◎ MEASURES FOR SAFETY We do not assume any responsibility for any damages or accidents caused by abuse, misuse, or misapplication or modifications without our permission. WARNING This may cause customers’ side accidents. CAUTION This may cause product side accidents. Both descriptions relate to the act that this should not be done or is to avoid the accident in advance. - Page 11 Preface WARNING Read this operation manual carefully and take care not to cause any accident. Power: (1) Use the specified AC adapter, and battery to avoid an electric shock or a fire. (2) Verify the specified power source before the power on. Cable, adapter, cord: (1) Use the AC adapter where is no water around.
- Page 12 Preface WARNING Find the safe place where the product is used for measurement. Avoid to carry the camera fixed with tripod or avoid to use the camera with tripod in the place where is large vibration or shock as it may cause trouble in the camera.
- Page 13 Preface WARNING Handling of Battery Pack. Following should be cared for handling of battery to keep safety. (1) Do not disassemble or modify the Battery Pack. To avoid danger, protectors, such as a protection circuit, are implemented in the Battery Pack. If a protector is broken by disassembling or modifying, it may cause overheating, explosion, or fire.
- Page 14 Preface WARNING (13)Do not use a broken or leaking Battery Pack. Using a broken Battery Pack may cause overheating, explosion, or fire. Do not allow the liquid leaking out of the Battery Pack to contact your skin. It may cause personal injury. Should the Battery Pack liquid contact your skin, immediately rinse it off with clean water and seek medical attention.
- Page 15 Preface WARNING The user must observe the following points to use the instrument safely. Laser light contact with the eyes may cause a drop of vision or visual impairment. (1) Never point the light from the laser pointer towards people. (2) Never look into the laser pointer's light source.
- Page 16 Preface CAUTION The product uses a high sensitive infrared detector and following cautions are requested. (1) Storage temperature is -40 to 70°C and storage humidity is less than 90% (not condensed) except battery pack and battery charger. It should not be beyond the range.
- Page 17 Preface CAUTION Do not apply excessive stress to LCD DISPLAY to avoid damages. Battery Handling (1) A battery is consumables. Replace with a new battery when operating time of the instrument becomes shorter. (2) Disposal of the battery must be done according to the waste-disposal law of the country or region where the battery is disposed of.
- Page 18 Preface CAUTION Visual camera handing: (1) Please use it within an operating temperature condition. (2) Do not put direct rays into the Visual camera window of main instrument. (3)Do not give a direct shock to the Visual camera window of main instrument. * Visual camera window : Please refer to P.14.
- Page 19 Preface CAUTION Holding the product: (1) Give much consideration not to drop the product. (2) When placing the product, do not give strong shock to the product. (3) To hold LCD Display or Lens Cap might cause failure. Don't input laser ray (CO2 laser or etc): Infrared detector might be damaged as disable to recover by inputting the laser ray.
-
Page 20: Product Details
Lens Cap G100/G120 AC adapter (AC adapter) Thermo Gear Battery pack Battery charger Power cable SD memory card (Battery charger) InfRec Analyzer NEC Avio Infrared Technologies Co., Ltd. PC Software Wristband USB cable Carrying case InfRec Analyzer NS9500LT Thermo Gear G100/G120... -
Page 21: Overall Construction
Preface ◎ OVERALL CONSTRUCTION *Note: Do not touch the infrared window since it is very sensitive and Thermal image window vulnerable to damage. If it becomes soiled, clean it following the (with built-in lens) information given in chapter 5 properly. LED light Visual image window (with built-in lens... - Page 22 Preface VIDEO OUT USB Mini-B socket SD memory card slot Alarm output terminal DC IN *View with the rear cover opened Battery cover Tripod screw hole 1/4-20UNC Thread length: Below 7mm 95691-2935-0000...
- Page 23 Preface <Button> (1) POWER button It turns ON or OFF the power. (2) LED button It turns ON or OFF the power. (3) PLAY button It makes the unit in image replay mode. (4) MENU button For displaying menu. (5) Joystick button H Temp (UP): For setting the maximum temperature value.
-
Page 24: Icon Displays And Names
Preface ◎ ICON DISPLAYS AND NAMES <Thermal image mode> [21] [20] [22] [23] ) ) ( ( ( ( ) ) TEMP OVER [12] [13] [14] ℃ ℃ [15] [10] [11] [16] [17] [18] [19] Items Description State of camera is displayed by the following icons. Status icon <Display of status icons>... - Page 25 Preface Items Description Date and time It displays date and time. * Displayed clock type is changeable. →Page 1-4 Range Upper temperature limit It displays the upper temperature limit of color bar. * Upper temperature limit can be changed. →P.2-1, P.3-7, P.4-13 Lower temperature limit It displays the lower temperature limit of color bar.
- Page 26 Preface <Visual image mode> *Icon on the Visual image mode is same as thermal image mode. <Composite image mode> [SIDE: side-by-side mode] [FULL: transparent composite mode] [CENTER: picture-in-picture mode] *Icon on the Composite image mode is same as thermal image mode. <Image replay mode>...
- Page 27 Preface <Menu mode> Item Description SAVE MODE Sets the save mode for shooting. →P.4-2 SCALE →P.4-12 With in color bar, etc, can be setup. MEASURE →P.4-19 Settings for measurement can be made. →P.4-30 Various corrections can be made. ALARM →P.4-41 Alarm set up can be made.
-
Page 28: Preparation
Chapter1 Preparation PREPARATION ◎ CHARGING BATTERIES For charging battery pack, use a battery charger came along with your G100/G120. Please read its manual carefully before charging battery pack. Connect the one end of the AC power cord to the AC In jack of the Battery Charger and connect the other end of the AC power cord to the outlet. -
Page 29: Inserting Batteries
Chapter1 Preparation ◎ INSERTING BATTERIES (1) Sets the save mode for shooting Lift the tab and remove the battery cover. Install the battery pack in the battery box of the main unit. Slide the battery pack upward from the bottom of the battery box. Back side of battery pack Battery box... -
Page 30: Inserting The Sd Card
Chapter1 Preparation ◎ INSERTING THE SD CARD (1) Open the rear cover and insert a SD memory card as shown below. SD memory card Caution DO NOT REMOVE SD memory card before the power is turned off and pilot lamp goes off entirely. (It may damage the main unit or destroy files saved in the SD memory card.) 95691-2935-0000... -
Page 31: Setting The Clock
Chapter1 Preparation ◎ SETTING THE CLOCK Turn the power and start up the main unit. Use MENU, Joystick buttons and operate as follows. 1. Press MENU button. 2. Select “SET UP”, then, “TIME &DATE”. 3. Use H Temp(UP) and L Temp(DOWN) of Joystick button to choose configuration. Use FAR(RIGHT) Joystick button for moving to each set value, H Temp(UP), L Temp(DOWN) for changing value and CENTER of Joystick button for confirmation. -
Page 32: Attaching Standard Accessories
Chapter1 Preparation ◎ ATTACHING STANDARD ACCESSORIES <AC adapter and power cable> (1) Connect power cable to AC adapter as below. (2) Insert a connecter of the AC adapter into G100/G120 main unit. Caution DO NOT REMOVE battery pack or AC adapter before the power is turned off and pilot lamp goes off entirely. - Page 33 Chapter1 Preparation <Hand strap> 1)Fix a wristband to the main unit as shown below. 95691-2935-0000...
-
Page 34: Confirming The Settings
Chapter1 Preparation ◎ CONFIRMING THE SETTINGS At setting screen, select each item No. 1-8 and check its settings. No. 9 and 10 are for saving set values. Go to No.11 for returning to default values. Item Description LANGUAGE Sets the language displayed on the main unit. ALL CLEAR Turns On/Off of the display on the screen. - Page 35 Chapter1 Preparation Chapter1 Preparation 95691-2935-0000 95691-2935-0000...
-
Page 36: Basic
Chapter2 Basic BASIC ◎ POWER ON/OFF <Power ON> POWER button Hold down the POWER button for two seconds. The pilot lamp lights in green when the power is turned on. <Power OFF> Hold down the POWER button for two seconds. The pilot lamp goes off when the power is turned off. - Page 37 Chapter 2 Basic (2) Continuous automatic setting Press and hold AS button. (The automatic/manual setting switches to AT (automatic).) The AT status icon is displayed. [Automatic state] Notes - This function is disabled in the freeze state. - If the manual setting is executed during the continuous automatic setting, the continuous automatic setting is cancelled.
-
Page 38: Visible Image Display
Chapter2 Basic <Focus setting> The focus setting screen is displayed by pressing NEAR(Left) or FAR(Right) side of the joy stick button. On the focus setting screen, pressing NEAR(Left) sets the focus point toward close range, and pressing FAR(Right) sets the focus point toward the distance (∞). Pressing CENTER determines the focus point and exits the focus setting screen. -
Page 39: Laser Pointer
Chapter 2 Basic ◎ LASER POINTER Laser pointer is projected while the LASER button is held down. The pilot lamp lights in orange and “LASER ON” is displayed on the LCD screen while projecting laser pointer. Pilot lamp When you release the LASER button, laser pointer will be disabled and “LASER ON”... -
Page 40: Single Image Save
Chapter2 Basic ◎ SINGLE IMAGE SAVE This section describes how to save a single image in a folder of SD memory card. <How to operate> Press and hold REC/FRZ button during the thermal image display. The Number of remaining files is displayed after the saving. - Page 41 Chapter 2 Basic <Saved image> For single image save, the image to be saved varies depending on the setting as shown in the following table. See page 4-46 for information about setting of visual image link. See page 2-3 for display mode change. Menu - DATA Display mode VIS IMAGE LINK...
-
Page 42: Replay
Chapter2 Basic ◎ REPLAY This section describes how to display images (thermal, visual or composite images) saved in a folder of SD memory card. (2) Select an image with the joystick and press (1) Press the PLAY button. CENTER. (3) The selected image is displayed. Press CENTER of the joystick button. -
Page 43: File Deletion
Chapter 2 Basic ◎ FILE DELETION <DELETE A FILE> (2) Select an image you want to delete with the (1) Press the PLAY button. joystick and hold down CENTER. (3) Move the cursor to “DELETE” and then press (4) Move the cursor to “DELETE A FILE” and then FAR(Right) of the joystick button. - Page 44 Chapter2 Basic <DELETE SELECT FILES> (1) Press the PLAY button. (2) Hold down CENTER of the joystick button. (3) Move the cursor to “SEL.FILE” and then press (4) Select an image you want to delete with the CENTER of the joystick button. joystick and press CENTER.
- Page 45 Chapter 2 Basic (7) Move the cursor to “DELETE” and then press (8) Move the cursor to “SEL.FILE” and then press FAR(Right) of the joystick button. CENTER of the joystick button. (9) Point the cursor to “YES” and press CENTER of the joystick button.
-
Page 46: Format
Chapter2 Basic ◎ FORMAT This function formats the SD Memory Card. (1) Highlight FORMAT on the Data screen. (2) Press CENTER to delete the selected image. Then, press CENTER of the joystick button. The screen returns to measuring mode Notes - Error messages are displayed as follows when no SD memory card exists or an I/O access error has occurred. - Page 47 Chapter 2 Basic 95691-2935-0000 2-12...
-
Page 48: Shortcut
Chapter3 Shortcut SHORTCUT ◎ SHORTCUT FUNCTIONS <Enabling shortcut functions> When CENTER of the joystick button is pressed in the thermal image or composite image mode, shortcut items will become available. Shortcut available <Selecting of shortcut functions> Select a desirable item using H Temp(Up), L Temp(Down), NEAR(Left) or FAR(Right) of the joystick button. - Page 49 Chapter3 Shortcut MENU button. 95691-2935-0000...
- Page 50 Chapter3 Shortcut <Shortcut – point cursor> This function is used to set the display to ON/OFF and move the coordinates for point cursors up to five points (a-e). (124,102) e : OFF e : OFF d : OFF d : OFF c : OFF c : OFF b : OFF...
- Page 51 Chapter3 Shortcut <Shortcut – Center temperature> This function is used to set the display to ON/OFF for center temperature information. e : OFF d : OFF c : OFF b : OFF a : 12.3 a : 12.3 Press X : 30.0 CENTER X : 30.0 M : 78.7...
- Page 52 Chapter3 Shortcut <Shortcut – Trace cursor> This function is used to set the trace cursor display to ON/OFF, and set the trace target temperature (maximum/minimum). XXXXX e : OFF e : OFF d : OFF d : OFF c : OFF c : OFF b : OFF b : OFF...
- Page 53 Chapter3 Shortcut <Shortcut – Delta temperature> This function is used to set a reference point and compared point for the delta temperature function. e : OFF e : OFF d : OFF d : OFF c : OFF c : OFF b : OFF b : OFF a : 12.3...
- Page 54 Chapter3 Shortcut <Shortcut – Range> This function is used to set the range. Press Press CENTER CENTER Normal mode Selecting item Setting Center temperature not displayed Center temperature displayed Selected item highlighted in blue Selected item highlighted in orange (1) Selecting item Select the temperature display (range display) located above the color bar using H Temp(Up), L Temp(Down), NEAR(Left) or FAR(Right) of the joystick button.
- Page 55 Chapter3 Shortcut <Shortcut – Upper/Lower/Center temperature> This function is used to set the upper/lower limits and center temperature for the temperature scale. Press Press CENTER CENTER Normal mode Selecting item Setting Center temperature not displayed Center temperature displayed Selected item highlighted in blue Selected item highlighted in orange Editing digit highlighted in orange (1) Selecting item...
- Page 56 Chapter3 Shortcut <Shortcut – Color palette> This function is used to set the color palette. Press Press CENTER CENTER Normal mode Selecting item Setting Center temperature not displayed Center temperature displayed Selected item highlighted in blue Selected item highlighted in orange (1) Selecting item Select the color bar using H Temp(Up), L Temp(Down), NEAR(Left) or FAR(Right) of the joystick button.
- Page 57 Chapter3 Shortcut <Shortcut – Color alarm> This function is used to set the color alarm to ON/OFF, and set the upper/lower limit temperature. Press Press CENTER CENTER Normal mode Selecting item Setting Upper/lower limit temp not Upper/lower limit temp displayed Selected item highlighted in blue displayed with color alarm OFF.
- Page 58 Chapter3 Shortcut <Shortcut – alarm temperature> This function is used to set the alarm to ON/OFF, and set a threshold value. Normal mode Press CENTER Selecting item Selected item highlighted in orange Press CENTER Setting Selected item highlighted in blue (1) Selecting item Select the alarm temperature using H Temp(Up), L Temp(Down), NEAR(Left) or FAR(Right) of the joystick button.
- Page 59 Chapter3 Shortcut <Shortcut – Emissivity> This function is used to set the emissivity. Normal mode Press CENTER Selecting item Selected item highlighted in orange Press CENTER Setting Selected item highlighted in blue Editing digit highlighted in orange (1) Selecting item Select the emissivity “E”...
- Page 60 Chapter3 Shortcut <Shortcut – Zoom> This function is used to set the zoom factor for infrared images. Normal mode Press CENTER Selecting item Selected item highlighted in orange Press CENTER Setting Zoom indicator displayed Zoom indicator (1) Selecting item Select “ZOOM” using H Temp(Up), L Temp(Down), NEAR(Left) or FAR(Right) of the joystick button.
-
Page 61: Advanced
Chapter 4 Advanced ADVANCED ◎ MENU The menu screen is displayed when the MENU button is pressed in the normal mode. From this screen, you can execute various functions and configure various settings. Menu screen How to operate 1. Select a desirable item with H Temp(Up), L Temp(Down), NEAR(Left) or FAR(Right) of the joystick button. -
Page 62: Save Mode - Single Image
Chapter 4 Advanced ◎ SAVE MODE – SINGLE IMAGE This item is used to set the save (shooting) mode to the single image mode. With the single image mode, a single image is saved into a folder of SD memory card. <Changing to the single image mode>... - Page 63 Chapter 4 Advanced <How to operate with the interval mode> (2) Holding down the REC/FRZ button will start (1) Check if the save mode is set to saving with the interval mode. “INTERVAL”. If not, change the setting to “INTERVAL” The REC icon blinks while saving data with the interval mode.
-
Page 64: Save Mode - Moving Image
Chapter 4 Advanced ◎ SAVE MODE – MOVING IMAGE *G120 only Select Image Saving (Shooting) Mode to moving image mode. When moving image mode is selected, a sequence of infrared image will be taken and saved as a movie file to a certain pre-defined folder of SD card. <Changing to the moving image mode>... - Page 65 Chapter 4 Advanced Notes Automatic updating process is inactive except for Continuous automatic temperature value setting and Auto-calibration while movie recording is being performed. During movie recording in process, no other operation is possible (except for stopping it). <Messages that might be shown during moving recording> Message Description Recording is halted as REC/FRZ button is...
-
Page 66: Save Mode - Panorama
Chapter 4 Advanced ◎ SAVE MODE – PANORAMA *G120 only Select Image Saving (Shooting) Mode to Panorama mode. When panorama mode is selected, a series of 2 to 4 infrared images taken consecutively will be combined and saved as one integrated (linked) image to a certain pre-defined folder of SD card. Tilt (vertical movement) [BT TO TP] Pan (horizontal movement) [LT TO RT] Top view... - Page 67 Chapter 4 Advanced (3) Press and hold REC/FRZ down to see the message shown as the LCD screen shot here. At this point, please firmly hold the camera to stabilize the position i.e. field of view. If the camera keeps moving to an excessive degree, this function won't work properly as intended. * Please keep REC/FRZ pressed.
- Page 68 Chapter 4 Advanced (6) After panning 4-image wide or long, it automatically stops shooting. It also stops if you release the REC/FRZ button during shooting. Shows how many images were panned out of four. PANORAMA SHOOTING DONE. SAVING FILES… Notes - Images may not be saved if your panning speed is too fast or slow.
- Page 69 Chapter 4 Advanced Notes - Hold the camera firmly with your two hands. Shaking the camera may cause failure in saving images. - For panning, keep a steady pace and move the camera as you draw a small arch. When panning from left to right: When panning from bottom to top: Keep the camera Side...
- Page 70 Chapter 4 Advanced Notes - Following display functions are invalidated during the Panoramic shooting: Center point, Tracking cursor, Point cursor and BOX. - During the Panoramic shooting, turn off the continuous auto function (See page 2-2) for temperature value setting. If it is on, temperature scale may vary in each individual image and it may cause poor looking of the obtained Panoramic image.
- Page 71 Chapter 4 Advanced < How to replay the Panoramic Image > The image is displayed as below. ( ( ) ) ( ( ) ) ℃ ℃ ℃ ℃ Panorama Direction: Left to Right Panorama Direction: Bottom to Top How to operate 1.
-
Page 72: Scale - Color Palette
Chapter 4 Advanced ◎ SCALE - COLOR PALETTE This item is used to change the type of color palette for thermal images. (1) Select Scale on the menu screen, and then (2) Select your favorite color palette, and select “COLOR PALETTE” and press press CENTER. -
Page 73: Scale - Tmp Unit
Chapter 4 Advanced ◎ SCALE – TMP UNIT This item is used to change the temperature unit (°C/°F). (1) Select Scale on the menu screen, and then (2) Select the temp unit to be used, and press select “TMP UNIT” and press CENTER. CENTER. -
Page 74: Scale - Zoom
Chapter 4 Advanced ◎ SCALE – ZOOM This item is used to set the zoom factor. (2) When the zoom indicator is displayed, move it (1) Select “ZOOM” on the “SCALE” setting with NEAR(Left) or FAR(Right) and change screen and press CENTER of the joystick the zoom factor. -
Page 75: Scale - Composite
Chapter 4 Advanced ◎ SCALE – COMPOSITE This item is used to configure the composite display settings. <Display the composite display setting screen> (2) COMPOSITE setting menu is displayed. (1) Select “COMPOSITE” on the “SCALE” setting screen and press CENTER of the joystick button. Composite display setting menu (3) Selecting “BACK”... - Page 76 Chapter 4 Advanced <Composite display setting menu> From this menu, you can set the display style, temperature range and transparency for composite image, and the size and position of a visual image used for composition. [COMP] Composite type Select the display style for composite image from “FULL”, “CNTR” and “SIDE”. [SIDE: side-by-side mode] [FULL: transparent mode] [CENTER: picture-in-picture mode]...
- Page 77 Chapter 4 Advanced [UPPER T/LOWER T] Upper temperature/Lower temperature The pixels of a thermal image within the temperature range specified by this item are superimposed on a visual image. Only the pixels within preset range superimposed. Thermal image Composite image 成...
- Page 78 Chapter 4 Advanced [POS] Position Adjust the positions of thermal image and visual image for composition. (2) Adjust the position with the joy stick (1) Select “POS” and press CENTER. button and then press CENTER. [ADJ SIZE] Adjust size Adjust the size of thermal image for composition. (1) Select “ADJ SIZE”...
- Page 79 Chapter 4 Advanced ◎ MEASURE – BOX This item is used to enable/disable the BOX display and temperature display (maximum, minimum and average). Basic operation Select an item you want to set using H Temp(Up), L Temp(Down), NEAR(Left) or FAR(Right) of the joystick button.
- Page 80 Chapter 4 Advanced DISP setting Select a target item in the “DISP” column and press CENTER. The setting of the specified BOX changes (ON/OFF). Temperature display setting Select an item from “MAX TEMP”, “MIN TEMP” and “AVE TEMP” and then press CENTER. The setting of the selected item changes (ON/OFF).
-
Page 81: Measure - Trace Cursor
Chapter 4 Advanced ◎ MEASURE – TRACE CURSOR Display the maximum or minimum temperature value or position (cursor) located in the set area. (1) On the measurement setting screen, select Select “DISPLAY MODE”, press “TRACE CURSOR”, and press CENTER. CENTER. (4) Select Area and press CENTER. -
Page 82: Measure - Delta Temp
Chapter 4 Advanced ◎ MEASURE – DELTA TEMP This item is used to indicate the temperature difference between a reference point and a compared point. For a reference/compared point, you can specify center, maximum, minimum or point cursor “a” temperature. (1) Select “DELTA TEMP”... -
Page 83: Measure - Range
Chapter 4 Advanced ◎ MEASURE – RANGE This item is used to change the temperature measurement range. Fig A: Item selection mode How to operate 1. Select an item you want to set using H Temp(Up) or L Temp(Down). 2. Pressing CENTER with an item selected will enter the setting mode (see Fig B and C). 3. -
Page 84: Measure - Wave
Chapter 4 Advanced ◎ MEASURE – WAVE This item is used to select the waveform display mode. Fig A: Item selection mode Fig B: Setting mode How to operate 1. Select an item you want to set using H Temp(Up) or L Temp(Down) of the joystick button. 2. -
Page 85: Measure - Text
Chapter 4 Advanced ◎ MEASURE – TEXT This item is used to read, display or delete a text stored in a text file of SD memory card. Text contents Fig A: Item selection mode How to operate 1. Select a desired item using H Temp(Up) or L Temp(Down) of the joystick button. 2. -
Page 86: Measure - Intvl Save
Chapter 4 Advanced ◎ MEASURE – INTVL SAVE This item is used to set the interval for saving, number of frames to save and whether or not to execute NUC before saving. Total time required for saving with the interval mode is calculated with the set values and displayed. - Page 87 Chapter 4 Advanced Notes These settings are available only when the save mode is set to “INTERVAL” and the system is in the freeze status. When the preset interval is less than one minute, NUC before saving cannot be executed. In this case, the setting is forced to be changed as follows.
-
Page 88: Measure - Moving Image
Chapter 4 Advanced ◎ MEASURE – MOVING IMAGE * G120 only Set frame rate & number of frame for moving image saving. Total recording time is calculated, based above “FRAME RATE” and “FRAME TO SAVE” Fig A: Item selection mode Notes Only when “SAVE MODE”... -
Page 89: Measure - Panorama
Chapter 4 Advanced ◎ MEASURE – PANORAMA * G120 only Set Swing Direction of Panoramic Thermal Image Saving. Fig A: Item selection mode Figure B : Setting mode Notes Only when “SAVE MODE” is “PANORAMA”, you can come into this setting mode of panoramic thermal image saving How to operate 1. -
Page 90: Cal - Emissivity Cal
Chapter 4 Advanced ◎ CAL – EMISSIVITY CAL This item is used to configure the emissivity correction settings. Fig A: Item selection mode How to operate 1. Select a desired item using H Temp(Up) or L Temp(Down) of the joystick button. 2. - Page 91 Chapter 4 Advanced Setting point emissivity The point emissivity setting menu (Fig E) pops up when POINT EMIS POINT CENTER is pressed with “EMIS” selected in the item selection ON/OFF mode (Fig A). EMIS 0.98 TEMP 40.0 Select an item you want to set using H Temp(Up), BACK L Temp(Down), NEAR(Left) or FAR(Right).
-
Page 92: Cal - Ambient Compensation
Chapter 4 Advanced ◎ CAL – AMBIENT COMPENSATION Calibration of the error caused by the atmosphere between the camera and the object to be measured. <Make the function of AMBIENT operative > (2) “ AMBIENT COMPENSATION” and (1) Press MENU button, Select “CAL”, then “... - Page 93 Chapter 4 Advanced Notes ・This function is operative only in run state. ・Status icon is displayed while AMBIENT COMPENSATION is operative. ・AMBIENT COMPENSATION is made on the assumption the atmosphere between the camera and the object to be measures is identical. ・Accuracy of calibration varies depending on measuring area and/or atmosphere.
-
Page 94: Cal - Lens Assembly
Chapter 4 Advanced ◎ CAL – LENS ASSEMBLY This item is used to perform correction according to the lens type. Make sure to configure this setting when you change a lens. Fig A: Item selection mode How to operate 1. Select a desired item using H Temp(Up) or L Temp(Down) of the joystick button.. 2. -
Page 95: Cal - Ref Cal
Chapter 4 Advanced ◎ CAL – REF CAL This item is used to execute the reflection correction (Ref-Cal). How to operate 1. “EXEC CAL. IS IT OK?” is displayed on the screen. Select “YES” with NEAR(Left) or FAR(Right), and then press CENTER. 2. -
Page 96: Cal - B.ground
Chapter 4 Advanced ◎ CAL – B. GROUND This item is used to correct back reflection for the case a measurement target has low emissivity. <Temperature of reflection light source is unknown> When a temperature of the reflection light source is unknown, measure it using Thermo GEAR and perform correction. -
Page 97: Cal - Calibration (Nuc)
Chapter 4 Advanced ◎ CAL – CALIBRATION (NUC) This correction calibrates the variation of characteristics of all infrared detection elements. NUC (Non Uniformity Correction) is a function to correct the variation of characteristics of all infrared detection elements. NUC enables more precise measurements when the ambient temperature changes rapidly. -
Page 98: Cal - Filter
Chapter 4 Advanced ◎ CAL – FILTER This item is used to remove noise contents from thermal images for better quality. (1) On the CAL screen, select “IMAGE (2) Select “FILTER”, and press CENTER. QUAL” and press CENTER. (3) Select “ON”, and press CENTER. Notes - While noise reduction is set to On, the temperature value displayed with the camera may differ from the color displayed on the screen. -
Page 99: Cal - Average
Chapter 4 Advanced ◎ CAL – AVERAGE This correction reduces noise content from the image signals by signal averaging of the thermal image, improving the noise equivalent temperature difference (NETD). (1) On the CAL screen, select “IMAGE (2) Select “AVERAGE”, and press CENTER. QUAL”... -
Page 100: Cal - Edge Enhancing
Chapter 4 Advanced ◎ CAL – EDGE ENHANCING *G120 only Enhance sharpness of thermal image for crisp image or emphasize edge of grayscale. (1) Select “CAL” and “IMAGE QUAL” from (2)Select “EDGE ENHANCING”, and press menu and press joystick CENTER joystick CENTER. -
Page 101: Alarm - Alarm
Chapter 4 Advanced ◎ ALARM – ALARM This item is used to configure the detail settings for alarm. Fig A: Item selection mode How to operate 1. Select a desired item using H Temp(Up) or L Temp(Down) of the joystick button in the item selection mode. - Page 102 Chapter 4 Advanced Fig B: Setting mode (ALARM JUDGE) Fig C: Setting mode (ALARM TYPE) Fig D: Setting mode (ALARM TEMP) Fig E: Setting mode (CONDITION) Fig F: Setting mode (AERA OF ALM) Fig G: Setting mode (SAVE IMAGE) Fig H: Setting mode (SAVE IMAGE) Fig I: Setting mode (VOLUME) 95691-2935-0000 4-42...
- Page 103 Chapter 4 Advanced Fig J: Setting mode (VIBRATION) *G120 only List of set items Item Description ALARM JUDGE Set whether or not to enable the alarm function. Set the type of alarm detection (once/constant). CONSTANT: An alarm is displayed every time a temperature satisfies the preset conditions (“ALARM TEMP”...
-
Page 104: Alarm - Color Alarm (Isotherm)
Chapter 4 Advanced ◎ ALARM – COLOR ALARM (Isotherm) This item is used to configure the color alarm settings: ON/OFF, upper/lower limit and colors. Fig A: Item selection mode How to operate 1. Select a desired item using H Temp(Up) or L Temp(Down) of the joystick button in the item selection mode. - Page 105 Chapter 4 Advanced List of set items Item Description COLOR ALARM Set whether or not to enable the color alarm function. MAX VALUE Set the upper limit of temperature range used for color alarm. MIN VALUE Set the lower limit of temperature range used for color alarm. Set the color palette used to represent the pixels within the temperature range of ALARM COLOR color alarm.
-
Page 106: Data - Vis Image Link
Chapter 4 Advanced ◎ DATA – VIS IMAGE LINK This item is used to set whether or not to add a visual image at single image save. Fig A: Item selection mode How to operate 1. Select a desired item using H Temp(Up) or L Temp(Down) of the joystick button in the item selection mode. -
Page 107: Data - Voice Memo Save
Chapter 4 Advanced ◎ DATA – VOICE MEMO SAVE This item is used to configure the screen, visual image and voice memo settings, and also used for folder operation and format. Fig A: Item selection mode How to operate 1. Select a desired item using H Temp(Up) or L Temp(Down) of the joystick button in the item selection mode. -
Page 108: Data - Voice Replay
Chapter 4 Advanced ◎ DATA – VOICE REPLAY You can replay a voice memo using this item when a voice memo file is linked to a displayed image data. How to operate 1. To replay a voice memo, select “VOICE REPLAY” and press CENTER of the joystick button. -
Page 109: Data - Make Folder
Chapter 4 Advanced ◎ DATA – MAKE FOLDER For creating a new folder: (2) Use NEAR(Left) and FAR(Right) to move (1) Select “DATA” from menu and press CENTER at “MAKE FOLDER”. right and left. Use H Temp(Up) and L Temp(Down) to change characters. Press CENTER to decide. -
Page 110: Data - Select Folder
Chapter 4 Advanced ◎ DATA – SELECT FOLDER This item is used to select a folder to be used. (2) Use H Temp(Up) and L Temp(Down) to (1) Select “DATA” from menu and Press CENTER at “SELECT FOLDER”. select a folder. Press FAR(Right) to go into the folder. -
Page 111: Data - Rename Folder
Chapter 4 Advanced ◎ DATA – RENAME FOLDER For renaming folder: (2) Use H Temp(Up) and L Temp(Down) to (1) Select “DATA” from menu and press CENTER at “RENAME FOLDER”. select a folder. Press FAR(Right) to go into the folder. Press NEAR(Left) to get out of it. -
Page 112: Data - Delete Folder
Chapter 4 Advanced ◎ DATA – DELETE FOLDER For deleting folder: Fig A: folder selection mode How to operate 1. Select a desired folder using H Temp(Up) , L Temp(Down) , NEAR(Left) or FAR(Right) of the joystick button in the folder selection mode. 2. - Page 113 Chapter 4 Advanced ◎ SET UP On the SET UP screen, select and set each of the following items (No.1 to No. 7, No.9 and No.10). Save the configured items in No. 11 and No. 12. To initialize the saved values, perform No. 13. №...
-
Page 114: Connecting To
Chapter 4 Advanced ◎ CONNECTING TO PC The USB interface is used to download images from this device to a PC. [Connecting the main unit and a PC with a USB cable] Open the rear cover and insert the USB cable into the USB Mini-B socket (indicated by the arrow). *View with the rear cover opened - Complied with USB 2.0. -
Page 115: Seeing Images On The Monitor
Chapter 4 Advanced ◎ SEEING IMAGES ON THE MONITOR Connect the main unit and a monitor with a video cable (3.5Φ mini-plug). Open the rear cover. Insert the 3.5Φ mini-plug of the video cable straight into the VIDEO OUT terminal (indicated by the arrow) of the body. -
Page 116: Alarm Output
Chapter 4 Advanced ◎ ALARM OUTPUT Alarm can be sent to an external circuit by open collector output from the alarm output terminal. 1) Open the cover. 2) Push the white tab of the alarm output terminal. 3) While pushing the white tab, insert an alarm cable (solid/stranded conductor) into the alarm output terminal hole. -
Page 117: Maintenance
Chapter5 Maintenance MAINTENANCE ◎ INSPECTION / MAINTENANCE It is recommended to carry out periodic the temperature calibration at least once a year to maintain the product quality and ensure the reliability of temperature indications. Also be sure to inspect the product after use, and to keep the storage environment conditions described in this manual carefully. - Page 118 Chapter5 Maintenance Followings are the failure examples. Proceed with the described advice. Symptom Probable cause Remedy Power switch is not on Turn on the Power Switch key Power does not turn AC adapter is not connected. Connect AC adapter. Battery is not connected. Connect the battery.
-
Page 119: Limited Warranty
Chapter6 Limited Warranty LIMITED WARRANTY ◎ LIMITED WARRANTY We warrant all portion of this hardware product against defects in materials or workmanship for a period of one year from the date of original shipment. If you discover a defect, we will, at its option, repair or replace this product at no charge except as set forth below. - Page 120 95691-2602-0000...
-
Page 121: Specifications
Chapter7 Specifications . SPECIFICATIONS ◎ SPECIFICATIONS <Thermo Tracer G100/G120 Specifications> Specifications Item G100 G120 1) Detector Uncooled focal plane array (Microbolometer) 2) Number of pixels 320 (H) x 240 (V) (3 edge lines of screen is out of the specs.) 3) Measuring range -40°C to 500°C R1: -40°C to 120°C... - Page 122 Chapter7 Specifications Specifications Item G100 G120 19) Data display Color bar, display temperature range (upper/lower limit), temperature value (max, min, arbitrary point and delta temperature), cursor (max, min and arbitrary point), date and time, emissivity, remaining number of files, temperature unit used (°C /°F), status icon (remaining battery, use of SD memory card, etc.), error display (SD memory card not inserted, system error, etc.) and alarm display 20) Image processing function...
- Page 123 Chapter7 Specifications Specifications Item G100 G120 27) Sleep mode Entered after 5, 10 or 15 minutes of non-operation Manual execution (from menu) 28) Image signal output Composite video NTSC/PAL * LCD/composite video output: exclusive output (automatically recognized) 29) Interface USB 2.0 (mass storage: available at power on) 30) Pilot lamp operation Green lights: Indicates power-on status Red lights: Indicates sleep mode...
- Page 124 Power cable (for AC Adapter) Lens cap Battery pack Attached to the unit Battery charger Power cable (for Battery charger) SD memory card Wristband USB cable Carrying case InfRec Analyzer NS9500LT PC soft ware, CD-ROM Thermo Gear G100/120 Operation manual 95691-2935-0000...
- Page 125 Chapter7 Specifications <Outline diagrams> Unit : mm 95691-2935-0000 7-5...
-
Page 126: Appendix
Chapter 7 Appendix APPENDIX PRINCIPLE ◎ The infrared energy emitted from the measured object is converted into an electrical signal by the imaging sensor (microbolometer) and displayed as a color or black & white thermal image. The measuring principle is explained next. <What is an infrared ray?>... -
Page 127: Blackbody Radiation
Chapter 7 Appendix <Blackbody radiation> Blackbody is an object which absorbs all the incident energy and the radiant intensity becomes maximum at full wavelengths and temperatures. α ε α ε In a blackbody, Absorptance equals Emissivity , and = 1. τ... - Page 128 Chapter 7 Appendix ε In radiation of normal object, as the emissivity is (<1) times of the blackbody, multiply above ε equation by . Following Fig. 7.2 is spectral radiant emittance of a blackbody. (a) is shown by logarithmic scale and (b) is shown by linear scale. Fig.
- Page 129 Chapter 7 Appendix <Blackbody type source and emissivity> Although a blackbody is actually only a theoretical ideal, an object can be formed which approximates it. A law closely related to the blackbody is Kirchhoff's law that defines reflection, transmission, absorption and radiation. α...
- Page 130 Chapter 7 Appendix cannot be measured. In other words, a variation or change in emissivity will cause a change in the indications on the Thermo Gear. To approach the true temperature therefore, (1)The emissivity must approximate 1. (→ The measured object must be nearly a blackbody.) (2)The emissivity must be corrected.
- Page 131 Chapter 7 Appendix 5) Comparison with blackbody surface If a small hole cannot be made in the object, then the emissivity can be obtained by applying black paint to the object and reaching a thermal equilibrium through similar procedures. But since the painted object will not provide a complete blackbody, first set the emissivity of the painted object and then measure the temperature.
-
Page 132: Practical Measurement
Chapter 7 Appendix ◎ P R A C T I C A L M E A S U R E M E N T There are a number of methods for correcting emissivity in order to obtain the true temperature. The correction procedure with each method will be explained next. - Page 133 Chapter 7 Appendix ◎ M E A S U R I N G D I S T A N C E A N D M E A S U R I N G F I E L D O F V I E W <Measuring field of view for Infrared Camera>...
- Page 134 Chapter 7 Appendix <Measuring field of view for G100/G120> Measuring Minimum detectable Horizontal Vertical distance Size range range (H × V mm) 0 . 1 8 × 0 . 1 8 0 . 0 0 5 7 0 . 0 4 3 0 .
-
Page 135: Emissivity Of Various Materials
Chapter 7 Appendix ◎ E M I S S I V I T Y O F V A R I O U S M A T E R I A L S From ”Infrared Radiation, a Handbook for Applications ”by Michael A. Bramson ε... - Page 136 Chapter 7 Appendix Wire, oxidized 50 to 500 0.95 to 0.98 Nickel Commercially pure, polished 0.045 200 to 400 0.07 to 0.09 Oxidized at 600°C 200 to 600 0.37 to 0.48 Wire 200 to 1000 0.1 to 0.2 Nickel oxide 500 to 650 0.52 to 0.59 1000 to 1250...
- Page 137 Chapter 7 Appendix Zirconium Zirconium oxide, powder Normal 0.16 to 0.20 temperature Zirconium silicate, powder 0.36 to 0.42 Asbestos Board 0.96 Paper 40 to 400 0.93 to 0.95 Powder Normal 0.40 to 0.60 temperature Slate 0.96 Carbon Filament 1000 to 1400 0.53 Purified (0.9% ash) 100 to 600...
- Page 138 Chapter 7 Appendix White, shiny Normal 0.70 to 0.75 temperature Rubber Hard 0.95 Soft, gray, rough 0.86 Sand Normal 0.60 temperature Shellac Black, dull 75 to 150 0.91 Black, shiny, applied on tin plate 0.82 Silica Granular powder Normal 0.48 temperature Silicon (silica gel), powder 0.30...
- Page 139 CHECK SHEET FOR SAFETY Date of use , Time : : : to : : Operator Check in the squares: □ N o t t o d a m a g e i n A C a d a p t e r o r c a b l e s . □...
- Page 140 CHECK SHEET FOR STORAGE D a t e S t o r a g e : T i m e Responsible person C o n f i r m S t o r a g e E n v i r o n m e n t : C h e c k i n t h e s q u a r e s □...
- Page 141 Thermo Gear G100/G120 Operation Manual Editorial History Edition 1 published on March 2010 NEC Avio Infrared Technologies Co., Ltd. Published:...
Need help?
Do you have a question about the Thermo Gear G100 and is the answer not in the manual?
Questions and answers