Table of Contents
Advertisement
Contents
Getting started ................... 6
Assembly ........................................ 6
Turning on the phone .................... 8
Help ................................................ 9
Charging the battery ....................... 9
Phone overview ........................... 11
Menu overview ............................. 13
Navigation .................................... 15
Memory ......................................... 16
Phone language ........................... 17
Entering text ................................. 18
Walkman™ ........................ 19
Stereo portable handsfree .......... 19
Walkman™ player ......................... 20
TrackID™ ...................................... 23
Online music and video clips ....... 23
Video player .................................. 24
Radio ........................................... 24
MusicDJ™ ................................... 24
Record sound .............................. 25
Sony Ericsson W595
content .............................. 25
Handling content within the phone ...
25
computer ..................................... 26
Using the USB cable ................... 27
Phone name ................................. 28
technology .................................... 28
Backing up and restoring ............. 30
Calling ............................... 31
Making and receiving calls ........... 31
Contacts ...................................... 33
Call list .......................................... 36
Speed dial ..................................... 36
Voicemail ...................................... 37
Voice control ................................ 37
More than one call ........................ 38
Restricted dialling ......................... 40
Call time and cost ......................... 41
41
Contents
1
Advertisement
Table of Contents

Related Manuals for Sony Ericsson W595


Summary of Contents for Sony Ericsson W595
-
Page 1: Table Of Contents
Contents Sony Ericsson W595 Getting started ....6 Transferring and handling content ......25 Assembly ........6 Handling content within the phone ... Turning on the phone ....8 Help ..........9 Sending content to another phone 26 Charging the battery ....... 9 Transferring content to and from a Phone overview ...... - Page 2 Walk Mate ........69 Vodafone live! ....... 55 Locks ..........69 To connect to Vodafone live! ..56 Troubleshooting....71 Vodafone live! services ....56 Web feeds ........56 Common questions ...... 71 Error messages ......74 Sony Ericsson W595...
- Page 3 Important information ..76 Index ......... 87 Sony Ericsson W595...
- Page 4 T9™ Text Input is a trademark or a registered other third party content. Under no circumstances trademark of Tegic Communications. T9™ Text will Sony Ericsson be liable in any way for your Input is licensed under one or more of the...
-
Page 5: Instruction Symbols
following: U.S. Pat. Nos. 5,818,437, 5,953,541, and its associated regulations, and may be subject 5,187,480, 5,945,928, and 6,011,554; Canadian to export or import regulations in other countries. Pat. No. 1,331,057, United Kingdom Pat. No. Customer agrees to comply strictly with all such 2238414B;... -
Page 6: Getting Started
A service or function is network- or subscription-dependent. Contact your network operator or go to www.vodafone.com details. > Use a selection or navigation key to scroll and select. See Navigation on page 15. Getting started Assembly Before you start using your phone, you need to insert a SIM card and the battery. - Page 7 To insert the SIM card To insert the battery Remove the battery cover. Insert the battery with the label side up Slide the SIM card into its holder with and the connectors facing each other. the gold-coloured contacts facing Slide the battery cover into place. down.
-
Page 8: Turning On The Phone
To correct a mistake when you enter You may be asked to register your phone your PIN, press at Sony Ericsson. If you accept to register your phone, no personal data Before turning the phone off, you must such as your phone number will be return to standby. -
Page 9: Help
Standby Charging the battery After you have turned on your phone The phone battery is partly charged and entered your PIN, the name of the when you buy it. network operator appears. This view is To charge the battery called standby. Your phone is now ready for use. - Page 10 Remove the charger by tilting the plug upwards. You can use your phone while it is charging. You can charge the battery at any time and for more or less than 2.5 hours. You can interrupt the charging without damaging the battery. Getting started...
-
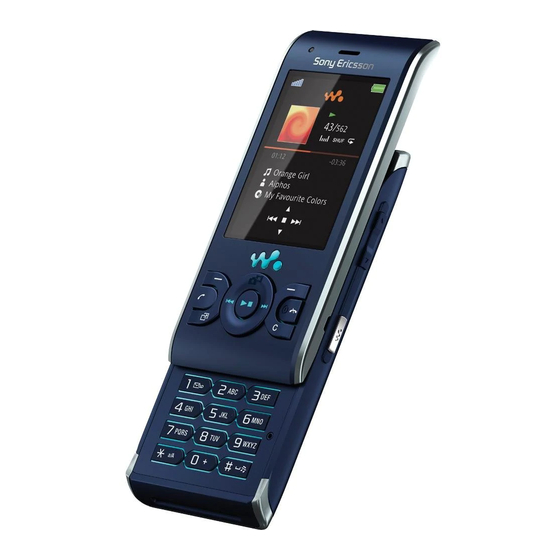
Page 11: Phone Overview
Phone overview Ear speaker Screen Selection keys Call key Toolbar key Selection key, Walkman™ player control Volume key Walkman™ key End key, On/off key C key (Clear) Navigation key, Walkman™ player control Silent key Getting started... - Page 12 Camera lens Speaker Connector for charger, handsfree and USB cable Strap holder Getting started...
-
Page 13: Menu Overview
Menu overview Web* Email* Applications Create new Inbox Drafts Outbox Sent Email Saved Email Settings Accounts Manage Email Camera Messaging Media Create new Photo Inbox Music live! Studio*** Video Drafts Web feeds Outbox Settings Sent messages Saved messages Messenger*** Call voicemail Templates Manage messages Settings... - Page 14 Entertainment** Organiser & Tools Radio Online services* TrackID™*** My Files Mobile TV*** Calls** Location services*** Alarms Games Video call VideoDJ™ Calendar PhotoDJ™ Tasks MusicDJ™ Notes Remote control Synchronisation Record sound Timer Stopwatch Calculator Code memo Settings** General Sounds & alerts Display Calls Connectivity...
-
Page 15: Navigation
Navigation To navigate your media From standby select Menu > Media. To navigate the phone menus Scroll to a menu item and press the navigation key right. To go back, press the navigation key left. To delete items • Press to delete items such as numbers, letters, pictures and sounds. -
Page 16: Memory
Scroll to an option and select Edit. Memory Scroll to a menu option and select You can save content on the memory Shortc.. card, in the phone memory and on the SIM card. Pictures and music are Main menu shortcuts saved on the memory card if a Menu numbering starts from the top memory card is inserted. -
Page 17: Phone Language
To insert a memory card To remove a memory card • Open the cover and insert the memory • Open the cover and remove the card with the gold-coloured contacts memory card. facing down. To view memory card options From standby select Menu >... -
Page 18: Entering Text
To change the phone language To enter text using T9™ Text Input From standby select Menu > Settings From standby select, for example, > the General tab > Language > Phone Menu > Messaging > Create new > language. Message. Select an option. -
Page 19: Walkman
Write the word using multitap input Walkman™ and select Insert. You can listen to music, audio books and podcasts. Use Sony Ericsson Media Manager to transfer content to and from your phone. See Transferring content to and from a computer on page 26 for more information. -
Page 20: Walkman™ Player
Walkman™ player Shake control To switch track To play music From standby select Menu > Media > Music. Browse by category using the navigation key. Scroll to a track and select Play. To stop playing music • Press the centre navigation key. To fast forward and rewind •... - Page 21 To shuffle tracks To change the volume When music is playing, hold the phone out in front of you facing upwards. • When music is playing, press and hold Press and hold down and bend down and shake your phone. your arm upwards towards you to increase the volume.
- Page 22 By using From standby select Menu > Media > Sony Ericsson Media Manager to Music > Playlists. analyze and transfer music to your phone, information such as mood, Select a playlist. tempo and chords is added to your...
-
Page 23: Trackid
Menu > Entertainment > TrackID™ > computer using Sony Ericsson Media Start. Manager. • When the radio is playing select Options > TrackID™. It may take a few minutes before a For best results, use TrackID™... -
Page 24: Video Player
To stream music and video clips To return to the radio From standby select Menu > Web. • From standby select Menu > Entertainment > Radio. Select Options > Go to > Bookmarks. Select a link to stream from. Saving channels You can save up to 20 preset Video player channels. -
Page 25: Record Sound
Record sound Transferring and You can record a voice memo or a handling content call. Recorded sounds can also be set You can transfer and handle content as ringtones. such as pictures and music. In some countries or states it is required You are not allowed to exchange some by law that you inform the other person copyright-protected material. -
Page 26: Sending Content To Another Phone
Transferring content to and memory and the memory card from a computer From standby select Menu > Organiser You can use Sony Ericsson Media & Tools > Files. Manager to transfer content between Find an item and select Options >... -
Page 27: Using The Usb Cable
Media Manager Help. Click in the top memory. right corner of the Sony Ericsson Media Manager window. You can also go to To disconnect the USB cable safely www.sonyericsson.com/support to read Right-click the removable disk icon in Getting started guides. -
Page 28: Phone Name
Select Eject. To enter a phone name Disconnect the USB cable when there From standby select Menu > Settings is a message saying it is safe to do so > the Connectivity tab > Phone name. in the phone. Enter the phone name and select OK. Do not copy the files immediately if you Using Bluetooth™... - Page 29 To turn the Bluetooth function on To pair the phone with a Bluetooth handsfree for the first time • From standby select Menu > Settings From standby select Menu > Settings > the Connectivity tab > Bluetooth > > the Connectivity tab >...
-
Page 30: Backing Up And Restoring
Phone mode. Before backing up and restoring, you Computer: Go to the backup and need to install the Sony Ericsson PC restore section in the Sony Ericsson Suite and the Sony Ericsson Media PC Suite and restore your phone. Manager. -
Page 31: Calling
Select the files you want to backup and make a back up. To make a call From standby enter a phone number The Sony Ericsson Media Manager will (with international country code and compare your phone content with your area code, if applicable). - Page 32 To re-dial a number Networks • When Retry? appears select Yes. Your phone switches automatically between GSM and 3G (UMTS) Do not hold your phone to your ear when networks depending on availability. waiting. When the call connects, your Some network operators allow you to phone gives a loud signal.
-
Page 33: Contacts
SIM card. From standby select Menu > Contacts. You can synchronise your contacts using Scroll to New contact and select the Sony Ericsson PC Suite. Options > Special numbers > Emergency nos.. Default contacts You can choose which contact Video call information is shown as default. - Page 34 Enter the number and select OK. Editing contacts Select a number option. To add information to a phone Scroll between the tabs and add contact information to the fields. From standby select Menu > Select Save. Contacts. Scroll to a contact and select Options Calling contacts >...
- Page 35 Select an option. Scroll to a contact and press When you copy all contacts from your Deleting contacts phone to the SIM card, all existing SIM To delete all contacts card information is replaced. From standby select Menu > To automatically save names and Contacts.
-
Page 36: Call List
To add your own business card Call list From standby select Menu > Contacts. You can view information about recent Scroll to Myself and select Open. calls. Scroll to My contact info and select To call a number from the call list >... -
Page 37: Voicemail
To speed dial Select > New voice command select a contact. If the contact has • From standby enter the position more than one number, select the number and press number to add the voice command to. Voicemail Record a voice command such as “John mobile.”... -
Page 38: More Than One Call
To activate voice answering and Diverting calls record voice answer commands You can divert calls, for example, to From standby select Menu > Settings an answering service. > the General tab > Voice control > When Restrict calls is used, some divert Voice answer >... - Page 39 To activate call waiting To join two calls • From standby select Menu > Settings • During the call, select Options > Join > the Calls tab > Manage calls > Call calls. waiting > Activate. To connect two calls To make a second call •...
-
Page 40: Restricted Dialling
To have a private conversation To accept all calls During the call, select Options > Talk to • From standby select Menu > Settings and select the participant to talk to. > the Calls tab > Manage calls > Accept calls >... -
Page 41: Call Time And Cost
Fixed dialling Call time and cost Fixed dialling allows calls to be made During a call, the phone shows how only to certain numbers saved on the long you have been talking. You can SIM card. The fixed numbers are also check on the duration of your last protected by your PIN2. -
Page 42: Messaging
Messaging To view a message from the inbox From standby select Menu > Your phone supports various Messaging > Inbox. messaging services. Please contact Scroll to the message and select View your network operator about the services you can use, or for more Text messages information, go to www.vodafone.com... -
Page 43: Picture Messages
Select Continue > Contacts look-up. video clips, signatures and attachments. You can send picture Select a recipient and select Send messages to a mobile phone or an A message automatically converts from email address. being a text message (SMS) to a picture message (MMS) if you use toolbar Before you use picture messaging options such as adding pictures, sounds... -
Page 44: Message Options
Enter text. To add items to the To set text message options message, press , scroll From standby select Menu > Settings select an item. > the Connectivity tab > Message Select Continue > Contacts look-up. settings > SMS. Select a recipient and select Send. Scroll to an option and select Edit. -
Page 45: Templates
To save a message on the SIM card Select Save, enter a title and select From standby select Menu > Messaging and select a folder. To save a message as a template Scroll to a message and select From standby select Menu >... -
Page 46: Voice Messages
Voice messages To create an email account From standby select Menu > Email > You can send and receive a sound Accounts. recording as a voice message. Scroll to New account and select Add. The sender and recipient must have a If you enter settings manually, you can subscription supporting picture contact your email provider for more... -
Page 47: Messenger
To receive and read an email To change the active email account message From standby select Menu > Email > From standby select Menu > Email > Accounts. Inbox > Options > Check new email. Select an account. Scroll to the message and select View. Push email To save an email message You can receive notification in your... - Page 48 • Username status to all users on the Messenger • Password server. • Server address To show my status • Internet profile From standby select Menu > To enter Messenger server settings Messaging > Messenger > Options > From standby select Menu >...
-
Page 49: Area And Cell Information
Enter a short invitation text and select Scroll to Reception and select Edit > Cont. > Send. To add a chat group From standby select Menu > Messaging > Messenger > the Groups tab > Options > group. Select an option. Conversation history is saved between log out and when you log in again to let you return to chat messages from... -
Page 50: Imaging
Imaging To take a picture Activate the camera and press the You can take pictures and record navigation key up or down to scroll to video clips to view, save or send. You find saved pictures and video clips in Press the navigation key to take a Media and in... -
Page 51: More Camera Features
More camera features To view pictures in a slide show From standby select Menu > Media > You can improve an underexposed Photo > Camera album. picture with Photo fix. Select a month. Camera icons and settings Scroll to a picture and select View. Icons on the screen inform what the Select Options... - Page 52 Using pictures Use Sony Ericsson Media Manager to You can add a picture to a contact, transfer content to and from your use it during phone startup, as a phone.
-
Page 53: Live! Studio
To edit and save a picture This service is not available in all countries. From standby select Menu > Media > Photo > Camera album. With Vodafone live! you can save Select a month. pictures in a Web-based album. This Scroll to a picture and select View. -
Page 54: Printing Photos
If you cannot use picture or video Select Publish. blog, see Troubleshooting on page 71. You can also send a video clip to a blog just after you have recorded it by Web services may require a separate selecting Send > To blog. license agreement between you and the service provider. -
Page 55: Internet
Scroll to a picture and select Options > Internet Print. If you cannot use the Internet, see You should disconnect and re-connect Troubleshooting on page 71. the USB cable if there is a printer error. Vodafone live! Vodafone live! has everything you need, full of information, games, music, ringtones and other entertainment. -
Page 56: To Connect To Vodafone Live
Select a region and a country. • News – get the latest news reports and weather forecasts. Select the Phone setup tab, and select a phone model. Vodafone live! is growing and kept up to Select which setting to download to date on a daily basis, so these options your phone. - Page 57 You can show news updates on the download a photo. standby screen. You can also subscribe to and download content to a computer via feeds using To show Web feeds in standby Sony Ericsson Media Manager. You can From standby select Menu > Media >...
-
Page 58: Synchronising
Microsoft Outlook. Before synchronising, you need to install the Sony Ericsson PC Suite. Sony Ericsson PC Suite software is included on the CD with your phone and available for download at www.sonyericsson.com/support. -
Page 59: Synchronising Using An Internet Service
See Required operating systems on Microsoft Exchange ActiveSync. If you cannot synchronise with an Internet service, see Troubleshooting on page To install the Sony Ericsson PC Suite Turn on your computer and insert the SyncML CD. The CD starts automatically and the installation window opens. - Page 60 Scroll to the Applications tab and mark • Username – account username applications to synchronise. • Password – account password Scroll to the App. settings tab and Before you synchronise with Exchange select an application. ActiveSync, you must enter the correct Select Database name and enter the...
-
Page 61: More Features
More features To view the current software in the phone From standby select Menu > Settings Flight mode > the General tab > Update service. Flight mode the network and radio Select Software version. transceivers are turned off to prevent disturbance to sensitive equipment. -
Page 62: Location Services
Update service using a PC To learn more about Google Maps You can update your phone using the • When you use Google Maps, select provided USB cable and an Internet Options > Help. connected PC. To view your approximate location Make sure all personal data saved on •... -
Page 63: Alarms
phone memory. Unrecognized files are Select Paste. saved in the Other folder. To select more than one file in a folder You are not allowed to exchange some From standby select Menu > Organiser copyright-protected material. A protected file has a icon. -
Page 64: Calendar
To select another day, scroll to the day To set an alarm to sound or not in silent mode and select Mark. From standby select Menu > Organiser Select Done > Save. & Tools > Alarms. To set the alarm signal Scroll to an alarm and select Edit. -
Page 65: Notes
To set default view Scroll to an appointment and select View. From standby select Menu > Organiser & Tools > Calendar. Select Options > Edit. Select Options > Advanced > Default Edit the appointment and confirm view. each entry. Select an option. Select Save. -
Page 66: Tasks
To show a note in standby Scroll to a task and select Options > Reminders. From standby select Menu > Organiser & Tools > Notes. Select an option. Scroll to a note and select Options > A reminders option set in tasks affects a Show in standby. -
Page 67: Theme
Enter the time and select Save. To change the main menu layout From standby select Menu > Options > To set the date Main menu layout. From standby select Menu > Settings Select an option. > the General tab > Time &... -
Page 68: Screen Orientation
Screen orientation Internet profiles for Java applications Some Java applications need to You can change between landscape connect to the Internet to receive and portrait orientation, or select Auto information. Most Java applications rotate to have the orientation change use the same Internet settings as your when you rotate the phone. -
Page 69: Walk Mate
information, contact the application minimize it and run it in the vendor. background. To set the screen size for a Java You cannot minimize Walk Mate and use application it as wallpaper at the same time. To From standby select Menu >... - Page 70 PUK and select OK. new code. If you forget it, you have to take your phone to your local Enter a new four-to-eight-digit PIN Sony Ericsson retailer. and select OK. Re-enter the new PIN and select OK. To use the phone lock...
-
Page 71: Troubleshooting
be answered without unlocking the Troubleshooting keypad. Some problems will require you to call Calls to the international emergency your network operator. number 112 can still be made. For more support go to www.sonyericsson.com/support. To use the automatic keylock From standby select Menu >... - Page 72 I have problems with memory The battery is worn out and needs to capacity or the phone is working be replaced See Charging the battery slowly on page 9. Restart your phone every day to free No battery icon appears when I start memory or do a Master reset.
- Page 73 Enter the number, including the The phone does not ring or rings too softly international “+” sign and country code. Make sure that Silent mode has not been set to On. See To turn off the Select Save. ringtone on page 67. I cannot use picture messages on my Check the ringtone volume.
-
Page 74: Error Messages
I have forgotten my code memo Where can I find the regulatory passcode information such as my IMEI number if I cannot turn on my phone? If you forget your passcode, you must reset the code memo. This means that all entries in the code memo are deleted. - Page 75 Wrong PIN Wrong PIN2 contact the nearest Sony Ericsson service location. You have entered your PIN or PIN2 incorrectly. Emerg. calls only Enter the correct PIN or PIN2 and You are within range of a network, but select Yes. See PIN on page 7.
-
Page 76: Sony Ericsson Consumer Web Site
• Global and local Web sites providing support • A global network of Call Centres • An extensive network of Sony Ericsson service partners • A warranty period. Learn more about the warranty conditions in the Important information. - Page 77 Support Important information...
-
Page 78: Guidelines For Safe And Efficient Use
• Do not paint or attempt to Recommendations for care and safe disassemble or modify the product. use of our products Only Sony Ericsson authorised personnel should perform service. • Handle with care and keep in a clean and dust-free • Consult with authorised medical staff place. -
Page 79: Personal Medical Devices
• Caution: Cracked or broken displays may create or replace built-in batteries. Use of batteries that sharp edges or splinters that could be harmful upon are not Sony Ericsson branded may pose increased contact. safety risks. Replace the battery only with another •... -
Page 80: Emergency Calls
Calls cannot be guaranteed under all conditions. metal parts in the vicinity of the phone or when Never rely solely upon mobile phones for essential properly used with an appropriate Sony Ericsson communication. Calls may not be possible in all accessory and worn on the body. -
Page 81: Disposing Of The Battery
PC. For details, refer to the operating instructions of the device or contact Accessible Solutions/Special Needs customer support. In the US, compatible Sony Ericsson phones may offer compatibility with TTY terminals (with use of Warning! necessary accessory). For more information call the... -
Page 82: Limited Warranty
Sony Ericsson and its third party suppliers and emissions. licensors retain all rights, title and interest in and to the Software. -
Page 83: Our Warranty
Subject to the conditions of this Limited Warranty, purchase and serial number**, is presented with the Sony Ericsson warrants this Product to be free from Product to be repaired or replaced. Sony Ericsson defects in design, material and workmanship at the reserves the right to refuse warranty service if this time of its original purchase by a consumer. -
Page 84: Fcc Statement
Sony Ericsson Product is sold in such country by an authorised branded original accessories intended for use with Sony Ericsson distributor. To find out if your the Product. Product is sold in the country you are in, please call Tampering with any of the seals on the Product will the local Sony Ericsson Call Center. -
Page 85: Industry Canada Statement
Any change or modification not expressly approved Cet appareil numérique de la classe B est conforme by Sony Ericsson may void the user's authority to à la norme NMB-003 du Canada. operate the equipment. This equipment has been tested and found to comply with the limits for a Class B digital device, pursuant to Part 15 of the FCC Rules. -
Page 86: Declaration Of Conformity For W595
Declaration of Conformity for Equipment and Telecommunication Terminal Equipment directive 1999/5/EC. W595 Lund, June 2008 We, Sony Ericsson Mobile Communications AB of Nya Vattentornet SE-221 88 Lund, Sweden declare under our sole responsibility that our product Sony Ericsson type AAD-3052111-BV... - Page 87 Index accepting ........40 alarms ........... 63 answering and rejecting ....32 answering service ........ 37 emergency ........32 applications .......... 68 handling two calls ......39 appointments ........65 international ......... 31 assembly ..........6 making and receiving ....31 audio book ...........
- Page 88 email ............. 46 language ..........17 emergency numbers ......32 location data .........51 entering text ......... 18 location services ........62 lock keypad ..........70 fixed dialling ......... 41 phone ..........70 flight mode ........... 61 SIM card ........69 games ..........68 master reset ..........72 Google Maps™...
- Page 89 my numbers ......... 40 recording, listen to ....... 25 restricted dialling ........40 ringtones ..........67 navigating menus ......... 15 notes ............ 65 safety guidelines ........78 screen orientation ........ 68 online music, listening ......23 selection keys ........15 online video clips, viewing ....
- Page 90 theme ........... 67 voice messages ........46 time ..........66, 67 voicemail ..........37 time zone ..........67 volume toolbar ..........16 ear speaker ........32 TrackID™ ..........23 ringtone .........67 transferring camera pictures ......26 Walk Mate ..........69 music ........... 26 Walkman™ player ......19, 20 sound ...........
- Page 91 Index...
Need help?
Do you have a question about the W595 and is the answer not in the manual?
Questions and answers