Table of Contents
Advertisement
Advertisement
Chapters
Table of Contents
Troubleshooting

Related Manuals for Yamaha TW125 1999


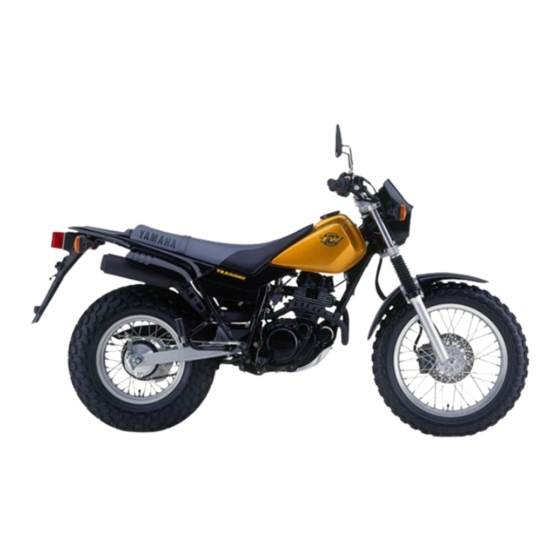
Summary of Contents for Yamaha TW125 1999
- Page 3 EAS00000 TW125 SERVICE MANUAL 1998 by Yamaha Motor Co., Ltd. 1st Edition, July 1998 All rights reserved. Any reprinting or unauthorized use without the written permission of Yamaha Motor Co., Ltd. is expressly prohibited.
- Page 4 It is not possible to include all the knowledge of a mechanic in one manual, so it is assumed that anyone who uses this book to perform maintenance and repairs on Yamaha mo- torcycle has a basic understanding of the mechanical ideas and the procedures of motorcycle repair.
-
Page 5: How To Use This Manual
EAS00007 HOW TO USE THIS MANUAL This manual is intended as a handy, easy-to-read reference book for the mechanic. Comprehensive explanations of all installation, removal, disassembly, assembly, repair and inspection procedures are laid out with the individual steps in sequential order. 1 The manual is divided into chapters. - Page 6 EAS00009 SYMBOLS The following symbols are not relevant to every SPEC vehicle. INFO Symbols 1 to 9 indicate the subject of each chapter. 1 General information 2 Specifications 3 Periodic inspections and adjustments 4 Engine 5 Carburetor(-s) CARB CHAS 6 Chassis 7 Electrical system 8 Troubleshooting TRBL...
- Page 7 INDEX GENERAL INFORMATION INFO SPECIFICATIONS SPEC PERIODIC INSPECTION AND ADJUSTMENT ENGINE OVERHAUL CARBURATION CARB CHASSIS CHAS ELECTRICAL ELEC TROUBLESHOOTING TRBL SHTG...
- Page 9 INFO...
-
Page 10: Table Of Contents
CHAPTER 1. GENERAL INFORMATION MOTORCYCLE IDENTIFICATION ....... 1–1 VEHICLE IDENTIFICATION NUMBER . -
Page 12: General Information
MOTORCYCLE IDENTIFICATION INFO EAS00014 GENERAL INFORMATION MOTORCYCLE IDENTIFICATION EAS00017 VEHICLE IDENTIFICATION NUMBER The vehicle identification number 1 is stamped into the right side of the steering head. EAS00018 MODEL CODE The model code label 1 is affixed to the frame. This information will be needed to order spare parts. -
Page 13: Important Information
5. Keep all parts away from any source of fire. EAS00021 REPLACEMENT PARTS 1. Use only genuine Yamaha parts for all re- placements. Use oil and grease recom- mended by Yamaha for all lubrication jobs. Other brands may be similar in function and appearance, but inferior in quality. -
Page 14: Lock Washers/Plates And Cotter Pins
IMPORTANT INFORMATION INFO EAS00023 LOCK WASHERS/PLATES AND COTTER PINS 1. After removal, replace all lock wash- ers/plates 1 and cotter pins. After the bolt or nut has been tightened to specification, bend the lock tabs along a flat of the bolt or nut. EAS00024 BEARINGS AND OIL SEALS 1. -
Page 15: Checking The Connections
CHECKING THE CONNECTIONS INFO EAS00026 CHECKING THE CONNECTIONS Check the leads, couplers, and connectors for stains, rust, moisture, etc. 1. Disconnect: S lead S coupler S connector 2. Check: S lead S coupler S connector Moisture ! Dry with an air blower. Rust/stains ! Connect and disconnect sev- eral times. -
Page 16: Special Tools
SPECIAL TOOLS INFO EAS00020 SPECIAL TOOLS The following special tools are necessary for complete and accurate tune-up and assembly. Use only the appropriate special tools; this will help prevent damage caused by the use of inappropriate tools or improvised techniques. When placing an order, refer to the list provided below to avoid any mistakes. - Page 17 SPECIAL TOOLS INFO Tool No. Tool name/Usage Illustration 90890-03079 Thickness gauge This tool is used to measure the valve clearance. 90890-03081 Compression gauge 90890-04082 Adaptor These tools are used to measure the engine compression. 90890-03112 Pocket tester These instruments are invaluable for checking the electrical system.
- Page 18 Tool name/Usage Illustration 90890-04101 Valve lapper This tool is used for lapping the valve. 90890-06754 Ignition checker This instrument is necessary for checking the ignition system components. 90890-85505 Yamaha bond No.1215 This sealant (bond) is used for crankcase mating surface, etc.
- Page 19 INFO...
- Page 20 SPEC...
-
Page 21: Specifications
CHAPTER 2. SPECIFICATIONS GENERAL SPECIFICATIONS ........MAINTENANCE SPECIFICATIONS . -
Page 23: Chapter 2. Specifications
SPEC GENERAL SPECIFICATIONS SPECIFICATIONS GENERAL SPECIFICATIONS Model TW125 Model code: 5EK1/5EK2 Dimensions: Overall length 2,140 mm Overall width ,810 mm Overall height 1,120 mm Seat height ,805 mm Wheelbase 1,330 mm Minimum ground clearance ,260 mm Minimum turning radius 2,100 mm Basic weight: With oil and full fuel tank 125 kg... - Page 24 SPEC GENERAL SPECIFICATIONS Model TW125 Carburetor: Type/quantity Y24P/1 Manufacturer TEIKEI Spark plug: Type DR8EA Manufacturer 0.6 X 0.7 mm Spark plug gap Clutch type: Wet, multiple-disc Transmission: Primary reduction system Spur gear Primary reduction ratio 74/20 (3.700) Secondary reduction system Chain drive Secondary reduction ratio 50/14 (3.571)
- Page 25 SPEC GENERAL SPECIFICATIONS Model TW125 Brake: Front brake type Single disc brake operation Right hand operation Rear brake type Drum brake operation Right foot operation Suspension: Front suspension Telescopic fork Rear suspension Swingarm (Monocross) Shock absorber: Front shock absorber Coil spring/Oil damper Rear shock absorber Coil gas spring/Oil damper Wheel travel:...
-
Page 26: Maintenance Specifications
SPEC MAINTENANCE SPECIFICATIONS MAINTENANCE SPECIFICATIONS ENGINE Item Standard Limit Cylinder head: Warp limit 0.05 mm Cylinder: 57.00 X 57.02 mm Bore size 57.1 mm Taper limit 0.05 mm Out of runout limit 0.01 mm Camshaft: Cam dimensions 36.54 X 36.64 mm Intake “A”... - Page 27 SPEC MAINTENANCE SPECIFICATIONS Item Standard Limit 6.000 X 6.012 mm Guide inside diameter 6.042 mm 6.000 X 6.012 mm 6.042 mm 0.010 X 0.037 mm Stem-to-guide clearance 0.08 mm 0.025 X 0.052 mm 0.10 mm Stem runout limit 0.03 mm 0.9 X 1.1 mm Valve seat width 1.6 mm...
- Page 28 SPEC MAINTENANCE SPECIFICATIONS Item Standard Limit F ´ Crankshaft: 55.95 X 56.00 mm Crank width “A” Runout limit “C” 0.03 mm 0.35 X 0.65 mm Big end side clearance “D” 1.0 mm 0.010 X 0.025 mm Big end radial clearance 0.8 X 1.0 mm Small end free play “F”...
- Page 29 SPEC MAINTENANCE SPECIFICATIONS TIGHTENING TORQUES ENGINE Tightening Thread torque Part to be tightened Part name Q’ty Remarks size size mSkg Cylinder head blind plug Screw Cylinder head and cylinder Bolt Cylinder head Bolt (Timing chain side) Cam sprocket cover Screw Valve cover Bolt Camshaft retainer...
- Page 30 SPEC MAINTENANCE SPECIFICATIONS Item Standard Limit Tightening sequence Cylinder head Crankcase...
-
Page 31: Chassis
SPEC MAINTENANCE SPECIFICATIONS CHASSIS Item Standard Limit Steering system: Steering bearing type (upper) Ball bearings (lower) Angular ball bearing No./size of steel balls (upper) 22 pcs. 0.1875 in Front suspension: Front fork travel 160 mm Fork spring free length 342 mm 338 mm Fitting length 337 mm... - Page 32 SPEC MAINTENANCE SPECIFICATIONS Item Standard Limit Rear brake: Type Leading, trailing Drum inside diameter 110 mm 111 mm Shoe thickness 4 mm 2 mm Shoe spring free length 50.5 mm Brake lever: 2 X 5 mm Brake lever free play (at lever end) Brake pedal: 20 X 30 mm Brake pedal free play...
- Page 33 SPEC MAINTENANCE SPECIFICATIONS TIGHTENING TORQUES CHASSIS Tightening torque Part to be tightened Thread size Remarks mSkg Handle crown and front fork Handle crown and steering shaft Handlebar holder (under and upper) Steering ring nut Refer to NOTE Master cylinder (front brake) Brake hose union bolt (front brake) Steering shaft and front fork Engine and front engine stay...
-
Page 34: Electrical
656 X 984 Ω at 20_C/ Pickup coil resistance/color Red – White 624 X 936 Ω at 20_C/ Source coil resistance/color Brown – Green C.D.I. unit model/manufacturer 5EK/YAMAHA Ignition coil: Model/ manufacturer 2JN/YAMAHA Minimum spark gap 6 mm 0.18 X 0.28 Ω at 20_C Primary winding resistance 6.32 X 9.48 kΩ... - Page 35 SPEC MAINTENANCE SPECIFICATIONS Item Standard Limit Starter relay: Model/manufacturer MS5F/JIDECO Amperage rating 100 A 4.2 X 4.6 Ω at 20_C Coil winding resistance Horn: Model/manufacturer YF-12/NIKKO Maximum amperage Flasher relay: Type Full transistor type Model/manufacturer FE 246 BH/DENSO Flasher frequency 85 cycle/min Circuit breaker: Type...
-
Page 36: Conversion Table
CONVERSION TABLE/ GENERAL TORQUE SPECIFICATIONS INFO EAS00028 CONVERSION TABLE All specification data in this manual are listed in Sl and METRIC UNITS. Use this table to convert METRIC unit data to IMPERIAL unit data. METRIC MULTIPLIER ** mm 0.03937 ** in 2 mm 0.03937 0.08 in... -
Page 37: Lubrication Point And Grade Of Lubricant
Valve stem/valve guide (IN, EX) Valve stem end (IN, EX) Rocker arm shaft Cam and bearing (camshaft) Rocker arm inner surface Crankcase mating surfaces Yamaha bond No.1215 O-ring (all) Starter idle gear thrust surfaces Starter clutch (outer/roller) Starter wheel gear inner surface Push rod... -
Page 38: Chassis
SPEC LUBRICATION POINT AND GRADE OF LUBRICANT CHASSIS Lubrication Point Symbol Steering head pipe bearing (upper/lower) Front wheel oil seal lips (left/right) Rear wheel oil seal lips (left/right) Rear brake shoe plate, camshaft and pivoting pin Pivoting points (brake pedal shaft and frame) Sidestand sliding surface/mounting bolt Tube guide (throttle grip) inner surface Brake lever bolt/master cylinder sliding surface... -
Page 39: Lubrication Diagram
SPEC LUBRICATION DIAGRAM LUBRICATION DIAGRAM 1 Rocker arm (IN) 2 Rocker shaft 3 Rocker arm (EX) 4 Camshaft 5 Oil pump 6 Push lever 2-17... - Page 40 SPEC LUBRICATION DIAGRAM 1 Oil pump 2 Oil filter 3 Crankshaft 4 Main axle 5 Drive axle 6 Oil strainer 2-18...
-
Page 41: Cable Routing
SPEC CABLE ROUTING CABLE ROUTING 1 Brake hose Meter lead A Fasten the handlebar switch 2 Throttle cable Headlight coupler lead, front brake switch lead and 3 Front brake switch lead Wireharness clutch switch lead to the handle- 4 Handlebar switch lead (right) Front turn signal light (right) bar with a plastic clamp. - Page 42 SPEC CABLE ROUTING 1 Battery positive lead A The end of the plastic locking tie E Route the battery breather hose 2 Starter relay must face down ward. through the hole of air cleaner 3 Starter motor lead B Fasten the wire harness, han- case.
- Page 43 SPEC CABLE ROUTING 1 Starter cable A Fasten the CDI magneto leads, E Route the carburetor air vent hose starter motor lead, neutral switch 2 Throttle cable and carburetor over flow hose be- lead and ground lead to the frame 3 Clutch switch lead tween the engine and swingarm.
- Page 44 SPEC CABLE ROUTING G Route the carburetor air vent hose and carburetor over flow hose through the guide. H Route the clutch cable through the cable guide. I Route the brake hose and speed- ometer cable through the cable guide. J Fasten the brake hose and spee- dometer cable to the front fork outer tube with a cable holder.
- Page 45 SPEC CABLE ROUTING 1 Clutch switch lead A Fasten the wire harness with E Route the rear turn signal light 2 Main switch lead steel clamp. lead (right) between the frame 3 Starter motor lead B Fasten the wire harness and rear and license bracket.
- Page 46 SPEC CABLE ROUTING G Fasten the rear turn signal light (left) to the frame with a plastic locking tie. The end of plastic locking tie must face rear ward. H Fasten the thermo switch lead connectors to the frame with a plastic locking tie.
- Page 48 CHAPTER 3. PERIODIC INSPECTIONS AND ADJUSTMENTS INTRODUCTION ..........PERIODIC MAINTENANCE/LUBRICATION INTERVALS .
-
Page 50: Periodic Inspections And Adjustments
INTRODUCTION/ PERIODIC MAINTENANCE/LUBRICATION INTERVALS EAS00036 PERIODIC INSPECTIONS AND ADJUSTMENTS INTRODUCTION This chapter includes all information necessary to perform recommended inspections and adjust- ments. These preventive maintenance procedures, if followed, will ensure more reliable vehicle opera- tion and a longer service life. The need for costly overhaul work will be greatly reduced. This informa- tion applies to vehicles already in service as well as to new vehicles that are being prepared for sale. - Page 51 PERIODIC MAINTENACE/LUBRICATION INTERVALS EVERY BRAKE-IN 6,000 km 12,000 km ITEM ROUTINE 1,000 KM 6 months 12 months S Make sure that all nuts, bolts and screws are properly tightened. Chassis fasteners S Tighten if necessary. S Check operation. Sidestand S Lubricate and repair if necessary. S Check operation.
-
Page 52: Seat, Fuel Tank And Side Cover
SEAT, FUEL TANK AND SIDE COVER SEAT, FUEL TANK AND SIDE COVER Order Job/Part Q’ty Remarks Removing the seat, fuel tank and Remove the parts in the order listed. side cover Seat NOTE: Fuel hose Before disconnecting the fuel hose, turn the fuel cock off. -
Page 53: Engine
ADJUSTING THE VALVE CLEARANCE EAS00049 ENGINE ADJUSTING THE VALVE CLEARANCE The following procedure applies to all of the valves. NOTE: S Valve clearance adjustment should be made on a cold engine, at room temperature. S When the valve clearance is to be measured or adjusted, the piston must be at top dead center (TDC) on the compression stroke. - Page 54 ADJUSTING THE VALVE CLEARANCE 5. Adjust: S valve clearance a. Loosen the locknut 1 . b. Insert a thickness gauge 2 between the end of the adjusting screw and the valve tip. c. Turn the adjusting screw 3 in direction a or b until the specified valve clearance is ob- tained.
-
Page 55: Adjusting The Engine Idling Speed
ADJUSTING THE ENGINE IDLING SPEED EAS00054 ADJUSTING THE ENGINE IDLING SPEED NOTE: Prior to adjusting the engine idling speed, the carburetor synchronization should be adjusted properly, the air filter should be clean, and the engine should have adequate compression. 1. Start the engine and let it warm up for several minutes. -
Page 56: Adjusting The Throttle Cable Free Play
ADJUSTING THE THROTTLE CABLE FREE PLAY EAS00058 ADJUSTING THE THROTTLE CABLE FREE PLAY NOTE: Prior to adjusting the throttle cable free play, the engine idling speed should be adjusted. 1. Check: S throttle cable free play a Out of specification ! Adjust. Throttle cable free play (at the flange of the throttle grip) 3 X 5 mm... -
Page 57: Checking The Spark Plug
ADJUSTING THE THROTTLE CABLE FREE PLAY/ CHECKING THE SPARK PLUG WARNING After adjusting the throttle cable free play, turn the handlebar to the right and to the left to ensure that this does not cause the en- gine idling speed to change. EAS00060 CHECKING THE SPARK PLUG 1. -
Page 58: Checking The Ignition Timing
CHECKING THE SPARK PLUG/ CHECKING THE IGNITION TIMING 7. Install: S spark plug Spark plug 18 Nm (1.8 mSkg) NOTE: S Before installing the spark plug, clean the spark plug and gasket surface. S Finger-tighten 1 the spark plug before torqu- ing to specification 2 . -
Page 59: Measuring The Compression Pressure
MEASURING THE COMPRESSION PRESSURE EAS00067 MEASURING THE COMPRESSIONPRES- SURE NOTE: Insufficient compression pressure will result in a loss of performance. 1. Check: S valve clearance Out of specification ! Adjust Refer to “ADJUSTING THE VALVE CLEAR- ANCE ”. 2. Start the engine, warm it up for several min- utes, and then turn it off. -
Page 60: Checking The Engine Oil Level
MEASURING THE COMPRESSION PRESSURE/ CHECKING THE ENGINE OIL LEVEL Compression pressure (at sea level) Standard: 1,200 kPa (12.0 kg/cm , 12 bar) Minimum: 1,100 kPa (11,0 kg/cm , 11 bar) a. Turn the main switch to “ON”. b. With the throttle wide open, crank the engine until the reading on the compression gauge stabilizes. -
Page 61: Changing The Engine Oil
CHECKING THE ENGINE OIL LEVEL/ CHANGING THE ENGINE OIL CAUTION: S Engine oil also lubricates the clutch and the wrong oil types or additives could cause clutch slippage. Therefore, do not add any chemical additives or use engine oils with a grade of CD a or higher and do not use oils labeled “ENERGY CONSERV- ING II”... - Page 62 CHANGING THE ENGINE OIL 8. Fill: S crankcase (with the specified amount of the recom- mended engine oil) Quantity Total amount 1.3 L Without oil filter element replacement 1.0 L With oil filter element replacement 1.1 L 9. Install: S engine oil filler cap 10.
-
Page 63: Adjusting The Clutch Cable Free Play
ADJUSTING THE CLUTCH CABLE FREE PLAY EAS00078 ADJUSTING THE CLUTCH CABLE FREE PLAY 1. Check: S clutch cable free play a Out of specification ! Adjust. Clutch cable free play (at the end of the clutch lever) 10 X 15 mm 2. -
Page 64: Cleaning The Air Filter Element
CLEANING THE AIR FILTER ELEMENT EAS00090 CLEANING THE AIR FILTER ELEMENT 1. Remove: S side cover (left) S air filter case cover 1 2. Remove: S air filter element 1 3. Clean: S air filter element (with solvent) NOTE: After cleaning, carefully pat the air filter element on a clean cloth to remove the excess oil. -
Page 65: Checking The Carburetor Joint And Intake Manifold
CLEANING THE AIR FILTER ELEMENT / CHECKING THE CARBURETOR JOINT AND INTAKE MANIFOLD/ CHECKING THE FUEL HOSES NOTE: S Make sure that the air filter element is properly installed in the air filter case. S The air filter screen fits into the slots 2 in the air filter case. -
Page 66: Checking The Crankcase Breather Hose
CHECKING THE CRANKCASE BREATHER HOSE/ CHECKING THE EXHAUST SYSTEM EAS00098 CHECKING THE CRANKCASE BREATHER HOSE 1. Remove: S seat S side cover S fuel tank Refer to “SEAT, FUEL TANK AND SIDE COVER”. 2. Check: S crankcase breather hose 1 Cracks/damage ! Replace. - Page 67 CHECKING THE EXHAUST SYSTEM 3. Check: S tightening torque Exhaust pipe 4 12 Nm (1.2 mSkg) Exhaust pipe and muffler bolt 5 20 Nm (2.0 mSkg) Muffler and muffler bracket bolt 6 20 Nm (2.7 mSkg) Muffler and muffler bracket bolt 7 27 Nm (2.7 mSkg) 4.
-
Page 68: Chassis
ADJUSTING THE FRONT BRAKE/ ADJUSTING THE REAR BRAKE EAS00108 CHASSIS ADJUSTING THE FRONT BRAKE 1. Check: S brake lever free play a Out of specification ! Adjust. Brake lever free play (at the end of the brake lever): 2 X 5 mm 2. - Page 69 ADJUSTING THE REAR BRAKE 2. Adjust: S brake pedal position a. Loosen the locknut 1 . b. Turn the adjusting bolt 2 in direction a or b until the specified brake pedal position is ob- tained. ! Brake pedal is raised. Direction ! Brake pedal is lowered.
-
Page 70: Checking The Brake Fluid Level
CHECKING THE BRAKE FLUID LEVEL EAS00115 CHECKING THE BRAKE FLUID LEVEL 1. Stand the motorcycle on a level surface. NOTE: S Place the motorcycle on a suitable stand. S Make sure that the motorcycle is upright. 2. Check: S brake fluid level Below the minimum level mark a ! Add the recommended brake fluid to the proper level. -
Page 71: Checking The Brake Pads
CHECKING THE BRAKE PADS/CHECKING THE BRAKE SHOES/ ADJUSTING THE REAR BRAKE LIGHT SWITCH EAS00117 CHECKING THE BRAKE PADS The following procedure applies to all of the brake pads. 1. Operate the brake. 2. Check: S brake pad Wear indicators 1 almost touch the brake disc ! Replace the brake pads as a set. -
Page 72: Checking The Brake Hose
CHECKING THE BRAKE HOSE/ BLEEDING THE HYDRAULIC BRAKE SYSTEM EAS00129 CHECKING THE BRAKE HOSE 1. Check: S brake hose 1 Cracks/damage/wear ! Replace. 2. Check: S brake hose clamp Loose connection ! Tighten. 3. Hold the motorcycle upright and apply the front or rear brake. -
Page 73: Adjusting The Drive Chain Slack
BLEEDING THE HYDRAULIC BRAKE SYSTEM/ ADJUSTING THE DRIVE CHAIN SLACK 1. Bleed: S hydraulic brake system a. Add the recommended brake fluid to the proper level. b. Install the brake master cylinder reservoir di- aphragm. c. Connect a clear plastic hose 1 tightly to the bleed screw 2 . - Page 74 ADJUSTING THE DRIVE CHAIN SLACK 1. Stand the motorcycle on a level surface. WARNING Securely support the motorcycle so that there is no danger of it falling over. NOTE: Place the motorcycle on a suitable stand so that the rear wheel is elevated. 2.
-
Page 75: Lubricating The Drive Chain
LUBRICATING THE DRIVE CHAIN/ CHECKING AND ADJUSTING THE STEERING HEAD EAS00143 LUBRICATING THE DRIVE CHAIN The drive chain consists of many interacting parts. If the drive chain is not maintained prop- erly, it will wear out rapidly. Therefore, the drive chain should be serviced, especially when the motorcycle is used in dusty areas. - Page 76 CHECKING AND ADJUSTING THE STEERING HEAD b. Loosen the lower ring nut 4 and then tighten it to specification with a ring nut wrench 5 . NOTE: Set the torque wrench at a right angle to the ring nut wrench. Ring nut wrench 90890-01403 Lower ring nut...
-
Page 77: Checking The Front Fork
CHECKING THE FRONT FORK CHECKING THE TIRES EAS00149 CHECKING THE FRONT FORK 1. Stand the motorcycle on a level surface. WARNING Securely support the motorcycle so that there is no danger of it falling over. 2. Check: S inner tube Damage/scratches ! Replace. - Page 78 CHECKING THE TIRES Basic weight (with oil and a full 125 kg fuel tank) Maximum load* 180 kg Cold tire pressure Front tire Rear tire 150 kPa 150 kPa Up to 80 kg load* (1.50kgf / cm (1.50kgf / cm 1.5 bar) 1.5 bar) 150 kPa...
- Page 79 No guarantee concerning handling characteristics can be given if a tire combination other than one approved by Yamaha is used on this motorcycle. Front tire Manufacturer Type...
-
Page 80: Checking And Tightening The Spokes
CHECKING AND TIGHTENING THE SPOKES/ CHECKING AND LUBRICATING THE CABLES EAS00169 CHECKING AND TIGHTENING THE SPOKES The following procedure applies to all of the spokes. 1. Check: S spoke 1 Bends/damage ! Replace. Loose ! Tighten. Tap the spokes with a screwdriver. NOTE: A tight spoke will emit a clear, ringing tone;... -
Page 81: Lubricating The Levers And Pedals
LUBRICATING THE LEVERS AND PEDALS/LUBRICATING THE SIDESTAND/LUBRICATING THE REAR SUSPENSION EAS00171 LUBRICATING THE LEVERS AND PEDALS Lubricate the pivoting point and metal-to-metal moving parts of the levers and pedals. Recommended lubricant Engine oil EAS00172 LUBRICATING THE SIDESTAND Lubricate the pivoting point and metal-to-metal moving parts of the sidestand. -
Page 82: Electrical System
CHECKING THE BATTERY EAS00176 ELECTRICAL SYSTEM CHECKING THE BATTERY WARNING Batteries generate explosive hydrogen gas and contain electrolyte which is made of poisonous and highly caustic sulfuric acid. Therefore, always follow these preventive measures: S Wear protective eye gear when handling or working near batteries. - Page 83 CHECKING THE BATTERY 4. Check: S electrolyte level The electrolyte level should be between the minimum level mark 1 and the maximum level mark 2 . Below the minimum level mark ! Add dis- tilled water to the proper level. CAUTION: Add only distilled water.
- Page 84 CHECKING THE BATTERY S Before removing the battery charger lead clips from the battery terminals, be sure to turn off the battery charger. S Make sure that the battery charger lead clips are in full contact with the battery ter- minal and that they are not shorted.
-
Page 85: Checking The Fuse
CHECKING THE BATTERY/CHECKING THE FUSES 10. Check: S battery terminals Dirt ! Clean with a wire brush. Loose connection ! Connect properly. 11. Connect: S battery leads (to the battery terminals) CAUTION: First, connect the positive lead 1 , then the negative lead 2 . -
Page 86: Replacing The Headlight Bulb
CHECKING THE FUSE/ REPLACING THE HEADLIGHT BULB 3. Replace: blown fuse a. Turn off the ignition. b. Install a new fuse of the correct amperage rating. c. Turn on the switches to verify if the electrical circuit is operational. d. If the fuse immediately blows again, check the electrical circuit. -
Page 87: Adjusting The Headlight Beam
REPLACING THE HEADLIGHT BULB/ ADJUSTING THE HEADLIGHT BEAM 3. Remove: S headlight bulb holder 1 S headlight bulb 2 WARNING Since the headlight bulb gets extremely hot, keep flammable products and your hands away from the bulb until it has cooled down. 4. - Page 88 ADJUSTING THE HEADLIGHT BEAM 2. Adjust: S headlight beam (horizontally) a. Turn the adjusting knob 2 in direction a or ! Headlight beammoves to Direction the right. ! Headlight beammoves to Direction the left. 3-39...
- Page 91 CHAPTER 4. OVERHAULING THE ENGINE ENGINE ............LEAD AND EXHAUST PIPE .
- Page 92 INSTALLING THE CLUTCH ........4-35 SHIFT SHAFT AND STOPPER LEVER .
- Page 93 CHECKING THE TRANSMISSION ......4-66 INSTALLING THE TRANSMISSION, SHIFT FORKS AND SHIFT DRUM ASSEMBLY .
-
Page 95: Chapter 4. Overhauling The Engine
ENGINE EAS00188 OVERHAULING THE ENGINE ENGINE LEAD AND EXHAUST PIPE 12 Nm (1.2 mSkg) 20 Nm (2.0 mSkg) 27 Nm (2.7 mSkg) 20 Nm (2.0 mSkg) Order Job/Part Q’ty Remarks Disconnecting the leads and hoses Disconnect the parts in the order listed. Seat, fuel tank and side cover Refer to ”SEAT, FUEL TANK AND SIDE COVER”... -
Page 96: Carburetor And Drive Sprocket
ENGINE EAS00189 CARBURETOR AND DRIVE SPROCKET 7 Nm (0.7 mSkg) 6 Nm (0.6 mSkg) 10 Nm (1.0 mSkg) Order Job/Part Q’ty Remarks Removing the carburetor and drive Remove the parts in the order listed. sprocket Carburetor Refer to ”CARBURETOR” in CHAPTER 5. Clutch cable Crankcase breather hose Ground lead... -
Page 97: Engine
ENGINE EAS00192 ENGINE 33 Nm (3.3 mSkg) 33 Nm (3.3 mSkg) 80 Nm (8.0 mSkg) 33 Nm (3.3 mSkg) 33 Nm (3.3 mSkg) Order Job/Part Q’ty Remarks Removing the engine Remove the parts in the order listed. Securely support the motorcycle so there is no danger of it falling over. -
Page 98: Installing The Engine
ENGINE EAS00192 INSTALLING THE ENGINE 1. Install: S pivot shaft 1 S engine mount bolt (rear) 2 S engine mount bolt (front) 3 S engine mount bolt (front) 4 S engine mount bolt (top) 5 S engine bracket bolt (front) 6 S engine bracket bolt (front) 7 S engien bracket bolt (top) 8 S engine bracket bolt (top) 9... -
Page 99: Cylinder Head
CYLINDER HEAD CYLINDER HEAD CAMSHAFT SPROCKET COVER 18 Nm (1.8 mSkg) 10 Nm (1.0 mSkg) 7 Nm (0.7 mSkg) 10 NM (1.0 mSkg) Order Job/Part Q’ty Remarks Removing the comshaft sprocket Remove the parts in the order listed. cover Side cover, seat and fuel tank Refer to “SEAT, FUEL TANK AND SIDE COVER”... -
Page 100: Cylinder Head
CYLINDER HEAD EAS00221 CYLINDER HEAD 22 Nm (2.2 mSkg) 20 Nm (2.0 mSkg) 60 Nm (6.0 mSkg) 10 Nm (1.0 mSkg) Order Job/Part Q’ty Remarks Removing the cylinder head Remove the parts in the order listed. Refer to ”REMOVEING THE CYLINDER Timing chain tensioner assembly HEAD/INSTALLING THE CAMSHAFT Camshaft sprocket/Timing chain... -
Page 101: Removing The Cylinder Head
CYLINDR HEAD EAS00225 REMOVING THE CYLINDER HEAD 1. Align: S “I” mark a on the generator rotor (with the stationary pointer b on the crankcase cov- a. Turn the primary pulley counterclockwise. b. When the piston is at TDC on the compres- sion stroke, align the “I”... -
Page 102: Checking The Cylinder Head
CYLINDER HEAD 4. Remove: S cylinder head NOTE: S Loosen the nuts in the proper sequence. S Loosen each nut 1/2 of a turn at a time. After all of the nuts are fully loosened, remove them. EAS00227 CHECKING THE CYLINDER HEAD 1. -
Page 103: Checking The Timing Chain Tensioner
CYLINDER HEAD EAS00216 CHECKING THE TIMING CHAIN TENSIONER 1. Check: S timing chain tensioner Cracks/damage ! Replace. EAS00212 CHECKING THE TAPPET COVERS AND CAMSHAFT SPROCKET COVER The following procedure applies to both of the tappet covers and O-rings. 1. Check: S tappet cover S camshaft sprocket cover S O-ring... -
Page 104: Installing The Camshaft Sprocket
CYLINDER HEAD EAS00213 INSTALLING THE CAMSHAFT SPROCKET 1. Align: S “I” mark on the generator rotor (with the mark on the generator rotor cover) a. Turn the crankshaft counterclockwise. b. When the piston is at TDC on the compres- sion stroke, align the “I” mark a on the gen- erator rotor with the mark b on the genera- tor rotor cover. - Page 105 CYLINDER HEAD 5. Install: S timing chain tensioner a. While lightly pressing the timing chain ten- sioner rod by hand, turn the tensioner rod ful- ly clockwise with a thin screwdriver 1 . b. with the timing chain tensioner rod turned all the way into the timing chain tensioner housing (with the thin screwdriver still installed),install the gasket and the timing...
-
Page 106: Camshaft
CAMSHAFT EAS00195 CAMSHAFT 14 Nm (1.4 mSkg) 14 Nm (1.4 mSkg) 8 Nm (0.8 mSkg) Order Job/Part Q’ty Remarks Removing the camshaft Remove the parts in the order listed. Cylinder head Refer to “CYLINDER HEAD”. Lock washer Camshaft retainer Camshaft bushing Refer to “REMOVING THE ROCKER Camshaft ARMS AND CAMSHAFT/INSTALLING... -
Page 107: Removing The Rocker Arms And Camshaft
CAMSHAFT EAS00202 REMOVING THE ROCKER ARMS AND CAM- SHAFT 1. Loosen: S locknuts 1 S adjusting screws 2 2. Remove: S bolt 1 S lock washer 2 S camshaft retainer 3 3. Remove: S camshaft 1 S camshaft bushing 2 NOTE: Screw a 10-mm bolt 3 into the threaded end of the camshaft and then pull out the camshaft. -
Page 108: Checking The Rocker Arms And Rocker Arm Shafts
CAMSHAFT 3. Measure: S camshaft lobe dimensions A and B Out of specification ! Replace the cam- shaft. Camshaft lobe dimension limit Intake A 36.45 mm B 30.05 mm Exhaust A 36.49 mm B 30.13 mm 4. Check: S camshaft oil passage Obstruction ! Blow out with compressed air. -
Page 109: Installing The Camshaft And Rocker Arms
CAMSHAFT 6. Calculate: S rocker-arm-to-rocker-arm-shaft clearance NOTE: Calculate the clearance by subtracting the rock- er arm shaft outside diameter from the rocker arm inside diameter. Out of specification ! Replace the defective part(-s). Rocker-arm-to-rocker-arm-shaft clearance 0.009 X 0.033 mm INSTALLING THE CAMSHAFT AND ROCK- ER ARMS 1. - Page 110 CAMSHAFT 5. Install: S camshaft retainer 1 S Lock washer 2 S Bolt 3 8 Nm (0.8 mSkg) NOTE: Bend the lock washer tab along a flat side of the bolt 3 . 4-16...
-
Page 111: Valves And Valve Springs
VALVES AND VALVE SPRINGS EAS00236 VALVES AND VALVE SPRINGS Order Job/Part Q’ty Remarks Removing the valves and valve Remove the parts in the order listed. springs Cylinder head Refer to “CYLINDER HEAD”. Rocker arm, Camshaft Refer to “CAMSHAFT”. Valve cotters Spring retainer Valve spring (inner) Refer to “REMOVING/INSTALLING THE... -
Page 112: Removing The Valves
VALVES AND VALVE SPRINGS EAS00238 REMOVING THE VALVES The following procedure applies to all of the valves and related components. NOTE: Before removing the internal parts of the cylin- der head (e.g., valves, valve springs, valve seats), make sure that the valves properly seal. 1. -
Page 113: Checking The Valves And Valve Guides
VALVES AND VALVE SPRINGS EAS00239 CHECKING THE VALVES AND VALVE GUIDES The following procedure applies to all of the valves and valve guides. 1. Measure: S valve-stem-to-valve-guide clearance Valve-stem-to-valve-guide clearance = Valve guide inside diameter a – Valve stem diameter b Out of specification ! Replace the valve guide. -
Page 114: Checking The Valve Seats
VALVES AND VALVE SPRINGS 3. Eliminate: S carbon deposits (from the valve face and valve seat) 4. Check: S valve face Pitting/wear ! Grind the valve face. S valve stem end Mushroom shape or diameter larger than the body of the valve stem ! Replace the valve. 5. - Page 115 VALVES AND VALVE SPRINGS a. Apply Mechanic’s blueing dye (Dykem) 1 onto the valve face. b. Install the valve into the cylinder head. c. Press the valve through the valve guide and onto the valve seat to make a clear pattern. d.
-
Page 116: Checking The Valve Springs
VALVES AND VALVE SPRINGS e. Apply a fine lapping compound to the valve face and repeat the above steps. f. After every lapping procedure, be sure to clean off all of the lapping compound from the valve face and valve seat. g. -
Page 117: Installing The Valves
VALVES AND VALVE SPRINGS EAS00246 INSTALLING THE VALVES The following procedure applies to all of the valves and related components. 1. Deburr: S valve stem end (with an oil stone) 2. Lubricate: S valve stem S oil seal (with the recommended lubricant) Recommended lubricant Molybdenum disulfide oil 3. -
Page 118: Cylinder And Piston
CYLINDER AND PISTON EAS00265 CYLINDER AND PISTON Order Job/Part Q’ty Remarks Removing the cylinder and piston Remove the parts in the order listed. Cylinder head Refer to “CYLINDER HEAD”. Timing chain guide (exhaust side) Cylinder/O-ring O-ring Refer to ”INSTALLING THE PISTON Dowel pin AND CYLINDER”. -
Page 119: Removing The Piston And Piston Rings
CYLINDER AND PISTON YP****** REMOVING THE PISTON AND PISTON RINGS 1. Remove: S piston pin circlip 1 S piston pin 2 S piston 3 NOTE: Before removing the piston pin circlip, cover the crankcase opening with a clean towel or rag to prevent the circlip from falling into the crank- case cavity. -
Page 120: Checking The Piston Rings
CYLINDER AND PISTON b. If out of specification, rebore or replace the cylinder, and replace the piston and piston rings as a set. c. Measure piston skirt diameter “P” with the micrometer. 1 7.0 mm from the bottom edge of the piston. Piston size “P”... -
Page 121: Checking The Piston Pin
CYLINDER AND PISTON 2. Install: S piston ring (into the cylinder) NOTE: Level the piston ring in the cylinder with the pis- ton crown as shown. a 5.0 mm 3. Measure: S piston ring end gap Out of specification ! Replace the piston ring. -
Page 122: Installing The Piston And Cylinder
CYLINDER AND PISTON Piston-pin-to-piston clearance = Piston pin bore size b – Piston pin outside diameter a Piston-pin-to-piston clearance 0.010 X 0.026 mm EAS00267 INSTALLING THE PISTON AND CYLINDER 1. Install: S top ring 1 S 2nd ring 2 S lower oil ring rail 3 S upper oil ring rail 4 S oil ring expander 5 NOTE:... - Page 123 CYLINDER AND PISTON 5. Offset: S piston ring end gaps a Top ring b Lower oil ring rail c Upper oil ring rail d 2nd ring 6. Install: S cylinder 1 NOTE: S While compressing the piston rings with one hand, install the cylinder with the other hand.
-
Page 124: Clutch
CLUTCH EAS00273 CLUTCH CLUTCH COVER 7 Nm (0.7 mSkg) Order Job/Part Q’ty Remarks Removing the clutch cover Remove the parts in the order listed. Drain the engine oil Refer to “CHANGING THE ENGINE OIL” in CHAPTER 3. Clutch cover Clutch cover gasket Dowel pins For installation, reverse the removal pro- cedure. -
Page 125: Clutch
CLUTCH EAS00274 CLUTCH 70 Nm (7.0 mSkg) 8 Nm (0.8 mSkg) 12 Nm (1.2 mSkg) 6 Nm (0.6 mSkg) Order Job/Part Q’ty Remarks Remove the parts in the order listed. Removing the clutch Clutch springs Pressure plate Friction plates Refer to “REMOVING/INSTALLING Clutch plates THE CLUTCH”. - Page 126 CLUTCH 70 Nm (7.0 mSkg) 8 Nm (0.8 mSkg) 12 Nm (1.2 mSkg) 6 Nm (0.6 mSkg) Order Job/Part Q’ty Remarks Push lever axle Refer to “INSTALLING THE CLUTCH”. Torsion spring Circlip Oil seal Nut/Washer Refer to “INSTALLING THE CLUTCH”. Short clutch push rod/O-ring Push plate For installation, reverse the removal pro-...
-
Page 127: Removing The Clutch
CLUTCH EAS00277 REMOVING THE CLUTCH 1. Straighten the lock washer tab 1 . 2. Loosen: S clutch boss nut 2 NOTE: While holding the clutch boss 3 with the univer- sal clutch holder 4 , loosen the clutch boss nut. Universal clutch holder 90890-04086 3. -
Page 128: Checking The Clutch Springs
CLUTCH 2. Measure: S clutch plate warpage (with a surface plate and thickness gauge Out of specification ! Replace the clutch plates as a set. Clutch plate warpage limit Less than 0.05 mm EAS00282 CHECKING THE CLUTCH SPRINGS The following procedure applies to all of the clutch springs. -
Page 129: Installing The Clutch
CLUTCH EAS00288 CHECKING THE CLUTCH PUSH RODS 1. Check: S O-ring 1 S short clutch push rod 2 S long clutch push rod 3 S ball 4 Cracks/damage/wear ! Replace the de- fective part(-s). 2. Measure: S long clutch push rod bending limit Out of specification ! Replace the long clutch push rod. - Page 130 CLUTCH 5. Install: S friction plates S clutch plates NOTE: First, install a friction plate and then alternate between a clutch plate and a friction plate. 6. Install: S long clutch push rod S ball 7. Install: S short clutch push rod 1 S O-ring 2 S push plate 3 S washer 4...
- Page 131 CLUTCH CAUTION: Do not overtighten the locknut since this will remove the free play between both push rods. Push lever lock nut 8Nm (0.8mSkg) 11. Install: S clutch cover 1 7 Nm (0.7 mSkg) NOTE: Tighten the clutch cover bolts in stages and in a crisscross pattern.
-
Page 132: Shift Shaft And Stopper Lever
SHIFT SHAFT AND STOPPER LEVER EAS00327 SHIFT SHAFT AND STOPPER LEVER 12 Nm (1.2 mSkg) Order Job/Part Q’ty Remarks Removing the shift shaft and stop- Remove the parts in the order listed. per lever Clutch Refer to “CLUTCH”. Shift pedal Refer to “ENGINE”. - Page 133 SHIFT SHAFT AND STOPPER LEVER 12 Nm (1.2 mSkg) Order Job/Part Q’ty Remarks Screw Segment Refer to “INSTALLING THE SEGMENT”. Dowel pins (short length) Dowel pins (long length) For installation, reverse the removal pro- cedure. 4-39...
-
Page 134: Checking The Shift Shaft
SHIFT SHAFT AND STOPPER LEVER EAS00328 CHECKING THE SHIFT SHAFT 1. Check: S shift shaft 1 S shift lever 2 Bends/damage/wear ! Replace. S shift lever spring Damage/wear ! Replace. EAS00330 CHECKING THE STOPPER LEVER 1. Check: S stopper lever Bends/damage ! Replace. -
Page 135: Installing The Shift Shaft
SHIFT SHAFT AND STOPPER LEVER INSTALLING THE SHIFT SHAFT 1. Install: S shift shaft assembly a. Set the stopper lever and return spring to the shift shaft. b. Mesh the stopper lever 1 with the shift cam segment. c. Install the shift lever 2 to the shift cam seg- ment. -
Page 136: Oil Pump
OIL PUMP EAS00357 OIL PUMP 50 Nm (5.0 mSkg) 7 Nm (0.7 mSkg) Order Job/Part Q’ty Remarks Removing the oil pump Remove the parts in the order listed Clutch Refer to “CLUTCH”. Refer to ”REMOVING/INSTALLING THE Lock washer PRIMARY DRIVE GEAR”. Primary drive gear Oil pump drive gear Oil pump cover... - Page 137 OIL PUMP EAS00360 7 Nm (0.7 mSkg) Order Job/Part Q’ty Remarks Disassembling the oil pump Disassemble the parts in the order listed. Oil pump housing Dowel pin Oil pump driven gear Dowel pins Refer to ‘‘ASSEMBLING THE OIL Inner rotor PUMP.”...
-
Page 138: Checking The Oil Pump
OIL PUMP REMOVING THE PRIMARY DRIVE GEAR 1. Straighten the lock washer tab. 2. Remove: S nut (primary drive gear) 1 S lock washer 2 S primary drive gear 3 NOTE: Place a folded aluminium plate or copper wash- er a between the teeth of the balancer drive gear 4 and balancer driven gear 5 . -
Page 139: Assembling The Oil Pump
OIL PUMP EAS411701 ASSEMBLING THE OIL PUMP 1. Lubricate: S inner rotor S outer rotor S oil pump shaft (with the recommended lubricant) Recommended lubricant Engine oil 2. Install: S oil pump shaft 1 (to the oil pump cover 2 ) S pin 3 S inner rotor 4 S outer rotor 5... -
Page 140: Installing The Primary Drive Gear
OIL PUMP EAS00302 INSTALLING THE PRIMARY DRIVE GEAR 1. Install: S primary drive gear 1 S lock washer 2 S primary drive gear nut 3 50 Nm (5.0 mSkg) NOTE: S Place a folded aluminum plate a or copper washer between the teeth of the balancer drive gear 4 and the balancer driven gear 5 in order to lock them. -
Page 141: Balancer Gear
BALANCER GEAR BALANCER GEAR 50 Nm (5.0 mSkg) Order Job/Part Q’ty Remarks Removing the balancer gear Remove the parts in the order listed. Clutch Refer to “CLUTCH”. Primary drive gear Refer to “OIL PUMP”. Refer to “REMOVING/INSTALLING Nut/Lock washer THE BALANCER DRIVEN GEAR”. Balancer driven gear Woodruff key Claw washer... -
Page 142: Checking The Balancer Drive Gear
BALANCER GEAR SR****** REMOVING THE BALANCER DRIVEN GEAR 1. Straighten the lock washer tab. 2. Remove: S nut (balancer driven gear) 1 S lock washer 2 S balancer driven gear 3 NOTE: Place a folded aluminium plate or copper wash- er a between the teeth of the balancer drive gear 4 and balancer driven gear 3 . -
Page 143: Installing The Balancer Driven Gear
BALANCER GEAR SR****** INSTALLING BALANCER DRIVEN GEAR 1. Install: S balancer driven gear 1 NOTE: Install the balancer driven gear, then mesh the balancer driven gear match mark a and ba- lancer drive gear assembly match mark b . 2. Install: S lock washer 1 S nut (balancer drive gear) 2 50 Nm (5.0 mSkg) -
Page 144: Starter Clutch And Generator
STARTER CLUTCH AND GENERATOR STARTER CLUTCH AND GENERATOR GENERATOR COVER 7 Nm (0.7 mSkg) Order Job/Part Q’ty Remarks Removing the generator cover Remove the parts in the orser listed. Drain the engine oil Refer to “CHANGING THE ENGINE OIL” in CHAPTER 3. Side cover Refer to “SEAT FUEL TANK AND SIDE COVER”... -
Page 145: Stator Coil
STARTER CLUTCH AND GENERATOR EAS00341 STATOR COIL 3 Nm (0.3 mSkg) 7 Nm (0.7 mSkg) Order Job/Part Q’ty Remarks Removing the stator coil Remove the parts in the order listed. Clamp (stator coil) Clamp (pickup coil) Pickup coil Stator coil For installation, reverse the removal pro- cedure. - Page 146 STARTER CLUTCH AND GENERATOR EAS00343 STARTER CLUTCH AND GENERATOR ROTOR 30 Nm (3.0 mSkg) 50 Nm (5.0 mSkg) Order Job/Part Q’ty Remarks Removing the starter clutch and Remove the parts in the order listed. generator rotor Generator rotor Idle shaft/collar Refer to ”REMOVING/INSTALLING Starter idle gear THE GENERATOR ROTOR”.
-
Page 147: Removing The Generator Rotor
STARTER CLUTCH AND GENERATOR REMOVING THE GENERATOR ROTOR 1. Remove: S bolt 1 (magneto) S plain washer 2 NOTE: S Loosen the bolt (generator rotor) 1 while holding the rotor with a sheave holder 3 . S Do not allow the sheave holder to touch the projection on the rotor. -
Page 148: Installing The Starter Clutch
STARTER CLUTCH AND GENERATOR b. When turning the starter clutch gear clock- wise a , the starter clutch and the starter clutch gear should engage. If the starter clutch gear and starter clutch do not engage, the starter clutch is faulty and must be replaced. -
Page 149: Installing The Generator Rotor
STARTER CLUTCH AND GENERATOR INSTALLING THE GENERATOR ROTOR 1. Install: S shim 1 S starter wheel gear 2 S woodruff key 3 2. Install: S generator rotor 1 NOTE: S Clean the tapered portion of the crankshaft and the rotor hub. S When installing the rotor, make sure the wood- ruff key is properly seated in the key way of the crankshaft and turning the starter wheel gear... -
Page 150: Crankshaft Crankcase
CRANKSHAFT CRANKSHAFT CRANKCASE 8 Nm (0.8 mSkg) 7 Nm (0.7 mSkg) Order Job/Part Q’ty Remarks Separation the crankcase Remove the parts in the order listed. Engine Refer to “ENGINE”. Cylinder head Refer to “CYLINDER HEAD”. Cylinder and piston Refer to “CYLINDER AND PISTON”. Clutch Refer to “CLUTCH”. - Page 151 CRANKSHAFT 8 Nm (0.8 mSkg) 7 Nm (0.7 mSkg) Order Job/Part Q’ty Remarks Timing chain Crankcase Refer to “DISASSEMBLING/ASSEM- Dowel pins BLING THE CRANKCASE”. For installation, reverse the removal pro- cedure. 4-57...
-
Page 152: Crankshaft And Balancer Weight
CRANKSHAFT CRANKSHAFT AND BALANCER WEIGHT Order Job/Part Q’ty Remarks Removing the crankshaft and ba- Remove the parts in the order listed. lancer weight Balancer weight Refer to ”INSTALLING THE CRANK– Crankshaft assembly SHAFT”. Dowel pin Refer to ”REMOVING/INSTALLING Plunger seal THE PLUNGER SEAL”. -
Page 153: Disassembling The Crankcase
CRANKSHAFT EAS00386 DISASSEMBLING THE CRANKCASE 1. Remove: S crankcase bolts NOTE: S Loosen each bolt 1/4 of a turn at a time, in stages and in a crisscross pattern. After all of the bolts are fully loosened, remove them. S Loosen the bolts in decreasing numerical or- der (refer to the numbers in the illustration). -
Page 154: Checking The Crankshaft And Connecting Rod
CRANKSHAFT EAS00394 CHECKING THE CRANKSHAFT AND CON- NECTING ROD 1. Measure: S crankshaft runout Out of specification ! Replace the crank- shaft, bearing or both. NOTE: Turn the crankshaft slowly. Crankshaft runout Less than 0.03 mm 2. Measure: S big end axial clearance Out of specification ! Replace the big end bearing, crankshaft pin, or connecting rod. -
Page 155: Checking The Bearings And Oil Seals
CRANKSHAFT EAS00401 CHECKING THE BEARINGS AND OIL SEALS 1. Check: S bearings Clean and lubricate the bearings, then rotate the inner race with your finger. Rough movement ! Replace. 2. Check: S oil seals Damage/wear ! Replace. EAS00207 CHECKING THE TIMING CHAIN, CAM- SHAFT SPROCKET, AND TIMING CHAIN GUIDES 1. -
Page 156: Installing The Crankshaft
1. Thoroughly clean all the gasket mating sur- faces and crankcase mating surfaces. 2. Apply: S sealant (onto the crankcase mating surfaces) Yamaha bond No. 1215 90890-85505 NOTE: Do not allow any sealant to come into contact with the oil gallery a . -
Page 157: Transmission
TRANSMISSION TRANSMISSION TRANSMISSION, SHIFT DRUM ASSEMBLY AND SHIFT FORKS Order Job/Part Q’ty Remarks Removing the transmission, shift Remove the parts in the order listed. drum assembly and shift forks Crankcase separating Refer to “CRANKCASE AND CRANKSHAFT”. Shift fork guide bar 2 (short length) Shift fork guide bar 1 (long length) Refer to “INSTALLING THE Shift cam... -
Page 158: Drive Axle And Main Axle
TRANSMISSION DRIVE AXLE AND MAIN AXLE Order Job/Part Q’ty Remarks Disassembling the drive axle and Disassemble the parts in the order listed. main axle Second wheel gear First wheel gear Fifth wheel gear Circlip/washer Third wheel gear Forth wheel gear Drive axle Second pinion gear Forth pinion gear... -
Page 159: Removing The Transmission
TRANSMISSION EAS00420 REMOVING THE TRANSMISSION 1. Remove: S Drive axle assembly 1 S Main axle assembly 2 Remove them at same the time. EAS00421 CHECKING THE SHIFT FORKS The following procedure applies to all of the shift forks and related components. 1. - Page 160 TRANSMISSION EAS00424 CHECKING THE TRANSMISSION 1. Measure: S main axle runout (with a centering device and dial gauge 1 ) Out of specification ! Replace the main axle. Main axle runout limit 0.08 mm 2. Measure: S drive axle runout (with a centering device and dial gauge 1 ) Out of specification ! Replace the drive axle.
- Page 161 TRANSMISSION EAS00426 INSTALLING THE TRANSMISSION, SHIFT FORKS AND SHIFT DRUM ASSEMBLY 1. Install: S shift fork 3 “L” (left) 1 (face the “L” side for the clutch side.) S shift fork 2 “R” (right) 2 (face the “R” side for the clutch side.) S shift fork 1 “C”...
- Page 163 CARB...
- Page 164 CHAPTER 5. CARBURETOR CARBURETOR ..........CHECKING THE CARBURETOR .
- Page 166 CARB CARBURETOR EAS00480 CARBURETOR CARBURETOR Order Job/Part Q’ty Remarks Removing the carburetor Remove the parts in order listed. Side cover Refer to ”SEAT, FUEL TANK AND SIDE Seat COVER” in CHAPTER 3. Fuel tank NOTE: Heater unit lead Disconnect the cable from wireharness. NOTE: Carburetor joint clamp screw Loosen.
- Page 167 CARB CARBURETOR EAS00483 Order Job/Part Q’ty Remarks Disassembly the carburetor Disassemble the parts in the order listed. Throttle cable Throttle valve assembly Throttle valve spring Mixing chamber top/O-ring Drain screw assembly Float chamber Gasket (float chamber) Float pin/float Refer to “ASSEMBLYING THE Needle valve assembly CARBURETOR”.
- Page 168 CARB CARBURETOR Order Job/Part Q’ty Remarks Pilot screw assembly Refer to “ASSEMBLING THE Pilot jet CARBURETOR”. Throttle stop screw assembly Starter plunger assembly Screw/gasket Heater unit/washer For assembly, reverse the disassembly procedure.
- Page 169 CARB CARBURETOR EAS00485 CHECKING THE CARBURETOR 1. Check: S carburetor body S float chamber S jet housing Cracks/damage ! Replace. 2. Check: S fuel passages Obstruction ! Clean. a. Wash the carburetor in a petroleum-based solvent. Do not use any caustic carburetor cleaning solution.
- Page 170 CARB CARBURETOR 8. Check: S piston valve movement Insert the piston valve into the carburetor body and move it up and down. Tightness ! Replace the piston valve. 9. Check: S starter plunger 1 S starter plunger spring 2 Bends/cracks/damage ! Replace. 10.
- Page 171 CARB CARBURETOR 2. Install: S needle valve seat 1 3. Install: S float 1 S needle valve S float pin 2 NOTE: Install the float pin from the side opposite the ar- row. 4. Install: S float chamber 1 S pilot screw 2 5.
- Page 172 CARB CARBURETOR EAS00492 INSTALLING THE CARBURETOR 1. Adjust: S engine idling speed Engine idling speed 1,300 X 1,500 r/min Refer to “ADJUSTING THE ENGINE ID- LING SPEED” in chapter 3. 2. Adjust: S throttle cable free play Throttle cable free play (at the flange of the throttle grip) 3 X 5 mm Refer to “ADJUSTING THE THROTTLE...
- Page 173 CARB CARBURETOR 2. Adjust: S fuel level a. Remove the carburetor. b. Check the needle valve seat and needle valve. c. If either is worn, replace them as a set. d. If both are fine, adjust the float level by slight- ly bending the float tang 1 .
- Page 174 CHAS...
- Page 175 CHAPTER 6. CHASSIS FRONT WHEEL AND BRAKE DISC ......REMOVING THE FRONT WHEEL .
- Page 176 REMOVING THE LOWER BRACKET ......6-49 CHECKING THE STEERING HEAD ......6-49 INSTALLING THE STEERING HEAD .
-
Page 177: Chapter 6. Chassis
CHAS FRONT WHEEL AND BRAKE DISC EAS00512 CHASSIS FRONT WHEEL AND BRAKE DISC 90 Nm (9.0 mSkg) 13 Nm (1.3 mSkg) Order Job/Part Q’ty Remarks Removing the front wheel and brake Remove the parts in the order listed. disc NOTE: Place the motorcycle on a suitable stand so that the front wheel is elevated. - Page 178 CHAS FRONT WHEEL AND BRAKE DISC Order Job/Part Q’ty Remarks Disassembling the front wheel Disassemble the parts in the order listed. Oil seal Bearing Refer to “ASSEMBLYNG/ Spacer DISASSEMBLING THE FRONT Spacer flange WHEEL”. Bearing For assembly, reverse the disassembly procedure.
-
Page 179: Removing The Front Wheel
CHAS FRONT WHEEL AND BRAKE DISC EAS00519 REMOVING THE FRONT WHEEL 1. Stand the motorcycle on a level surface. WARNING Securely support the motorcycle so that there is no danger of it falling over. NOTE: Place the motorcycle on a suitable stand so that the front wheel is elevated. - Page 180 CHAS FRONT WHEEL AND BRAKE DISC 3. Check: S spokes Bends/damage ! Replace. Loose ! Tighten. Tap the spokes with a screwdriver. NOTE: A tight spoke will emit a clear, ringing tone, a loose spoke will sound flat. 4. Tighten: S spokes 2 Nm (0.2 mSkg) NOTE:...
- Page 181 CHAS FRONT WHEEL AND BRAKE DISC 7. Check: S wheel bearings Front wheel turns roughly or is loose ! Re- place the wheel bearings. S oil seals Damage/wear ! Replace. 8. Replace: S wheel bearings (New) S oil seals (New) a.
-
Page 182: Checking The Brake Disc
CHAS FRONT WHEEL AND BRAKE DISC EAS00527 CHECKING THE BRAKE DISC 1. Check: S brake disc Damage/galling ! Replace. 2. Measure: S brake disc deflection 1 Out of specification ! Correct the brake disc deflection or replace the brake disc. Brake disc deflection limit (maxi- mum) 0.15 mm... -
Page 183: Installing The Front Wheel
CHAS FRONT WHEEL AND BRAKE DISC d. Measure the brake disc deflection. e. If out of specification, repeat the adjustment steps until the brake disc deflection is within specification. f. If the brake disc deflection cannot be brought within specification, replace the brake disc. EAS00542 INSTALLING THE FRONT WHEEL 1. -
Page 184: Adjusting The Front Wheel Static Balance
CHAS FRONT WHEEL AND BRAKE DISC EAS00548 ADJUSTING THE FRONT WHEEL STATIC BALANCE NOTE: S After replacing the tire, wheel or both, the front wheel static balance should be adjusted. S Adjust the front wheel static balance with the brake disc installed. 1. - Page 185 CHAS FRONT WHEEL AND BRAKE DISC b. Turn the front wheel 90_ so that the heavy spot is positioned as shown. c. If the heavy spot does not stay in that posi- tion, install a heavier weight. d. Repeat steps (b) and (c) until the front wheel is balanced.
-
Page 186: Rear Wheel And Rear Brake
CHAS REAR WHEEL AND REAR BRAKE REAR WHEEL AND REAR BRAKE REAR WHEEL 90 Nm (9.0 mSkg) Order Job/Part Q’ty Remarks Removing the rear wheel Remove the parts in the order listed. NOTE: Place the motorcycle on a suitable stand so that the rear wheel is elevated. - Page 187 CHAS REAR WHEEL AND REAR BRAKE 90 Nm (9.0 mSkg) Order Job/Part Q’ty Remarks Rear wheel assembly Refer to ‘‘REMOVING/INSTALLING THE Collar/O-ring REAR WHEEL.” For installation, reverse the removal procedure. 6-11...
-
Page 188: Rear Brake And Rear Wheel Sprocket
CHAS REAR WHEEL AND REAR BRAKE REAR BRAKE AND REAR WHEEL SPROCKET 35 Nm (3.5 mSkg) Order Job/Part Q’ty Remarks Removing the rear brake and rear Remove the parts in the order listed. wheel sprocket Shoe plate Nuts/washers (driven sprocket) Refer to ”ASSEMBLYNG THE REAR Bolts WHEEL”. - Page 189 CHAS REAR WHEEL AND REAR BRAKE Order Job/Part Q’ty Remarks Disassembling the rear wheel Disassemble the parts in the order listed. Bearing Collar Spacer Oil seal Bearing For assembly, reverse the disassembly procedure. 6-13...
- Page 190 CHAS REAR WHEEL AND REAR BRAKE 9 Nm (0.9 mSkg) Order Job/Part Q’ty Remarks Disassembling the brake shoe plate Disassemble the parts in the order listed. Brake shoe kit Tension springs Refer ”REMOVING REAR Camshaft lever WHEEL/ASSEMBLYING THE BRAKE Indicator plate SHOE PLATE”.
-
Page 191: Removing The Rear Wheel
CHAS REAR WHEEL AND REAR BRAKE EAS00563 REMOVING THE REAR WHEEL 1. Stand the motorcycle on a level surface. WARNING Securely support the motorcycle so that there is no danger of it falling over. NOTE: Place the motorcycle on a suitable stand so that the rear wheel is elevated. -
Page 192: Checking And Replacing The Rear Wheel Sprocket
CHAS REAR WHEEL AND REAR BRAKE EAS00568 CHECKING AND REPLACING THE REAR WHEEL SPROCKET 1. Check: S rear wheel sprocket More than 1/4 tooth a wear ! Replace the rear wheel sprocket. Bent teeth ! Replace the rear wheel sprock- b Correct 1 Drive chain roller 2 Rear wheel sprocket... -
Page 193: Assembling The Brake Shoe Plate
CHAS REAR WHEEL AND REAR BRAKE WARNING Do not allow oil or grease to contact the brake shoes. NOTE: Replace the brake shoes as a set, if either is worn to the wear limit. 3. Measure: S brake drum inside diameter a Out of specification ! Replace the wheel. -
Page 194: Installing The Rear Wheel
CHAS REAR WHEEL AND REAR BRAKE EAS00571 INSTALLING THE REAR WHEEL 1. Lubricate: S wheel axle S wheel bearings S oil seal lips Recommended lubricant Lithium soap base grease 2. Adjust: S drive chain slack Drive chain slack 35 X 60 mm Refer to “ADJUSTING THE DRIVE CHAIN SLACK”... -
Page 195: Front Brake
CHAS FRONT BRAKE FRONT BRAKE FRONT BRAKE PADS 27 Nm (2.7 mSkg) Order Job/Part Q’ty Remarks Removing the front brake pads Remove the parts in the order listed. Bolt (caliper support bolt) Refer to “REPLACING THE FRONT Brake pads BRAKE PADS”. Pad springs For installation, reverse the removal procedure. -
Page 196: Replacing The Front Brake Pads
CHAS FRONT BRAKE EAS00579 CAUTION: Disc brake components rarely require dis- assembly. Therefore, always follow these preventive measures: S Never disassemble brake components un- less absolutely necessary. S If any connection on the hydraulic brake system is disconnected, the entire brake system must be disassembled, drained, cleaned, properly filled, and bled after reassembly. - Page 197 CHAS FRONT BRAKE 4. Measure: S brake pad wear limit a Out of specification ! Replace the brake pads as a set. Brake pad wear limit 0.8 mm 5. Install: S brake pads 1 S brake pad spring 2 NOTE: Always install new brake pads and a new brake pad spring as a set.
- Page 198 CHAS FRONT BRAKE 7. Install: S brake caliper S brake pad bolt 27 Nm (2.7 mSkg) 8. Check: S brake fluid level Below the minimum level mark a ! Add the recommended brake fluid to the proper level. Refer to “CHECKING THE BRAKE FLUID LEVEL”...
-
Page 199: Front Brake Master Cylinder
CHAS FRONT BRAKE FRONT BRAKE MASTER CYLINDER 2 Nm (0.2 mSkg) 7 Nm (0.7 mSkg) 26 Nm ( 2.6 mSkg) Order Job/Part Q’ty Remarks Removing the front brake master Remove the parts in the order listed. cylinder Drain the brake fluid Rear view mirror (right) Brake lever/compression spring Brake switch... - Page 200 CHAS FRONT BRAKE Order Job/Part Q’ty Remarks Disassembling the front brake mas- Disassemble the parts in the order listed. ter cylinder Rubber boots Circlip Master cylinder kit Spring For assembly, reverse the removal proce- dure. 6-24...
-
Page 201: Disassembling The Front Brake Master Cylinder
CHAS FRONT BRAKE EAS00588 DISASSEMBLING FRONT BRAKE MASTER CYLINDER NOTE: Before disassembling the front brake master cylinder, drain the brake fluid from the entire brake system. 1. Disconnect: S brake switch 1 2. Remove: S union bolt 1 S copper washers 2 S brake hose 3 NOTE: To collect any remaining brake fluid, place a... -
Page 202: Master Cylinder
CHAS FRONT BRAKE 4. Check: S brake hose 1 Cracks/damage/wear ! Replace. EAS00598 ASSEMBLING INSTALLING FRONT BRAKE MASTER CYLINDER WARNING S Before installation, all internal brake com- ponents should be cleaned and lubricated with clean or new brake fluid. S Never use solvents on internal brake com- ponents. - Page 203 CHAS FRONT BRAKE NOTE: Turn the handlebar to the left and to the right to make sure that the brake hose does not touch other parts (e.g., wire harness, cables, leads). Correct if necessary. 3. Fill: S brake master cylinder reservoir (with the specified amount of the recom- mended brake fluid) Recommended brake fluid...
-
Page 204: Front Brake Caliper
CHAS FRONT BRAKE FRONT BRAKE CALIPER 30 Nm (3.0 mSkg) 26 Nm (2.6 mSkg) 27 Nm (2.7 mSkg) Order Job/Part Q’ty Remarks Removing the front brake caliper Remove the parts in the order listed. Drain teh brake fluid Brake hose holder Union bolt Refer to ”DISASSEMBLING/ Plain washer... - Page 205 CHAS FRONT BRAKE 6 Nm (0.6 mSkg) Order Job/Part Q’ty Remarks Disassembling the front brake cali- Disassemble the parts in the order listed. Brake pad Refer to “BRAKE PAD” section. Caliper pistons Refer to ”DISASSEMBLING THE FRONT Dust seals BRAKE CALIPER”. Piston seals Bleed screw/Cap For assembly, reverse the disassembly...
-
Page 206: Disassembling The Front Brake Caliper
CHAS FRONT BRAKE EAS00619 DISASSEMBLING THE FRONT BRAKE CAL- IPER NOTE: Before disassembling the brake caliper, drain the brake fluid from the entire brake system. 1. Remove: S union bolt 1 S copper washers 2 S brake hose NOTE: Put the end of the brake hose into a container and pump out the brake fluid carefully. -
Page 207: Assembling And Installing The Front Brake
CHAS FRONT BRAKE 1. Check: S brake caliper pistons 1 Rust/scratches/wear ! Replace the brake caliper. S brake caliper cylinders 2 Scratches/wear ! Replace the brake cali- per. S brake caliper body 3 Cracks/damage ! Replace the brake cali- per. S brake fluid delivery passages (brake caliper body) Obstruction ! Blow out with compressed air. - Page 208 CHAS FRONT BRAKE WARNING Proper brake hose routing is essential to in- sure safe motorcycle operation. Refer to “CABLE ROUTING”. CAUTION: When installing the brake hose onto the brake caliper 1 , make sure that the brake pipe a touches the projection b on the brake caliper.
- Page 209 CHAS FRONT BRAKE CAUTION: Brake fluid may damage painted surfaces and plastic parts. Therefore, always clean up any spilt brake fluid immediately. 5. Bleed: S brake system Refer to “BLEEDING THE HYDRAULIC BRAKE SYSTEM” in chapter 3. 6. Check: S brake fluid level Below the minimum level mark a ! Add the recommended brake fluid to the proper level.
-
Page 210: Front Fork
CHAS FRONT FORK FRONT FORK 23 Nm (2.3 mSkg) 23 Nm (2.3 mSkg) 23 Nm (2.3 mSkg) 30 Nm (3.0 mSkg) Order Job/Part Q’ty Remarks Removing the front fork Remove the parts in the order listed. Front wheel Refer to “FRONT WHEEL AND BRAKE DISC”. - Page 211 CHAS FRONT FORK 23 Nm (2.3 mSkg) 27 Nm (2.7 mSkg) Order Job/Part Q’ty Remarks Disassembling the front fork Disassemble the parts in the order listed. Cap bolt/O-ring Collar/washer NOTE: Fork spring Drain the fork oil. Boot Retaining clip Refer to “DISASSEMBLING/ Oil seal ASSEMBLING THE FRONT FORK”.
-
Page 212: Removing The Front Fork Legs
CHAS FRONT FORK EAS00649 REMOVING THE FRONT FORK LEGS The following procedure applies to both of the front fork legs. 1. Stand the motorcycle on a level surface. WARNING Securely support the motorcycle so that there is no danger of it falling over. NOTE: Place the motorcycle on a suitable stand so that the front wheel is elevated. -
Page 213: Checking The Front Fork Legs
CHAS FRONT FORK 3. Remove: S damper rod bolt S copper washer NOTE: While holding the damper rod with the damper rod holder 1 and T-handle 2 , loosen the damper rod bolt. Damper rod holder 90890-01294 T-handle 90890-01326 4. Remove: S inner tube EAS00657 CHECKING THE FRONT FORK LEGS... -
Page 214: Assembling The Front Fork Legs
CHAS FRONT FORK CAUTION: S The front fork leg has a built-in damper ad- justing rod and a very sophisticated inter- nal construction, which are particularly sensitive to foreign material. S When disassembling and assembling the front fork leg, do not allow any foreign ma- terial to enter the front fork. - Page 215 CHAS FRONT FORK 2. Lubricate: S inner tube’s outer surface Recommended lubricant Fork oil 10W or equivalent 3. Tighten: S damper rod bolt 27 Nm (2.7 mSkg) NOTE: While holding the damper rod with the damper rod holder 1 and T-handle 2 , tighten the damper rod bolt.
- Page 216 (with the specified amount of the recom- mended fork oil) Quantity (each front fork leg) 0.243 L Yamaha fork and shock oil 10W or equivalent. Front fork leg oil level a (from the top of the inner tube, with the...
-
Page 217: Installing The Front Fork Legs
CHAS FRONT FORK EAS00662 INSTALLING THE FRONT FORK LEGS The following procedure applies to both of the front fork legs. 1. Install: S front fork leg Temporarily tighten the upper and lower bracket pinch bolts. NOTE: Make sure that the inner fork tube is flush with the top of the handlebar holder. -
Page 218: Handlebar
CHAS HANDLEBAR HANDLEBAR 20 Nm (2.0 mSkg) Order Job/Part Q’ty Remarks Removing the handlebar Remove the parts in the order listed. Master cylinder bracket Master cylinder Housing (throttle grip) Refer to “INSTALLING THE HANDLE- Throttle grip assembly BAR”. Handlebar switch (right) Clutch switch Clutch cable 6-42... - Page 219 CHAS HANDLEBAR 20 Nm (2.0 mSkg) Order Job/Part Q’ty Remarks Handlebar switch (left) Grip (left) Refer to “REMOVING THE HANDLEBAR” section. Clutch lever Starter cable holder Upper holders Refer to “INSTALLING THE Handlebar HANDLEBAR” section. For installation, reverse the removal procedure.
-
Page 220: Removing The Handlebar
CHAS HANDLEBAR EAS00666 REMOVING THE HANDLEBAR 1. Stand the motorcycle on a level surface. WARNING Securely support the motorcycle so that there is no danger of it falling over. 2. Remove: S throttle cable housing 1 S throttle grip 2 3. -
Page 221: Installing The Handlebar
CHAS HANDLEBAR WARNING Do not touch the handlebar grip until the rubber adhesive has fully dried. EB704700 INSTALLING THE HANDLEBAR 1. Stand the motorcycle on a level surface. WARNING Securely support the motorcycle so that there is no danger of it falling over. 2. - Page 222 CHAS HANDLEBAR 5. Install: S left handkbar switch NOTE: Align the tab a on the plate with the slot b on the handkbar switch/ 6. Install: S clutch cable 7. Connect: S clutch switch coupler NOTE: Apply a thin coat of litium soap base grease onto the end of the clutch cable.
-
Page 223: Steering Head
CHAS STEERING HEAD STEERING HEAD 90 Nm (9.0 mSkg) 1st 38 Nm (3.8mSkg) 2nd 18 Nm (1.8 mSkg) Order Job/Part Q’ty Remarks Removing the lower bracket Remove the parts in the order listed. Front fork Refer to “FRONT FORK”. Handlebar Refer to “HANDLEBAR”... - Page 224 CHAS STEERING HEAD 90 Nm (9.0 mSkg) 1st 38 Nm (3.8mSkg) 2nd 18 Nm (1.8 mSkg) Order Job/Part Q’ty Remarks Ball race (upper) Ball Ball Refer to ”INSTALLING THE STEERING”. Ball race (center) Ball race (lower) For installation, reverse the removal pro- cedure.
-
Page 225: Removing The Lower Bracket
CHAS STEERING HEAD EAS00679 REMOVING THE LOWER BRACKET 1. Stand the motorcycle on a level surface. WARNING Securely support the motorcycle so that there is no danger of it falling over. 2. Remove: S upper ring nut S rubber washer S lower ring nut 1 NOTE: Hold the lower ring nut with the exhaust and... -
Page 226: Installing The Steering Head
CHAS STEERING HEAD b. Remove the bearing race from the lower bracket with a floor chisel 2 and hammer. c. Install a new dust seal and new bearing races. CAUTION: If the bearing race is not installed properly, the steering head pipe could be damaged. NOTE: S Always replace the bearing balls and bearing races as a set. -
Page 227: Rear Shock Absorber And Swingarm
CHAS REAR SHOCK ABSORBER AND SWINGARM REAR SHOCK ABSORBER AND SWINGARM 56 Nm (5.6 mSkg) 80 Nm (8.0 mSkg) Order Job/Part Q’ty Remarks Rear shock absorber and swingarm Remove the parts in order. removal Refer to “REAR WHEEL AND REAR Rear wheel BRAKE. -
Page 228: Handling The Rear Shock Absorber
CHAS REAR SHOCK ABSORBER AND SWINGARM EAS00687 HANDLING THE REAR SHOCK ABSORBER WARNING This rear shock absorber contain highly com- pressed nitrogen gas. Before handling the rear shock absorber, read and make sure you understand the following information. The manufacturer cannot be held responsible for property damage or personal injury that may result from improper handling of the rear shock absorber. -
Page 229: Removing The Rear Shock Absorber Assembly
CHAS REAR SHOCK ABSORBER AND SWINGARM EAS00694 REMOVING THE REAR SHOCK ABSORBER ASSEMBLY 1. Stand the motorcycle on a level surface. WARNING Securely support the motorcycle so that there is no danger of it falling over. NOTE: Place the motorcycle on a suitable stand so that the rear wheel is elevated. -
Page 230: Removing The Swingarm
CHAS REAR SHOCK ABSORBER AND SWINGARM EAS00703 REMOVING THE SWINGARM 1. Stand the motorcycle on a level surface. WARNING Securely support the motorcycle so that there is no danger of it falling over. NOTE: Place the motorcycle on a suitable stand so that the rear wheel is elevated. -
Page 231: Checking The Rear Shock Absorber Assembly
CHAS REAR SHOCK ABSORBER AND SWINGARM EAS00696 CHECKING THE REAR SHOCK ABSORBER ASSEMBLY 1. Check: S rear shock absorber rod Bends/damage ! Replace the rear shock absorber assembly. S rear shock absorber Gas leaks/oil leaks ! Replace the rear shock absorber assembly. S spring Damage/wear ! Replace the rear shock absorber assembly. -
Page 232: Checking The Drive Chain
CHAS REAR SHOCK ABSORBER AND SWINGARM 4. Check: S dust covers 1 S spacer 2 S oil seals 3 Damage/wear ! Replace. S bearings Damage/pitting ! Replace. EAS00710 CHECKING THE DRIVE CHAIN 1. Measure: S 10-link section a of the drive chain Out of specification ! Replace the drive chain. -
Page 233: Installing The Rear Shock Absorber Assembly
CHAS REAR SHOCK ABSORBER AND SWINGARM 4. Check: S drive chain rollers 1 Damage/wear ! Replace the drive chain. S drive chain side plates 2 Damage/wear ! Replace the drive chain. Cracks ! Replace the drive chain and make sure that the battery breather hose is proper- ly routed away from the drive chain and be- low the swingarm. -
Page 234: Installing The Swingarm
CHAS REAR SHOCK ABSORBER AND SWINGARM EAS00711 INSTALLING THE SWINGARM 1. Lubricate: S bearings S spacers S dust covers S pivot shaft Recommended lubricant Molybdenum disulfide grease 2. Install: S Swingarm 80 Nm (8.0 mSkg) 3. Install S rear shock absorber assembly S rear wheel Refer to “INSTALLING THE REAR SHOCK ABSORBER... -
Page 235: Rear Shock Absorber And Swingarm
CHAS REAR SHOCK ABSORBER AND SWINGARM CAUTION: A drive chain that is too tight will overload the engine and other vital parts, and one that is too loose can skip and damage the swin- garm or cause an accident. Therefore, keep the drive chain slack within the specified limits. - Page 236 CHAS...
- Page 237 – ELEC...
- Page 238 CHAPTER 7. ELECTRICAL ELECTRICAL COMPONENTS ........SWITCHES .
-
Page 240: Chapter 7. Electrical
ELEC ELECTRICAL COMPONENTS EAS00729 ELECTRICAL ELECTRICAL COMPONENTS Horn Neutral relay C.D.I. unit Flasher relay Thermo switch Main switch Sidestand switch Fuse holder assembly Rear brake switch Starter relay Neutral switch Rectifier/ Regulator Spark plug cap Battery Ignition coil... -
Page 241: Switches
ELEC SWITCHES EAS00730 SWITCHES CHECKING SWITCH CONTINUITY Check each switch for continuity with the pocket tester. If the continuity reading is incorrect, check the wiring connections and if necessary, replace the switch. CAUTION: Never insert the tester probes into the cou- pler terminal slots 1 . -
Page 242: Switch Continuity Inspection
ELEC SWITCH INSPECTION EAS00731 SWITCH CONTINUITY INSPECTION Check each switch for damage or wear, proper connections, and also for continuity between the termi- nals. Refer to “CHECKING SWITCH CONTINUITY”. Damage/wear ³ Repair or replace the switch. Improperly connected ³ Properly connect. Incorrect continuity reading ³... -
Page 243: Checking The Bulbs And Bulb Sockets
ELEC CHECKING THE BULBS AND BULB SOCKETS EAS00732 CHECKING THE BULBS AND BULB SOCKETS Check each bulb and bulb socket for damage or wear, proper connections, and also for continu- ity between the terminals. Damage/wear ! Repair or replace the bulb, bulb socket or both. - Page 244 ELEC CHECKING THE BULBS AND BULB SOCKETS WARNING Since the headlight bulb gets extremely hot, keep flammable products and your hands away from the bulb until it has cooled down. CAUTION: S Be sure to hold the socket firmly when re- moving the bulb.
-
Page 245: Checking The Condition Of The Bulb Sockets
ELEC CHECKING THE BULBS AND BULB SOCKETS CHECKING THE CONDITION OF THE BULB SOCKETS The following procedure applies to all of the bulb sockets. 1. Check: S bulb socket (for continuity) (with the pocket tester) No continuity ! Replace. Pocket tester 90890-03112 NOTE: Check each bulb socket for continuity in the... -
Page 246: Ignition System
ELEC IGNITION SYSTEM EAS00734 IGNITION SYSTEM CIRCUIT DIAGRAM C.D.I. magneto Neutral switch Battery Fuse Engine stop switch Main switch Diode C.D.I. unit Ignition coil Spark plug Sidestand switch Neutral relay... -
Page 247: Troubleshooting
ELEC IGNITION SYSTEM EAS00736 EAS00742 TROUBLESHOOTING 2. Ignition spark gap The ignition system fails to operate (no S Disconnect the spark plug cap from the spark spark or intermittent spark). plug. S Connect the ignition checker as shown. Check: Spark plug cap 1. - Page 248 ELEC IGNITION SYSTEM Spark plug cap resistance Secondary coil resistance 6.32 X 9.48 kΩ at 20_C 10 kΩ at 20_C S Is the spark plug cap OK? S Is the ignition coil OK? Replace the spark Replace the ignition plug cap. coil.
- Page 249 ELEC IGNITION SYSTEM EAS00750 6. Source coil resistance 8. Engine stop switch S Disconnect the source coil coupler from the S Check the engine stop switch for continuity. wireharness. Refer to “CHECKING THE SWITCHES”. S Connect the pocket tester (Ω 100) to the S Is the engine stop switch OK? charging coil terminal as shown.
- Page 250 ELEC IGNITION SYSTEM EAS00766 12. Diode 13. Wiring S Disconnect the diode from the coupler. S Check the entire ignition system’s wiring. S Connect the pocket tester (Ω 1) to the Refer to ”CIRCUIT DIAGRAM”. diode terminals as shown. S Is the ignition system’s wiring properly con- S Measure the diode for continuity as follows.
-
Page 251: Electric Starting System
ELEC ELECTRIC STARTING SYSTEM EAS00755 ELECTRIC STARTING SYSTEM CIRCUIT DIAGRAM Neutral switch Battery Starter relay Fuse Starter motor Start switch Engine stop switch Main switch Clutch switch Sidestand switch Neutral relay 7-12... -
Page 252: Starting Circuit Cutoff System Operation
ELEC ELECTRIC STARTING SYSTEM EAS00756 STARTING CIRCUIT CUTOFF SYSTEM OP- ERATION If the engine stop switch is set to “ ” and the main switch is set to “ON” (both switches are closed), the starter motor can only operate if at least one of the following conditions is met: S The transmission is in neutral (the neutral switch is closed). -
Page 253: Troubleshooting
ELEC ELECTRIC STARTING SYSTEM EAS00757 TROUBLESHOOTING 2. Battery S Check the condition of the battery. The starter motor fails to turn. Refer to “CHECKING AND CHARGING THE Check: BATTERY” in chapter 3. 1. fuse Specific gravity: 2. battery 1.280 at 20_C 3. - Page 254 ELEC ELECTRIC STARTING SYSTEM 4. Neutral relay S Disconnect the relay unit from the coupler. S Connect the pocket tester (Ω 1) and bat- tery (12 V) to the relay unit terminals as shown. R / W Battery positive terminal ! brown Battery negative terminal ! sky blue Tester positive probe ! blue/white Tester negative probe ! black/white...
- Page 255 ELEC ELECTRIC STARTING SYSTEM EAS00751 EAS00766 8. Neutral switch 12. Wiring S Check the neutral switch for continuity. S Check the entire starting system’s wiring. Refer to “CHECKING THE SWITCHES”. Refer to “CIRCUIT DIAGRAM”. S Is the neutral switch OK? S Is the starting system’s wiring properly con- nected and without defects? Replace the neutral...
-
Page 256: Starter Motor
ELEC ELECTRIC STARTING SYSTEM STARTER MOTOR Order Job name/Part name Q’ty Remarks Starter motor removal Remove the parts in order. Drain the engine oil Refer to “ENGINE OIL REPLACEMENT” in CHAPTER 3. Starter motor lead Starter motor O-ring Reverse the removal procedure for installation. - Page 257 ELEC ELECTRIC STARTING SYSTEM EAS00769 Checking the starter motor 1. Check: S commutator Dirt ! Clean with 600 grit sandpaper. 2. Measure: S commutator diameter a Out of specification ! Replace the starter motor. Min. commutator diameter 21 mm 3. Measure: S mica undercut a Out of specification ! Scrape the mica to the proper measurement with a hacksaw blade...
- Page 258 ELEC ELECTRIC STARTING SYSTEM 5. Measure: S brush length a Out of specification ! Replace the brushes as a set. Min. brush length 3.5 mm 6. Measure: S brush spring free length (Compressed spring) a Out of specification ! Replace the brush springs as a set.
-
Page 259: Charging System
ELEC CHARGING SYSTEM YP804000 CHARGING SYSTEM CIRCUIT DIAGRAM C.D.I. magneto Rectifier/ Regulator Battery Fuse 7-20... -
Page 260: Troubleshooting
ELEC CHARGING SYSTEM EAS00774 EAS00775 TROUBLESHOOTING 3. Charging voltage The battery is not being charged. S Connect the engine tachometer to the spark plug lead. Check: S Connect the pocket tester (DC 20 V) to the 1. fuse battery as shown. 2. - Page 261 ELEC CHARGING SYSTEM EB804401 4. Stator coil assembly resistance S Disconnect the starter coil coupler from the wire harness. S Connect the pocket tester (Ω 1) to the sta- tor coil assembly coupler as shown. Tester positive probe ! white Tester negative probe ! white Tester positive probe ! white Tester negative probe ! white...
-
Page 262: Lighting System
ELEC LIGHTING SYSTEM EB804000 LIGHTING SYSTEM CIRCUIT DIAGRAM Battery Fuse Main switch Meter light High beam indicator light Lights switch Dimmer switch Headlight Auxiliary light Tail / Brake light 7-23... -
Page 263: Troubleshooting
ELEC LIGHTING SYSTEM EAS00781 TROUBLESHOOTING 2. Battery S Check the condition of the battery. Any of the following fail to light: head Refer to “CHECKING AND CHARGING THE light, high beam indicator light, taillight, BATTERY” in chapter 3. auxiliary light or meter light. Specific gravity Check: 1.280 at 20 _C... -
Page 264: Checking The Lighting System
ELEC LIGHTING SYSTEM EAS00784 EAS00788 CHECKING THE LIGHTING SYSTEM 5. Dimmer switch 1. The headlight and the high beam indicator S Check the dimmer switch for continuity. light fail to come on. Refer to “CHECKING THE SWITCHES”. S Is the dimmer switch OK? 1. - Page 265 ELEC LIGHTING SYSTEM Headlight 2. Voltage Tester positive probe ! S Connect the pocket tester (20 V) to the meter yellow or green assembly coupler (wire harness side) as Tester negative probe ! black shown. High beam indicator light Tester positive probe ! yellow Tester positive probe ! blue Tester negative probe ! black Tester negative probe ! black...
- Page 266 ELEC LIGHTING SYSTEM EAS00790 EAS00791 3. A tail/brake light fails to come on. 4. The auxiliary light fails to come on. 1. Tail/brake light bulb and socket 1. Auxiliary light bulb and socket S Check the tail/brake light bulb and socket for S Check the auxiliary light bulb and socket for continuity.
-
Page 267: Signal System
ELEC SIGNAL SYSTEM EB806000 SIGNAL SYSTEM CIRCUIT DIAGRAM Neutral switch Front brake switch Battery Rear brake switch Fuse Rear turn signal light (right) Main switch Front turn signal light (right) Thermo switch Front turn signal light (left) Carburetor heater Rear turn signal light (left) Horn Tail / Brake light Flasher relay... -
Page 268: Troubleshooting
ELEC SIGNAL SYSTEM EAS00794 TROUBLESHOOTING 2. Battery S Any of the following fail to light: turn sig- S Check the condition of the battery. nal light, brake light or an indicator light. Refer to “CHECKING THE BATTERY” in S The horn fails to sound. chapter 3. -
Page 269: Checking The Signaling System
ELEC SIGNAL SYSTEM EAS00796 3. Horn CHECKING THE SIGNALING SYSTEM 1. The horn fails to sound. S Disconnect the pink connector at the horn terminal. 1. Horn switch S Connect a jumper lead to the horn terminal S Check the horn switch for continuity. and ground the jumper lead. - Page 270 ELEC SIGNAL SYSTEM EAS00797 S Set the main switch to “ON”. 2. A tail/brake light fails to come on. S Pull in the brake lever or push down on the 1. Tail/brake light bulb and socket brake pedal. S Measure the voltage (12 V) of yellow at the S Check the tail/brake light bulb and socket for tail/brake light coupler (wire harness side).
- Page 271 ELEC SIGNAL SYSTEM S Set the main switch to “ON”. 4. Voltage S Measure the voltage (12 V) on brown/white S Connect the pocket tester (DC V 20) to the at the flasher relay coupler (wire harness flasher relay coupler (wire harness side) as side).
- Page 272 ELEC SIGNAL SYSTEM S Set the main switch to “ON”. 3. Voltage S Set the turn switch to “ ” or “ ”. S Connect the pocket tester (DC 20 V) to the S Measure the voltage (12 V) of chocolate meter assembly coupler (wire harness side) (orange) or dark green...
- Page 273 ELEC SIGNAL SYSTEM S Measure the carburetor heater resistance. Carburetor heating element resis- tance: 6 X 12 Ω (20_C) S Is the carburetor heating element OK? This circuit is OK. Replace the carbure- S Check the thermo switch for continuity at the tor heater element.
- Page 274 TRBL SHTG...
- Page 275 CHAPTER 8. TROUBLESHOOTING STARTING PROBLEMS ........INCORRECT ENGINE IDLING SPEED .
- Page 277 TRBL STARTING PROBLEMS SHTG EAS00844 TROUBLESHOOTING NOTE: The following guide for troubleshooting does not cover all the possible causes of trouble. It should be helpful, however, as a guide to basic troubleshooting. Refer to the relative procedure in this manual for checks, adjustments, and replacement of parts.
-
Page 278: Faulty Gear Shifting
INCORRECT ENGINE IDLING SPEED/POOR MEDIUM AND- TRBL HIGH-SPEED PERFORMANCE/FAULTY GEAR SHIFTING SHTG EAS00846 INCORRECT ENGINE IDLING SPEED ENGINE ELECTRICAL SYSTEMS Cylinders and cylinder head Battery S Incorrect valve clearance S Faulty battery S Damaged valve train components S Discharged battery Air filter Spark plug S Clogged air filter element... - Page 279 TRBL FAULTY CLUTCH/OVERHEATING SHTG EAS00851 FAULTY CLUTCH CLUTCH SLIPS CLUTCH DRAGS Clutch Clutch S Incorrectly assembled clutch S Unevenly tensioned clutch spring S Incorrectly adjusted clutch cable S Warped pressure plate S Loose or fatigued clutch spring S Bent clutch plate S Worn friction plate S Swollen friction plate S Worn clutch plate...
-
Page 280: Poor Braking Performance
POOR BRAKING PERFORMANCE/FAULTY FRONT FORK TRBL LEGS/UNSTABLE HANDLING SHTG EAS00859 POOR BRAKING PERFORMANCE Front brake Rear brake S Worn brake pad S Improper brake pedal adjustment S Worn brake disc S Worn brake shoe S Air in hydraulic brake system S Improper brake shoe contact S Leaking brake fluid S Worn camshaft... - Page 281 TRBL FAULTY LIGHTING AND SIGNALING SYSTEMS SHTG EAS00866 FAULTY LIGHTING AND SIGNALING SYSTEMS HEADLIGHT DOES NOT LIGHT TURN SIGNAL BLINKS SLOWLY S Wrong headlight bulb S Faulty flasher relay S Too many electrical accessories S Faulty main switch S Hard charging S Faulty turn signal switch S Incorrect connection S Wrong turn signal bulb...
- Page 282 TRBL SHTG...
- Page 283 TW125 ’99 WIRING DIAGRAM C.D.I. magneto Neutral switch Rectifier / Regulator Battery Starter relay Fuse Starting motor Handlebar switches (right) Start switch Engine stop switch Main switch Clutch switch Diode C.D.I. unit Ignition coil Spark plug Thermo switch Carbuletor heater Horn Flasher relay Sidestand switch...
Need help?
Do you have a question about the TW125 1999 and is the answer not in the manual?
Questions and answers