Table of Contents
Advertisement
Advertisement
Table of Contents

Related Manuals for Novatel MiFi 2352


Summary of Contents for Novatel MiFi 2352
-
Page 2: Software License
Nothing contained in this user manual should be construed as granting by implication, estoppel, or otherwise, a license or right of use of Novatel Wireless or any other Trademark displayed in this user manual without the written permission of Novatel Wireless or its respective owners. -
Page 3: Table Of Contents
Table of Contents Getting Started ............1 MiFi Overview . - Page 4 Internet Configuration ..............46 Internet Menu .
-
Page 5: Getting Started
Getting Started MiFi Overview Install SIM Card and Battery Initial Connection and Setup — Overview WiFi Mode Setup USB Mode Setup... -
Page 6: Mifi Overview
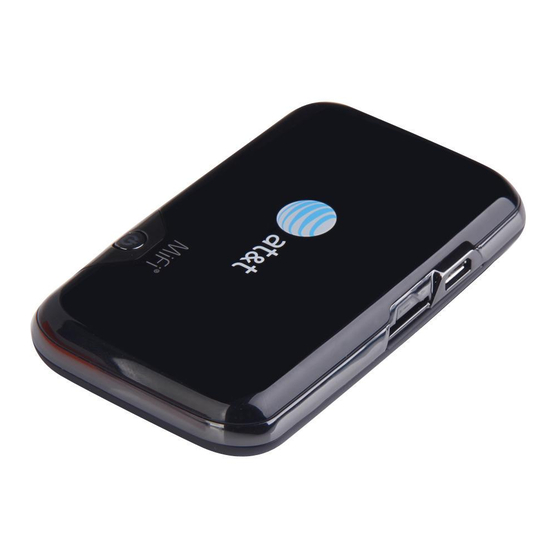
MiFi Overview The Novatel Wireless MiFi Intelligent Mobile Hotspot (models 2352 / 2372) (MiFi) allows you more freedom than ever before. No wires, no cables, just access to your data when you need it. Plus it can simultaneously support up to five WiFi enabled devices, depending on your setup. -
Page 7: Power Sources For Mifi
➎ ➊ Battery / SIM compartment — The battery and SIM card are placed here. ➏ ➊ Master Reset Button — Resets device to factory default settings. [See Using the Master Reset Button (page 82). ➐ ➊ SIM Card Slot — The SIM card is inserted here. ➑... -
Page 8: Install Sim Card And Battery
Install SIM Card and Battery Before connecting MiFi to your computer for the first time you must insert the SIM card, and then insert and charge the battery. IMPORTANT The battery must be fully charged (for a minimum of four hours) before using MiFi the first time. -
Page 9: Battery Tips
Use only batteries and chargers with your device that have been approved by your service provider or by Novatel Wireless. The failure to use approved batteries and chargers may increase the risk that your device will overheat, catch fire, or explode, resulting in serious bodily injury, death, or property damage. -
Page 10: Initial Connection And Setup - Overview
Initial Connection and Setup — Overview IMPORTANT Your MiFi unit is pre-configured with your network operator settings. If MiFi is unable to pre-configure your settings, you will need the Access Point Name (APN) from your service provider plus any username, password, or other information they may have given you. If you do not have this information, contact your service provider before attempting to set up MiFi. -
Page 11: Wifi Mode Setup
WiFi Mode Setup To properly set up your device for WiFi mode, you need to do both of the following tasks: Set Up a WiFi Connection • Set Up Wireless Security • IMPORTANT Your MiFi unit may be pre-configured with Wi-Fi encryption (WEP 128 bits) to prevent unauthorised access to your mobile broadband service. - Page 12 ➌ ➊ Click Connect. If your unit was not pre-configured, the WiFi LED will flash to show connected status. Continue with “Configure MiFi for your service provider. ” ➍ ➊ Enter the WEP key when requested. The WiFi LED will flash to show connected status. Since your network was pre-configured, you do not need to continue with the following sections.
- Page 13 ➌ ➊ Select Internet > Internet Profiles. The Internet Profiles – Set Internet Profiles page will open. ➍ ➊ Select the profile for your provider from the Profile list and click the Edit Internet Profile button. The Internet Profiles – Edit Profile page will open.
- Page 14 ➎ ➊ If desired, change the Profile Name to something more descriptive, for example My MiFi. ➏ ➊ Enter the APN, Username, Password and other information you were given by your service provider. ➐ ➊ Click Apply. ➑ ➊ Click the Return to Profile List link. ➒...
-
Page 15: Set Up Wireless Security
Set Up Wireless Security Using security with your wireless network is very important. If your network was not pre-configured, Novatel Wireless recommends that you set up security immediately by following these procedures: Change the Administrative Password • Establish a Secure Profile •... -
Page 16: Establish A Secure Profile
Establish a Secure Profile You can use WEP (64- or 128-bit), WPA-PSK, WPA2-PSK, or WPA/WPA2 mixed mode security. IMPORTANT Record your network key. ➊ ➊ Choose WiFi > WiFi Profiles from the menu bar. ➋ ➊ From the Profile list, select Secure and click the Edit WiFi Profile button. The Edit WiFi Profile page will open. - Page 17 ➌ ➊ Choose the type of security you want to use from the Security list. ➍ ➊ Type the Network Key you want to use in the box. ➎ ➊ Click Apply. ➏ ➊ Click the Return to Profile List link. ➐...
-
Page 18: Usb Mode Setup
USB Mode Setup To use MiFi in USB mode, you must install the software and drivers that are contained in the MiFi device. IMPORTANT You will need the Access Point Name (APN) from your service provider plus any username, password, or other information they may have given you. This section contains the following information: System Requirements •... -
Page 19: Windows Setup And Connection
Windows Setup and Connection A complete user guide for the MobiLink 3 software is available from the Novatel Wireless website at www.novatelwireless.com/support. This section contains information on installing the software, configuring your new profile, and connecting to the network. Install the software and configure the profile: ➊... - Page 20 ➏ ➊ Click New to start the Profile Manager wizard. ➐ ➊ Enter a simple name for the new profile (for example, My MiFi Connection). ➑ ➊ Enter the Access Point Name (APN) that you received from your service provider and click Next.
- Page 21 Connect to the network: ➊ ➊ Right-click the system tray icon again and select Connect. – Or – ➊ ➊ To see network and connection status also, right-click the system tray icon and select Open Connection Manager. ➋ ➊ Click Connect. When Ready changes to Connected, you have successfully connected to the network and can browse the Internet, check e-mail, or any other activities you require.
-
Page 22: Mac Setup And Connection
Mac Setup and Connection This section contains information on installing the MiFi drivers, configuring your new profile, and connecting to the network. Install the MiFi Drivers and Configure Your Device ➊ ➊ Turn on your computer and close all open applications. ➋... -
Page 23: Using Mifi And Sharing Files
Using MiFi and Sharing Files Using MiFi in WiFi Mode Using MiFi in USB Mode Using microSDHC Cards with MiFi — File Sharing... -
Page 24: Using Mifi In Wifi Mode
This chapter covers using MiFi wirelessly (including as a temporary hotspot), using MiFi as a USB modem, and using the File Sharing capabilities allowed by the microSDHC card capabilities. Using MiFi in WiFi Mode WiFi mode is where you use your MiFi as a wireless hotspot or access point. It can be powered by battery, AC mains charger, or car charger when used in this mode. -
Page 25: Setting Up A Temporary Hotspot
Setting Up a Temporary Hotspot MiFi allows you to set up a temporary network name and network key so you can allow people to connect to it without having to share your security information. MiFi can have up to 5 devices connected at any one time. - Page 26 The Network Name and Network Key will change to a new temporary network name (SSID) and network key. ➍ ➊ Note the temporary hotspot network name and network key. In the example shown above, they are “MiFi 72DE SBQA” and “YZFBE”. ...
-
Page 27: Using Mifi In Usb Mode
Using MiFi in USB Mode In USB mode, you connect your MiFi to your computer with the microUSB cable and use it as a USB modem. The microUSB cable will power MiFi (and slowly charge its battery) while it is plugged in. Windows: ➊... - Page 28 Mac: ➤ ➊ Connect to the “Novatel Wireless Modem” using your usual Mac application. Tip! You can use System Preferences > Network on OS X v10.4, v10.5, and v10.6.
-
Page 29: Using Microsdhc Cards With Mifi - File Sharing
Using microSDHC Cards with MiFi — File Sharing MiFi comes with a microSDHC card slot that allows you to move files with you without having to carry an additional flash drive. You can use microSDHC cards with up to 16GB capacity. Insert the microSDHC Card ➤... -
Page 30: Access Your Files From Mifi
Access Your Files from MiFi ➊ ➊ From your computer’s Web browser, enter http://www.mifi into the address window and press the Enter or Return key. The MiFi Login Home page will open. ➋ ➊ Choose microSD Files from the menu bar. ... -
Page 31: Share Files On Your Mifi
Share Files on Your MiFi If you establish file sharing on your MiFi, others connected to your MiFi can access the files on your microSDHC card. You can determine whether they can both read and write to the card or just read the files on the card. -
Page 32: Accessing Mifi's Features
Accessing MiFi’s Features Interface Basics WiFi Configuration Internet Configuration Router Configuration System Configuration... - Page 33 MiFi uses a browser interface that allows you to configure the device and access its many features. Using your Web browser, you can open the MiFi Home page that gives you access to the many features of the device. For example, you can do the following: View the status of the wireless network, your internet connection, the •...
-
Page 34: Interface Basics
Interface Basics Open the Browser Interface ➊ ➊ From your computer’s Web browser, enter http://www.mifi (or http://192.168.1.1) into the address window and press the Enter or Return key. The MiFi Login Home page will open. From the MiFi Login Home page you can access your microSDHC card or log in to the browser interface to check status and configure MiFi. -
Page 35: The Home Page
The Home Page The Home page is the first page you see after logging in to the browser interface. It is the main point of entry for all your work with MiFi. -
Page 36: The Menu Bar
The Menu Bar At the top of the Home page (and across all the main pages) in the browser interface is a menu bar. In addition to the menu items, the bar provides status information about the Internet connection and the battery level of the device. ➊... -
Page 37: Home Page Sections
Home Page Sections The Home page is divided into two sections. Internet Connection The Internet Connection section of the Home page gives you the following status information: The number of bytes received and transmitted • The duration of the current connection •... -
Page 38: Wifi Configuration
WiFi Configuration The WiFi menu allows you to work with profiles, set up a temporary hotspot, set MAC filters, view the WiFi log, and view status information for the WiFi network. This section contains the following information: WiFi Menu Options •... -
Page 39: Wifi Status
WiFi Status The WiFi Status page provides you with information about your wireless network. Opening the Page ➊ ➊ Choose WiFi > WiFi Status from the menu bar. The WiFi Status page will open. - Page 40 WiFi Status Page Sections This page contains three sections. WiFi Network The WiFi Network section of the WiFi Status page provides the following information: Profile that is currently in use. • Name of the network (SSID) that you are connected to. •...
- Page 41 WiFi Log The WiFi Log must be enabled on the WiFi Settings page. [See WiFi Settings Page (page 45). The WiFi log is primarily used for troubleshooting. Unless you are having problems, you should leave it off. ➤ ➊ Click the WiFi Log button to open a window showing a log of WiFi events.
-
Page 42: Wifi Profiles
WiFi Profiles The WiFi Profiles page allows you to configure your secure profile or set up a temporary hotspot. Opening the Page ➤ ➊ Choose WiFi > WiFi Profiles from the menu bar. The WiFi Profiles – Set Profile page will open. WiFi Profiles Page This page provides the following information: Profile —... -
Page 43: Choosing A Profile
Security — The type of security the profile is using. This applies to both the Secure and the • Temporary Hotspot profiles. [See Setting Security (page 40). Authentication — Locked to Open Access for all profiles. • Encryption — Shows the type of encryption used for the security type. •... -
Page 44: Setting Security
Setting Security You can use WEP (64- or 128-bit), WPA, WPA2, or WPA/WPA2 Mixed Mode security. Tip! Some WiFi clients become confused if the security is changed and the network name is not. If you change security settings and do not get asked for the new network key when you try to reconnect, delete the existing “old” network name from your “Preferred Networks” list. Then you can reconnect. IMPORTANT Record your network key. ➊ ➊ Choose WiFi > WiFi Profiles from the menu bar. ➋ ➊ Select a profile and click Edit Profile. The WiFi Profiles –... - Page 45 Setting Up a Temporary Hotspot You can use the device to set up a temporary hotspot to allow a maximum of five connections to your MiFi at one time. This profile generates a temporary network name and network key that you can use to allow others to connect to your device without you having to share your security settings or change your secure profile.
- Page 46 ➎ ➊ Click Apply. ➏ ➊ Click the Return to Profiles List link. ➐ ➊ Click Apply on the WiFi Profiles – Set Profile page. IMPORTANT Your wireless connection will be disabled at this point. You must reconnect with the new settings you just established. ➑...
-
Page 47: Mac Filter
MAC Filter MAC Filtering allows you to restrict access to your MiFi to only those devices with a specific MAC address. The MAC address is a unique code specific to a particular piece of hardware such as a network adapter. [See Finding the MAC Address (page 43). - Page 48 Using MAC Filter The MAC Filter page allows you to enable or disable MAC filtering and to add or delete MAC addresses from the trusted client list. IMPORTANT Do not enable MAC filtering unless you have added your own MAC address to the trusted client list.
-
Page 49: Wifi Settings
WiFi Settings The WiFi Settings page allows you to enable or disable broadcasting the network name and the WiFi log. Opening the Page ➊ ➊ Choose WiFi > WiFi Settings from the menu bar. The WiFi Settings page will open. WiFi Settings Page This page contains two items: Broadcast Network Name (SSID) -
Page 50: Internet Configuration
Internet Configuration The Internet menu provides status information for your connection to the Internet, allows you to configure your MiFi to work with your service provider, and view information about your MiFi. The section contains the following information: Internet Menu •... -
Page 51: Internet Status
Internet Status The Internet Status page provides information about the Internet connection. Opening the Page ➤ ➊ Choose Internet > Internet Status from the menu bar. The Internet Status page will open. - Page 52 Internet Status Page Sections This page contains three sections. Internet Connection The Internet Connection section of the Internet Status page gives you the following information: Status of the connection • Network connected to • Technology of connection • Whether or not you are roaming •...
- Page 53 Traffic Counters The Traffic Counters provide approximate values and are not used for billing purposes. This information is presented as a resettable counter. Date the data collection began • Total duration of connection • Megabytes received • Megabytes transmitted • Total megabytes of data •...
-
Page 54: Internet Profiles
Internet Profiles The Internet Profiles page allows you to configure your device to work with your service provider by entering the APN, username, and other information that your provider requires and provides to you. Opening the Page ➤ ➊ Choose Internet > Internet Profiles from the menu bar. The Internet Profiles –... - Page 55 To edit an existing profile or to create a new profile: ➊ ➊ Select an existing profile from the Profile list and click Edit Internet Profile. NOTE – The default profile cannot be edited. – If the MiFi is connected, the connected profile cannot be edited. The Internet Profiles – Edit Internet Profile page will open. ➋ ➊ If you want to create a new profile, simply change the name on this page. ➌...
-
Page 56: Sim
The SIM page allows you to change the password and to unlock your SIM. Opening the Page ➤ ➊ Choose Internet > SIM from the menu bar. The SIM page will open. SIM Page ➊ ➊ Enter the current PIN (password) for the SIM. ➋... -
Page 57: Internet Diagnostics
Internet Diagnostics The Internet Diagnostics page provides status information about your Internet connection and the MiFi device. Opening the Page ➤ ➊ Choose Internet > Internet Diagnostics from the menu bar. The Internet Diagnostics page will open. - Page 58 Internet Diagnostics Page Sections This page contains two sections. 3G Modem The 3G Modem section of the Internet Diagnostics page gives you the following information about the MiFi device: Manufacturer — manufacturer of this device • Model — model name or number of the device •...
-
Page 59: Internet Settings
Internet Settings The Internet settings page allows you to set the MiFi device to auto-connect, to enable the Modem Event log, and establish the network technology that MiFi tries to connect to. Opening the Page ➤ ➊ Choose Internet > Internet Settings from the menu bar. The Internet Settings page will open. - Page 60 3G Modem The 3G Modem section allows you to set MiFi to automatically connect whenever it is turned on, enable the Event Log, and set MiFi to automatically open to the login page if the Internet connection is unavailable. Auto-connect enable Auto-connect allows MiFi to connect to your provider’s network automatically whenever it is turned There are three available options for auto-connect: Never —...
-
Page 61: Router Configuration
Router Configuration The Router Menu gives you access to options that allow you to configure traffic through your MiFi device. The section contains the following information: Router Menu • Port Filtering • Port Forwarding • TCP/IP • Router Settings • Router Menu ➊... -
Page 62: Port Filtering
Port Filtering Port Filtering allows you to enhance the security of your system by only allowing certain applications to reach the Internet. Opening the Page ➤ ➊ Choose Router > Port Filtering from the menu bar. The Port Filtering page will open. - Page 63 Port Filtering Page This page allows you to enable Port Filtering, select common applications to allow access to the Internet, and set up custom applications for access to the Internet. To set port filtering for standard applications: ➊ ➊ Open the page. ➋ ➊ Select the Enable Port Filtering checkbox. ➌...
- Page 64 The Ports for Application # entry area will overlay the page. ➎ ➊ Enter the port number or port number range. You can enter up to five ports or port ranges for each application. Single port — enter the port number in both fields. •...
-
Page 65: Port Forwarding
Port Forwarding Incoming traffic from the Internet is normally prevented by the firewall from reaching devices on your local wireless network. Use port forwarding to allow Internet users to reach any server you are running on your computer, such as an FTP server. Also some online games require incoming access to work properly. - Page 66 Port Forwarding Page This page allows you to enter the local static IP address for each application that you want to receive traffic from the Internet. ➊ ➊ Select the checkbox for the application you want to enable. ➋ ➊ Enter the local static IP address of the device hosting the application in the IP Address of WiFi Client field.
-
Page 67: Tcp/Ip
TCP/IP The TCP/IP page allows you to view the local (WLAN) IP address and the MAC address for the MiFi device. Opening the Page ➤ ➊ Choose Router > TCP/IP from the menu bar. The TCP/IP page will open. TCP/IP Page This page gives you the following status information about your device: Local IP Address •... -
Page 68: Router Settings
Router Settings The Router Settings page allows you to enable DHCP and allow VPN passthrough. Opening the Page ➤ ➊ Choose Router > Router Settings from the menu bar. The Router Settings page will open. Router Settings Page This page contains two options: DHCP Server DHCP Server allows the device to automatically assign a local IP address to a new device joining your network (such as a wireless printer or additional laptop). -
Page 69: System Configuration
System Configuration The System Menu gives you access to settings and features that affect MiFi as a whole. The section contains the following information: System Menu • System Status • Backup/Restore • File Sharing • Power Management • Password • System Settings •... -
Page 70: System Status
System Status The System Status page provides you with information about your MiFi system. Opening the Page ➤ ➊ Choose System > System Status from the menu bar. The System Status page will open. - Page 71 System Status Page This page contains four sections. System Information The System Information section provides information about MiFi. This information includes the following: Manufacturer – Novatel Wireless • Model Number • Serial Number • Firmware (embedded software) version numbers for MiFi components •...
- Page 72 Restart/Reboot You can restart your MiFi from this page. ➤ ➊ Click Restart/Reboot to reset your MiFi (as if you turned the power off then on again). IMPORTANT Your Internet and WiFi connections will be lost and you will have to reconnect. Reset to Factory Defaults ➤...
-
Page 73: Backup/Restore
Backup/Restore The Backup/Restore page allows you to make a backup copy or restore a backup copy of your configuration settings. Opening the Page ➤ ➊ Choose System > Backup/Restore from the menu bar. The Backup/Restore page will open. Backup/Restore Page This page contains two sections. - Page 74 To save the configuration file: Windows: ➊ ➊ Click Backup. A dialog will open asking whether you want to open or save the file. ➋ ➊ Locate the folder where you want to store the file and click Save. You may rename the file to make it easier to locate when you need it.
-
Page 75: File Sharing
File Sharing The File Sharing page allows you to provide access to files on your microSDHC card to others on your MiFi network. Opening the Page ➤ ➊ Choose System > File Sharing from the menu bar. The File Sharing page will open. File Sharing Page This page has two sections. - Page 76 The microSD Files Link The microSD Files link allows you to view files currently on the microSDHC card. In addition you can upload files to the card or delete files from it. ➤ ➊ Click the microSD Files link on the File Sharing page. The directory list will open in a separate window.
-
Page 77: Power Management
Power Management The MiFi device can turn itself off when it is idle and running on battery power. The Power Management page allows you to set the timing for when MiFi switches off. Opening the Page ➤ ➊ Choose System > Power Management from the menu bar. The Power Management page will open. -
Page 78: Password
Password The Password page allows you to change the administrative password that gives access to the browser interface. Opening the Page ➤ ➊ Choose System > Password from the menu bar. The Password page will open. Password Page This page allows you to create a new administrative password. ➊... -
Page 79: System Settings
System Settings The System Settings page allows you to change the interface language and the date and time format used in the browser interface. You can also enable the system log from this page. The system log is used for troubleshooting and should usually be left disabled. Opening the Page ➤... -
Page 80: Troubleshooting
Troubleshooting Overview Common Problems and Solutions Using the Master Reset Button... -
Page 81: Overview
Overview The following tips will help solve many common problems encountered while using MiFi. Make sure you are using MiFi in the correct geographic region. • Ensure that your network operator’s wireless coverage extends to your current location. • If you are using MiFi in USB Mode, simply unplugging and replugging in the USB cable can •... -
Page 82: Common Problems And Solutions
Common Problems and Solutions Before you read on, all of the steps mentioned here are given in more detailed form elsewhere in the user guide. When a reference is given, click the link to go to the more detailed information. The following are some common problems and solutions. - Page 83 My network does not appear in the wireless network list. Verify that the MiFi LEDs are on and are not showing an error condition. Refer to your Quick ➤ ➊ Start Guide for a table of LED states. Refresh your network list. ➤ ➊ Windows: • Click Refresh Network List on the left side of the Wireless Network Connection screen. If that does not work you can try the following: 1.
- Page 84 How do I disconnect from the network? WiFi Mode: Login to MiFi and click Disconnect. ➤ ➊ 1. Open the MiFi Home page (http://www.mifi). 2. Then type your administrative password into the login window and click Login. 3. Click the Disconnect button. USB Mode (Windows): ➤ ➊...
- Page 85 Where can I find my IMEI number? Login to MiFi. Choose Internet>Internet Diagnostics. ➤ ➊ How do I check the available space on the microSDHC card? Open the MiFi Login Home page (http://www.mifi). Click microSD Files. ➤ ➊ How do I turn off MiFi? Press and hold the Power button for 5 seconds until the LEDs turn off. ➤ ➊ What is the default administrative/login password? “admin”...
-
Page 86: Using The Master Reset Button
Using the Master Reset Button MiFi comes with a master reset button that allows you to return it to its factory default state. The master reset button is recessed in a hole on the back of the device. You will need a paperclip or similar object to push the button. -
Page 87: Product Specifications And Regulatory Information
Product Specifications and Regulatory Information Product Specifications Regulatory Safety Hazards Proper Battery Use and Disposal Limited Warranty and Liability... -
Page 88: Product Specifications
Product Specifications Interface microUSB microSDHC Up to 16GB SIM socket 1.8V and 3.0V standard USIM Mechanical Dimensions (W x D x H) 62mm x 98mm x 15.3mm Weight 81 g Two: status and WiFi indicators... -
Page 89: Regulatory
NOTE: The Radio Frequency (RF) emitter installed in your device must not be located or operated in conjunction with any other antenna or transmitter, unless specifically authorized by Novatel Wireless Technologies. -
Page 90: Limitation Of Liability
Notwithstanding the foregoing, in no event shall Novatel Wireless and/or its affiliates aggregate liability arising under or in connection with the Novatel Wireless product, regardless of the number of events, occurrences, or claims giving rise to liability, be in excess of the price paid by the purchaser for the Novatel Wireless product. -
Page 91: Safety Hazards
Safety Hazards Do not operate MiFi in an environment that may be susceptible to radio interference resulting in danger specifically; Areas where prohibited by the law Follow any special rules and regulations and obey all signs and notices. Always turn off MiFi •... -
Page 92: Proper Battery Use And Disposal
Proper Battery Use and Disposal CAUTION! Never dispose of batteries in a fire because they might explode. WARNING! In the event of a battery leak: • Do not allow the liquid to come in contact with the skin or the eyes. If contact has been made, wash the affected area with large amounts of water and seek medical advice. -
Page 93: Limited Warranty And Liability
(IV) damage caused by force of nature or act of any third person, (V) shipping damage, (VI) service or repair of Product by the purchaser without prior written consent from Novatel Wireless, (VII) products designated by Novatel Wireless as beta site test samples, experimental, developmental, reproduction, sample, incomplete or out of specification Products, or (VIII) returned products if the original identification marks have been removed or altered. -
Page 94: Glossary
Glossary... -
Page 95: Glossary
Glossary ● ➊ 3G — Third Generation. 3G refers to the third generation of mobile telephony technology. The evolution of 3G technology is as follows: GSM technologies » GPRS offered speeds up to 114 Kbps (began in 2000). » EDGE reached up to 384 Kbps (2003). » WCDMA offered downlink speeds up to 1.02 Mbps. » HSDPA boosted downlink to 14 Mbps (in 75 countries 2007) » LTE Evolved UMTS Terrestrial Radio Access is aiming for 100 Mbps (specifications completed 2008). CDMA technologies » 1xRTT offered speeds up to 144 Kbps (2002). »... - Page 96 ● ➊ ESN — Electronic Serial Number. A unique 32-bit number embedded in the microchip of a wireless device that identifies the device. ● ➊ Firewall — A hardware or software boundary that protects a network or single computer from unwanted outside traffic.
- Page 97 ● ➊ Kbps — Kilobits per second. The rate of data flow. ● ➊ LAN — Local Area Network. A type of network that lets a group of computers, all in close proximity (such as inside an office building), communicate with one another. It does not use common carrier circuits though it may have gateways or bridges to other public or private networks.
- Page 98 ● ➊ PPTP — Point-to-point Tunneling Protocol. A method for implementing virtual private networks that does not provide confidentiality or encryption but relies on the tunneling process for security. ● ➊ PRL — Preferred Roaming List. A list that your wireless phone or device uses to determine which networks to connect with when you are roaming.
- Page 99 ● ➊ USB — Universal Serial Bus. A connection type for computing device peripherals such as a printer, mobile modem, etc. ● ➊ USB Port Types — The USB ports on computers and hubs have a rectangular Type A socket, and peripheral devices have a cable with a Type A plug. Peripherals that do not have an attached cable have a square Type B socket on the device and a separate cable with a Type A and Type B plug.
Need help?
Do you have a question about the MiFi 2352 and is the answer not in the manual?
Questions and answers