Table of Contents

Related Manuals for TELEFONICA Teléfono DOMO


Summary of Contents for TELEFONICA Teléfono DOMO
- Page 1 Teléfono DOMO English Translation English Users Guide Digitally signed by Domophone. DN: CN = Domophone.com, C = GB, O = Domophone.com Reason: I am the author of this document Location: Costa Blanca Date: 2004.06.21 12:45:46 +02'00'...
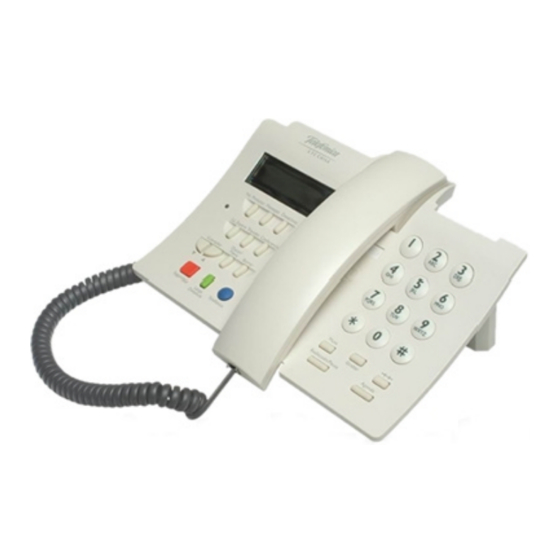
- Page 2 1. SCREEN 2. ANSWERPHONE KEY 13. DIRECT 1004 KEY 3. MESSAGE KEY 14. ERASE KEY 4. DEACTIVATE KEY 15. OPERATOR 1077 KEY 5. CALL DIVERT 16. EUROPEAN EMERGENCY SERVICE NUMBER 112 KEY 6. HANDSET 17. UP AND DOWN ARROWS / 7.
-
Page 3: Table Of Contents
INDEX 1. INTRODUCTION ..........................5 2. INSTALLATION ..........................6 Connecting the cables to the telephone..................... 6 Connecting the telephone to the line....................6 Fitting the base support stand......................6 Wall mounting ............................ 7 3. SETTING UP THE DOMO TELEPHONE...................7 Selecting the ringing tone........................7 Selecting the ringing volume...................... -
Page 4: Introduction
1. INTRODUCTION To start with, Telefonica thanks you for choosing a Domo Message Telephone. We recommend you read this guide carefully before using this telephone. It is organized in such a way that you can find quick answers to the different services and functions the equipment offers, together with the messages that appear on the screen every moment. -
Page 5: Installation
2. INSTALLATION In order to use your DOMO message telephone the unit MUST be connected to an active telephone line. THIS TELEPHONE MUST ONLY BE CONNECTED TO LINES WITH MULTIFREQUENCY DIALLING CAPABILITY. Connecting the Connect the longest (flat) cable to the telephone base, cables to the and the coiled cable to the receiver, as shown in the telephone... -
Page 6: Wall Mounting
You may also adjust the screen contrast, program the time and date, activate or deactivate confirmation, validity and error tones. Additionally you may select the Telefonica’s Operator Code. These adjustments will be made with the receiver down, and by pressing the MARCAR/MENU (18) key until you have selected the function you require. -
Page 7: Selecting The Time And Date
(17) keys to increase or decrease the contrast. There are five contrast degrees. Press the DESACTIVAR/SALIR (4) key to return to the previous menu. Selecting the time Press the MARCAR/MENU (18) key until the message PULSE HORA/FEC. and date PULSE HORA/FEC appears on the screen. With the receiver down, type the time and date on the keypad. -
Page 8: Activating And De-Activating Code 1077
By default, this option is de-activated when you purchase your telephone. If you wish to activate it, so that Telefonica’s Code 1077 appears when you dial you will have to proceed as follows: Press the MARCAR/MENU (18) key until the message ACTIVAR 1077 ACTIVAR 1077 appears on the screen. -
Page 9: Dialling
4. DIALLING Manual dialling Dialling with the Lift the receiver. Wait for the tone, and then dial the receiver up telephone number. While you are dialling the numbers are dialled and appear on the display. Dialling with the With the handset down, dial the telephone number you receiver down wish to call, the number will appear on the screen as you dial. -
Page 10: Using The Directory
(received or made), in chronological order, so that the received calls appear on the list. In order to use this function the Caller Line Identification service must be activated (See your Telefonica contract). To recall these numbers from the list follow these instructions:... -
Page 11: Recording Recalls In The Directory
GRABAR NUMERO Now enter the number you want to store alongside the name you entered in the directory, (24 digits 912397657 maximum). Once you have finished, press the GRABAR (10) key (record). And GRABAR NOMBRE appears on the GRABAR NOMBRE screen. - Page 12 Press the key in which the first letter of the name you are looking for appears once or several times, For example if you are looking for a name that begins with “R” then press the 7 key 4 times in quick succession.
-
Page 13: Direct Services Keys
6. DIRECT SERVICES KEYS Access to direct Direct access to Telefonica´s Customer Service Line. attention line (1004). Telefonica line (1004) Lift the receiver and wait for the dial tone. Press the blue (13) key. Telefonica will appear on the screen. -
Page 14: Mute Function
This feature allows you to see the telephone number of the person calling as well as those on the call waiting list. However, it is necessary to activate this service with Telefonica in order to send short messages. When the phone rings, the telephone number of the 912397657 person calling is displayed on the screen. - Page 15 NUMERO PRIVADO • The caller identity cannot be ascertained for No NO DISPONIBLE some reason • The call is made from a telephone booth. TELEF. PUBLICO Displaying screen When the receiver is down you can read the time and information date, phone numbers, the number of telephone calls (made and received), the number of new calls received 20:00 02 11 10 6 3...
- Page 16 The number checked or answered will be marked with î which appears to the right of the telephone FRANCIS GAL number. To return to the normal display, press the DESACTIVAR/SALIR (4) key and (17) keys. Alternatively the display will revert after a short while with no intervention from you.
-
Page 17: Other Services
10. OTHER SERVICES This telephone enables you to use extra services, as long as they are included in your contract. Divert incoming calls Activation: Lift the receiver, and press the DESVIO (20) key. PULSE No + DESVIO Dial the number to which you wish to divert all your calls to. -
Page 18: Answer Phone Service
Accessing your If you have received calls, and the caller left a messages message, then these will be stored as messages in your mailbox, on your return the red light will be MENSAJES VOZ:01 flashing (indicating missed calls and/or new messages) and will flash while you review your messages. -
Page 19: Third Party Calling
PULSE LL. ESPERA Then press the LL.Espera (19) key. 3 way calling You can start a conversation with two people from different telephone lines. During a conversation, you can make another call, this will start the third party call conversation. Press the Ll. -
Page 20: Short Messages
11. SHORT MESSAGES Domo Mensajes allows you to access the Short Message service. This Telephone offers you the possibility to: • Receive short messages coming from other telephones or mobiles, or from e-mails. • Send short messages to other telephones, mobiles, e-mails and fax (*) = these services are not yet available). -
Page 21: Short Message Configuration
DESACTIVADO If there is a problem, the message DESACTIVAR reappears, you can try again by pressing DESACTIVAR MENSAJES/ACEPTAR (3) key. Short message Once the service is activated, you will be able to configuration receive and send messages. However, it is important that you read the following information concerning the configuration of the private mail service. -
Page 22: Private Mail
ƒ „ EXTENSION (4) Private Mail Domo Mensajes also offers you the possibility to send and receive private messages. You can create private mail accounts (up to 5), to which you will have access when you have defined the following parameters: Name: A Unique user identification. -
Page 23: Delete A User
(17) keys select the account you wish to modify by pressing the MENSAJES/ACEPTAR (3) key. Each name is related to a key which you will need to change. Press the Mensajes/Aceptar (3) key once you have found the name (account) you wish to make changes to. - Page 24 ENVIAR MENSAJE The other options, sending E-Mail and sending a Fax, can be accessed by pressing the (17) key. We will explain how to send each type of message in detail later in this manual. Sending a message When ENVIAR MENSAJES is displayed on the ENVIAR MENSAJE screen.
- Page 25 DESTINATARIO When ENVIAR: SI is displayed on the screen. ENVIAR: SI If you wish to continue sending the message, press Mensajes/Aceptar (3) key, and ENVIANDO will appear ENVIANDO… on the screen. If you do not wish to send the message, press the ENVIAR: NO (17) keys until ENVIANDO appears.
- Page 26 LEER MENSAJE The information related to the message is: 1. Message Number î 2. Symbol ! Or which will tell you whether it is ALMUDENA a new or a saved message. ì î 3. The arrows characters, show whether it is an in-coming or out-going message.
-
Page 27: Distribution Lists
REENVIAR Deleting messages To delete a message and can see BORRAR (as BORRAR explained in chapter How to read a Message), press Mensajes/Aceptar (3) key. If you read through the message list, as shown under the LEER (read) option, choose the message you want to delete and then press BORRAR (14), you will then be asked to confirm. - Page 28 ##AI#TRABAJO*91396751* 1*INMA## • ##AI#<Name-of-the-group>*>telephone- number>*machine-number>*<public-key>## • ##AEI#>name-of-the-group>*<e-mail- ##AEI#TRABAJO*INMA@ address>## HOTMAIL.COM## After adding a new member to the group, you will EL INTEGRANTE INMA SE receive a message informing you that the request has HA INCLUIDO EN been accepted: TRABAJO “ The- member-<member’s-data> has been included in <Name-of-the-group>”...
- Page 29 ##CI#TRABAJO## ##CI#<Name-of-the-group>## You will receive a message containing a list of all the LOS INTEGRANTES DE members of that group. “The-members-of<Name-of- TRABAJO SON: the-group< are: <member’s-data-1>*< member’s -data- 91396751;INMA*912 2>*…< member’s -data-3>. The different parts of the 55180;FRANCIS*9139 member’s data will appear separated by the symbol”;” 7657;ROSA.
- Page 30 The LED turns on when you hold the receiver but you Check the cord is connected to the receiver. hear no tones in the receiver earpiece. There is nothing in the display screen, but you can Insert the heel, and change the contrast. dial and hear perfectly.
-
Page 31: Technical Specifications
15. TECHNICAL SPECIFICATIONS Minimum isolating resistance 100M Minimum dialectric 500V Return losses 14dB Multifrequency dialling codes CCITTQ.23 Emission time 70 ms +-5% Pause time 140 ms +- 5% Programmed starting period 100 ms + 5% Dialling pause time 25+-5% Directory time, incoming and outgoing calls phone Limited unplugged Calling part identification code... -
Page 32: Declaration Of Conformity
UNE-EN 55022:1995+A1:1997+A2:1998 Limites y metodos de medida de las caracteristicas relativas a las perturbaciones radioelectricas de los equipos de tecnología dela información. ITE-CA-001 Interfaz de linea analogica de Telefonica de España,S.A. ETSI TC AT TD=(r2”AT Features on SMS:Short Message Service”.
Need help?
Do you have a question about the Teléfono DOMO and is the answer not in the manual?
Questions and answers