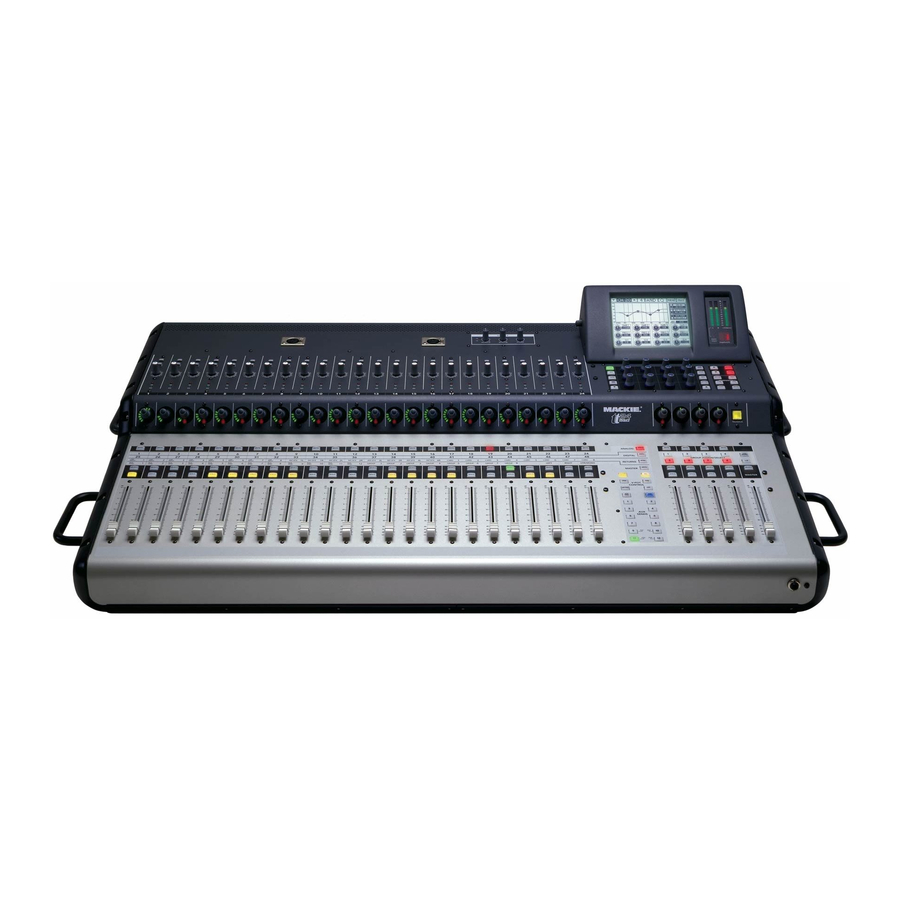
Mackie tt24 Owner's Manual
Digital live console
Hide thumbs
Also See for tt24:
- Quick start manual (130 pages) ,
- Owner's manual (68 pages) ,
- Schematics (18 pages)
Table of Contents
Advertisement
Quick Links
Advertisement
Table of Contents

Related Manuals for Mackie tt24


Summary of Contents for Mackie tt24
-
Page 2: Important Safety Instructions
Important Safety Instructions 13. Unplug this apparatus during lightning storms or when unused for long periods of time. 1. Read these instructions. 14. Refer all servicing to qualified service personnel. 2. Keep these instructions. Servicing is required when the apparatus has 3. -
Page 3: Table Of Contents
Mackie TT24 Digital Live Console Owner’s Manual Table of Contents Chapter 1: Introduction ..................9 1.1 Evolution of the TT24 Console ............9 1.2 Summary of Features ..............10 1.2.1 DSP Functionality............. 10 1.3 Terminology and Conventions............. 12 Chapter 2: Quickstart Tutorial .............. - Page 4 Mackie TT24 Digital Live Console Owner’s Manual 3.3 V-Pot Control Area............... 29 3.3.1 TRIM .................. 29 3.3.2 PAN..................30 3.3.3 HPF ..................30 3.3.4 METERS ................31 3.3.5 AUX SENDS 1–12............. 31 3.3.6 AUX PAN................31 3.3.7 AUX MODE ............... 32 3.4 QuickMix Area ................
- Page 5 Mackie TT24 Digital Live Console Owner’s Manual Chapter 4: Rear Panel Connectors ............43 4.1 Analog I/O..................43 4.1.1 MIC Inputs 1–24 ............... 43 4.1.2 LINE Inputs 1–24 ............. 44 4.1.3 INSERTS 1–24 ..............44 4.1.4 AUX SENDS 1–12............. 45 4.1.5 LINE INPUTS 1–8 (RETURNS) ........
- Page 6 Mackie TT24 Digital Live Console Owner’s Manual 5.4 Flex-Group DSP ................54 5.4.1 Flex-Group Modes ............. 54 5.4.2 Group DSP Allocation ............56 5.5 Matrix Output ................57 5.5.1 Delay .................. 57 5.6 Internal Effects Processors............57 5.7 Tabular Summary of DSP and Effects........58...
- Page 7 Mackie TT24 Digital Live Console Owner’s Manual 6.7 Snapshots ..................82 6.7.1 PROTECT ................83 6.7.2 CLEAR ................84 6.7.3 STORE ................84 6.7.4 RECALL................84 6.7.5 Snapshot Filtering ............84 6.8 Aux Master ................... 85 6.9 Groups/Auxes ................86 6.9.1 GROUPS ................
- Page 8 Mackie TT24 Digital Live Console Owner’s Manual This manual is based on Build 41 so some screenshots and functions may differ from the version you are using. Regular updates to the manual will be available fromwww.mackie.com. Web Version : SW0135 ©2005 LOUD Technologies Inc.
-
Page 9: Chapter 1: Introduction
With all the features of high-end consoles, the TT24 is extremely cost effective. The design mandate for the TT24 console user interface is simply stated : Provide quick, intuitive access to any primary live mixing function with no more than two button presses, both within easy reach of the engineer’s two hands... -
Page 10: Summary Of Features
The TT24 is loaded with DSP horsepower that is distributed on inputs and outputs in an optimal manner for live sound. The TT24 design team spent a great deal of time implementing and allocating the TT24’s DSP to satisfy the... - Page 11 Mackie TT24 Digital Live Console Owner’s Manual Introduction 8 Line Inputs • 4 - band parametric EQ • Stereo linking Main Outputs (LEFT, RIGHT, CTR/MONO) • Compressor/Limiter • 6 - band parametric EQ (includes dual kill filters) • L/R + Mono or LCR modes of operation 12 Aux Sends •...
-
Page 12: Terminology And Conventions
Mackie TT24 Digital Live Console Owner’s Manual Introduction Terminology and Conventions The following terms and conventions are used throughout this manual. • Touchscreen and console controls are represented in bold type using their exact spelling and capitalization (i.e., press the ANLG bank button). -
Page 13: Chapter 2: Quickstart Tutorial
Mackie TT24 Digital Live Console Owner’s Manual Chapter 2: Quickstart Tutorial This Quickstart Tutorial will help you begin using the TT24 quickly and easily by providing step - by - step instructions for its most commonly utilized tasks. Rest assured that our team of design engineers has verified these instructions! - Page 14 Mackie TT24 Digital Live Console Owner’s Manual Quickstart Tutorial ANALOG ANLG Mute MUTE button DIGITAL DGTL Bank Select Bank/ RETURNS RTNS Channel LINE INPUT description SEND MASTER MSTR Select SELECT Clear Solo and button CLEAR SOLO PFL buttons Solo SOLO...
- Page 15 Mackie TT24 Digital Live Console Owner’s Manual Quickstart Tutorial 11. Press and hold the Group 1 button in the GROUP ASSIGN area and ac- tivate channel 1’s SELECT button. The mic is now routed to Group 1. 12. Press and hold the L/R button in the GROUP ASSIGN area and activate Group 1’s SELECT button.
- Page 16 Mackie TT24 Digital Live Console Owner’s Manual Quickstart Tutorial Aux Master button RECALL MSTR SNAPSHOTS SNAP STORE SETUP HELP Utility GRP/ CTRL MATRIX UTIL button COPY PASTE Figure 2-4 QuickMix area AUX 1 Master level Figure 2-5 AUX MASTER Touchscreen Engage and adjust the variable high-pass filter 17.
-
Page 17: Connect A Cd/Tape Device
Mackie TT24 Digital Live Console Owner’s Manual Quickstart Tutorial Connect a CD/Tape Device This section illustrates how to connect a CD/tape device to the dedicated CD/ TAPE A or B connectors (A = RCA, B = TRS), and to channels 23/24 to demon- strate stereo linking and channel strip processing. - Page 18 Mackie TT24 Digital Live Console Owner’s Manual Quickstart Tutorial 6. Turn channel 23’s V - Pot hard left. Channel 24 automatically pans in the opposite direction. Pretty cool! 7. Activate the SOLO button above the fader on either channel to solo.
-
Page 19: Aux Functions
Mackie TT24 Digital Live Console Owner’s Manual Quickstart Tutorial 6. Use the 12 QuickMix knobs to adjust the dynamics parameters. Touch the Gate or Compressor Touchscreen graph to display their more detailed Touchscreen. 7. Press the GRP/AUX QuickMix button to display the GRPS/AUXES Touchscreen (Figure 2-8). - Page 20 Mackie TT24 Digital Live Console Owner’s Manual Quickstart Tutorial Figure 2-9 AUX MASTER (left) and 6-BAND EQ (right) Touchscreens The six bands have the following format : • bands 2 and 3 are full parametric filters (GAIN, FREQ, Q) ;...
-
Page 21: Effects
Mackie TT24 Digital Live Console Owner’s Manual Quickstart Tutorial Effects Four effects processors can each use one of the following effects : reverb, reverb through gate, mono/stereo/ping pong delay, chorus, and flange. The default effect sends are Aux sends 9–12 but any Aux or Matrix sends can be used. The effect returns are on the Returns bank. - Page 22 Mackie TT24 Digital Live Console Owner’s Manual Quickstart Tutorial...
-
Page 23: Chapter 3: Console Surface Controls
Mackie TT24 Digital Live Console Owner’s Manual Chapter 3: Console Surface Controls The TT24 console surface is organized into the following areas, each of which is discussed in this chapter : • Channel Strips • QuickMix • Bank Select • V - Pot Control •... -
Page 24: Line
Push the 48V button to supply 48 VDC phantom power, required by most condenser mics, to the channel’s XLR mic input. The TT24 can provide phantom power to all 24 mic inputs simultaneously. Push the button for dynamic mics that do not require phantom power. The line input is not affected by the... -
Page 25: Gain
Mackie TT24 Digital Live Console Owner’s Manual Console Surface Controls 3.1.3 GAIN The GAIN knob controls the analog amplifier that adjusts the input sensitivity of the mic or line input signal. The gain range of the mic input is 0–60 dB; the line’s range is - 20 to +40 dB. -
Page 26: Mute
Mackie TT24 Digital Live Console Owner’s Manual Console Surface Controls 3.1.6 MUTE Push the MUTE button to toggle the channel between muted (button lights) and enabled (not lit). NOTE: Pre-fader Aux sends can be globally changed to pre- or post-mute from the SETUP- GENERAL Touchscreen (see page 91). -
Page 27: Solo
Mackie TT24 Digital Live Console Owner’s Manual Console Surface Controls Channel Linking adjacent Pressing and holding the SELECT buttons on an odd/even pair of channels for two seconds links their functions. A Touchscreen window requests confirmation : “Link Channel X and Y?” Touch YES to link the channels or CANCEL to abort the process. -
Page 28: Bank Select Area
Mackie TT24 Digital Live Console Owner’s Manual Console Surface Controls Bank Select Area The four Bank Select buttons (ANLG, DGTL, RTNS, MSTR) change the mapping to the 24 channel strips (Figure 3-3). The four buttons intercancel and one is always active. All channels retain their settings between Bank changes. -
Page 29: Master
Mackie TT24 Digital Live Console Owner’s Manual Console Surface Controls 3.2.4 MASTER Press the MSTR button to select the MASTERS bank. The button lights green and the following inputs are controlled on the channel strips : 1–12 : Twelve Aux send masters 13–20 : Eight Group masters... -
Page 30: Pan
Mackie TT24 Digital Live Console Owner’s Manual Console Surface Controls TRIM V-POT CONTROL METERS MODE SENDS Figure 3-4 V Pot Control Area 3.3.2 Pan position is indicated by a single, lit LED. When the pan is exactly centered, the top LED (12 : 00 position) the bottom V - Pot LED illuminate. -
Page 31: Meters
Mackie TT24 Digital Live Console Owner’s Manual Console Surface Controls 3.3.4 METERS The V - Pot LEDs serve as a meter (indicating left to right) for the channel’s signal level. The bottom, red LED illuminates to indicate digital clipping (0 dBFS). -
Page 32: Aux Mode
3.3.7 AUX MODE AUX MODE, the only blue button on the console, effectively turns the TT24 into a powerful, dedicated monitor mixer by using the 24 channel faders as channel Aux sends and the four Group faders as Aux masters. Select an AUX SENDS button (it flashes) and each channel fader is then used to control that channel’s Aux send level. - Page 33 Mackie TT24 Digital Live Console Owner’s Manual Console Surface Controls It is important to note : • The only adjustable controls on the Touchscreen are buttons that toggle a value on/off and dropdown menus that allow a selection. All knobs represented on the Touchscreen are controlled by corresponding QuickMix knobs.
-
Page 34: Fat
Mackie TT24 Digital Live Console Owner’s Manual Console Surface Controls 3.4.1 Press the FAT button to display the selected channel’s OVERVIEW Touchscreen with all channel settings and meters. Although not all parameters can be adjust- ed from the OVERVIEW screen, touching a non - adjustable parameter opens its dedicated screen (i.e., touch the EQ graph to open the EQ Touchscreen). -
Page 35: Aux Mstr
Mackie TT24 Digital Live Console Owner’s Manual Console Surface Controls 3.4.5 AUX MSTR Press the AUX MSTR button to display the AUX MASTER Touchscreen. The 12 Aux Master Sends can be adjusted using the QuickMix knobs. The selected Aux Master is listed in the top left of the screen. Change the selected Aux Master by pressing the desired Aux’s QuickMix knob. - Page 36 Mackie TT24 Digital Live Console Owner’s Manual Console Surface Controls HELP This button is reserved for future use SETUP Press the SETUP button to open the SETUP Touchscreen, which accesses global console parameters from the following categories : Operation, General, and Digital.
-
Page 37: Main Meters And Rude Solo Led
Mackie TT24 Digital Live Console Owner’s Manual Console Surface Controls PASTE Press the PASTE button to paste the clipboard contents onto the selected channel(s). The PASTE button has no effect until a channel is copied to the clipboard. The parameters copied and pasted can be restricted depending on the current Touchscreen : •... -
Page 38: Utility Area
Mackie TT24 Digital Live Console Owner’s Manual Console Surface Controls If any channel is soloed, the RUDE SOLO LED flashes red. The L and R meters now display the stereo solo signal instead of the main output. If the solo signal is mono, it appears on both the L and R meters. -
Page 39: Phones
Press RECALL to recall the blinking snapshot number displayed in the LCD. When the RECALL button is pressed, the snapshot parameters are loaded into the TT24 and the LCD lights continuously. Press STORE to save the state of the console to the current snapshot (the last snapshot recalled). -
Page 40: Group And Master Controls
Console Surface Controls Group and Master Controls The TT24 has four Group strips and one Master strip (Figure 3-8). Each Group has a V - Pot to control group pan and the Group Mode, MUTE, SELECT, SOLO buttons, and a fader. The four Group strips control either Groups 1–4 or 5–8. -
Page 41: Group Assignment
Mackie TT24 Digital Live Console Owner’s Manual Console Surface Controls 3.7.2 Group Assignment Press and hold a GROUP ASSIGN/SELECT button and press the channel SELECT buttons to add/subtract channels from that Group. This method is used for all of the GROUP ASSIGN/SELECT buttons : Groups 1–8, L/R and CTR/Mono. - Page 42 Mackie TT24 Digital Live Console Owner’s Manual Console Surface Controls...
-
Page 43: Chapter 4: Rear Panel Connectors
Figure 4-1 Analog I/O 4.1.1 MIC Inputs 1–24 The TT24 microphone preamp was based on our extensive knowledge and experience with those used in the Digital 8•Bus, VLZ Pro, and Onyx Series mixers, but optimized for a digital mixer. These female XLR connectors accept a balanced microphone input from almost any type of microphone. -
Page 44: Line Inputs 1-24
Mackie TT24 Digital Live Console Owner’s Manual Rear Panel Connectors 4.1.2 LINE Inputs 1–24 These ¼ - in TRS connectors accept a balanced or unbalanced line level input signal from almost any source. The LINE button on the console surface should... -
Page 45: Aux Sends 1-12
Mackie TT24 Digital Live Console Owner’s Manual Rear Panel Connectors The figure below shows three ways to use the INSERT jacks : MONO PLUG Channel Insert jack Direct out with no signal interruption to master. Insert only to first click. -
Page 46: Monitor
Mackie TT24 Digital Live Console Owner’s Manual Rear Panel Connectors 4.1.6 MONITOR These ¼ - in TRS output connectors provide three balanced line - level signals that can be used to provide another stereo (L, R outputs) or mono (M output) main mix output or to monitor the CD/TAPE A or CD/TAPE B inputs. -
Page 47: Talkback Mic Input
Mackie TT24 Digital Live Console Owner’s Manual Rear Panel Connectors 4.1.9 TALKBACK MIC Input This female XLR connector accepts an external talkback mic input. It requires a dynamic microphone because it does not supply phantom power. Use the Talkback UTILITY Touchscreen to route the signal to the desired outputs (see page 95). -
Page 48: Digital I/O
Mackie TT24 Digital Live Console Owner’s Manual Rear Panel Connectors Digital I/O This section discusses the rear panel digital I/O (Figure 4-4) . MIDI Word Clock ADAT Optical In/Out In/Out I/O connectors MIDI ADAT DIGITAL I/O AES/EBU WORD SPDIF CLOCK... -
Page 49: Aes/Ebu In/Out
AES/EBU IN is a female XLR connector that accepts a stereo AES/EBU digital input. A sample - rate converter can be enabled at the AES/EBU input to convert the incoming signal to the TT24’s current sample rate. The signal can be routed from the STEREO INPUT Touchscreen (see page 95). -
Page 50: Word Clock In/Out
TT24 shipping box to the power receptacle. Plug the other end of the cord into an AC outlet. The TT24 has a universal power supply that can accept any AC voltage in the range 100–240 VAC. This feature, which alleviates the need for voltage select switches (and setting them correctly!), allows the TT24 to operate safely virtually anywhere in the world. -
Page 51: Chapter 5: Dsp And Internal Effect Allocation
Mackie TT24 Digital Live Console Owner’s Manual Chapter 5: DSP and Internal Effect Allocation TECH NOTE:The TT24 uses 12 SHARC DSP chips with embedded algorithms. This DSP approach differs from conventional digital audio workstations in that the algorithms are programmed as firmware on the DSP chips. The incoming audio signal is digitized by its ADC and then routed through the DSP chip whether or not processing is engaged. -
Page 52: Master L/R And C/Mono
Mackie TT24 Digital Live Console Owner’s Manual DSP and Internal Effect Allocation Master L/R and C/Mono The Master L/R and C/Mono bus has the following signal path : six - band parametric EQ, compressor, and master fader. 5.2.1 L/R+Mono and LCR Modes The TT24 has two master mix operating modes : L/R+Mono : Stereo with an independent mono output. -
Page 53: Six-Band Eq
Mackie TT24 Digital Live Console Owner’s Manual DSP and Internal Effect Allocation 5.2.2 Band EQ The Master outputs can each access a six - band EQ comprised of a four - band kill filters EQ and two (see page 78). -
Page 54: Six-Band Parametric Eq
Each group’s mode can be configured independently. Mono Mode If the TT24 is in L/R+Mono mode, all groups are mono by default. Mono groups operate similarly to groups on a typical analog console : pre - pan mono signals are routed from the channels to the Groups using the GROUP ASSIGN switches. - Page 55 Mackie TT24 Digital Live Console Owner’s Manual DSP and Internal Effect Allocation Stereo Mode Stereo groups do not have a pan control. Signals are routed from channels to stereo groups using the GROUP ASSIGN switches but the signal is post - pan and the stereo image is maintained throughout the group signal path.
-
Page 56: Group Dsp Allocation
DSP are available and each Group mode requires a different number of units : Mono = 1, Stereo = 2, LCR = 3. Since the TT24 can have up to 8 LCR groups, there is not enough DSP to cover all group routing in all cases. -
Page 57: Matrix Output
Mackie TT24 Digital Live Console Owner’s Manual DSP and Internal Effect Allocation Compressor Compressor The Group’s compressor operates identically to the channel’s (see on page 53). The Group mode setting determines the number of Compressor sections and DSP units required : Mono = 1, Stereo = 2, LCR = 3. Stereo and LCR groups have linked Compressor sections to implement their multichannel format. -
Page 58: Tabular Summary Of Dsp And Effects
Mackie TT24 Digital Live Console Owner’s Manual DSP and Internal Effect Allocation Tabular Summary of DSP and Effects Table 5-1 DSP Functions and Allocation Default Function Channels Parameter Value Range/Increments Value Analog 1-24, Digital Trim Digital Trim +15 dB to -15 dB (0.1 dB steps) - Page 59 Mackie TT24 Digital Live Console Owner’s Manual DSP and Internal Effect Allocation Default Function Channels Parameter Value Range/Increments Value -15 dB to +15 dB (0.1 dB steps) Gain 1 0 dB -not available when Band 1 is HP Freq 1...
- Page 60 Mackie TT24 Digital Live Console Owner’s Manual DSP and Internal Effect Allocation Table 5-2 Internal Effects Parameters and Values Default Function Parameter Value Range/Increments Value Size 3–40 m (1 m steps) 10 m Decay 0.1–10 s (0.1 s steps) 1.6 s Pre Delay 0–...
- Page 61 Mackie TT24 Digital Live Console Owner’s Manual DSP and Internal Effect Allocation Default Function Parameter Value Range/Increments Value Size 3–40 m (1 m steps) 10 m Decay 0.1–10 s (0.1 s steps) 1.6 s Pre Delay 0–300 ms (1 ms steps)
- Page 62 Mackie TT24 Digital Live Console Owner’s Manual DSP and Internal Effect Allocation Default Function Parameter Value Range/Increments Value Delay Left 0–1600 ms (scaled steps) 250 ms Delay Right 0 –1600 ms (scaled steps) 250 ms Feedback Left 0% to 100% (1% steps)
-
Page 63: Chapter 6: Touchscreen And Tt Control
• Remote Venue/Preset management and console– > console backup/restore • Console firmware upgrade capability • Detailed Snapshot management The TT24 connects to the PC via a USB cable (six - ft cable supplied). The minimum PC requirements are summarized below. Table 6-1 Minimum PC Requirements... -
Page 64: Tt Control Knob
Mackie TT24 Digital Live Console Owner’s Manual Touchscreen and TT Control 6.1.1 TT Control Knob The parameter value for each knob can be adjusted using two methods : • Click on the knob, hold, and drag up/down to increase/decrease the value, respectively. -
Page 65: Tt Control Buttons
Mackie TT24 Digital Live Console Owner’s Manual Touchscreen and TT Control 6.1.2 TT Control Buttons The TT control software has two types of buttons : • On/off or selected/unselected An on/selected button has black letters over a light blue background (L/R in the GROUPS area of Figure 6-3). -
Page 66: Touchscreen Conventions
Mackie TT24 Digital Live Console Owner’s Manual Touchscreen and TT Control Touchscreen Conventions The Touchscreen uses knobs, buttons, and sub screens, each described in the following sections. The FILES menu is the same for all Touchscreens. 6.2.1 Touchscreen Knobs NOTE: The Touchscreen knobs cannot be touched and adjusted directly! They corre- spond to the QuickMix rotary encoders below the Touchscreen. -
Page 67: Touchscreen Buttons
Mackie TT24 Digital Live Console Owner’s Manual Touchscreen and TT Control 6.2.2 Touchscreen Buttons There are two types of Touchscreen buttons : • On/off or selected/unselected An off/unselected button has black letters over a white background (SOLO in Figure 6-3). An on/selected button has white letters over a black back- ground. -
Page 68: Sub Screens
Mackie TT24 Digital Live Console Owner’s Manual Touchscreen and TT Control 6.2.4 Sub Screens Some functions require one or more sub screens to adjust all parameters. These screens are accessed by touching a button or an area, such as an EQ graph. After viewing and adjusting parameters on the sub screen, return to the previous screen by pressing the hardware button that displayed the original Touchscreen. -
Page 69: Digital
Mackie TT24 Digital Live Console Owner’s Manual Touchscreen and TT Control EQ, GATE, and COMP Touch any of the graphs to open its specific Touchscreen. Touch the arrows to toggle the order of the EQ and compressor. Touch the EQ OUT, COMP OUT, GATE OUT buttons to toggle their processors in/out. -
Page 70: Effect Return
Mackie TT24 Digital Live Console Owner’s Manual Touchscreen and TT Control GROUP/AUX ASSIGNMENTS The AUXES area displays the selected channel’s assignments, level settings, pan settings (if Auxes are stereo linked), and pre - /post - fader status (blank = POST). The GROUP ASSIGNMENTS area displays the selected channel’s group assignments. - Page 71 Mackie TT24 Digital Live Console Owner’s Manual Touchscreen and TT Control RETURN The bottom of this section lists the effect name (Chorus in Figure 6-6). Touch the EFX EDIT button to edit and change the effect in its own Touchscreen (Figure 6-7).
-
Page 72: Line
Mackie TT24 Digital Live Console Owner’s Manual Touchscreen and TT Control 6.3.4 Line Figure 6-8 Line OVERVIEW GROUP/AUX ASSIGNMENTS The AUXES area displays the selected channel’s assignments, level settings, pan settings (if Auxes are stereo linked), and pre - /post - fader status (blank = POST). -
Page 73: Aux
Mackie TT24 Digital Live Console Owner’s Manual Touchscreen and TT Control 6.3.5 Figure 6-9 Aux OVERVIEW EQ and COMP Touch the EQ or compressor graphs to open their specific Touchscreens. Touch the arrows to toggle the processor order. Touch the EQ IN, COMP IN buttons to toggle their processors in/out. -
Page 74: Group
Mackie TT24 Digital Live Console Owner’s Manual Touchscreen and TT Control 6.3.6 Group Figure 6-10 Group OVERVIEW GRP DSP ENABLE/DISABLE This button enables/disables the group DSP. Use this button in conjunction with the GRP DSP AVAILABLE meter to conserve DSP for where it is most needed. -
Page 75: Master
Mackie TT24 Digital Live Console Owner’s Manual Touchscreen and TT Control EQ and COMP Touch the graphs to open their specific Touchscreens. Touch the arrows to toggle the processor order. Touch the EQ IN, COMP IN buttons to toggle their processors in/out. -
Page 76: Four-Band Equalizer
Mackie TT24 Digital Live Console Owner’s Manual Touchscreen and TT Control Four-Band Equalizer Figure 6-12 Analog Channel 4 BAND EQ The 24 Mic/Line inputs, eight additional Line Inputs, and eight Flex - Groups can each access a four - band EQ. The four bands can be configured in two ways : •... - Page 77 Mackie TT24 Digital Live Console Owner’s Manual Touchscreen and TT Control The default frequencies for each band are : • Band 1 : 80 Hz • Band 2 : 500 Hz • Band 3 : 2 kHz • Band 4 : 10 kHz...
-
Page 78: Six-Band Equalizer
Mackie TT24 Digital Live Console Owner’s Manual Touchscreen and TT Control Six-Band Equalizer Figure 6-13 6 BAND EQ The Master LR and C/Mono outputs can each access a six - band EQ comprised kill filters of a four - band EQ and two 6.5.1... -
Page 79: Dynamics
Mackie TT24 Digital Live Console Owner’s Manual Touchscreen and TT Control Dynamics Figure 6-14 DYNAMICS Press the DYN QuickMix button to display the DYNAMICS Touchscreen. Touch the GATE or COMP graphs to display their respective Touchscreens. 6.6.1 Compressor Figure 6-15 COMPRESSOR Touchscreen The IN/OUT meters show the levels coming in/out of the compressor. - Page 80 Mackie TT24 Digital Live Console Owner’s Manual Touchscreen and TT Control Threshold The THRESH control adjusts the level above which attenuation begins. It is adjustable in the range - 60 to 0 dBFS in increments of 0.1 dBFS; the default value is 0 dB.
-
Page 81: Gate/Expander
Mackie TT24 Digital Live Console Owner’s Manual Touchscreen and TT Control 6.6.2 Gate/Expander Figure 6-16 GATE (left) and EXP Touchscreens The Gate/expander has five controls and an on/off switch. There is a mode button to switch between the gate and downward expander. -
Page 82: Snapshots
Mackie TT24 Digital Live Console Owner’s Manual Touchscreen and TT Control Attack The ATK control adjusts the time for the gate to open and pass the signal through once the signal exceeds the threshold after reduction has occurred. ATK is adjustable in the range 1–30 ms. ATK is scaled such that the faster settings can have finer adjustments. -
Page 83: Protect
Mackie TT24 Digital Live Console Owner’s Manual Touchscreen and TT Control Figure 6-17 Snapshots main screen 6.7.1 PROTECT The PROTECT button allows the user to prevent a snapshot from being cleared or overwritten. To protect a snapshot : • select a snapshot then click the PROTECT button;... -
Page 84: Clear
Mackie TT24 Digital Live Console Owner’s Manual Touchscreen and TT Control 6.7.2 CLEAR Click the CLEAR button to clear the selected snapshot. The snapshot is deleted Empty and the name returns to . Attempting to clear a protected snapshot produces a warning message. -
Page 85: Aux Master
Mackie TT24 Digital Live Console Owner’s Manual Touchscreen and TT Control Aux Master Figure 6-18 AUX MASTER Press the AUX MSTR QuickMix button to display the AUX MASTER Touch- screen. The 12 Master Aux Send levels are controlled by their corresponding QuickMix knobs. -
Page 86: Groups/Auxes
Mackie TT24 Digital Live Console Owner’s Manual Touchscreen and TT Control Groups/Auxes Figure 6-19 GRPS/AUXES From the Group or Aux OVERVIEW screen, touch in the AUXES area to open the GRPS/AUXES Touchscreen. 6.9.1 GROUPS Touch a GROUPS button to assign the selected channel to that Group. The highlighted buttons indicate assignments (in Figure 6-19, no Group is assigned). -
Page 87: 6.10 Matrix Mix
Mackie TT24 Digital Live Console Owner’s Manual Touchscreen and TT Control 6.10 Matrix Mix Display the MATRIX MIX Touchscreen by pressing the MATRIX QuickMix button. Activate the matrix by selecting ALL ACTIVE which sends the Matrix signals to the Group outputs. - Page 88 Mackie TT24 Digital Live Console Owner’s Manual Touchscreen and TT Control Figure 6-21 MATRIX MIX Selection/Assignment The following input signals are available to the matrix : • Analog inputs 1–24 pre/post fader • Digital inputs 25–48 pre/post fader • Line inputs 1–8 pre/post fader •...
-
Page 89: Delay
Mackie TT24 Digital Live Console Owner’s Manual Touchscreen and TT Control 6.10.1 Delay Each Matrix output has a 600 ms delay to allow time alignment of multiple speaker groups in a large venue. The Matrix Output Delay is adjusted by touching DELAY SETUP from the MATRIX MIX Touchscreen. -
Page 90: 6.11 Effects
Mackie TT24 Digital Live Console Owner’s Manual Touchscreen and TT Control 6.11 Effects Figure 6-23 INTERNAL EFX Touchscreens Press the EFX QuickMix button to display the INTERNAL EFX Touchscreen (left of Figure 6-23). Touch an Effect to change the effect. Touch an Edit button to edit the selected effect. -
Page 91: Operation
Pre - fader Aux sends can be globally changed to pre - or post - mute. This feature facilitates using the TT24 for both FOH and monitors. For example, the monitors are normally fed by pre - fader Aux sends. During a set change, to reset the mics for the next band, they must be muted in the monitors. -
Page 92: Digital
Mackie TT24 Digital Live Console Owner’s Manual Touchscreen and TT Control UNITS OF MEASUREMENT This allows U.S. or metric units of measurement to used for console settings. FADERS and SCREEN CALIBRATE Touch either of these CALIBRATE buttons to follow simple instructions to cal- ibrate the faders and Touchscreen. -
Page 93: 6.13 Utility
Touchscreen and TT Control Clock Status This field highlights Locked if the TT24 has successfully locked onto its external Word Clock Source. It is not highlighted if the Clock Source is set to Internal or it has not locked to a Word Clock Source. -
Page 94: Monitor Source
Mackie TT24 Digital Live Console Owner’s Manual Touchscreen and TT Control 6.13.1 MONITOR SOURCE Figure 6-29 UTILITY MONITOR SOURCE The MONITOR SOURCE Touchscreen assigns a source for the monitor outputs and the headphones. The monitor analog gain controls are located in the UTILITY area (see page 38). -
Page 95: Talkback
Mackie TT24 Digital Live Console Owner’s Manual Touchscreen and TT Control 6.13.2 TALKBACK Figure 6-30 UTILITY TALKBACK Select the desired Matrix and Aux channels to enable for Talkback. 6.13.3 STEREO INPUT ASSIGN Figure 6-31 UTILITY STEREO INPUT ASSIGN This screen routes the selected stereo input (DIGITAL, TAPE/CD A, or TAPE/... -
Page 96: Metering
Mackie TT24 Digital Live Console Owner’s Manual Touchscreen and TT Control SOLO Activate the SOLO button to cue the signal prior to routing to the speakers. MONO both Activate the MONO button to send the summed mono signal to the LEFT and RIGHT outputs. -
Page 97: 6.14 File Management
Mackie TT24 Digital Live Console Owner’s Manual Touchscreen and TT Control 6.14 File Management The TT24 parameters related to the physical/acoustical space and equipment can be saved to a Venue. These parameters are from the SETUP Touchscreens : Operation, General, and Digital. See page 90. -
Page 98: Dsp Preset Management
Preset management is not presently available from the Touchscreen but can be accessed from the TT control software. The TT24 DSP settings can be saved and restored to a file by choosing Save Preset and Load Preset, respectively, from the Files menu. -
Page 99: Appendix A: Specifications
Appendix A: Specifications Analog Mic Preamp Frequency response 2 dB, 10 Hz to 20 kHz (Mic In to Insert Out) < 0.003% @ +20 dBu output, 20 Hz to 20 kHz Distortion (THD + N) (Mic In to Insert Out) 20 Hz to 20 kHz BW (150 Ω... - Page 100 Maximum Output Level Insert Out +22 dBu L/R/C Mono, Group/Matrix Out +26 dBu Aux Send, Monitor Out +21 dBu CD/Tape A and B Out +22 dBu 500 mW into 100 Ω Phones Out System +0, –1 dB, 10 Hz to 20 kHz @ 44.1 kHz Frequency Response (Gain at unity) +0, –2 dB, 10 Hz to 40 kHz @ 96 kHz Mic Input to Main Output...
- Page 101 Word Clock Input Minimum Level 0.4 V p Duty Cycle 75 Ω Impedance 44.1 kHz = 42.5 kHz – 45.8 kHz 48 kHz = 46.4 kHz – 49.4 kHz External Word Clock Lock Range 88.2 kHz = 85.0 kHz – 90.7 kHz 96 kHz = 92.2 kHz –...
- Page 102 General AC Power Requirements 100–240 VAC, 50–60 Hz, auto switching Fuse 6 A/250 V Operating Temperature 10ºC–40ºC (50ºF–104ºF) Physical Dimensions Height 10.4 in/265 mm Width 42.6 in/1083 mm (including handles) Depth 25.0 in/636 mm Weight 71.0 lb/32.2 kg Disclaimer Since we are always striving to make our products better by incorporating new and improved materials, components, and manufacturing methods, we reserve the right to change these specifications at any time without notice.
-
Page 103: Appendix B: Configurations And Block Diagrams
Figure B-1 48 channel TT24 system mono monitor output In-Ear Monitor 24 Built-in Mic/Line Inputs System headphones and monitor for engineer TT24 Aux Outs 1-12 stereo linked Eight additional mono monitor mixes from Matrix-Plus Figure B-2 TT24 system with in ear monitors... - Page 104 Microphones Microphones TT24 24 Built-in 24 Built-in Mic/Line Inputs ONYX 800R Mic Preamps Expansion Cards TT24 1 - U100 per TT24 In-Ear Monitor 1 - UFX2 per TT24 System Main Outs (L/R/Mono) Aux Outs Stereo Power Mono Power Stereo Power...
- Page 105 Main Out PFL Solo AFL Solo Figure B-5 TT24 in L/R + Mono mode...
- Page 106 Main Out PFL Solo AFL Solo Figure B-6 TT24 in LCR mode...
-
Page 107: Appendix C:service Information
Details concerning Warranty Service are spelled out in Appendix D: Information If you think your TT24 has a problem, please do everything you can to confirm it before calling for service. Doing so might save you from the deprivation of your TT24 and the associated suffering. - Page 108 1. Review the preceding troubleshooting suggestions. Please. 2. Call Tech Support at 1-800-898-3211, 7 am to 5 pm PST, to explain the problem in detail. If it appears that the TT24 needs repair, you will be given a Service Request Number. Have your TT24's serial number ready.
- Page 109 7. Tech Support will tell you where to ship the loudspeaker for repair. We suggest insurance for all forms of cartage. 8. We'll try to fix the TT24 within five business days. Once it is repaired, we'll ship it back the same way in which it was received. This paragraph does not necessarily apply to non-warranty service.
-
Page 111: Appendix D: Warranty Information
Mackie product is within the warranty period. D. To obtain factory-authorized service: 1. Call Mackie Technical Support at 800 - 898 - 3211, 7 AM to 5 PM Monday through Friday (Pacific Time) to get a Service Request Number. Products re- turned without a Service Request Number will be refused. - Page 112 ANY KIND. LOUD TECHNOLOGIES INC. SHALL NOT BE LIABLE FOR ANY INCIDENTAL, SPECIAL, OR CONSEQUENTIAL DAMAGES THAT MAY RESULT FROM ANY DEFECT IN THE MACKIE PRODUCT OR ANY WARRANTY CLAIM. Some states do not allow exclusion or limitation of inci- dental, special, or consequential damages or a limitation on how long warran- ties last, so some of the above limitations and exclusions may not apply to you.
Need help?
Do you have a question about the tt24 and is the answer not in the manual?
Questions and answers