Advertisement
Table of Contents
- 1 Specifications
- 2 Safety Precautions and Warnings
- 3 Before You Begin
- 4 Customer Care
- 5 Filling Clean Water Tank
- 6 Instructions for Use
- 7 Filling Solution Tank
- 8 Operating Steam Cleaner
- 9 Refilling Water During Operation
- 10 Using on Carpet
- 11 Accessories Chart
- 12 Maintenance
- 13 After Steam Cleaner Use / Using Cooling Tray
- 14 Troubleshooting
- Download this manual
See also:
Instruction Manual
Advertisement
Table of Contents

Related Manuals for Hoover Twin Tank


Summary of Contents for Hoover Twin Tank
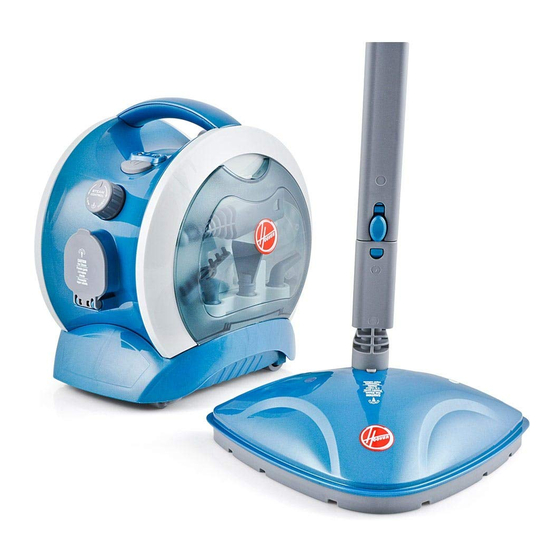
- Page 1 Twin Tank ™ Multi-Steamer Twin Tank System Disinfects and Kills or Removes 99.99% of Harmful Bacteria On Board Accessory Storage of 10 Included Cleaning Tools Twin Tank ™ *With steam alone, per instruction manual ** Staphylococcus aureus ATCC6538 & Salmonella enterica ATCC10708...
- Page 2 Accessories: 17 18...
-
Page 3: Specifications
Multi-Steamer ™ Congratulations on the purchase of your new HOOVER Twin Tank™ multi-steamer. There are many useful features built into your cleaner and we recommend that you carefully read this instruction manual so that you may take best advantage of them. -
Page 4: Safety Precautions And Warnings
Safety Precautions and Warnings The power and the heat of the steam may with wet hands and follow electrical safety precautions at all times, i.e., never operate have adverse consequences for certain without shoes. materials. Always check before putting 7 Do not aim steam directly at parts that the appliance into operation, whether the containing electrical components such as the surface or material is actually suitable for... - Page 5 Grounding Instructions 16 Do not attempt to change the attachments while the appliance is emitting steam. Use only This appliance must be grounded. If it should manufacturer’s recommended accessories. malfunction or breakdown, grounding provides a 17 Do not leave the appliance unattended when path of least resistance for the electric current to it is connected to a power supply or an flow, this will reduce and prevent the risk of electric...
-
Page 6: Before You Begin
AC supply at the voltage shown on the rating plate. This cleaner should only be used for its intended purpose as described in these instructions. Customer Care Please contact Hoover Customer Care: 1300 360 845 to find your local spare parts provider. Part Part Number... - Page 7 Assembly WARNING! To reduce the risk of personal injury - Unplug the steam cleaner when assembling the accessories. Hose/Handle Assembly 1. Open steam outlet door to expose interface and hold open. Insert hose connector (A) onto the steam outlet interface (B) pressing firmly until you hear a click sound. 2.
-
Page 8: Filling Clean Water Tank
Filling Clean Water Tank WARNING! Turn off, unplug, and allow steam cleaner to cool before servicing or filling tank. Do not clean over electrical outlets. Use only with Hoover® SteamPlus™ Cleaning Solution 2x. CAUTION! Use caution when removing water fill safety cap. Even when cap is able to be turned the steam cleaner may still be hot, especially the metal ring. -
Page 9: Filling Solution Tank
Filling Solution Tank IMPORTANT! Do not mix Hoover® SteamPlus™ Cleaning Solution 2x with any other cleaning solution. 1. Solution tank is located in hose/handle assembly. Place hose/ handle assembly on flat surface. Unscrew the solution tank cap (A) by turning counter- clockwise, and insert funnel. - Page 10 “OFF”. Now every time you press the steam trigger, you will release steam alone. 3. If you wish to clean using Hoover® SteamPlus™ Cleaning Solution 2x, simply turn the clean control™ dial to the desired setting. Now...
-
Page 11: Operating Steam Cleaner
Operating Steam Cleaner WARNING! When pressing the steam trigger for the first time or after a certain amount of time out of use, water may form due to the initial heat instability. This is normal and is simply caused by steam condensation in the hose. - Page 12 Instructions for Use (continued) Operating Steam Cleaner (continued) 7. Press steam trigger (E). 8. By turning steam control knob (F) in a counter-clockwise direction, the steam flow decreases. To increase, turn it in the opposite direction. To Sanitize Hard Surfaces 1.
-
Page 13: Refilling Water During Operation
Refilling Water During Operation CAUTION! To avoid burn injury, do not refill water tank before steam cleaner has cooled completely. Use caution when removing water fill safety cap. Even when cap is able to be turned the steam cleaner may still be hot, especially all metal surfaces. - Page 14 Instructions For Use (continued) Refilling Water During Operation (continued) IMPORTANT! To prevent steam condensation in the hose, turn the steam control knob counter-clockwise all the way when you are not using steam cleaner. This will shut off steam flow to the hose. 4.
- Page 15 Attaching the Accessory Adaptors IMPORTANT! Do not use steam cleaner on leather, wax polished furniture or floors, synthetic fabrics, velvet or other delicate, steam or water sensitive materials. 1. Align the hose/handle assembly (G) with the extension tool (H). The extension adaptor can also be attached to the extension wand if longer reach is needed.
- Page 16 Instructions for Use (continued) Attaching Mop Head 1. Align extension wand (C) with the opening on the mop head (D), at the corresponding end. 2. Press extension wand against the mop head until you hear a click. 3. Use mop head to clean sealed hard floors and carpets. Microfibre pad must be attached.
-
Page 17: Using On Carpet
Using on Carpet WARNING! Do not clean over floor electrical outlets. Do not use steam cleaner or press the steam trigger without water in the water tank. IMPORTANT! When using on carpets, always ensure the multi-surface microfibre pad is properly attached to the mop head. 1. -
Page 18: Accessories Chart
Accessories Chart: Extensions And Usage CAUTION: Before cleaning any electrical appliance, check and follow appliance manufacturer’s cleaning guidelines. Never apply steam to electrical parts. Required part that must be connected to the hose/ handle assembly before use Suggested Use Accessory Accessory Ext. - Page 19 Required part that must be connected to the hose/handle Accessory Suggested Use assembly before use Accessory Ext. Wand Adaptor Use with microfibre pad to clean sealed Triangular hard floors, including tile, granite, linoleum, Mop Head** hardwood, laminates, and engineered hardwood floors as well as refresh carpets. Hard Floor Connect microfibre pad...
-
Page 20: Maintenance
Maintenance IMPORTANT! Allow the steam cleaner to fully cool down before performing any maintenance or troubleshooting checks. Never use bleach or fabric softener when washing the microfibre cleaning pad. This steam cleaner contains no serviceable parts. Do not try to repair it yourself. If steam cleaner is not working as it should, has been dropped, damaged, left outdoors, or dropped into water, call Customer Service at 1800 360 845 for further instruction before continuing use. - Page 21 Storage CAUTION! If the hose/handle assembly is removed from the steam port door while the steam cleaner is under pressure, residual steam may dispense from this port. Also, be careful, steam and/or residual water may dispense from hose as well. 1.
-
Page 22: Troubleshooting
Troubleshooting Use troubleshooting guide as a first step to resolve any problems you may be experiencing. All servicing should be done by an authorized service representative. WARNING! To reduce risk of personal injury - unplug multi steam cleaner before servicing and allow to cool. - Page 23 Service If you need further assistance: If your product needs servicing within the warranty period, please contact Hoover Customer Care at 1800 360 845; Mon-Fri 9am-5pm EST. Always identify your steam cleaner by the complete model number when requesting information or ordering parts.
- Page 24 Hoover Service Agent or from the use of non-genuine parts. in accordance with the terms and conditions of this If any part is no longer available or manufactured, Hoover warranty statement.
Need help?
Do you have a question about the Twin Tank and is the answer not in the manual?
Questions and answers