Advertisement
Advertisement
Table of Contents

Related Manuals for RC Aerodyne 450 scale fuselage Airwolf


Summary of Contents for RC Aerodyne 450 scale fuselage Airwolf
-
Page 1: Instruction Manual
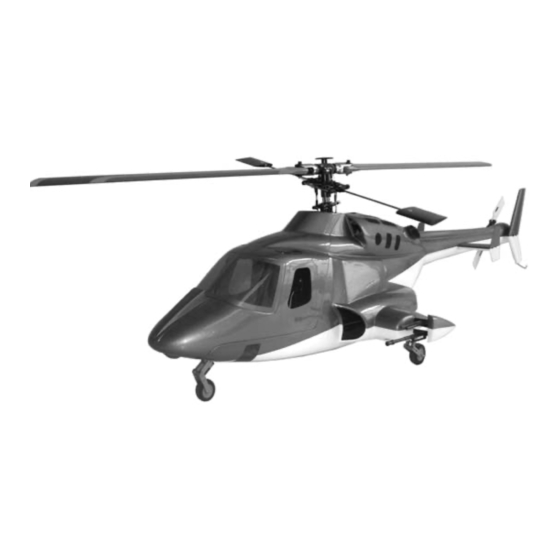
450 scale fuselage Airwolf INSTRUCTION MANUAL Produced By:... -
Page 2: Table Of Contents
Additional items required TABLE OF CONTENTS Trex 450 electric or Chaos 450 Additional items required……………. Motor, ESC, gyro, servos for a stock 450 size Adhesives and building supplies….. helicopter Disclaimer…………………………………… 2100mah 3 cell LiPo battery Parts sheet………...………………………. Initial setup…………….……………… Installing the mechanics…………….. Adhesives and building supplies Final steps………………………………….. -
Page 3: Parts Sheet
assistance in person or property damage. We strongly recommend you attain a membership with the AMA. The contact information for the AMA is: Academy of Model Aeronautics. 5161 E. Memorial Dr. Muncie IN 47302 (800) 435-9262 Helicopter and Aircraft operation requires a high degree of skill. Accidents, modifications or damage during flight are not covered by any warranty and are solely the pilot’s responsibility. -
Page 4: Initial Setup
INITIAL SET UP 1. Assemble the control arms and add the ball links to the arms. Attach the ball links to the control rods. 2. Attach the control arms to the control rods. Attach the small rod to the nose control arm. Attach the nose gear to the control arms with the smaller carbon fiber rod. - Page 5 4. Install the carbon fiber brace rod into the fuselage. Install the main retract into the fuselage as shown above. 5. Attach the control arm to the retract rod and secure. 6. Install the retract servo to the nose of the fuselage and connect the ball link to the retract system.
-
Page 6: Installing The Mechanics
INSTALLING THE MECHANICS 7. Glue the wood spacers into 2 even blocks. Attach them to the bottom of the mechanics using the skid bolts from the mechanics. 8. Detach the tail cover and place aside. Insert the mechanics into the fuselage. 9. -
Page 7: Final Steps
10. Secure the mechanics to the fuselage using the screws provided. Attach the vertical fin to the tail of the helicopter. FINAL STEPS 11. Glue the horizontal stab to the tail of the fuselage using epoxy. Attach the vertical fins to the horizontal stabs. - Page 8 13. Install the weapons cap to the weapons. Install the windshield to the fuselage body.
-
Page 10: Flying Characteristics
The fuselage will make your helicopter look and fly more like the full scale helicopters, and that is how we advise you fly it. Thanks again from all of us here at RC Aerodyne and enjoy flying your new fuselage. Printed in China...
Need help?
Do you have a question about the 450 scale fuselage Airwolf and is the answer not in the manual?
Questions and answers