Table of Contents
Advertisement
Advertisement
Table of Contents

Subscribe to Our Youtube Channel
Summary of Contents for SOUNDMASTER KTD 51002
- Page 1 DEUTSCH ENGLISH FRANÇAIS KTD 51002...
-
Page 2: Table Of Contents
Table of Contents Important Safety Instructions ....................2 Characteristic Features ......................4 Disc Information........................6 View of Unit ..........................7 Front Panel................................ 7 Rear Panel................................9 Display Panel..............................9 Remote Control ........................10 Preparation ..............................10 Using Of Remote Control ...........................10 Remote Control Drawing ...........................11 System Connections...................... -
Page 3: Important Safety Instructions
Important Safety Instructions The lightning flash with arrowhead symbol, within an equilateral triangle, is intended to alert the user to the presence of un-insulated “dangerous voltage” within the product’s enclosure that may be of sufficient magnitude to constitute a risk of electric to persons. The exclamation point within an equilateral triangle is intended to alert the user to the presence of important operating and maintenance (servicing) instructions in the literature accompanying the appliance. -
Page 4: Copyright Protection
Important Safety Instructions NOTES IMPORTANT FOR LASER PRODUCTS 1. CLASS 1 LASER PRODUCT Read these instructions. 2. DANGER: Visible laser radiation when open and Keep these instructions. interlock failed or defeated. Avoid direct exposure to Heed all warnings. beam. Follow all instructions. 3. -
Page 5: Characteristic Features
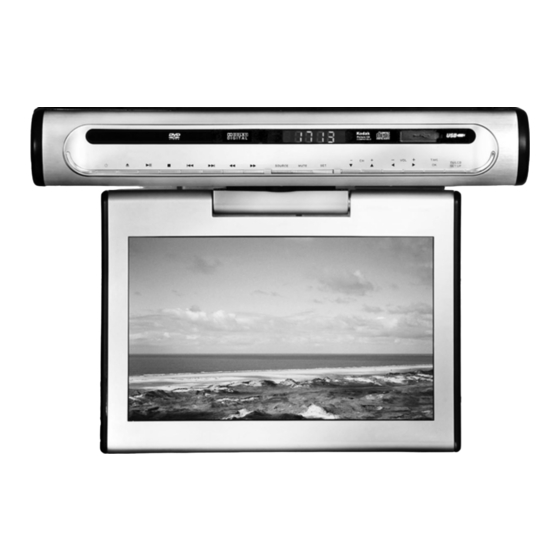
Characteristic Features This product incorporates a DVD player, LCD display, TV receiver, Radio function and DVB-T function in one system. It is designed for convenient use in the kitchen. Please refer to page 31 for the installation instructions. Multiple Mode Advanced Playing Function Compatibility Plays: DVD, CD and JPEG discs. -
Page 7: Disc Information
Disc Information Disc Formats Supported By This Player PLAYBACK TIME/ DISC LOGO DIAMETER PLAYABLE SIDES 133 min (SS-SL) 242 min (SS-DL) 12cm 266 min (DS-SL) 484 min (DS-DL) 41 min (SS-SL) 75 min (SS-DL) 82 min (DS-SL) 150 min (DS-DL) 12cm 74 min 20 min... -
Page 8: View Of Unit
View of Unit 1. POWER Button Press twice to go to the previous Press to enter or exit the STANDBY track/chapter. mode. Button 2. Disc Tray Press to go to the next track in DVD Used to load disc. mode. EJECT Button REV SCAN Button Press to open or close the disc tray. - Page 9 View of Unit FWD SCAN Button 17. ◄/VOL- Button In FM mode, press once to fine tune frequency forward. Press to select items in the system Press for about 1.5 seconds to search setup menu. radio stations forward automatically. Press for about 1.5 seconds to decrease In DVD mode, press to activate fast the volume.
-
Page 10: Rear Panel
View of Unit Rear Panel 1. TV Antennal Jack Connected to external antenna to receive the ATV/DTV/Radio program in ATV/DTV mode. 2. FM Coaxial Antenna Jack 3. Left/Right AUDIO Input Jacks Connection for audio input. 4. VIDEO Input Jack Connection for video input. 5. -
Page 11: Remote Control
Remote Control Preparation Using Of Remote Control Refer to the drawing and remove the Point the remote control towards the main empty battery receptacle. unit when operating. The remote control works best at a distance less than 7m and at an angle of up to 60°to the front of the unit. -
Page 12: Remote Control Drawing
Remote Control Remote Control Drawing 1. POWER Button 2. SUBTITLE Button Press to access to or exit the STANDBY Press to select a subtitle language or to mode. turn subtitles off when a DVD disc with multi-subtitles is playing. In DTV mode, press to enter the subtitle language menu. - Page 13 Remote Control 3. DVD Button In program edit menu, use the red Press to enter DVD mode. button to delete a program and the 4. DTV Button green button to rename a program. Press to enter DTV mode. /TTX Button 5.
- Page 14 Remote Control 19. AUDIO Button 27. USB Button Press to access various audio In DVD mode, press the shift between languages when the DVD disc contains disc playback and USB playback. multiple audio languages. Buttons In DTV mode, press to enter the audio Press to go to the previous/next track language menu.
-
Page 15: System Connections
System Connections Do not connect the power cord until all other connections have been made. Each time you restart the unit, it remembers the last function used. Please make all the connections before installing the unit in the kitchen. Connecting to External AV Signal Source Connections should be made as follows: Connect the L/R audio cables according to the marks on the rear panel of the unit. -
Page 16: Connecting To Antenna
System Connections Connecting to Antenna Connect the supplied FM antennas to listen to the radio. Extend FM antenna fully. Keep the FM antenna as horizontal as possible after connection. If the FM reception is poor, use a 50Ω coaxial cable (not supplied) to connect system to an outdoor FM antenna as above. -
Page 17: First Time Installation
First Time Installation After you reset all the settings to their original status, the Installation Guide page appears automatically. With this guide you can search analogue and digital TV channels. The search routine includes the frequencies of the analogue and digital broadcaster. Please select the OSD language. -
Page 18: Setup Setting
On Screen Menus and Displays SETUP Setting The channel settings includes the options for Auto Tuning, DTV manual Tuning, ATV manual Tuning and Program Edit. Auto Tuning Press the ▼ button and navigate to the option “Auto Tuning”. Press the OK or ►... -
Page 19: Program Edit
On Screen Menus and Displays DTV Manual Tuning Press the ▲▼ button to select DTV Manual Tuning and press the OK or ► button, the screen will display as shown on the right: Use the ◄► button to change the channel number. So you can define, on which channel shall be runs the search. -
Page 20: Picture Setting
On Screen Menus and Displays Rename a program: (only for ATV programs) Within the menu, press the ▲▼ button to select a program you want to rename and press the green button to set a symbol “RENAME” on the program. Press the ◄►... -
Page 21: Sound Setting
On Screen Menus and Displays Tint (under NTSC mode ) Aspect Ratio With the ◄► button you can adjust the With the ◄► button you can select 16:9, level of tint. Zoom1, Zoom2, Auto or 4:3. Colour Temp Noise Reduction With the ◄►... -
Page 22: Time Setting
On Screen Menus and Displays Time Setting The time settings includes the options for Clock and Time Zone. Clock Press the ► or ENTER button and start to change the clock. A new popup window appears on the screen. Use the ▲▼ button to select every sub-option and use the ◄► button to change the option. -
Page 23: Lock Setting
On Screen Menus and Displays Subtitle Language You can select the subtitle language. Some broadcast TV stations supports subtitles in TV programs. Hearing Impaired For the people with poor hearing, some digital program is added some special subtitle when it is made. Use the ◄► button to select activate or deactivate this function. Not all the digital programs have this function. -
Page 24: Epg Function
EPG Function In DTV Mode Only In DTV mode, press the TITLE/EPG button to enter the PROGRAM GUIDE menu, as shown. Within this menu, press the ▲▼ button to select a desired program. Press the RED button to page up and press the BLUE button to page down. To schedule a program reminder Select a program on the PROGRAM GUIDE menu then press the GREEN button to enter the Reminder menu, as shown on... -
Page 25: Dvd Playback Operation
DVD Playback Operation Preparation Install the unit in the kitchen; refer to page 31 for details. After connecting the unit to the AC power, turn on the unit’s power by pressing the POWER button on the front panel or the remote control. Press the DVD button on the remote control or the SOURCE button on the front panel to shift to DVD mode. -
Page 26: Previous And Next
DVD Playback Operation Audio Search By Time DVD discs can contain up to 8 audio bit During DVD disc playback, press the GOTO streams. For Example: German, English, button on the remote control repeatedly to French, Spanish, etc. choose TITLE and CHAPTER. Use the To select the audio bit stream you prefer number buttons to to input desired title or press the AUDIO button on the remote... -
Page 27: Cd Disc Playback
DVD Playback Operation CD disc Playback The player will play all tracks on a CD disc by default. You can use the (PREV/NEXT skip) buttons, or number buttons to select a track. JPEG disc Playback JPEG is a common picture format that requires small amounts of storage per image and has low loss in resolution. -
Page 28: Using The Memory Cards
DVD Playback Operation Using the Memory cards In DVD mode, insert USB device into the USB Port on the front of the unit. Press the USB button and the system start detecting the USB device. After detecting, the figure appears: Prior to connecting the device, make sure that the USB device contains files. -
Page 29: General Setup Page
DVD System Setup General Setup Page The General Setup menu will appear. Select the desired submenu using the ▲▼ direction buttons and press OK to confirm. Select an option value to be set using the ▲▼ direction buttons, or press ◄ to cancel setting. -
Page 30: Dolby Digital Setup
DVD System Setup Downmix Select “Lt/Rt” in DOWNMIX, the player will output the audio signal in mixed mono. Select “Stereo”, then the player will output a stereo signal. Dolby Digital Setup The Dolby Digital Setup menu will appear. Select “Speaker Setup” using the ▲▼ direction buttons and press OK to confirm. -
Page 31: Preference Page
DVD System Setup Preference Page NOTE: This function is allowed to set when there is no disc in the disc tray or all the operation has been stopped. The Preference Page will appear: Select the desired submenu using the ▲▼ direction buttons and press OK to confirm. -
Page 32: Radio Function
Radio Function Press the FM button on the remote control or the SOURCE button on the front panel to enter FM radio mode. Then press the SEEK+/- button on the remote control or the / buttons on the front panel for about 1.5 seconds to start searching forward/backward from the current frequency. -
Page 33: Installing The Unit In Kitchen
Installing the Unit In Kitchen NOTE: Before installing the unit in the kitchen, please make all the connections. Installing the unit under a cabinet The player unit may be installed in the kitchen with or without the spacer. The suggested mounting position of the unit is under a wall cabinet. - Page 34 Installing the Unit in Kitchen Mark the position of the 4 holes by using the supplied paper template. Drill four holes with diameter of 8mm. You can use the connecting steel panel to check the holes. If the cabinet door overhangs the shelf and obstructs the unit, adjust the unit or the shelf height for clearance.
-
Page 35: Troubleshooting
Troubleshooting SYMPTOM CHECK ITEM Make sure a disc is loaded. Make sure the disc is loaded with label side up. Disc should be clean, not dirty or warped. The player cannot Player’s region code should be the same as the region play. -
Page 36: Specifications
Specifications LCD Screen Size 10.2 inches Laser Wavelength Wavelength: 780/650nm Video System Frequency Response 20Hz~20kHz ±2.5dB Audio Signal-to-Noise ≥ 85 dB Audio Distortion + Noise ≤ -70dB (1KHz) Channel Separation ≥ 70dB (1KHz) Dynamic Range ≥ 80dB (1KHz) System Radio Frequency Range 87.5~108MHz Power...
Need help?
Do you have a question about the KTD 51002 and is the answer not in the manual?
Questions and answers