Table of Contents
Advertisement
Available languages
Available languages
Quick Links
Advertisement
Chapters
Table of Contents

Related Manuals for JVC CU-VD50U


Summary of Contents for JVC CU-VD50U
- Page 1 CU-VD50U DVD Burner INSTRUCTIONS Grabador de DVD MANUAL DE INSTRUCCIONES ENGLISH ESPAÑOL For Customer Use: Enter the Model No. and Serial No. (located on the bottom of the burner) below. Retain this information for future reference. Model No. Serial No.
-
Page 2: Safety Precautions
This burner enables DVDs of videos recorded with the JVC Hard Disk Camera to be created without using a PC. • If you want to edit videos recorded with the camera and create your original DVDs, use the software provided with the camera for editing and creating DVDs. - Page 3 (For owners in the U.S.A.) Changes or modifications not approved by JVC could void the user’s authority to operate the equipment. This equipment has been tested and found to comply with the limits for a Class B digital device, pursuant to Part 15 of the FCC Rules.
-
Page 4: Basic Guide
Get ready a recommended disc Use DVD-R, DVD-RW or DVD-R DL disc of the brands listed below. DVD+R, DVD+RW and DVD-RAM discs cannot be used. DVD-R JVC, TDK, Brand Verbatim, SONY • DVD-R DL (single-sided double layer) discs can be used only when the Caution burner is connected to a high definition Everio camera. - Page 5 Open the tray and insert the disc • The tray cannot be opened/closed when the burner is off. Caution A Press the eject button. Close the tray • Push in until the tray snaps in. Open the LCD monitor • The Everio camera turns on. •...
- Page 6 Copying Videos to a DVD Operate on the Everio camera. Depending on the model connected, the on-screen display may differ from those shown below. Select (move up-down) Confirm (push in) Select “CREATE FROM ALL” VIDEO CREATE FROM ALL SELECT AND CREATE PLAYBACK FINALIZE SELECT...
- Page 7 Playing Videos Stored on the DVD Connect this burner to the TV To DC jack Power lamp • For details, refer to “Connecting to the TV” (P.12, 13). Remove the USB cable • The power lamp on the burner changes as follows. Green Blinking orange •...
-
Page 8: Table Of Contents
Contents Safety Precautions ... 2 Getting Started... 9 Accessories ... 9 Placing the Burner ... 9 Names and Functions of Each Part ... 10 Front and Top Panel... 10 Rear Panel... 10 Remote Control ... 11 Connecting to the TV ... 12 Connecting to a TV with HDMI Input Terminal ... -
Page 9: Getting Started
Getting Started If there are any items missing, please consult your authorized dealer. AC adapter (AP-V50U) Audio/Video cable DVD-R (blank disc) x 1 CD-ROM (data writing software) x 1 Do not use the provided AC adapter and power cord for other devices. In addition, do not use AC adapter and power cord other than those provided with this burner. -
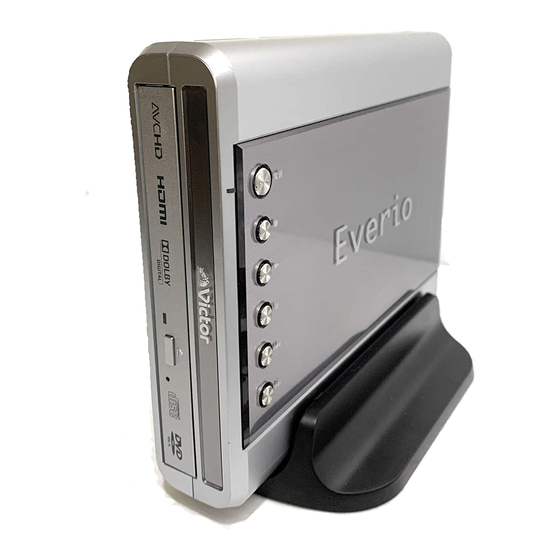
Page 10: Names And Functions Of Each Part
Names and Functions of Each Part Power (On/Off) Power lamp Power on: orange USB connected: green Remote control sensor Tray Access lamp To eject tray (P. 5) Connect to the Everio camera (P. 14) Connect to the PC (P. 16) Connect to the AC adapter Front and Top Panel... -
Page 11: Remote Control
Power (On/Off) To perform basic setup (P. 34) To display the playback navigator (P. 23) Basic playback operations (P. 25, 28) • If the burner responds poorly to the remote control, the battery of the Note remote control is weak. Replace it with a new battery. Insert correctly according to the e and d directions indicated. -
Page 12: Connecting To The Tv
Connecting to the TV Connecting to a TV with HDMI Input Terminal This burner HDMI cable (not provided) • Images can only be displayed on a High-bandwidth Digital Content Note Protection (HDCP) monitor. • We recommend using the Category 2 HDMI cable (High Speed cable) for viewing in higher picture quality. -
Page 13: Connecting To A Tv With Component Video Input Connectors
Connecting to a TV with Component Video Input Connectors Component video cable (not provided) This burner Audio cable (not provided) • Connect to a High-bandwidth Digital Content Protection (HDCP) Note monitor when using an HDMI-DVI conversion cable. Connecting to a TV with Audio/Video Input Connectors This burner Audio/Video cable (provided) -
Page 14: Copying Everio Video To A Dvd
Copying Everio Video to a DVD By connecting this burner to an Everio camera, you can easily copy recorded images to a DVD. Connecting to an Everio Camera • Everio: Off Preparations • This burner: Off USB connector USB cable (provided with CU-VD50) To DC jack •... -
Page 15: Creating Avchd Disc/Data Disc/Dvd-Video
(P. 23) Play back on this burner. (P. 23) Cannot be played back on other devices. Can be played back on DVD recorder, DVD player or this burner. (P. 27) mode (depending on the item to be copied) -
Page 16: Copying From Pc To Dvd
Copying from PC to DVD This burner can be used as a DVD burner when connected to a PC. And you can use the provided software to copy to a DVD. • Everio: Off Preparations • This burner: Off USB cable (provided with Everio) USB connector DC connector... -
Page 17: Computers That Can Be Used
• For details on using Power2Go, refer to the User’s guide, Help and Note Readme files installed with the software. You can access the User’s guide, Help and Readme files from the Start menu on the PC. • To get customer support and to register the software, you need the following product key (CD-Key): PXNVM-NWE4G-XQD9Q-CU9DX-3FQFN-NAKUS •... -
Page 18: Installing Cyberlink Power2Go 5.5 Lite
Installing CyberLink Power2Go 5.5 Lite • Do not play the provided CD-ROM in an audio player. It is not an audio Caution CD. Playing this CD-ROM in an audio player will result in a loud high noise. It may also damage the circuit and speaker. Insert the provided CD-ROM in the PC Windows Vista: A Click “Run INSTALL.EXE”... - Page 19 Enter the “User Name” and “Company Name” and then click “Next” Follow the on-screen intructions • Installation starts. After a while, the “InstallShield Wizard Complete” screen appears. Click “Finish” • The computer will restart and installation is completed. • If the screen on the right does not appear, proceed to step Click “Finish”...
-
Page 20: Cyberlink Power2Go 5.5 Lite Contact Information
CyberLink Power2Go 5.5 Lite Contact Information For information on CyberLink Power2Go 5.5 Lite or other products, use the following contact information. Telephone/fax support Location Language English / French / Germany Spanish Paid voice support Location Language U.S.A. English Support web/e-mail Language English http://www.cyberlink.com/english/cs/support/new_site/support_index.html... -
Page 21: Folder Configuration
Folder Configuration This shows the folder configuration when files are copied from a high definition Everio camera or a PC to a DVD. When Copying from High Definition Everio to Data Disc [EVERIO_V] EVERIO VIDEO ROOT [EVERIO_S] EVERIO IMAGE Video and still image files recorded on a high definition Everio camera that are copied to this burner will be stored in the “EVERIO_V”... -
Page 22: When Copying From High Definition Everio To Avchd Disc
When Copying from High Definition Everio to AVCHD Disc [BDMV] ROOT [EVERIO_I] When Creating and Storing Desired Folders and Files on a PC ROOT *2, 3 [USER_DAT] *2 Create folders with Power2Go and copy the desired video and/or still image files into the folders. -
Page 23: Playing Images Stored On The Dvd
Playing Images Stored on the DVD You can play back video and still images of Everio stored on a DVD. Viewing Images Copied from the High Definition Everio To start viewing immediately after storing images on a DVD A Remove the USB cable. (P. 14) B Connect this burner to the TV. - Page 24 Digest Playback (for AVCHD disc only) • Use the selection keys to select “DIGEST PLAYBACK” and press the ENTER button. The videos will be played back for several seconds consecutively. • Press the NAVIGATION/TOP MENU button during playback to display the sub menu.
- Page 25 Displaying the TOOL MENU [for data disc (video/still images) only] You can switch between video/still images or display file details from the TOOL MENU. Operate when playback navigator is displayed A Select Select an item with the selection keys and press the ENTER button. •...
- Page 26 Remote Control Button Rewinds playback. Changes in the order of Search b1 to Search b3 with each press. Press the button when in the paused mode to enable reverse playback frame by frame. (Not available for AVCHD disc.) Reverse playback at slow speed is not possible.
-
Page 27: Viewing Dvd-Video Copied From Everio
Viewing DVD-Video Copied from Everio To start viewing immediately after storing images on a DVD A Remove the USB cable. (P. 14) B Connect this burner to the TV. • For details on connection, refer to “Connecting to the TV” (P. 12, 13). •... - Page 28 Buttons that can be used during playback (DVD-Video) Remote Control Button Pressing this button when in the paused or variable speed PLAY playback mode resumes normal playback. PAUSE Pauses playback. STOP Stops playback. Fast-forwards playback. Changes in the order of Search +1 to Search +3 with each press.
-
Page 29: Changing The Playback Settings
Changing the Playback Settings You can alter the method for playing back video/still images as well as the image settings. Operate during playback indicates the default settings during purchase of this product. DISC SETTING If the disc contains more than one audio language, subtitle language or has multi-angle scenes, you can select with this setting. - Page 30 VIDEO SETTING PICTURE QUALITY For specifying the video image quality. NORMAL Set to this value under normal circumstances. CINEMA Plays back in cinema-like picture quality. FINE Plays back in clear sharply defined picture quality. SOFT Plays back in soft textured picture quality. Plays back images in the picture quality specified in USER SETTING “DETAIL SETTING”.
-
Page 31: Operate In Conjunction With Tv Via Hdmi
Operate in Conjunction with TV via HDMI Connecting this burner to an HDMI-CEC-enabled TV using the HDMI cable allows you to utilize the following convenient functions. • Connect an HDMI cable between this Preparations burner and the TV. (P. 12) •... - Page 32 • HDMI-CEC (Consumer Electronics Control) is an industry standard that Note enables interoperability between HDMI-CEC compliant devices that are connected via HDMI cables. • Not all HDMI-compatible devices comply with the HDMI-CEC standard. The HDMI control function of this burner will not work when connected to these devices.
-
Page 33: Viewing High Quality Images
Viewing High Quality Images You can change the video output resolution when this burner is connected to a high definition TV using a HDMI or component video cable. Operate when in the intermediate screen* * To display the intermediate screen, refer to page 34. •... -
Page 34: Settings Menu
Settings Menu Change the settings of this burner according to the environment of use. Menu Operation Procedures • The SET UP button can only function when the intermediate screen Caution (screen without image display) is displayed. If the playback navigator is displayed, press STOP (for AVCHD disc and DVD-Video) or NAVIGATION/TOP MENU (for data disc) to clear the screen. -
Page 35: Settings Menu Items And Descriptions
Settings Menu Items and Descriptions indicates the default settings during purchase of this product. Menu items for which setting cannot be changed will appear grayed out on the screen. DISC SETTING If the disc contains more than one audio language, subtitle language or has multi-angle scenes, you can select with this setting. - Page 36 During output in D5 (1080p) (P. 12) 24p OUTPUT JVC camcorders do not support 1080/24p recording. (As of May 2008.) Specify this setting when viewing video images recorded by other devices in 1080/24p on a TV that supports 1080/24p via HDMI connection.
- Page 37 Deep Color This function works during playback. Specify this setting when viewing images on a TV that supports Deep Color. This allows viewing of high definition images of 30-bit and 36-bit color depths that are higher than the full 24-bit color. Select this value to view high definition images on a TV that AUTO supports Deep Color.
- Page 38 OTHER SETTING RESUME * For specifying whether to memorize the stop position. Memorize the stop position. Do not memorize the stop position. ON SCREEN GUIDE For specifying whether to display the playback status information. AUTO Display for 5 seconds. Do not display. ON SCREEN LANGUAGE For specifying the language to be displayed for the settings menu screen and others.
-
Page 39: Screen Displays
Screen Displays You can display information during playback on the screen. • Press each time to hide/show information. During playback of AVCHD disc copied from a high definition Everio Title Number Playback Position During playback of video data disc copied from a high definition Everio Playback Position Chapter Number... - Page 40 During playback of still image data disc copied from a high definition Everio During playback of DVD disc copied from Everio Title Number Playback Position File Date/Time Disc Type DVD-R JUN.01.2008 10:20AM Playback Mode Chapter Number Playback Time Disc Type DVD-R Audio Format 00:00:25...
-
Page 41: Troubleshooting
Troubleshooting Trouble Cannot turn the power on. Cannot function properly. The burner or AC adapter is hot. The power lamp blinks slowly in red while using the burner. The burner is not recognized by the Everio camera. The burner is not recognized by the PC. - Page 42 Trouble The remote control is not working. Unable to operate. No images on the TV. Images are distorted during fast-forward/ fast-reverse playback. The images cannot be displayed in the normal aspect ratio. Reading fails. Playback cannot function properly. Digest Playback starts when the PREVIOUS / NEXT button is pressed...
- Page 43 Trouble Unable to read the content of the AVCHD disc using the PC’s explorer function. Unable to play back images added by a The TV switches input automatically when the burner is played. The TV turns off when this burner is turned off.
- Page 44 Problems with seamless playback During continuous playback of multiple files, the image will freeze for a few seconds while switching the files in the following cases. • When the recording dates are different: The image will freeze for a few seconds when switching between files with different recording dates.
-
Page 45: Error Messages
Error Messages Trouble Unplayable disc Incompatible disc Unfinalized disc Use finalized disc Disc error Region code error Cannot execute the operation Cannot play back No video files stored No image files stored Action The disc may be dirty. Clean the disc and try again. The disc or data format is not supported. -
Page 46: Other Information
If the number for a disc does not match the number for the player, the disc cannot be played on the player. Disclaimer JVC accepts no liability whatsoever for loss of data resulting from inappropriate connections or handling. Copyrights Duplicating copyright protected material, for other than personal use, without the permission of the copyright holder is prohibited by copyright law. - Page 47 Registered Trademarks and Trademarks • Microsoft, Windows, and Windows Vista are is either registered trademarks or trademarks of Microsoft Corporation in the United States and/or other countries. • Macintosh and Mac OS are trademarks of Apple, Inc., registered in the United States and other countries.
-
Page 48: Specifications
*1 DVD-R DL discs can be used when the burner is connected to a high definition Everio and PC. *2 For DVD-R DL manufactured by JVC, use of discs with the “Also recommended for high definition Everio” message stated is recommended. - Page 49 Discs supported DVD-R, DVD-R DL, DVD-RW Data format AVCHD or DVD data disc created by connecting to a high (extension) definition Everio DVD video disc created by connecting to Everio DVD data disc for which data is recorded using the high definition Everio, processed using an editing software of Everio, and written to a specific folder on this burner •...
- Page 50 When connected to an Everio camera Interface USB 2.0 Interface cable USB cable (Mini A type - Mini B type) Compatible discs for Everio writing High definition (8 cm discs cannot Everio be used) Recording format Everio High definition Everio Recording time Everio High definition...
- Page 51 Interface USB 2.0, USB 1.1 *1 Interface cable USB cable (USB cable provided with Everio can also be used) Supported operating Windows XP Home Edition, Windows XP Professional system Windows Vista Premium (Macintosh is not supported.) Data buffer capacity 2 MB Data transfer rate Writing (for USB 2.0)
-
Page 52: Precauciones De Seguridad
Este grabador permite crear discos DVD a partir de los vídeos grabados con la videocámara de disco duro JVC sin necesidad de utilizar el PC. • Si desea editar los vídeos grabados con la cámara y crear sus propios DVD originales, use el software que acompaña a la cámara. - Page 53 (Para propietarios de EE. UU.) Los cambios o modificaciones no aprobados por JVC podrian anular la autoridad del usuario para utilizar el equipo. Este equipo ha sido examinado y cumple con los limites de dispositivos digitales Clase B, segun el Apartado 15 de la reglamentacion FCC.
- Page 54 Utilice un disco DVD-R, DVD-RW o DVD-R DL de las marcas enumeradas a continuación. Los discos DVD+R, DVD+RW y DVD-RAM no pueden utilizarse. DVD-R JVC, TDK, Marca Verbatim, SONY • Se pueden utilizar discos DVD-R DL (una sola cara, doble capa) sólo Precaución...
- Page 55 Abra la bandeja e introduzca el disco • La bandeja no se puede abrir/cerrar cuando la grabadora está Precaución apagada. A Presione el botón de expulsión. Cierre la bandeja • Empuje hasta que la bandeja encaje. Abra el monitor de LCD •...
- Page 56 Copiar vídeos en DVD Funcionar en la cámara Everio. Dependiendo del modelo de conectado, la visualización en pantalla puede variar de las mostradas a continuación. Seleccione (subir-bajar) Confirme (presione) Seleccione “SELECC. ENTRE TODO” VÍDEO SELECC. ENTRE TODO SELECCIONAR Y CREAR REPRODUCCIÓN FINALIZAR SELECC...
- Page 57 Reproducción de vídeos guardados en el DVD Conecte esta grabadora al TV Al toma de CC Luz de alimentación • Para obtener más detalles, consulte la sección “Conexión al televisor” (P.12, 13). Retire el cable USB • La luz de alimentación de la grabadora cambia como sigue. Verde Naranja intermitente •...
- Page 58 Índice Precauciones de seguridad... 2 Procedimientos iniciales ... 9 Accesorios ... 9 Colocación de la grabadora... 9 Nombres y funciones de cada pieza... 10 Panel delantero y superior... 10 Panel trasero ... 10 Mando a distancia ... 11 Conexión al televisor ... 12 Conexión a un televisor mediante el terminal de entrada HDMI ...
-
Page 59: Procedimientos Iniciales
Procedimientos iniciales Si falta algún elemento, por favor consulte con su distribuidor autorizado. Adaptador de CA (AP-V50U) Cable de audio y vídeo DVD-R (disco en blanco) x 1 CD-ROM (software para grabación de datos) x 1 No utilice el adaptador de CA y el cable de alimentación proporcionados con otros dispositivos. -
Page 60: Nombres Y Funciones De Cada Pieza
Nombres y funciones de cada pieza Panel delantero y superior Alimentación (Encender/Apagar) Luz de alimentación Alimentación encendida: naranja USB conectado: verde Sensor del mando a distancia Bandeja Lámpara de acceso Conexión con la cámara Everio (p. 14) Conexión al ordenador (p. 16) Conexión al adaptador de CA Parar... -
Page 61: Mando A Distancia
Alimentación (Encender/Apagar) Para realizar la configuración básica (p. 34) Mostrar el navegador de reproducción (p. 23) Operaciones básicas de reproducción (p. 25, 28) • Si la grabadora responde mal al mando a distancia, la pila del mando a Nota distancia está floja. Cámbiela por una pila nueva. Introdúzcala correctamente según las direcciones e y d indicadas. -
Page 62: Conexión Al Televisor
Conexión al televisor Conexión a un televisor mediante el terminal de entrada HDMI Esta grabadora Cable HDMI (no suministrado) • Las imágenes solamente se pueden mostrar en un monitor de Nota protección de contenido digital de alto ancho de banda ((HDCP), High-bandwidth Digital Content Protection). -
Page 63: Conexión A Un Televisor Mediante Conectores De Entrada De Vídeo De Componentes
Conexión a un televisor mediante conectores de entrada de vídeo de componentes Cable de vídeo de componente (no suministrado) Esta grabadora Cable de audio (no suministrado) • Conectar a un monitor de protección de contenido digital de alto ancho Nota de banda (HDCP) cuando se utilice un cable de conversión HDMI-DVI. -
Page 64: Copiar Vídeos De Everio En Dvd
Copiar vídeos de Everio en DVD Al conectar esta grabadora a una cámara Everio, puede grabar fácilmente imágenes registradas en un DVD. Conexión con la cámara Everio • Everio: Apagado Preparativos • Esta grabadora: Apagada Conector USB Cable USB (incluido con CU-VD50) Al toma de CC •... -
Page 65: Creación De Un Disco Avchd/Disco De Datos/Dvd-Vídeo
Creación de un Disco AVCHD/Disco de datos/DVD-Vídeo Discos que se pueden crear en esta grabadora Copiar Vídeos de alta definición en formato AVCHD. Disco AVCHD Vídeos de alta definición Disco de datos en formato MPEG-2. Vídeos de definición DVD-Vídeo estándar en formato MPEG-2. -
Page 66: Grabar De Ordenador A Dvd
Grabar de ordenador a DVD Esta grabadora se puede utilizar como grabadora de DVD cuando está conectada a un ordenador. Y puede utilizar el programa incluido para grabar en DVD. • Everio: Apagado Preparativos • Esta grabadora: Apagada Cable USB (incluido con Everio) Conector USB Conector de... -
Page 67: Equipos Que Se Pueden Utilizar
• Para obtener detalles sobre el uso de Power2Go, consulte la guía del Nota usuario y los archivos Ayuda y Léame que se instalan con software. Puede acceder a la guía del usuario y los archivos Ayuda y Léame desde el menú Inicio del ordenador. •... -
Page 68: Instalación De Cyberlink Power2Go 5.5 Lite
Instalación de CyberLink Power2Go 5.5 Lite • No reproduzca el CD-ROM proporcionado en un reproductor de Precaución sonido. No es un CD de sonido. Si reproduce este CD-ROM en un reproductor de audio se generará un ruido de gran volumen. También puede dañar los circuitos y el altavoz. - Page 69 Escriba los datos de los campos “Nombre de usuario” y “Nombre de organización” y haga clic en “Siguiente” Siga las instrucciones que se indican en pantalla • Empieza la instalación. Después de un poco, aparece la pantalla “InstallShield Wizard”. Haga clic en “Finalizar” •...
-
Page 70: Información De Contacto De Cyberlink Power2Go 5.5 Lite
Información de contacto de CyberLink Power2Go 5.5 Lite Para obtener información sobre CyberLink Power2Go 5.5 Lite u otros productos, use la siguiente información de contacto. Soporte técnico por teléfono o fax Lugar Idioma Inglés / Francés / Alemania De 9:00 a. m. a 5:00 p. m. +49-700-462-92375 +49-241-70525-25 Español Soporte técnico por voz (de pago) Lugar... -
Page 71: Configuración De Carpetas
Configuración de carpetas A continuación se muestra la configuración de las carpetas cuando se copian archivos de una cámara Everio de alta definición o de su ordenador o en un DVD. Al copiar desde una Everio de alta definición en un disco de datos [EVERIO_V] VÍDEO EVERIO RAÍZ... -
Page 72: Al Copiar Desde Una Everio De Alta Definición En Un Disco Avchd
Al copiar desde una Everio de alta definición en un disco AVCHD [BDMV] RAÍZ [EVERIO_I] Cuando se crear y se guardan carpetas y achivos deseados en un ordenador RAÍZ *2, 3 [USER_DAT] *2 Cree carpetas con el programa Power2Go y copie los archivos de vídeo/imagen fija en las carpetas. -
Page 73: Reproducción De Imágenes Guardadas En El Dvd
Reproducción de imágenes guardadas en el DVD Puede reproducir vídeo e imágenes fijas de la Everio guardados en un DVD. Visualización de imágenes copiadas desde la Everio de alta definición Para comenzar a ver inmediatamente después de guardar imágenes en un DVD A Retire el cable USB. - Page 74 Reproducción de compendio (sólo para discos AVCHD) • Utilice las teclas de selección para seleccionar “REPR. DE EXTRACTOS” y pulse el botón ENTER. Los vídeos se reproducirán durante varios segundos consecutivamente. • Pulse el botón NAVIGATION/TOP MENU durante la reproducción para mostrar el submenú. A REPRODUCCIÓN NORMAL: Reproduce el vídeo normalmente.
- Page 75 Visualización del MENÚ HERRAM. [sólo para discos de datos (vídeo/ imágenes fijas)] Puede cambiar entre vídeo/imágenes fijas o visualizar los detalles del archivo desde el MENÚ HERRAM.. Haga funcionar cuando se muestra el navegador A Seleccione Seleccione un elemento con las teclas de selección y pulse el botón ENTER. •...
- Page 76 Botón del mando a distancia Reproducción de imagen de vídeo Reproducción de imagen fija Rebobina la reproducción. Cambios en el orden de Búsqueda b1 a Búsqueda b3 con cada pulsación. Pulse el botón cuando esté en modo pausado para habilitar la reproducción atrás fotograma a fotograma.
-
Page 77: Visualización De Dvd-Vídeo Copiado Desde La Everio
Visualización de DVD-Vídeo copiado desde la Everio Para comenzar a ver inmediatamente después de guardar imágenes en un DVD A Retire el cable USB. (p. 14) B Conecte esta grabadora al TV. • Para obtener más detalles sobre las conexiones, consulte la sección “Conexión al televisor”... - Page 78 Botones que se pueden utilizar durante la reproducción (DVD-vídeo) Botón del mando a distancia Pulsar este botón cuando está en modo pausado o PLAY reproducción de velocidad variable reanuda la reproducción normal. PAUSE Pausa la reproducción. STOP Detiene la reproducción. Avanza rápidamente la reproducción.
-
Page 79: Cambio De La Configuración De Reproducción
Cambio de la configuración de reproducción Puede alterar el método de reproducción de imágenes de vídeo/fijas así como la configuración de imágenes. Haga funcionar durante la reproducción indica las opciones predeterminadas durante la compra de este producto. CONF. DE DISCO Si el disco contiene más de un idioma de sonido, idioma de subtítulos o tiene escenas de múltiples ángulos, puede seleccionarlos con esta opción. - Page 80 CONF. REPRODUCCIÓN EFECTOS DIAPOS. (Sólo para imágenes fijas) Para especificar el efecto de fundido al cambiar a otra imagen. Deshabilitar el efecto de fundido. Habilitar el fundido en negro o en blanco desde el color negro. CONF. DE VÍDEO CALIDAD DE IMAGEN Para especificar la calidad de la imagen de vídeo.
-
Page 81: Hacer Funcionar Junto Con El Tv A Través Del Hdmi
Hacer funcionar junto con el TV a través del HDMI La conexión de esta grabadora a un TV habilitado para HDMI-CEC utilizando el cable HDMI le permite utilizar las siguientes convenientes funciones. • Conecte el cable HDMI entre esta Preparativos grabadora y el TV. - Page 82 • El HDMI-CEC (Control de productos electrónicos de consumo) es un Nota estándar de la industria que hace posible la interoperabilidad entre aparatos que cumplan con HDMI-CEC que están conectados con cables HDMI. • No todos los aparatos compatibles con HDMI cumplen con el estándar HDMI-CEC.
-
Page 83: Visualización De Imágenes De Alta Calidad
Visualización de imágenes de alta calidad Puede cambiar la resolución de la salida de vídeo cuando la grabadora esté conectada a un TV de alta definición a través de un cable HDMI o de vídeo de componentes. Usar cuando la pantalla intermedia está activada* * Para mostrar la pantalla intermedia, consulte la página 34. -
Page 84: Menú De Configuración
Menú de configuración Cambie la configuración de esta grabadora según el entorno de uso. Procedimientos de funcionamiento de los menús • El botón SET UP solamente funciona cuando se muestra la pantalla Precaución intermedia (pantalla sin visualización de imágenes). Si se visualiza el navegador de reproducción, pulse STOP (para discos AVCHD y DVD- Vídeo) o NAVIGATION/TOP MENU (para discos de datos) para borrar la pantalla. -
Page 85: Opciones Y Descripciones Del Menú De Configuración
Opciones y descripciones del menú de configuración indica las opciones predeterminadas durante la compra de este producto. Las opciones del menú cuya configuración no puede cambiar aparecen de color gris en la pantalla. CONF. DE DISCO Si el disco contiene más de un idioma de sonido, idioma de subtítulos o tiene escenas de múltiples ángulos, puede seleccionarlos con esta opción. - Page 86 Durante la emisión en D5 (1080p) (p. 12) SALIDA 24p Las videocámaras JVC no admiten la grabación 1080/24p. (a mayo de 2008). Especifique esta configuración al ver imágenes de vídeo grabadas por otros aparatos en 1080/24p en un TV que admita 1080/24p a través de una conexión HDMI.
- Page 87 Deep Color Esta función funciona durante la reproducción. Especifique esta configuración al ver imágenes en un TV que admita Deep Color. Esto permite la visualización de imágenes de alta definición de profundidades de color de 30 y 36 bits que sean más altas que el color completo de 24 bits.
- Page 88 OTRA CONF. REANUDAR * Para especificar si memorizar la posición de parada. Memorizar la posición de parada. No memorizar la posición de parada. GUÍA EN PANTALLA Para especificar si visualizar la información de estado de reproducción. AUTO Visualizar durante 5 segundos. No visualizar.
-
Page 89: Visualizaciones De La Pantalla
Visualizaciones de la pantalla Puede visualizar información durante la reproducción en la pantalla. • Pulse cada vez para ocultar/visualizar información. Durante la reproducción de discos AVCHD grabados desde una Everio de alta definición Número de título Posición de reproducción Durante la reproducción de discos de datos grabados desde una Everio de alta definición Fecha/Hora del archivo Posición de reproducción... - Page 90 Durante la reproducción de discos de imágenes fijas grabadas desde una Everio de alta definición Fecha/Hora del archivo Durante la reproducción de un disco DVD copiado desde una Everio Número de título Posición de reproducción Tipo de disco JUN.01.2008 10:20AM DVD-R Modo de reproducción Número de capítulo...
-
Page 91: Guía Para Solucionar Problemas
Guía para solucionar problemas Problema El aparato no se enciende. No puede funcionar correctamente. El grabador o el adaptador de CA se calientan. La luz de alimentación parpadea lentamente en color rojo mientras se utiliza la grabadora. La cámara Everio no reconoce la grabadora. - Page 92 Problema No puede grabar/leer datos a la velocidad máxima (cuando está conectada a un ordenador) El mando a distancia no funciona. No se puede utilizar. No se muestran imágenes en el televisor. Las imágenes se distorsionan durante la reproducción de avance rápido/ retroceso rápido.
- Page 93 Problema La reproducción no puede funcionar correctamente. La reproducción de compendia comienza cuando se pulsa repetidamente el botón PREVIOUS / NEXT. No se puede leer el contenido del disco AVCHD usando la función del explorador de su PC. No puede reproducir imágenes añadidas por un ordenador.
- Page 94 Problemas con la reproducción sin interrupciones Durante la reproducción continua de archivos múltiples, la imagen se congela durante unos segundos mientras se cambia de archivo en los casos siguientes. • Cuando las fechas de grabación son distintas: La imagen se congela unos segundos al cambiar entre archivos con fechas de grabación distintas.
-
Page 95: Mensajes De Error
Mensajes de error Problema Disco no reproducible ¡disco incompatible! Disco no finalizado. Utilice un disco finalizado Error en disco Error de código de región No se puede ejecutar la operación No se puede reproducir ¡no hay archivos de vídeo almacenados ¡no hay archivos de imagen almacenados... -
Page 96: Otra Información
Si el número de un disco no coincide con el número del reproductor, no es posible utilizarlo en ese reproductor. Renuncia de responsabilidades JVC no se hará responsable en ningún caso de las pérdidas de datos causadas por conexiones o manipulaciones inadecuadas. Copyright Duplicar material protegido con derechos de autor para fines que no sean personales sin el permiso del propietario de los derechos está... - Page 97 Marcas comerciales y marcas registradas • Microsoft, Windows y Windows Vista son marcas comerciales registradas o marcas comerciales de Microsoft Corporation en los Estados Unidos y/u otros países. • Macintosh y Mac OS son marcas comerciales de Apple, Inc., registradas en Estados Unidos y en otros países.
-
Page 98: Especificaciones
*1 Se pueden utilizar discos DVD-R DL cuando la grabadora esté conectada a una cámara Everio de alta definición y a un ordenador. *2 Para los DVD-R DL fabricados por JVC, se recomienda el uso de discos con el mensaje “Recomendado también para Everio de alta definición”. - Page 99 Discos admitidos DVD-R, DVD-R DL, DVD-RW Formato de los AVCHD o disco DVD de datos creados al conectarse a una datos (extensión) alta definición Everio Disco DVD de vídeo creado al conectarse a Everio Discos DVD de datos para los que los datos se graban utilizando la Everio de alta definición, procesados utilizando un programa de edición Everio y grabado en una carpeta específica en esta grabadora...
- Page 100 Cuando se conecta a una cámara Everio Interfaz USB 2.0 Cable de interfaz Cable USB (Tipo Mini A - Tipo Mini B) Discos compatibles Everio para grabación Everio de alta (No se pueden usar definición discos de 8 cm) Formato de Everio grabación Everio de alta...
- Page 101 Interfaz USB 2.0, USB 1.1 *1 Cable de interfaz Cable USB (también se puede usar el cable USB proporcionado para la cámara Everio) Sistemas operativos Windows XP Home Edition, Windows XP Professional compatibles Windows Vista Premium (Macintosh no está soportado). Capacidad del búfer 2 MB de datos...
- Page 104 Printed in Malaysia © 2008 Victor Company of Japan, Limited 0608MNH-SW-VM...