
Related Manuals for Toro 22155


Summary of Contents for Toro 22155
- Page 1 Form No. 3375-280 Rev A Commercial 21in Lawn Mower Model No. 22155—Serial No. 313000001 and Up Model No. 22156—Serial No. 313000001 and Up *3375-280* A Register at www.Toro.com. Original Instructions (EN)
-
Page 2: Introduction
You are responsible for operating the attention. product properly and safely. You may contact Toro directly at www.Toro.com for product and accessory information, help finding a dealer, or to register your product. Whenever you need service, genuine Toro parts, or additional... -
Page 3: Table Of Contents
Contents Safety This lawn mower meets or exceeds the CPSC blade safety Introduction ..............2 requirements for walk-behind rotary lawn mowers and the Safety ................3 B71.1 specifications of the American National Standards General Operation ..........3 Institute in effect at the time of production. Slope Operation ............ -
Page 4: Slope Operation
• • Do not operate the machine while under the influence Use only an approved gasoline container. of alcohol or drugs. • Never remove gas cap or add fuel with the engine • Never operate the mower in wet grass. Always be sure of running. -
Page 5: Safety And Instructional Decals
Safety and Instructional Decals Safety decals and instructions are easily visible to the operator and are located near any area of potential danger. Replace any decal that is damaged or lost. Manufacturer's Mark 117–2718 1. Indicates the blade is identified as a part from the original machine manufacturer. -
Page 6: Setup
Setup Loose Parts Use the chart below to verify that all parts have been shipped. Procedure Description Qty. Oval-head bolt (5/16 x 1-1/2 inches) Bolt (5/16 x 1-1/2 inches) Spacer Install the handle. Locknut (5/16 inch) Cable tie SAE 30W detergent oil with an API 20 oz. - Page 7 Note: You can set the handle height in 1 of 2 positions (Figure 5). Set the handle to a height that is comfortable for you. Figure 7 1. Self-propel-drive cable 3. Attach cable end here 2. Insert cable jacket end Figure 5 here 1.
-
Page 8: Filling The Engine With Oil
Filling the Engine with Oil Install the Rear-discharge Plug or Grass Bag Parts needed for this procedure: No Parts Required SAE 30W detergent oil with an API service 20 oz. classification of SH, SJ, SL, or higher (not supplied (0.55 l) with the machine). -
Page 9: Product Overview
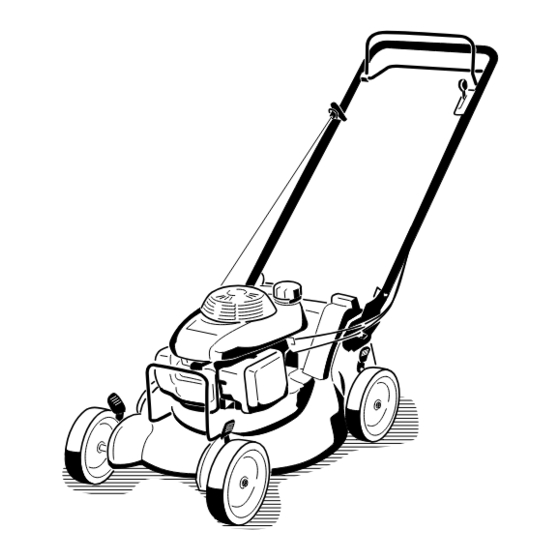
Product Overview Figure 12 1. Blade-control bar 6. Air filter 2. Self-propel-drive bar 7. Spark plug 3. Handle 8. Oil fill/dipstick (not shown) 4. Fuel tank 9. Starter handle Figure 11 5. Cutting-height lever (4) 2. Squeeze the button on the lever with your thumb and fully insert the rear-discharge plug into the opening (Figure 11). -
Page 10: Controls
Controls Operation Note: Determine the left and right sides of the machine from the normal operating position. Checking the Engine Oil Level Service Interval: Before each use or daily 1. Remove the dipstick, wipe it clean, and insert it into the oil filler neck, but do not screw it in (Figure 15). -
Page 11: Filling The Fuel Tank With Gasoline
Filling the Fuel Tank with Gasoline DANGER Gasoline is extremely flammable and explosive. A fire or explosion from gasoline can burn you and others. • To prevent a static charge from igniting the gasoline, place the container and/or machine directly on the ground before filling, not in a vehicle or on an object. -
Page 12: Stopping The Engine
Figure 21 1. Recoil-start handle 5. If the machine does not start after 1 or 2 pulls, repeat steps 3 and 4. Note: If the machine still does not start, contact an Authorized Service Dealer. Stopping the Engine Service Interval: Before each use or daily To stop the engine, release the blade-control bar (Figure 22). -
Page 13: Adjusting The Cutting Height
Figure 23 1. Self-propel-drive bar Note: The maximum self-propel-drive speed is fixed. To reduce the speed, increase the space between the self-propel-drive bar and the handle. 2. To disengage the self-propel drive, release the self-propel drive bar. Note: The machine comes with freewheeling clutches that make it easier to pull the machine rearward. -
Page 14: Bagging The Clippings
(Figure 27). injury or death to the operator or bystanders. Check the grass bag frequently. If it is damaged, install a new Toro replacement bag. WARNING The blade is sharp; contacting the blade can result in serious personal injury. -
Page 15: Side-Discharging The Clippings
Figure 30 3. Install the side-discharge chute and close the door onto the chute (Figure 31). Figure 28 Side-discharging the Clippings Use the side-discharge chute for cutting very tall grass. If the bag is on the machine, remove it and insert the rear-discharge plug; refer to Removing the Grass Bag (page 14) before side-discharging the clippings. -
Page 16: Operating Tips
Walk at a slower pace while mowing. Periodically file down nicks on the blade. • Raise the cutting height on your machine. • Replace the blade when necessary with an original Toro • Cut the grass more frequently. replacement blade. •... -
Page 17: Maintenance
Maintenance Recommended Maintenance Schedule(s) Maintenance Service Maintenance Procedure Interval • Change the engine oil. After the first 5 hours • Check the engine oil level. • Ensure that the engine stops within 3 seconds after releasing the blade-control bar. Before each use or daily •... -
Page 18: Engine Maintenance
Engine Maintenance Servicing the Air Cleaner Service Interval: Before each use or daily Yearly 1. Press down on the latch tabs on top of the air cleaner cover and remove the cover (Figure 34). Figure 35 3. Tip the machine onto its side, with the air filter up, to drain the used oil out through the oil fill tube (Figure 36). -
Page 19: Drive System Maintenance
Drive System Important: Replace a cracked, fouled, or dirty spark plug. Do not clean the electrodes because Maintenance grit entering the cylinder can damage the engine. 5. Set the gap on the plug to 0.030 in. (0.76 mm) (Figure 37). Adjusting the Self-propel Drive Cable Self-propel model only... -
Page 20: Blade Maintenance
Blade Maintenance Maintaining the Cutting Blade Service Interval: Yearly Examine the blade whenever you run out of gasoline. If the blade is damaged or cracked, replace it immediately. If the blade edge is dull or nicked, have it sharpened or replace it. WARNING The blade is sharp;... -
Page 21: Cleaning
Cleaning Storage To prepare the machine for off-season storage, perform Cleaning under the Machine the recommended maintenance procedures. Refer to Maintenance. Housing Store the machine in a cool, clean, dry place. Cover the Service Interval: Before each use or daily machine to keep it clean and protected. -
Page 22: General Information
General Information 1. Clean the machine housing. Refer to Cleaning under the Machine Housing (page 21). 2. Clean any dirt and chaff from the cylinder, cylinder head fins, and blower housing. 3. Remove grass clippings, dirt, and grime from the external parts of the engine, the shrouding, and the top of the machine housing. -
Page 23: Troubleshooting
Troubleshooting Problem Possible Cause Corrective Action The engine does not start. 1. The fuel tank is empty or the fuel 1. Drain and/or fill the fuel tank with system contains stale fuel. fresh gasoline. If the problem persists, contact an Authorized Service Dealer. 2. - Page 24 Countries Other than the United States or Canada Customers who have purchased Toro products outside the United States or Canada should contact their Toro Distributor (Dealer) to obtain guarantee policies for your country, province, or state. If for any reason you are dissatisfied with your Distributor's service or have difficulty obtaining guarantee information, contact the Toro importer.