
Related Manuals for Tank Touring Deluxe 150cc

Summary of Contents for Tank Touring Deluxe 150cc
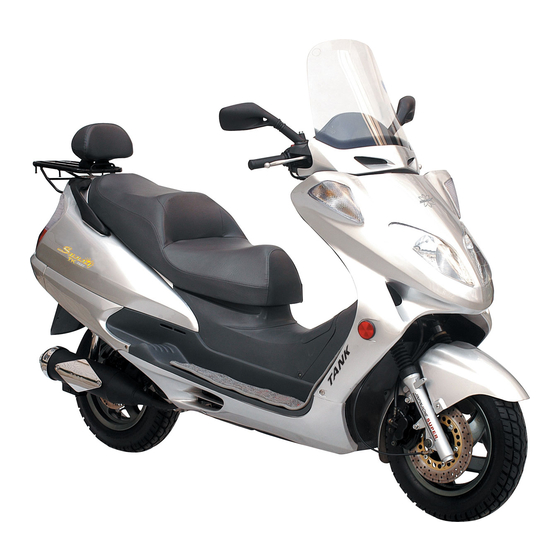
- Page 1 Tank Touring Tank Touring Deluxe Scooter Deluxe Scooter 150cc 4 Stroke 150cc 4 Stroke Operating and Maintenance Manual...
-
Page 2: Table Of Contents
Contents Contents Save Driving Regulations Parking Driving Tips Inspection & Servicing Loading Fuel Features and Controls Locations Braking Operation Brake Lights Meters Turn Signals Indicators Tires Main Switch Changing Gear Oil Starting Button-Headlight Air Cleaner Switch Hi-Lo Beam Switch-Horn Maintenance Schedule Button Turn Signal Switch Spark Plug... - Page 3 Disclaimer I have done my best interpreting this manual. However, there may be mistakes in the translation, decimal points, etc. I take no credit for those. Using this manual is at your own risk. I accept no responsibility for any errors or omissions herein. You will in no way hold me responsi- ble for any problems associated with usage of this scooter or this manual.
-
Page 4: Save Driving Regulations
Safe Driving Safe Driving The main point of safe driving is to relax and wear comfortable clothing. Wear helmet and gloves when driving. Hold the handlebars with Wear protective shoes. both hands. Never drive using only one hand. Avoid wearing loose or long clothing. To avoid a burn injury, be careful to avoid any contact with the hot exhaust system after running the engine. -
Page 5: Driving Tips
Driving Tips Driving Tips Maintain your natural posture while For proper weight distribution, sit operating the motorscooter. on the center of the double seat. Sitting further back will reduce the weight on the front end, making the steering more sensitive. When turning or swerving, keep your weight to the inside of the turn. -
Page 6: Loading
Loading Loading The steering becomes more sensitive when placing weight to the rear of the motorscooter. When passing, with a load on the motor- scooter, the steering may become very light. Please drive with caution. Maximum Weight under the seat: 22 Lbs. -
Page 7: Features And Controls Locations
Features and Controls Features and Controls Locations Locations Helmet Hook Under Seat Storage Rear Brake Lever Seat Lock Head Light Air Cleaner Side Stand Engine ID Number Location Frame ID Number Location Center Stand... -
Page 8: Features And Controls
Features and Controls Features and Controls Locations Locations Front Brake Lever Oil Dipstick Filler Cap Main Switch Fuel Filler Trademark Location... -
Page 9: Operation
ON the indicator is correct, with the main switch turned OFF the indicator is not correct) When the needle reaches the zone, it indicates 1.5L of fuel is remaining in the tank. 90 octane fuel needs to be supplied within a short time. -
Page 10: Main Switch
Main Switch Main Switch Main Switch LOCK Electrical source is turned off and the engine stopped. The key can be removed. Electrical source is on, engine may be started. The key cannot be removed. The steering column is locked. LOCK The key can be removed. -
Page 11: Headlight Switch
Controls Controls Starter Button In order to use the electric start, you must engage the front or rear brake by pulling on the brake lever. Throttle Starter Button Headlight Switch Headlights, side lights and speedometer light OFF. Sidelights and speedometer lights ON, headlights OFF. Headlights and speedometer lights ON, sidelights OFF Throttle Light Switch... -
Page 12: Turn Signal Switch
Controls Controls Headlight, Hi/Lo Beam and Passing Switch High beam, high speed driving. Low beam, low speed and city driving. PASSING Flashes lights to indicate passing. Left Handgrip Turn Signal Switch Left Turn. Turn signal switch is not self canceling, please Right Turn. -
Page 13: Key-Helmet-Luggage Box
Controls Controls Helmet Lock Unlock and raise the seat, insert the helmet strap into the hook, lower and lock the seat. Do not leave a helmet in the lock while driving as body damage will occur to the scooter Underseat Storage Do not exceed item weight of 22 lbs. -
Page 14: Steering Lock
Controls Controls Steering Column Lock To avoid theft, lock the steering when parking by turning the steering to the left and turning the key to LOCK. Turn the steering lightly after locking to ensure it is locked. To avoid damage do not move the scooter after locking the steering . -
Page 15: Ignition Switch
Controls Controls Starting The Engine 1. Check the fuel, oil and battery before starting. 2. Stand the scooter on the Main Stand and make sure the rear wheel is up. 3. Turn the key to ON. 4. Pull in on either the front or rear brake handle and engage the starting button. -
Page 16: Electric Starting
Controls Controls Electric Starting Do not engage the starter longer than 3 seconds if the scooter fails to start. Wait 10 seconds then try again but do not exceed 4 times. Allow the starter to cool down before trying again. After starting, release the starter button and continue to hold the brake. -
Page 17: Natural Way Of Driving
Scooter Operations Scooter Operations Push the scooter forward to remove it from the main stand which will fold up under the frame automatically. Mount the scooter from the left side, seat comfortably and keep the left foot on the ground. Keep the brake engaged. NOTE: Do not run the engine at high rpm until it has warmed up. - Page 18 Scooter Operations Scooter Operations Release the brake. NOTE: Do not add throttle before releasing the brake Turn the throttle slowly. Add the throttle slowly to avoid a dangerous fast start.
-
Page 19: Driving Correctly
Scooter Operations Scooter Operations Drive Safely. Before proceeding, turn on the turn signal and ensure there is no traffic approaching from the rear. Speed is controlled by the throttle. Twisting towards you will increase the speed and power. Twisting away from you will lower the speed and power. -
Page 20: Break In
Scooter Operations Scooter Operations The break-in period of the new motorscooter Please keep the speed less than 60 km/h during the first 1500 km, details as follows: Driving Mileage km 0-300 300-500 500-1000 1000-1500 Speed km/h 25-30 35-40 45-50 55-60 Avoid accelerating quickly and passing. - Page 21 Scooter Operations Scooter Operations Don’t stop or swerve quickly without warning. This is a major cause of accidents. Wet Weather Driving Please drive slowly and decrease your driving distance. When on a downgrade, return the throttle to OFF and use intermittent braking.
-
Page 22: Parking
Scooter Operations Scooter Operations Parking When near the parking space: • Turn on the turn signal, note surrounding traffic and stop slowly. • Turn the throttle OFF while braking. NOTE: If the scooter inclines excessively the idle speed will become unstable. -
Page 23: Inspection Before Driving
Scooter Operations Scooter Operations Parking When parking: • Stand to the left of the scooter and operate the main stand with your foot. • Hold the handle bar with the left hand and the handhold on the side of the seat with your right hand. •... -
Page 24: Inspection & Servicing
Scooter Operations Scooter Operations Servicing Check and Service Oil Remove and clean the oil dipstick. Reinsert and remove the dipstick and note the level of oil. Add oil to full level if it indicates below the low level Recommended Oil SAE 10W-30 (SIGMA) Please do not use synthetic oil. -
Page 25: Braking
Movement of the brake levers should be 1-2 cm. Adjust if necessary. Check and Fill Brake Fluid Center the handlebars and check the fluid level in the right brake fluid tank. Maintain the level between the upper and lower limits. Use DOT3 fluid. -
Page 26: Brake Lights
Scooter Operations Scooter Operations Servicing Check Brake Lights Turn the Main Switch ON. Engage the brake levers and check to see that the brake lights are on. Check for broken lenses and cleanliness. Check Turn Signals Turn the Main Switch ON. Engage the turn signal switch, check front and rear turn signals for proper operation, broken lenses and cleanliness. -
Page 27: Tires
Scooter Operations Scooter Operations Servicing Check Tire Pressure Maintain the front tire pressure at 28.5 PSI and the rear tire at 32 PSI. Check Tire Wear and Damage Check for tread wear limits as shown above. Repair or replace any tire damaged by a foreign object. Change Gear Oil Replace the 10 weight or GY gear oil after the first 300 km and... -
Page 28: Air Cleaner
Scooter Operations Scooter Operations Servicing Check the Rear Wheel Spline and Hangar Set Support the scooter on the Main Stand, push the side of the rear wheel and observe if the collar and ring of the rear fork is loose. Carefully check whether the rear hangar is tight. -
Page 29: Inspection And Maintenance Schedule
Scooter Operations Scooter Operations Servicing Inspection and Maintenance Schedule To assure driving safety, to maintain performance, assure lon- gevity and reduce pollution, please perform inspections and maintenance regularly. I: Check, Clean, Lubricate, Adjust or Replace. A: Adjustment C: Cleaning R: Replace T: Tighten DRIVING DISTANCE (KM) Check... -
Page 30: Spark Plug
Scooter Operations Scooter Operations Servicing Check Spark Plug Check for cleanliness and electrode gap. Clean using a spark plug cleaner or brush. Side Electrode Gap 0.6-0.7 mm Center Electrode Recommended Spark Plugs: Washer G7HSA (NGK) U22FS-U (ND) Be careful of burn injury if engine is hot. Start the spark plug into the cylinder with your hand and tighten with wrench. -
Page 31: Fuse Replacement
Scooter Operations Scooter Operations Servicing Fuse Replacement 1. Turn off the Main Switch and check whether the fuse is blown or not. 2. Remove the 3 screws of the battery cover and locate the fuse in the fuse box. 3. Replace the 7 Amp fuse if necessary. Fuse Assembly Disconnect Open Fuse Cover... -
Page 32: Clean Battery
Scooter Operations Scooter Operations Servicing Battery • If the vehicle is supplied with a sealed battery, there is no need to check the electrolyte. • If using a non-sealed battery, check the electrolyte fluid level and refill with distilled water as necessary. •... - Page 33 Scooter Operations Scooter Operations Servicing Carburetor and Choke Adjustment The carburetor is adjusted for maximum efficiency at the factory and needs no further adjustment. The choke and idle speed may need adjustment, however. Adjusting the choke. 1. Check whether the choke and throttle are working well with the choke indicating full opening and closing.
-
Page 34: Cleaning Air Cleaner
Scooter Operations Scooter Operations Servicing Cleaning The Air Cleaner Dust is the leading cause of loss of power and performance. Removal 1. Remove the left side cover. 5 locking screws. 2. Remove the cover and air cleaner 3. Remove 2 screws holding the air cleaner. 4. - Page 35 Scooter Operations Scooter Operations Servicing Start Electric/Kick Start Tire Front 110/90-12 Tire Spec. Ignition System Specs. Rear 130/70-12 Tire C7HSA (NGK) Tire Front 196 kpa / 28.42 psi Spark Plug Pressure U22FS-U (ND) Pressures Rear 221 kpa / 32.05 psi Lubrication System Forced Lubricant Electrical System...
-
Page 36: Specifications
Scooter Operations Scooter Operations Servicing Specifications Min. Fuel Usage Length/Width/Height 2070/735/1410 < 2.9 L/100Km Wheel Base 1450 Braking Distance < 7(30km/h) Dead Weight Climb Performance (“) > 10 Fuel Capacity Engine Model YY1P57QMJ Single Cylinder/ Crankcase Capacity L Engine Style Forced Air/4 Stroke Fuel Octane Stroke &... -
Page 37: Electrical Diagram
Scooter Operations Scooter Operations Electrical Diagram...
Need help?
Do you have a question about the Touring Deluxe 150cc and is the answer not in the manual?
Questions and answers