Table of Contents
Advertisement
Advertisement
Table of Contents

Related Manuals for KVH Industries TV3


Summary of Contents for KVH Industries TV3
- Page 1 TracVision ® Installation Guide...
-
Page 2: Table Of Contents
TracVision TV3 Installation Guide This guide explains how to install the TracVision TV3 satellite TV antenna system on a vessel. Operation instructions are provided in the Quick Start Guide. Installation Steps 1. Inspect Parts and Get Tools ....3 11. Wire the Receivers........13 2. -
Page 3: Important Safety Information
5º F to 131º F (-15º C to 55º C) temperature range. WARNING Risk of Electric Shock Failure to ground the TracVision system properly to ship’s ground will cause an unsafe floating ground condition, risking potentially lethal electric shock. See “Connect Power” on page 21 for details on the proper grounding of the equipment. -
Page 4: Inspect Parts And Get Tools
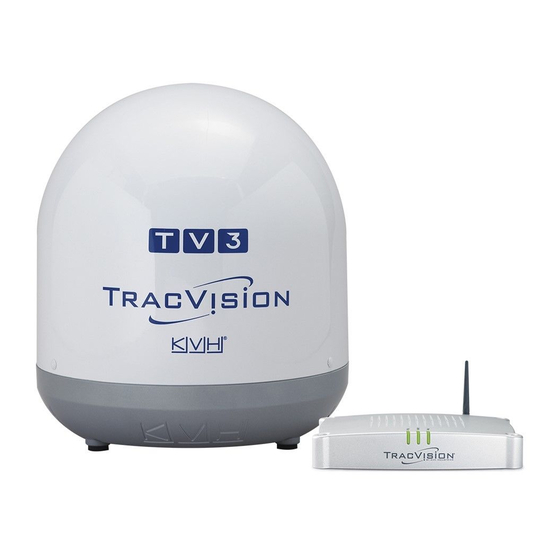
Inspect Parts and Get Tools Before you begin, follow the steps below to ensure Figure 1: TracVision TV3 System Components you have everything needed to complete the installation. Antenna IMPORTANT! Always lift the antenna by the baseplate and never by the radome or any portion of the Radome internal antenna assembly (see Figure 1). -
Page 5: Plan The Antenna Installation
Blocked! IMPORTANT! 10° to 80° Look Angle Be sure to follow the guidelines below. TracVision Antenna Damage caused by an improper installation is not covered under KVH warranty. Mast Vessel Platform • Minimize blockage. The antenna requires a clear view of the sky to receive satellite TV (see Figure 3). -
Page 6: Plan The Tv-Hub Installation
Plan the TV-Hub Installation Consider the following TV-Hub installation Figure 6: TV-Hub Dimensions - Horizontal Orientation guidelines. LED Lights • Select a mounting location in a dry, well- ventilated area belowdecks away from any 4.36" heat sources or salt spray. (11.1 cm) 1.73"... -
Page 7: Prepare The Antenna Site
Prepare the Antenna Site Once you have identified a suitable antenna Figure 8: Antenna Mounting Holes Layout mounting site, according to the guidelines provided on page 4, follow these steps to drill the Antenna Base 15.5" mounting holes and cable access hole to prepare (39.4 cm) the site for installation. -
Page 8: Prepare The Rf Cables
Prepare the RF Cables Follow the steps below before you begin wiring Figure 10: Number of RF Coax Cables to Connect to Antenna the antenna. Connecting to: RF Cables a. Determine the number of RF coax cables you System with Circular LNB need to connect to the antenna for your 1 receiver particular installation (see Figure 10). -
Page 9: Wire The Antenna
Mate the boot to the RF connector or boot extension covering the right-angle connector. If the antenna is a dual linear TV3, label both ends of each cable and repeat steps b through h to connect the second RF cable to the antenna’s “RF2”... -
Page 10: Remove The Shipping Restraint
Remove the Shipping Restraint Inside the antenna, a shipping restraint prevents Figure 15: Removing the Radome the antenna assembly from moving during shipment. Follow these steps to remove this restraint. a. Remove the three #10-32 Phillips screws securing the radome to the baseplate (see Figure 15). -
Page 11: Mount The Antenna
Mount the Antenna Follow these steps to mount the antenna to the Figure 17: Forward Arrow in Antenna Baseplate mounting surface. a. Place the antenna baseplate over the holes drilled in the mounting surface. Ensure the “Forward” arrow inside the baseplate points toward the bow and is parallel to the vessel’s centerline (see Figure 17). -
Page 12: Mount The Tv-Hub
Mount the TV-Hub Follow these steps to install the TV-Hub inside Figure 19: TV-Hub Mounting Template the vessel: Front of TV-Hub 7.93" a. Tape the mounting template in the location (20.1 cm) selected for the TV-Hub. Punch holes at each Keyhole of the two keyhole locations and at the mounting tab location. -
Page 13: Wire The Tv-Hub
Antenna a. Connect the RF1 cable from the antenna to Antenna the “Antenna” jack on the TV-Hub (see Figure 21). RF2 for TV3 dual linear IMPORTANT! Deck Do not connect anything other than the antenna to the “Antenna” jack. The “Antenna”... -
Page 14: Wire The Receivers
Connect an RF cable from the “Receiver” jack on Antenna TV-Hub the back of the TV-Hub to the “Satellite In” connector of the receiver. Connecting 2 Receivers (TV3 Dual Linear) Receiver a. Connect each RF cable coming from the antenna to a grounding block belowdecks Receiver (see “Grounding Requirements”... - Page 15 Continued Wire the Receivers DIRECTV – SWM Wiring Figure 25: DIRECTV SWM Wiring for 1 Receiver Follow the steps below to wire a DIRECTV system that includes SWM receivers. Connecting 1 Receiver Connect an RF cable from the “SWM” jack on the TV-Hub to the “Satellite In”...
- Page 16 Continued Wire the Receivers DIRECTV – Non-SWM Wiring Figure 27: DIRECTV Non-SWM Wiring for 1 or 2 Receivers Follow the steps below to wire a DIRECTV system that includes non-SWM receivers. Connecting 1-2 Receivers a. Connect an RF cable from the “Legacy 1” jack on the back of the TV-Hub to the “Satellite In”...
- Page 17 Continued Wire the Receivers DIRECTV – SWM and Non-SWM Wiring Figure 28: DIRECTV SWM and Non-SWM Wiring To wire a DIRECTV system that includes both SWM and non-SWM receivers, refer to the diagram shown in Figure 28 and the individual SWM and non-SWM instructions provided on the previous pages.
- Page 18 Continued Wire the Receivers DISH Network and Bell TV Wiring Figure 29: DISH/Bell Receiver Wiring Follow these steps to wire a DISH Network or Bell TV configuration. IMPORTANT! Receivers must be DISH Pro-compatible. Look for the DISH Pro logo on the box. Connecting 1 Receiver Connect an RF cable from the “Receiver”...
-
Page 19: Connect A Nmea Device
NMEA 0183 messages at 4800 baud (see Figure 31). NMEA 0183 Talker Later, you will select the NMEA source at the TracVision Setup Wizard (see “Set Up the System” on page 24). Figure 31: Supported NMEA Messages... -
Page 20: Connect To A Network
Connect to a Network Optional Connecting the TV-Hub to an onboard local area network (LAN) is required if any of the following Figure 32: TV-Hub Ethernet Connection apply: • One or more IP AutoSwitches are installed to enable automatic satellite switching (Linear/ DISH Network/Bell TV only) TV-Hub Ethernet... -
Page 21: Secure The Wi-Fi Connection
Secure the Wi-Fi Connection By default, the TV-Hub’s wireless settings are Figure 34: TV-Hub Security and Password Setting configured for the following: • Wireless Mode: AP (Access Point) • SSID: TV-Hub-<TV-Hub serial number> • IP Address: 172.16.0.1 • Security Mode: Off After the system is turned on (see page 23) and... -
Page 22: Connect Power
Figure 35: Grounding Block Example properly grounded in accordance with marine standards. Grounding Requirements Proper grounding of the TracVision system to ship’s ground is critically important, as it protects the equipment from lightning and electrostatic discharges (ESD). Follow these steps Grounding Block to ground the system. - Page 23 Continued Connect Power Connect Power to the System Figure 36: TracVision System Power NOTE: When powering up a SWM configuration, apply power to all other system components before powering up the receivers and DVRs (tuners are assigned channels during startup).
-
Page 24: Turn On The System
Plug in and turn on any connected receivers, DVRs, Genie clients, and televisions. TV-Hub Antenna Power e. Follow the steps in the next section to access the web interface and set up the TracVision system for the customer’s service provider. -
Page 25: Set Up The System
Set Up the System Before you begin to set up the system: Figure 39: Setup Wizard • Know the service provider and associated satellite(s) • Check the latest software version (described below) • Verify all system components are connected Access the Web Interface – Wireless To access the web interface from any Wi-Fi-enabled mobile device: a. - Page 26 Continued Set Up the System Update Software and Satellite Library Figure 41: Software Updates Page Before you start the Setup Wizard, update the system software and satellite library with the latest versions from the portal (see last item on page a.
- Page 27 Continued Set Up the System Setup Wizard Figure 42: Preset Satellite Groups System configuration continues by prompting Service Satellites (A-B-C-D) you to enter information or perform specific tasks as needed. For example: DIRECTV DIRECTV Dual: 101W and 119W U.S. • Enter installer and vessel information DISH Western Arc: 110W, 119W, 129W •...
- Page 28 DiSEqC communications protocol, set up linear receivers for the same satellites installed in the TracVision system. Set up the satellites in the receiver in the exact same order as they were set up in the antenna. The specific setup process varies among receiver models –...
-
Page 29: Set The Lnb Skew Angle
Set the LNB Skew Angle Linear Systems Only Follow the steps below to set the antenna’s LNB to the skew angle supplied by the Setup Wizard. A dual linear LNB is shown in this procedure. Figure 44: Location of LNB on Back of Antenna Reflector a. -
Page 30: Educate The Customer
Educate the Customer Before you leave the vessel, test the system to Figure 46: Satellite Switching Selection on Home Page ensure the antenna works properly. Fill out the Installation Checklist (provided in the Welcome Kit) and return it to KVH. Refer to the instructions on the form. -
Page 31: Wiring Diagrams
Wiring Diagrams DIRECTV - SWM The wiring diagrams that follow supplement the basic wiring diagrams provided in “Wire the Receivers” on page DIRECTV Configuration - up to 8 SWM Tuners The diagram below shows the wiring for a DIRECTV configuration with up to 8 SWM tuners. -
Page 32: Wiring Diagrams
Continued Wiring Diagrams DIRECTV - Genie Only DIRECTV Genie Configuration The diagram below shows the wiring for a DIRECTV configuration with Genie DVR and clients. All DIRECTV configurations can include a Genie network. Antenna TV-Hub DC Power Ethernet (10-30V, 10A max) To Network* SWM Splitter Terminate... - Page 33 Continued Wiring Diagrams DIRECTV - Non-SWM DIRECTV Non-SWM Configuration The diagram below shows the wiring for a non- SWM configuration with 3-8 receivers. Antenna TV-Hub DC Power (10-30V, 10A max) Legacy 1 Legacy 2 Antenna Antenna DC Block DC Block Splitter Splitter 13V/...
- Page 34 Continued Wiring Diagrams DIRECTV - SWM and Non-SWM DIRECTV SWM and Non-SWM Configuration The diagram below shows the wiring for a DIRECTV configuration with both SWM tuners (including Genie clients) and non-SWM receivers. Antenna TV-Hub Supports up to 8 tuners: Each SWM receiver = 1 tuner Each SWM DVR = 2 tuners Each Genie DVR = 5 tuners...
- Page 35 Continued Wiring Diagrams DISH Network and Bell TV DISH Network and Bell TV Configurations The diagram below shows the wiring for either a DISH Network or Bell TV configuration with 3 - 8 DISH Pro-compatible receivers. Antenna TV-Hub DC Power (10-30V, 10A max) Receiver Antenna...
-
Page 36: Connecting Ip Autoswitches
Connecting IP AutoSwitches Follow the steps below to add IP AutoSwitches Figure 49: IP AutoSwitch (KVH part no. 72-0634) to DISH Network, Bell TV, or linear configurations. Inspect Parts Follow these steps to inspect the kit contents. a. Unpack the box and ensure it contains one each of the following items: •... - Page 37 Continued Connecting IP AutoSwitches Wire the IP AutoSwitch Figure 51: IP AutoSwitch Connections The wiring of the IP AutoSwitch depends on the specific configuration. Refer to the wiring RF Input** diagrams provided in this guide, while following the general wiring steps below: RF In a.
- Page 38 Continued Connecting IP AutoSwitches Configure the IP AutoSwitch Figure 1: Add IP AutoSwitch Screen When performing system setup (see “Set Up the System” on page 24), follow these instructions to configure the IP AutoSwitch. NOTE: KVH recommends that you run the Setup Wizard in the web interface whenever you change your system’s configuration by adding or removing devices.
- Page 39 www.kvh.com KVH Industries A/S KVH Industries, Inc. KVH Industries Pte Ltd. EMEA Headquarters World Headquarters Asia-Pacific Headquarters Kokkedal, Denmark Middletown, RI U.S.A. Singapore Tel: +45 45 160 180 Fax: +45 45 160 181 Tel: +1 401 847 3327 Fax: +1 401 849 0045 Tel: +65 6513 0290 Fax: +65 6472 3469 E-mail: info@emea.kvh.com E-mail: info@kvh.com...
Need help?
Do you have a question about the TV3 and is the answer not in the manual?
Questions and answers