Table of Contents
Advertisement
Quick Links
Advertisement
Table of Contents

Related Manuals for Russell Hobbs 20350-56


Summary of Contents for Russell Hobbs 20350-56
- Page 1 INSTRUCTIONS AND WARRANTY MODEL NO. 20350-56 DESIRE KITCHEN MACHINE...
-
Page 2: Important Safeguards
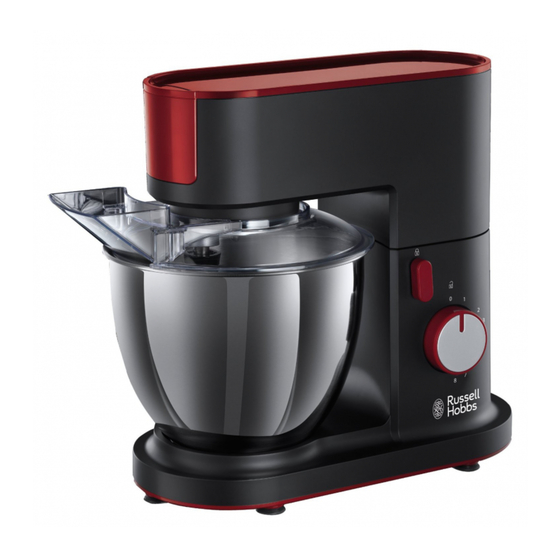
Congratulations on purchasing our Russell Hobbs Desire Kitchen Machine. Each unit is manufactured to ensure safety and reliability. Before using this appliance for the first time, please read the instruction manual carefully and keep it for future reference. FEATURES OF THE RUSSELL HOBBS DESIRE KITCHEN MACHINE ... - Page 3 8. Check the power cord and plug regularly for any damage. If the cord or the plug is damaged, it must be replaced by the manufacturer or a qualified person in order to avoid an electrical hazard. 9. Do not use the appliance if it has been dropped or damaged in any way. In case of damage, take the unit in for examination and/or repair by an authorised service agent.
-
Page 4: Parts Diagram
25. Do not leave this appliance unattended during use. Always unplug the unit when not in use or before cleaning. 26. Always operate the appliance on a smooth, even, stable surface. Do not place the unit on a hot surface. 27. -
Page 5: Before Using The Appliance For The First Time
BEFORE USING THE APPLIANCE FOR THE FIRST TIME Remove all protective packaging and clean all parts as recommended in the CLEANING AND MAINTENANCE section. OPERATING INSTRUCTIONS Kneading/ Beating/ Whisking Refer to figure A in the Parts Diagram Depending on the nature of the ingredients, the bowl (7) with its cover can be used to prepare up to 2kg of dough. -
Page 6: Hints And Tips
During preparation, you can add ingredients through the window located on the splashguard. To stop the appliance or once you are finished, turn the speed control dial back to the OFF (0) position to switch the machine off. HINTS AND TIPS ... -
Page 7: Processing Guide
Hints for beating egg whites Be sure that the bowl and beaters are clean. Be sure that there is egg yolk in the egg white. Egg whites should be at room temperature for maximum volume. Use high setting. ... - Page 8 Water 300g Lard Flour 100g Castor sugar 100g Mixer 5minutes Min-Max blade Margarine 100g 2pcs RECIPES Grand Marnier Delight -2 tablespoons orange rind -½ cup Grand Marnier -150g dark chocolate -3 eggs separated -100ml thickened cream Decoration: -½ cup whipped cream -2 teaspoons caster sugar -Orange segments Marinate orange rind overnight in Grand Marnier.
-
Page 9: Almond Fingers
form. Fold cream into chocolate mixture. Whip egg whites on speed 5 until stiff. Fold in chocolate mixture, adding half the reserved marinade. Pour into small pots, refrigerate 5 hours. Serve with whipped cream. Chocolate Pecan Pudding -100g dark chocolate -75g pecan nits, finely chopped -2 slices white bread, crumbed -60g plain flour... - Page 10 -1 egg -3 cups plain flour -1 teaspoon baking powder Topping -1 egg white, beaten with 2 tablespoons caster sugar -1/2 cup chopped almonds Cream butter and sugar on speed 5 for 5 minutes, or until light and fluffy. Add essence and egg, beating until combined.
- Page 11 lemon rind on Speed 3 until the sugar has dissolved, and the mixture is pale and thick. Heat lemon juice and gradually add to yolk mixture while beating. Combine gelatine with water in a small bowl. Stand bowl in hot water and stir until gelatine dissolves. Add gradually to lemon mixture- continuing on speed 1.
- Page 12 Scones -60g butter or margarine -2 cups self-raising flour -1 teaspoon salt -1 cup sour cream Place butter into mixing bowl, beat until soft. Add half the flour and mix well. Add remaining flour, salt, milk and sour cream. With dough hooks mix to soft dough. Turn dough onto a floured board and knead lightly.
-
Page 13: Cleaning And Maintenance
Cheese & Sour Cream Scones -2 cups self-raising flour -60g butter, melted -125g tasty cheese, shredded -1cup sour cream -1 egg, beaten -paprika Place flour into mixing bowl. Add butter and mix well. Add cheese, sour cream and egg. With dough hooks mix to a soft dough. -
Page 14: Storing The Appliance
Do not immerse the mixer in water or any other liquid, or hold it under a running tap to clean. To remove stubborn spots/marks, wipe the surfaces with a cloth slightly dampened in soapy water or mild non-abrasive cleaner. Rinse and dry with a clean, dry soft cloth. STORING THE APPLIANCE ... -
Page 15: Changing The Plug
CHANGING THE PLUG Should the need arise to change the fitted plug, follow the instructions below. This unit is designed to operate on the stated current only. Connecting to other power sources may damage the appliance. Connect a three-pin plug as follows: The wires in this mains lead are coloured in accordance with the following code: Green/Yellow = Earth Blue = Neutral... - Page 16 PLEASE AFFIX YOUR PROOF OF PURCHASE/RECEIPT HERE IN THE EVENT OF A CLAIM UNDER WARRANTY THIS RECEIPT MUST BE PRODUCED. W A R R A N T Y 1. Home of Living Brands (Pty) Limited warrants to the original purchaser of this product (“the customer”) that this product will be free of defects in quality and workmanship which under normal personal, family or household use and purpose may manifest within a period of 1 (one) year from the date of purchase (“warranty period”).
Need help?
Do you have a question about the 20350-56 and is the answer not in the manual?
Questions and answers