Airwell R410A Installation Instructions Manual
Dc inverter air conditioner
Hide thumbs
Also See for R410A:
- User & installation manual (134 pages) ,
- Installation manual (96 pages) ,
- Installation and maintenance manual (84 pages)
Table of Contents
Advertisement
■ R410A Models
Indoor Units
Indoor Unit Type
4-Way Air Discharge
4WK
Semi-Concealed
HW Wall-Mounted
C
Ceiling-Mounted
D
Concealed-Duct
Outdoor Units
OU Outdoor Units
* Refrigerant R410A is used in the outdoor units.
Optional Controllers
Remote Controller
Wireless Remote Controller (For 4WK type)
Wireless Remote Controller (For C type)
Wireless Remote Controller (For D type)
RC
Wireless Remote Controller (For HW type)
Simplifi ed Remote Controller
Remote Sensor
System Controller
Schedule Timer
85464359944001 2009
INSTALLATION INSTRUCTIONS
– DC INVERTER Air Conditioner –
for Refrigerant R410A
12
16
IU-PSINV-
IU-PSINV-
4WK12R
4WK16R
IU-PSINV-
IU-PSINV-
HW12R
HW16R
IU-PSINV-
IU-PSINV-
C12R
C16R
IU-PSINV-
IU-PSINV-
D12R
D16R
OU-PSINV-25HR, OU-PSINV-36HR, OU-PSINV-48HR, OU-PSINV-60H
NRCT-FLR
AWAC-RCIRA-FL
AWAC-RCIRD-FL
AWAC-RCIRC-FL
AWAC-RCIRE-FL
NRCB-FLR
NSDR
NRSC-FLR
NWTM-FLR
18
25
IU-PSINV-
IU-PSINV-
4WK18R
4WK25R
IU-PSINV-
IU-PSINV-
HW18R
HW25R
IU-PSINV-
IU-PSINV-
C18R
C25R
IU-PSINV-
IU-PSINV-
D18R
D25R
36
48
IU-PSINV-
IU-PSINV-
4WK36R
4WK48R
IU-PSINV-
IU-PSINV-
C36R
C48R
IU-PSINV-
IU-PSINV-
D36R
D48R
60
IU-PSINV-
4WK60R
IU-PSINV-
C60R
IU-PSINV-
D60R
Advertisement
Table of Contents

Related Manuals for Airwell R410A


Summary of Contents for Airwell R410A
-
Page 1: Installation Instructions
D25R D36R D48R D60R Outdoor Units OU Outdoor Units OU-PSINV-25HR, OU-PSINV-36HR, OU-PSINV-48HR, OU-PSINV-60H * Refrigerant R410A is used in the outdoor units. Optional Controllers Remote Controller NRCT-FLR Wireless Remote Controller (For 4WK type) AWAC-RCIRA-FL Wireless Remote Controller (For C type) -
Page 2: Important
Securely anchor the outdoor unit down with bolts and a metal frame. Provide a suitable air baffle. Note: This air conditioner uses the new refrigerant R410A. This product is intended for professional use. …In a Snowy Area (for Heat Pump-type Systems) -
Page 3: Check Of Density Limit
The refrigerant (R410A), which is used in the air conditioner, is safe, without the toxicity or combustibility of ammonia, and is not restricted by laws imposed to protect the ozone layer. -
Page 4: Precautions For Installation Using New Refrigerant
* Using tools for R22 and R407C and new tools for R410A important than ever. together can cause defects. -
Page 5: Table Of Contents
CONTENTS Page Page ■ Concealed-Duct Type (D Type) ..... 26 IMPORTANT! ........2 3-18. - Page 6 Page Page 9. HOW TO INSTALL THE CEILING PANEL ... . 41 11. HOW TO INSTALL WIRELESS REMOTE CONTROLLER RECEIVER ........68 ■...
-
Page 7: General
1. General 1-4. Additional Materials Required for Installation Refrigeration (armored) tape This booklet briefly outlines where and how to install the air conditioning system. Please read over the entire set of Insulated staples or clamps for connecting wire (See your instructions for the indoor and outdoor units and make sure all local codes.) accessory parts listed are with the system before beginning. - Page 8 Table 1-3 (Ceiling-Mounted) Part Name Figure Q’ty Remarks For temporarily Special suspending indoor unit washer from ceiling Drain For drain hose joint insulator For gas and liquid tube Flare insulator sets joints Insulating For gas and liquid flare White tape joints (heat- resisting)
-
Page 9: Tubing Size
1-5. Tubing Size Table 1-5 (A) Single type Outdoor unit type 18 type ● Refrigerant tubing between the indoor and outdoor units Maximum allowable tubing length 40 m should be kept as short as possible. Charge-less tubing length 3 – 30 m ●... - Page 10 Table 1-7 Tubing Data for Models (Single, Twin, Triple, Double-Twin) Models OU-PSINV-25HR OU-PSINV-36HR OU-PSINV-48HR OU-PSINV-60H Tubing Data Liquid tube mm (in.) 9.52 (3/8) 9.52 (3/8) 9.52 (3/8) 9.52 (3/8) Tubing size outer diameter Gas tube mm (in.) 15.88 (5/8) 15.88 (5/8) 15.88 (5/8) 15.88 (5/8) Limit of tubing length...
-
Page 11: Optional Distribution Joint Kits
Table 1-9 Distribution Branch Size ( 1, 2, 3, 4) CAUTION Unit: mm (in.) 1. This unit requires no additional refrigerant charge up to Indoor Unit 12 type 16 type 18 type tubing length 30 m. In case of more than 30 m, additional refrigerant charge is required. -
Page 12: Installing Distribution Joint Kit (For Triple)
1-7. Installing Distribution Joint Kit (for Twin & Nitrogen gas replacement required for tube brazing Double-Twin) (NRF-DL16R) If nitrogen replacement is not done when brazing is performed on the indoor and outdoor unit refrigerant tubing, oxide scale ● Use a tube cutter and cut at the size position that will occur. -
Page 13: Selecting The Installation Site
2. Selecting the Installation Site Only the distribution joints are horizontal with respect to the ground. The collective tubes are vertical with respect to the ground. 2-1. Indoor Unit CAUTION The collective tube and distribution joint are ● When moving the unit during or after unpacking, make horizontal with respect to the ground. - Page 14 Installation space Ceiling-Mounted Type For 3, 4, 5 and 6 HP Outdoor Unit Distance between obstructions and the unit air inlet and outlet Ceiling must be as shown below. Inlet side C Wall More than 1 cm More than 1 cm min.
- Page 15 In case of multiple installations 2-5. Precautions for Installation in Heavy Snow Areas ● Provide a solid base (concrete block, 10 × 40 cm beams or (1) The platform should be higher than the max. snow depth. equal), a minimum of 15 cm above ground level to reduce (Fig.
-
Page 16: How To Install The Indoor Unit
(3) Determine the pitch of the suspension bolts using the 3. How to Install the Indoor Unit supplied full-scale installation diagram. The diagram and table (Fig. 3-3 and Table 3-2) show the relationship ■ 4-Way Air Discharge Semi-Concealed Type between the positions of the suspension fitting, the unit, (4WK Type) and the panel. -
Page 17: Installing The Drain Piping
● Align the hose bands with the end of the hose. Tighten (3) Thread the 3 hexagonal nuts and 2 washers (field supply) onto each of the 4 suspension bolts (Fig. 3-5). Use 1 nut the hose band firmly. Make sure that the bead is not and 1 washer for the upper side, and 2 nuts and 1 washer covered by the hose band. - Page 18 NOTE 3-5. Checking the Drainage Tubing can be extended in 4 directions. Select the direction After wiring and drain piping are completed, use the following which will provide the shortest run to the outdoor unit. (Fig. 3-14) procedure to check that the water will drain smoothly. For this, prepare a bucket and wiping cloth to catch and wipe up spilled water.
-
Page 19: Removing The Grille To Install The Indoor Unit
(5) Measure the thickness of the wall from the inside edge to b) If the Wall is Brick, Concrete or Similar the outside edge and cut the PVC pipe at a slight angle 6 Drill 4.8 mm dia. holes in the wall. Insert Rawl plugs for mm shorter than the thickness of the wall. -
Page 20: Preparing The Tubing
Attaching the grille Raising the clamp to lift up the indoor unit will facilitate this work. (Fig. 3-28) (1) Close the flap. Clamp (2) Keep the grille installation tabs aligned with the top portion of the grille, and reinstall the lower portion of the grille. Fit the installation tabs into the grooves and press the lower portion of the grille back into its original position. -
Page 21: Installing The Drain Hose
(2) After performing a leak test, wrap the refrigerant tubing and drain hose together with insulating tape (Fig. 3-31). Refrigerant tubing Insulating tape Rear panel Inter-unit wiring Drain hose Fig. 3-31 Then fit the tubing into the tubing storage space in the rear of the indoor unit and clamp in place. - Page 22 ■ Ceiling-Mounted Type (C Type) 3-13. Required Minimum Space for Installation and Air intake Service (1) Dimensions of suspension bolt pitch and unit Ceiling side Length Type 12, 16, 18 1125 1180 27.5 27.5 36, 48, 60 1540 1595 (Suspension bolt pitch) Unit: mm Unit: mm Fig.
- Page 23 (4) Wall and ceiling side opening position WARNING Figure shows view from front. It is important that you use extreme care in supporting the indoor unit from the ceiling. Ensure that the ceiling is strong enough to support the weight of the unit. Before Ceiling hanging the ceiling unit, test the strength of each attached suspension bolt.
-
Page 24: Duct For Fresh Air
Suspension bolt PVC pipe (locally purchased) (field supply) INSIDE OUTSIDE Washer Wall (field supply) PVC pipe Unit Slight Washer (supplied) angle Double nut (field supply) Cut at slight angle Fig. 3-44 Fig. 3-49 3-15. Duct for Fresh Air There is a duct connection port (knock-out hole) at the right-rear of the top panel of the indoor unit for drawing in fresh air. - Page 25 3-17. Installing the Drain Pipe CAUTION ● Prepare standard PVC pipe for the drain and connect it to Check local electrical codes and regulations before wiring. the indoor unit drain pipe with the supplied hose clamps to Also, check any specified instruction or limitations. prevent water leaks.
-
Page 26: Concealed-Duct Type (D Type)
■ Concealed-Duct Type (D Type) 3-18. Required Minimum Space for Installation and Service ● This air conditioner is usually installed above the ceiling so A (Suspension bolt pitch) Electrical that the indoor unit and ducts are not visible. Only the air component box intake and air outlet ports are visible from the unit bottom. - Page 27 3-19. Suspending the Indoor Unit Suspension bolt Depending on the ceiling type: • Insert suspension bolts (Fig. 3-58) Hexagonal nut • Use existing ceiling supports or construct a suitable support (Fig. 3-59). Hole-in-anchor Double nuts Concrete Insert Hole-in-plug Fig. 3-61 ●...
- Page 28 3-20. Installing the Drain Pipe 30 cm or less (1) Prepare standard hard PVC pipe (O.D. 32 mm) for the 50 cm or less drain and use the supplied hose band to prevent water Good leaks. The PVC pipe must be purchased separately. The transparent drain part on the unit allows you to check drainage.
-
Page 29: Increasing The Fan Speed
3-21. Checking the Drainage Indoor Fan Performance After wiring and drain piping are completed, use the following 12 Type 16, 18 Type procedure to check that the water will drain smoothly. For this, prepare a bucket and wiping cloth to catch and wipe up spilled water. -
Page 30: When Installing The Indoor Unit
3-23. When Installing the Indoor Unit Confirm that the indoor unit should be installed in a horizontal position. Use the level gauge or vinyl tube and check every four corner of the unit is in horizontal. If the air outlet duct flange is positioned with downward gradient, there is in danger of water splash or drainage. -
Page 31: Supplement On Drain Piping
■ SUPPLEMENT ON DRAIN PIPING 1. Drain hose installation Hose band Hose band Drain port Drain port (supplied) (supplied) Hard PVC socket (VP25) Hard PVC socket (VP25) (Drainage check section (Drainage check section Soft polyvinyle chloride socket Soft polyvinyle chloride socket on drain port, transparent, on drain port, transparent, Hard PVC pipe... -
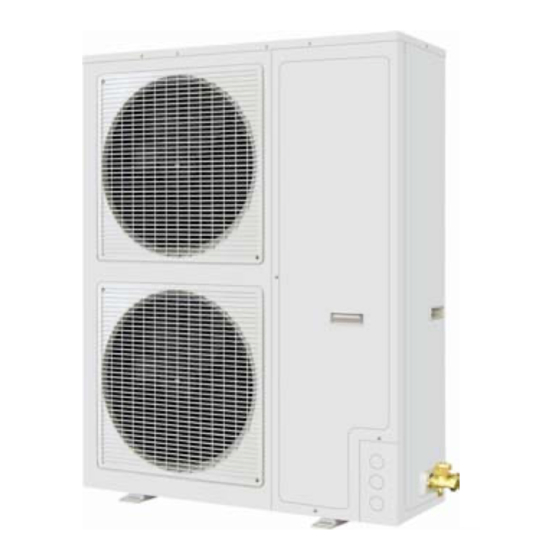
Page 32: How To Install The Outdoor Unit
4. HOW TO INSTALL THE OUTDOOR UNIT 4-2. Drainage Work Follow the procedure below to ensure adequate draining for the outdoor unit. 4-1. Installing the Outdoor Unit ● For the drain port dimensions, refer to Fig. 4-1. ● Use concrete or a similar material to make the base, and ●... -
Page 33: Electrical Wiring
5. ELECTRICAL WIRING Control wiring (C) Inter-unit (between outdoor (D) Remote control (E) Control wiring 5-1. General Precautions on Wiring and indoor units) wiring for group control control wiring (1) Before wiring, confirm the rated voltage of the unit as shown on its nameplate, then carry out the wiring closely 0.75 mm (AWG #18) -
Page 34: Wiring System Diagrams
5-3. Wiring System Diagrams (for single-phase outdoor unit) Indoor unit (No. 1) Outdoor unit Power supply INV unit 220 – 240 V ~ 50 Hz Power supply 220 – 240 V ~ 50 Hz Ground Remote controller Ground Ground Indoor unit (No. - Page 35 CAUTION (1) When linking the outdoor units in a network (S-net link system), disconnect the terminal extended from the short plug (CN003, 2P Black, location: right bottom on the outdoor main control PCB) from all outdoor units except any one of the outdoor units.
-
Page 36: How To Process Tubing
(5) Use shielded wires for inter-unit control wiring (c) and 7. HOW TO PROCESS TUBING ground the shield on one side, otherwise misoperation The liquid tubing side is connected by a flare nut, and the gas from noise may occur. (Fig. 5-6) tubing side is connected by brazing. - Page 37 Fig. 7-4 for R410A (type 2). The refrigerant tubing that is used must (3) For proper connection, align the union tube and flare tube be of the correct wall thickness as shown in the table below.
-
Page 38: Insulating The Refrigerant Tubing
7-3. Insulating the Refrigerant Tubing Insulation material The material used for insulation must have good insulation Tubing Insulation characteristics, be easy to use, be age resistant, and must not easily absorb moisture. (Fig. 7-11) ● Thermal insulation must be applied to all units tubing, Refrigerant tubing and including distribution joint (purchased separately). -
Page 39: Refrigerant Charge
7-5. Finishing the Installation Manifold valve After finishing insulating and taping over the tubing, use sealing putty to seal off the hole in the wall to prevent rain and draft from entering. (Fig. 7-13) Apply putty here Pressure gauge Charge hose Cylinder valve Tubing... -
Page 40: Finishing The Job
Confirm that the gauge pressure is under –101 kPa (–755 mmHg, 5 Torr) after 4 to 5 minutes of vacuum pump operation. (Fig. 8-4) R410A CAUTION Close Use a cylinder specifically designed for use with R410A. Manifold valve Liquid tube Close Outdoor unit Gas tube... -
Page 41: How To Install The Ceiling Panel
(2) Removing the corner cover 9. HOW TO INSTALL THE CEILING a) Slide the corner cover to the direction shown by the PANEL arrow 1 to remove the corner cover. (Fig. 9-6) ■ 4-Way Air Discharge Semi-Concealed Type (4WK Type) Checking the unit position (1) Check that the ceiling hole is within this range: 860 ×... -
Page 42: Wiring The Ceiling Panel
(4) Check that the panel is attached tightly to the ceiling. 9-3. Wiring the Ceiling Panel ● At this time, make sure that there are no gaps between the (1) Open the cover of the electrical component box. unit and the ceiling panel, or between the ceiling panel and (2) Connect the 7P wiring connector (red) from the ceiling the ceiling surface. -
Page 43: Adjusting The Auto Flap
9-7. Adjusting the Auto Flap Hole for ceiling The air-direction louver on the ceiling panel outlet can be panel hook adjusted as follows. ● Adjust the louver to the desired angle using the remote controller. The louver also has an automatic air-sweeping mechanism. -
Page 44: Test Run
■ 4WK, C, D Types 10. TEST RUN 10-2. Caution 10-1. Preparing for Test Run ● ● Before attempting to start the air conditioner, check the This unit may be used in a single-type refrigerant system where 1 outdoor unit is connected to 1 indoor following: unit, and also in a system where 1 outdoor unit is (1) All loose matter is removed from the cabinet especially... - Page 45 10-4. Items to Check Before the Test Run 10-6. Precautions ● Request that the customer be present when the test run is (1) Turn the remote power switch ON at least 12 hours in advance in order to energize the crank case heater. performed.
- Page 47 10-8. System Control 10-8-2. Basic wiring diagram 2 Group control (when a central control device is not used) System control refers to the link wiring connection for control of simultaneous-operation multi systems, group control, and main- ● Simultaneous-operation multi system sub remote controller control.
- Page 48 (Wiring procedure) (1) Connect the remote controller to the indoor unit remote controller wiring terminal plate (1, 2). (Remote controller wiring) (2) Connect the indoor units (U1, U2) and the outdoor units (1, 2). Connect the other outdoor units and indoor units (with different refrigerant systems) in the same way.
- Page 49 10-8-3. Setting the outdoor unit system addresses 10-8-4. Automatic address setting using the remote controller For basic wiring diagram 2 (Set the system addresses: 1, 2, 3...) When the outdoor unit shown in “10-8-2. Basic wiring diagram Outdoor unit control PCB 3 –...
- Page 50 ■ HW Type 10-8-6. Main-sub remote controller control Control using 2 remote controller switches 10-9. Caution Main-sub remote controller control refers to the use of 2 remote ● controllers to control 1 or multiple indoor units. (A maximum of 2 This unit may be used in a single-type refrigerant remote controllers can be connected.) system where 1 outdoor unit is connected to 1 indoor...
-
Page 51: Preparation For Test Run
10-10. Test Run Procedure 10-12. Preparation for Test Run 10-12-1. Switching the temperature sensor Recheck the items to check (See 10-11) before the test run. ● Temperature sensors are contained in the indoor unit and wireless remote controller. One or the other of the temperature sensors is used for operation. - Page 52 10-13. Test Run Indoor unit control PCB Using the control unit 2 HP Varistor (black) (1) Change the indoor control unit switch from “ON” → “TEST”. VA002 (The outdoor unit will not operate for 3 minutes after the power is turned ON and after operation is stopped.) Fuse (0.5A) (2) All the indicator lamps blink while the test run is in progress.
-
Page 53: Table Of Self-Diagnostic Functions And Corrections
10-15. Table of Self-Diagnostic Functions and Corrections Cause Wired remote controller Indoor unit Group connection Correction display receiver lamp 1:1 connection (Single type) (Simultaneous multi (Field supply) system) Nothing is Nothing is • Indoor operation switch is OFF. • Same at left. •... -
Page 54: System Control
10-16. System Control (Wiring procedure) (1) Set the No. 1 wall-mounted indoor unit so that it can be System control refers to the link wiring connection for control of operated by the wireless remote controller. (This is set at simultaneous-operation multi systems, group control, and main- the time of shipment.) sub remote controller control. - Page 55 10-16-2. Basic wiring diagram 2 (Wiring procedure) Group control (when a central control device is not used) (1) Set the No. 1 wall-mounted indoor unit so that it can be operated by the wireless remote controller. ● A maximum of 8 indoor units can be connected to a single (This is set at the time of shipment.) remote controller.
- Page 56 10-16-3. Setting the outdoor unit system addresses 10-16-4. Automatic address setting from the outdoor unit For basic wiring diagram 2 (Set the system addresses: 1, 2,...) When there are multiple outdoor units as shown in basic wiring diagram 2 Outdoor unit control PCB 3 –...
-
Page 57: Wk, C, D Types (For Link Wiring)
■ 4WK, C, D Types (for Link Wiring) 10-16-6. Indoor unit address setting ● If multiple single-type units are installed in the same room, 10-17. Caution the addresses can be set to prevent signal interference. By coordinating the numbers of the indoor unit (wireless This unit may be used in a single-type refrigerant system PCB) and remote controller addresses, up to 6 indoor units where 1 outdoor unit is connected to 1 indoor unit, and also... - Page 58 10-18. Test Run Procedure 10-19. Items to Check Before the Test Run (1) Turn the remote power switch ON at least 12 hours in Recheck the items to check (See 10-19) advance in order to energize the crank case heater. before the test run.
- Page 59 10-21. Table of Self-Diagnostic Functions and Corrections (4WK, C, D Types) Cause Wired remote Indoor unit controller Correction Group connection and simultaneous-operation multi receiver lamp display system • Remote controller is not connected with indoor unit Connect the remote controller correctly. Turn ON the Nothing is Nothing is correctly.
- Page 60 Automatic address setting from the outdoor unit (4WK, C, 10-22. Automatic Address Setting D Types) 10-22-1. Basic wiring diagram Case 1 ● Link wiring ● If the power can be turned ON separately for the indoor and outdoor units in each system, the indoor unit addresses can NOT E be set without running the compressor.
- Page 61 Automatic address setting using the remote controller 10-22-2. Setting outdoor unit system addresses Case 3 For the basic wiring diagram (Set the system addresses: 1, 2, 3...) ● If the power can be turned ON separately for the indoor and outdoor units in each system (indoor unit addresses can be Outdoor unit control PCB 3 –...
-
Page 62: Hw Type (For Link Wiring)
● 10-22-3. Checking indoor unit addresses Check that the 220 – 240 V AC wiring is not connected to the inter-unit control wiring connector terminal. Use the remote controller to check the addresses of the indoor If 220 – 240 V AC is accidentally applied, the indoor or units. -
Page 63: Test Run Procedure
10-24. Test Run Procedure Recheck the items to check (See 10-11) before the test run. Check the combination (wiring) of (See 10-26-1) indoor and outdoor units. Is system “single-type”? (1 indoor unit is connected to 1 outdoor unit) Turn ON Are multiple outdoor units the indoor used? - Page 64 10-25. Table of Self-Diagnostic Functions and Corrections (HW Type) Cause Wired remote Indoor unit controller Correction Group connection and simultaneous-operation multi receiver lamp display system • Remote controller is not connected with indoor unit Connect the remote controller correctly. Turn ON the Nothing is Nothing is correctly.
-
Page 65: Automatic Address Setting
10-26-2. Setting the outdoor unit system addresses 10-26. Automatic Address Setting For basic wiring diagram (Set the system addresses: 1, 2, 3...) 10-26-1. Basic wiring diagram ● Link wiring Outdoor unit control PCB 3 – 6 HP System address rotary switch NOT E (Set to “0”... - Page 66 Case 1 10-26-3. Checking indoor unit addresses ● If the power can be turned ON separately for the indoor and Use the remote controller to check the addresses of the indoor outdoor units in each system: units. Press and hold the button and button for 4 (The indoor unit addresses can be set without running the...
-
Page 67: Caution For Pump Down
Installing the Remote Controller Important Information Concerning Pump Down ● If the remote controller is to be installed onto a wall or other surface for use, first place the remote controller in the Observe the following items when using pump down operation location where it will be installed and press (ON / OFF). -
Page 68: Receiver
11. HOW TO INSTALL WIRELESS REMOTE CONTROLLER RECEIVER NOT E Refer to the Instruction Manual attached to the Optional Wireless Remote Controller Receiver. 12. MARKINGS FOR DIRECTIVE 97/23/EC (PED) Rating nameplate fi gure A: Model Name Various Various A Various Various Operating Spec. -
Page 69: Appendix
<How to clean the filter> 13. APPENDIX 1. Remove the air filter from the air intake grille. 2. Use a vacuum cleaner to remove light dust. If there is sticky 13-1. 4-Way Air Discharge Semi-Concealed Type dust on the filter, wash the filter in lukewarm, soapy water, (4WK Type) rinse it in clean water, and dry it. -
Page 70: Troubleshooting
■ Troubleshooting 13-2. Concealed Duct Type (D Type) If your air conditioner does not work properly, first check the ■ Name of Parts (Indoor Unit) following points before requesting service. If it still does not work properly, contact your dealer or a service center. CONCEALED DUCT Trouble Possible Cause... - Page 71 *Concealed duct type (D): NOTE An air filter is not provided with this air conditioner at the time of shipment. To get clean air and to extend the service life of the Should the power fail while the unit is running air conditioner, an air filter must be installed in the air intake.
- Page 72 ■ Troubleshooting If your air conditioner does not work properly, first check the following points before requesting service. If it still does not work properly, contact your dealer or a service center. Air filter finger-hold Air filter finger-hold Trouble Possible Cause Remedy Air conditioner 1.
- Page 73 13-4. Wall-Mounted Type (HW Type) Air intake grille ■ Name of Parts Air intake Air outlet Air filter ■ Care and Cleaning When replacing the filter, make sure that the FRONT mark is facing you. WARNING Push it up until you hear it click back into position. ●...
- Page 74 ■ Troubleshooting If your air conditioner does not work properly, first check the following points before requesting service. If it still does not work properly, contact your dealer or a service center. Trouble Possible Cause Remedy 1. Power failure. 1. After a power outage, conditioner press ON/OFF does not run...
- Page 76 Kyoto, avec un potentiel de chauffage global (GWP) = 1530 Ne déchargez pas R410A dans l’atmosphère : R410A est un gaz fluoré à effet serre, couvert par le protocole de Kyoto, avec un potentiel de chauffage global (GWP) = 1730 DE (German) Zerstreuen Sie R407C in Atmosphäre nicht : R407C ist ein fluoriertes Gas, abgedeckt durch...
Need help?
Do you have a question about the R410A and is the answer not in the manual?
Questions and answers