Table of Contents
Advertisement
Advertisement
Table of Contents

Summary of Contents for Viprinet 2610
- Page 1 Manual Viprinet Multichannel VPN Router ™ Model 1610/2610...
- Page 2 55411 Bingen am Rhein Germany Phone: +49 (0)6721 4 90 30-0 Fax: +49 (0)6721 4 90 30-109 E-mail: info@viprinet.com Web: www.viprinet.com © 2007-2010 Viprinet GmbH Pictures by Frauke Boensch Reprinting or copying even in extracts only with written permission of Viprinet GmbH.
-
Page 3: Table Of Contents
Table of contents General information Product at a glance Device description Technical data Unpacking Delivery content Installation Device setup Installation of line modules Installing the software Wiring the network Configuration Network knowledge is necessary Overview Choosing topology Net segmentation Basic configuration using the setup program Configuration using the web interface Tunnel Channel Autotuning Qos System and Bonding Options... -
Page 4: General Information
Product at a glance The Multichannel VPN Router connects a local network via up to six broadband channels with a Multichan- nel VPN Hub, which is acting as a VPN concentrator. At least two Viprinet Routers are needed for this connection: Internet •... - Page 5 IP traffic is then passed through it. Cooling The Viprinet Router is set up for continuous operation and is cooled using regulated redundant case fans. It is critical that the ventilation slots are never covered and the maximum specified ambient temperature is not exceeded.
-
Page 6: Vpn Tunnels
Preface The LAN port The router is integrated into the LAN using an Ethernet switch connected to the router's LAN port. • Using the LAN port, the web configuration system “AdminDesk” can be accessed from the LAN using a web browser. •... - Page 7 Preface • A Tunnel Channel contains the information which of the existing WAN Interfaces is used to create the physical connection. With a VPN Node connected to just one VPN Hub (usual case) a Tunnel Channel per existing WAN Interface will be created.
- Page 8 Preface The second component of the Quality of Service system are the “QoS Traffic sorting rules”. These are rules to sort data streams by different criteria into the QoS Traffic Classes mentioned above. Several criteria may be used to do so: •...
-
Page 9: Device Description
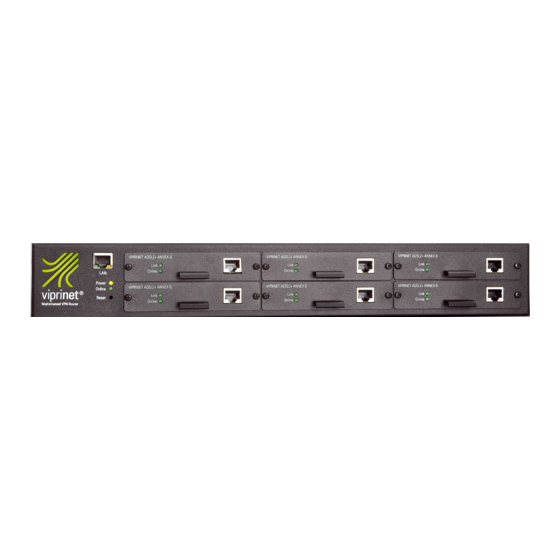
Device Description Preface IEC C14 socket for electric power (backside) LAN-socket Link to local network Viprinet router status LEDs Power: lit when power is supplied Online: • lit when connection to a VPN Hub is established through at least one line •... -
Page 10: Technical Data
40 Watt 45 Watt SNMP Status / Accounting ü / « ü / ü Bonding capacity MBit/s Unpacking The Viprinet Router and the modules will be sent singly or pre-configured depending on the supplier. Unpack all elements and check if complete. -
Page 11: Delivery Content
Delivery content Preface Number Type Multichannel VPN Router (model number see identification plate on the backside) Power Cable Manual CD with software Angle-irons for inserting router into 19” rack ADSL/ADSL2+ module Annex A ADSL/ADSL2+ module Annex B Euro-ISDN module Fast Ethernet module UMTS/GPRS/EDGE module * Number of modules due to your order. -
Page 12: Installation
Installation Installation Device setup The Viprinet Router is a desktop device and can be put up at any location which offers the following conditions: • Working temperature 10-35°C • No direct sunlight (danger of overheating) • Detached position Attention: The ventilation shafts must not be covered. There must be at least a space of 5cm on both sides of the device to assure proper ventilation to prevent overheating. -
Page 13: Installation Of Line Modules
Installation of line modules Installation Up to 6 line modules can be inserted into the Viprinet Router. Modules can be plugged into any of the slots. They may be installed or taken out even when the router is running (hot-plug). -
Page 14: Replacement Of Modules
Replacement of modules Installation • You can exchange a module in slot 1 with another one of the same type. • The configuration is maintained. This way, you can, for example, exchange one ADSL module with another ADSL module. Slot and configuration stay the same. -
Page 15: Installing The Software
Installing the software Installation The following software is delivered with the Viprinet Router and should be installed on a workstation/ desktop. Setup program for configuring the Viprinet router. Setup program File name: setup.exe Monitoring system displaying of the data streams. -
Page 16: Wiring The Network
Wiring the network Installation Connect the Viprinet Router with the network and the lines as follows: • Connect the LAN port (1) with the local network, • e.g. a work-group switch • e.g. a firewall system • Connect the module with the lines. Notice the following tips. - Page 17 Module Type Installation Mount the UMTS antenna shipped with the module to the UMTS/GPRS/EDGE-Module SMA socket. Alternatively an external UMTS antenna equipped with an SMA plug may be connected.
-
Page 18: Configuration
Configuration Network knowledge is necessary Configuration For correct Viprinet Router configuration sufficient network knowledge is necessary. You will find an over- view of important terms in the appendix. See: Basic Network Technology. Overview Below you will find a compact overview about the steps you need to take in order to use the router inside... - Page 19 At first use, you will have to install a basic configuration on each Viprinet Router using the setup program. The following values are determined: • router name Configuration • local IP and netmask Basic configuration • VPN Node/ VPN Hub (Setup program) •...
-
Page 20: Choosing Topology
Example: One office with bundled redundant connection to the Internet Configuration A bundled redundant connection of a single office to the internet may be established using two Viprinet Routers. Up to six access lines in any combination can be used at the office. - Page 21 VPN Node and the WAN/VPN port of the VPN Hub. The branches LAN is connected to the LAN port of the Viprinet Router. For this type of topology, it is of vital importance that the VPN Hub can be reached easily by all physical service providers of the VPN Nodes.
-
Page 22: Net Segmentation
It is another special case if two branch offices are meant to be connected directly using multiple bundled broadband lines on both sides. The Viprinet Router is able to support this, but it may prove to be quite diffi- cult – Tunnel Channels from the first branch office have to connect to varied lines at the other branch office. - Page 23 Configuration with private IPs You can build your network using private IP addresses. These are only valid inside your own network and Configuration therefore not reachable from the Internet. If data should leave the VPN towards the Internet, the VPN Hub within the VPN will have to mask the private IP source addresses using Network Address Translation (NAT) for packets leaving the VPN towards the Internet.
- Page 24 Configuration with public IPs Since public IP addresses are limited, you have to be sparing when segmenting a public IP net – the single Configuration segments should only be as big as really needed for each branch office. Net segmentation You may have the IP range 192.0.2.0/24 assigned for your network.
- Page 25 Configuration with private and public IPs If you have set up your network with private IPs, but want to use computers with public IPs as well (e.g. Configuration server reachable via the Internet), you should start with the initial configuration for private IP networks in the setup program.
-
Page 26: Basic Configuration Using The Setup Program
Basic configuration using the setup program Before using a new router, you have to install a basic configuration on your new Viprinet Router using the Configuration setup program. The setup program is compatible with Windows 2000/XP/Vista/7. The chosen settings may be refined and adjusted with the Web Interface later. -
Page 27: Basic Configuration
Basic Configuration Initial configuration Enter the following data: Configuration • Name You can identify the router by this name later on (it is displayed when opening the setup program and the Web Interface). • Local IP for the LAN where the router is situ- ated. - Page 28 If "VPN Node" was chosen LAN-Interface Configuration • IP-Address Configuration Enter the IP address here under which the router may be reached in the LAN. The address serves as a gateway for computers within the LAN. • Netmask corresponding to the IP entered above. •...
- Page 29 ADSL module • Username and password Configuration Enter ISP's PPP username and password. • Connect on demand If this option is activated, the module only dials in if a VPN Tunnel is actually trying to use this line. This makes sense if the connection is deducted on a time basis.
- Page 30 VPN-Connection Here, the connection to the VPN Hub (= router at the data center) is configured. Configuration • Target Hub Hostname/IP Enter the host name or the IP of the Ethernet module of the VPN Hub to connect to. • Name of VPN-Tunnel This name identifies the link of between the VPN Hub and this VPN Node.
- Page 31 Transfer Network • A private IP network not used anywhere else in- side the VPN is needed internally by the router. Configuration Root password You have to decide on a router root password. • The password is for the user “root” (who has all rights).
- Page 32 For a VPN Node, the router itself will be the gateway, the field will therefore stay clear. • DHCP server Tick this option, if the Viprinet Router should assign IPs dynamically inside the LAN. This is only sensible for VPN Nodes, •...
- Page 33 Finish the configuration Upload settings When all steps in the setup program are done, you Configuration can upload them to your router. • Click “Finish”. • The configuration is uploaded to the router. The URL of the router's Web Interface is shown...
-
Page 34: Configuration Using The Web Interface
Configuration using the web interface The Viprinet Router implements a Web Interface which allows you to carry out all settings. The Web Inter- Configuration face can only be used if the initial configuration using the setup program has been done. - Page 35 Configuration • You see the main menu with all available objects. • Select an object, e.g. “VPN Tunnels”. • You see the functions and objects now. Navigate • In addition, you see your selected path top-left on each screen. Click on a part of the path to change to another level, if necessary. •...
-
Page 36: Configuration Options
Below you will find a brief introduction of the main configuration objects inside the Web Interface. Detailed Configuration information about these objects is available inside the Web Interface. It is possible that your Viprinet Router is already supplied with a newer software version with more possibilities. You will then have an extended menu available. - Page 37 » First rule When in use, the Viprinet Router directs the data stream into the cor- responding classes according to these rules.. For all software VPN Clients connecting to this router a single shared own IP subnet is used in form of a IP address pool clients get assigned VPN Clients / Road IPs from.
- Page 38 In this object a whole lot of things in regards of system logging & maintenance can be configured and viewed. You may view the system log file or configure remote SysLog logging. Firmware updates can be Logging & Maintenance executed from inside this menu. Also the health of the router hardware Configuration can be checked and backup copies of the router configuration may be downloaded.
-
Page 39: Tunnel Channel Autotuning
Tunnel Channel Autotuning Introduction Configuration A TCP VPN connection set up via one module slot from VPN Node to a VPN Hub is termed Tunnel Channel. One or more of these Tunnel Channels combined make a VPN Tunnel. Typically, a single Tunnel Channel is established from each WAN module of the VPN Node. - Page 40 Bandwidth Autotuning Bandwidth Autotuning will attempt several speedtests in order to always reliably know the usable band- Configuration width. For this purpose the initial transfer will be run with low rates (32 KBit/s). The rate will be raised in follow-up tests as long as the latency will stay below the "Optimal latency below" value during the test. Should the value be exceed, the speedtest will be canceled;...
- Page 41 When using connections with frequent variations in latency and band- width as well as high traffic expenses (e.g. UMTS), Autotuning can with this setting be ordered to perform speedtests only when user traffic Configuration already uses most of the connection's capacity. The speedtest can then Mimimize autotuning traffic employ this traffic for measuring.
- Page 42 status to "Connected" an be used again. Both values are extremely relevant for a successful "Bandwidth Autotuning" as well as for stable operation with as few connection losses in the Tunnel Channel as possible. Configuration The interaction between "Bandwidth Autotuning" and "Maximum allowed Latency autotuning" will lead to a compromise between bandwidth exploitation and latency achievable in the end.
-
Page 43: Qos System And Bonding Options
QoS System and Bonding Options The Quality of Service (QoS) System on the VPN tunnel level controls the prioritization of different parallel Configuration data streams flowing through a tunnel to each other. QoS is of major importance in setups where applica- tion data sensitive to latency variations (VoIP, Software as a Service, Citrix etc.) is transferred parallel with Down- and Uploads demanding large bandwidths. - Page 44 The following "Channel selection/bonding modes" exist: For each new connection fitting into this class, from all available tunnel channels Configuration (hence WAN uplinks) the one best matching this connection's requirements will be chosen. This mode should be applied in absolutely exceptional cases only, most BestChannel of the time bonding is desirable.
- Page 45 A "QoS Traffic Class" further contains the following important properties: Defines the size of the packet queue. The value in milliseconds deter- Configuration mines the maximum time a packet of this class may be buffered (caused Packet Queue Size by congestion) before it is dropped. Please note that depending on the transfer rate this value may have great influence on the memory usage of the router.
-
Page 46: Snmp
Depending on the firmware version currently used by the router, further information may be available. Extended SNMP With the Multichannel VPN Router 2610 and the Multichannel VPN Hub 2000, and with purchasing an additional license with all other products, extended SNMP retrievals are available. These allow for status requests on modules and VPN tunnels as well as for determining their traffic rate. - Page 47 Settings SNMP settings can be found at the web interface under "Logging & Maintenance" -> "SNMP Settings". The Configuration following setting options are available: Enabled Activates or deactivates SNMP service. The community name serves as authentication of SNMP clients. If no special authentication is needed, the community should be named "pub- Community lic".
-
Page 48: Additional Information
WAN modules in real time in a graphical fashion. This tool also is very suitable to do diagnostics on under performing WAN lines, e.g. to check if a line is overloaded, causing abnormal latency. • Start the Monitoring System program » » Programs Viprinet Monitor Create account You can create a single account for each router. » • Select Account •... - Page 49 Settings You can chose how data streams are displayed. Other » » Select Options Settings ... to activate or deactivate the options. Display Account » Account name, to display the account. • Select Account • Select Order by Channel or Order by Source •...
-
Page 50: Integration Of Vpn Clients/Road Warriors
Integration of VPN Clients/Road Warriors Every Viprinet Router may, in addition to site-to-site VPN Tunnels, provide service to an unlimited number of connections from VPN Clients. Other • A VPN Client is a single computer which is located outside all networks connected per VPN. This can be a field representative or a home office. -
Page 51: Service
LAN-interface, the router can be resetted to delivery status with the reset button. Before taking this action, you should verify that the router is wired correctly. Resetting the Viprinet Router To reset the router into initial state, hold the reset button at the front end for at least 5 seconds (e.g. with a pencil). -
Page 52: Service Providers
Service providers Internet Find current documentation and FAQ at: http://www.viprinet.com Service Supplier Turn to your supplier for help, e.g. with the configuration. Address, Hotline:... - Page 53 Service...
-
Page 54: Appendix
Appendix CIDR notation In CIDR notation, a suffix is added, e.g. /24 to show how many bits of the address identify the network (and are therefore not available). In the CIDR notation all digits which are 0 can be left out (seen from the right) –... - Page 55 Number of CIDR Netmask Netmask in binary addresses 16777216 255.0.0.0 11111111.00000000.00000000.00000000 128x65536 255.128.0.0 11111111.10000000.00000000.00000000 64x65536 255.192.0.0 11111111.11000000.00000000.00000000 32x65536 255.224.0.0 11111111.11100000.00000000.00000000 Appendix 16x65536 255.240.0.0 11111111.11110000.00000000.00000000 8x65536 255.248.0.0 11111111.11111000.00000000.00000000 4x65536 255.252.0.0 11111111.11111100.00000000.00000000 2x65536 255.254.0.0 11111111.11111110.00000000.00000000 65536 255.255.0.0 11111111.11111111.00000000.00000000 128x256 255.255.128.0 11111111.11111111.10000000.00000000 64x256 255.255.192.0 11111111.11111111.11000000.00000000 32x256...
- Page 56 Netmask A netmask is a bit mask that divides an IP address into a network and a device part. It is used in IP net- works to make routing decisions. The netmask is also called network mask and subnet mask. Structure and notation of a netmask Appendix A netmask is as long as the IP address it is used on (that is 32 bit for IP version 4).
- Page 57 Division of addresses You can divide address spaces to create separate ranges – subnets – for single LANs. Division of private addresses decimal If you are using the private address space, it is easy to divide the addresses using the decimal Appendix representation.
- Page 58 Division of public addresses When using an address space in the public range, you will have to split as exact as possible to spare the limited public IP address range, that is in binary: e.g. the range 192.0.2.0/24 was assigned to you. That means that the first 24 bit are needed to identify the net and you can freely assign 8.
-
Page 59: Nat-Network Address Translation
NAT-Network Address Translation The Viprinet Router supports NAT. Using NAT, a request coming from the private IP address of a PC inside the VPN will get its source IP replaced with a public one before packets get forwarded to the Internet. - Page 60 Appendix all other settings are obtained automatically. The DHCP server has to be activated either in the Viprinet Router or on another server that assigns IP addresses from the correct network range. IP address: Each computer needs its own IP address.
Need help?
Do you have a question about the 2610 and is the answer not in the manual?
Questions and answers