Table of Contents
Advertisement
Advertisement
Table of Contents

Related Manuals for Pioneer BDP-3110


Summary of Contents for Pioneer BDP-3110
- Page 1 BDP-3110 Blu-ray Disc PLAYER Operating Instructions...
-
Page 2: Operating Environment
Thank you for buying this Pioneer product. Please read through these operation instructions so you will know how to operate your model properly. After you have finished reading the instructions, put them away in a safe place for future reference. - Page 3 A damaged power cord can cause a fire or give you an electrical shock. Check the power cord once in a while. When you find it damaged, ask your nearest PIONEER authorized service center or your dealer for a replacement.
- Page 4 “Blu-ray Disc”, “Blu-ray” and “Blu-ray Disc” logo The terms HDMI and HDMI High-Definition are trademarks of Blu-ray Disc Association. Multimedia Interface, and the HDMI Logo are trademarks or registered trademarks of HDMI is a trademark of DVD Format/Logo Licensing, LLC in the United States and other Licensing Corporation.
-
Page 5: Table Of Contents
Contents Chapter 1 Before you start Playing photos as slideshows ....21 Switching the camera angles ....21 Checking the Accessories ......6 Continuing playback from a specified Propare the remote control ......6 position (Continued Viewing Playback) ..21 Types of discs/files that can be played ..7 Switching the subtitles ......21 Playable discs .........7 Switching the audio .........22... -
Page 6: Chapter 1 Before You Start
Chapter 1 Before you start Check the Accessories Notes: • Do not use any battery other than the ones specified. Also, do not use a new battery • Remote control unit x 1 together with an old one. • Video/Audio cable x 1 •... -
Page 7: Types Of Discs/Files That Can Be Played
Types of discs/files that can be played Playable discs Discs with the logo marks below indicated on the disc label, package or jacket can be played. Notes: • Only the discs that have been finalized can be played. Application format Disc types Logo DVD-... - Page 8 * Discs that cannot be played loading a BD containing sound in one of these audio formats, select the audio format on the • FUJICOLOR-CD menu screen. • Kodak Picture Discs * Playing BDs • DVD-RAM Discs • BDs (BDMV) compatible with the formats •...
-
Page 9: Playable Files
Playable files audio, etc. — while the other side contains non-DVD content such as digital audio material. Video, image and audio files recorded on DVDs and CDs can be played. The DVD side of a DualDisc can be played on Notes: this player (excluding any DVD-Audio content). - Page 10 played as many times as you like (the remaining number of views is not displayed). * Table of Playable Files Playable media BD-R/RE/-R DL/ Playable files RE DL/-R LTH, File specifications (Extensions) DVD-R/RW/-R DL/ USB devices +R/+RW/+R DL, CD-R/RW • Sampling frequencies: Up to 48 kHz •...
-
Page 11: Part Names And Functions
Part Names and Functions Remote control 7 - Start playback. - PAUSE/STOP playback. - PAUSE playback. - Press to skip to the beginning of the previous title/chapter/track/file. - Press to skip to the beginning of the next title/chapter/track/file. /... -
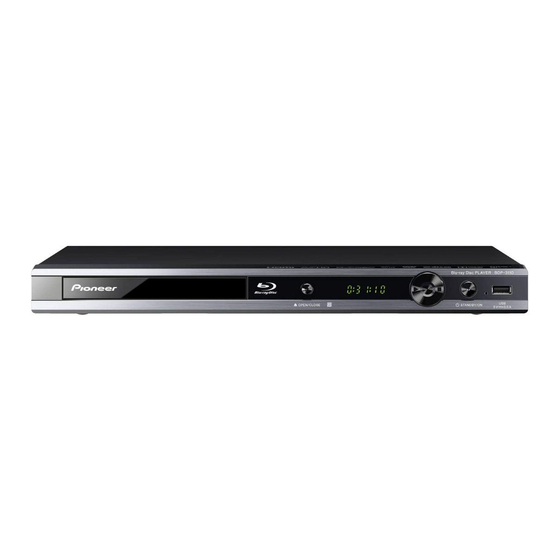
Page 12: Front Panel
Front panel 1 Disc tray 5 - Press to start playback. 2 OPEN/CLOSE - Press to open and 6 - Press to stop playback. close the disc tray. 7 STANDBY/ON - Press to turn the 3 Remote control sensor - Point the power on and off. -
Page 13: Chapter 2 Connecting Up
Chapter 2 Connecting up * About the HDMI high speed transmission This player outputs 1080p and Deep Color Be sure to turn off the power and unplug the video signals. If your TV supports 1080/50p, power cord from the power outlet whenever 1080/60p or Deep Color signals, use a ®... -
Page 14: Connecting A Tv
Connecting a TV Connecting an AV receiver or amplifier See Connecting an AV receiver or amplifier Connect to an AV receiver or amplifier in order below to connect an AV receiver or amplifier to enjoy the surround sound of Dolby TrueHD, using an HDMI cable. -
Page 15: Connecting Video And Audio Cables
Connecting video and audio Connecting an AV receiver cables or amplifier using an coaxial digital audio cable Note: • To output video signals from this player, Player’s rear panel connect using one of the following (not White including when connected using an HDMI cable): a video cable. -
Page 16: Connecting The Usb Device
• For some Internet service providers, you may have to set the individual network configuration manually. Hard disk, etc. • Pioneer is not responsible for any malfunction of the player due to USB flash drive communication error/malfunctions associated with your network connection and/or your connected equipment. -
Page 17: Chapter 3 Getting Started
Using the FUNCTION menu Various functions can be called out according to the player’s operating status. When a Pioneer Flat Screen TV that is compatible with HDMI CEC is connected to this player’s HDMI OUT terminal, language 1 Display the FUNCTION menu. - Page 18 • Some discs do not include secondary audio/secondary video. • In some cases, the secondary audio/ secondary video may switch or the switching screen provided on the disc may be displayed immediately, without the current secondary audio/secondary video or the total number of secondary audio/ secondary video streams recorded on the disc being displayed.
-
Page 19: Chapter 04 Playback
Chapter 4 Playback Notes: • Some discs start playing automatically Playing discs or files when the disc tray is closed. • DVD-Video discs have parental lock This section describes the player’s main features. Input the password registered in operations. For the types of discs that can be the player’s settings to unlock the parental played, see Playable discs on page 7. -
Page 20: Zoom
displayed on the TV screen). The speed is see Step below: 2x → 4x → 8x → 16x → During , press /. 32x • The step playback switches each time the 2x → 4x → 8x → 16x → button is pressed. -
Page 21: Playing Photos As Slideshows
Notes: Playing CH-Chapter 1 Press to play the title for which you TT-Title have set continued viewing playback. All-All The continued viewing playback confirmation screen appears. 2 Use c/ to select Yes, then press Playing photos as slideshows ENTER. Playback starts from the specified position. -
Page 22: Switching The Audio
Note • Depending on the file, the external subtitles may not be displayed properly. Switching the audio For discs or files on which multiple audio streams/channels are recorded, audio streams/channels can be switched during playback. During playback, press AUDIO. •... -
Page 23: Playback Functions
Playback functions The functions that can be used differ according to the type of disc and file. In some cases, some of the functions cannot be used. Check the usable functions on the table below. Function Disc/file type BD-ROM BD-R DVD- DVD-R /- AVCREC... -
Page 24: Using The Play Mode Functions
Using the Play Mode Playing a specific title, chapter or track (Search) functions 1 Press FUNCTION to display the Play Mode screen. 2 Select the type of search. Use a/b to select, then press ENTER. See the table on page18 for the search types. 3 Input the number. -
Page 25: Playing From The Home Media Gallery
Playing from the Home Media Gallery • Some BD-R/-RE discs have playback The Home Media Gallery lets you display a list protection. To cancel the protection, input of the titles, tracks or files recorded on the the password set for the disc. disc. -
Page 26: Playing Audio Files
4 Select the folder or containing the image Playback starts from the selected file, and file you want to play. continues until the end of the list is reached. Use / to play the previous or next file. Use a/b to select, then press ENTER . The now playing screen (shown below) is •... - Page 27 * Playing the Playlist 1 Press HOME MEDIA GALLERY to display the Home Media Gallery. The Home Media Gallery can also be displayed by selecting Home Media Gallery from Home Menu, then pressing ENTER. 2 Select Playlist. Use a/b to select, then press ENTER. 3 Select the track/file to be played.
-
Page 28: Chapter 5 Advanced Settings
Chapter 5 Advanced settings {10 min}, {20 min}, {30 min} - The power will be automatically turned off if no operation has been performed for more than 10 minutes/20 minutes/30 minutes. • [Disc Auto Playback] {On} - Turn on disc auto playback mode. {Off} - Turn off disc auto playback mode. - Page 29 5. Press ENTER to enter language setting. 8. Press ENTER to return Gereral Setting Menu. Press a/b select to language. • [System Upgrade] You may select to Upgrade the software from the disc or USB flash drive. 1. Insert the disc or connect the USB flash drive which contains the upgrade file package.
-
Page 30: Parental Lock
Language {Off} – Hide the PIP mark. • [Sec. Audio Mark] Select the OSD(On-Screen Display) {On} – Dispaly Secondary Audio Mark. Language, Disc Menu Language, Audio {Off} – Hide the Secondary Audio Mark. Language, Subtitle Language default • [Last Memory] language for the player. - Page 31 1. Use number keys to enter four digit old • The ratings are country-depended. To password. allow all disc to play, select 'Off'. 2. Enter the new password. • [Country Code] This ensures you see the scenes intended for your current residential region/country. Use 0-9 enter your password.
-
Page 32: Video Output
Default Gateway and DNS. if the disc is labeled for 4:3PS.) • [Connection Test] {4:3 Letterbox} – Select this when connecting Display network connection message. to a 4:3 screen TV and playing a 16:9 video. • [IP Setting] The video will be played with black bands at {Auto} –... -
Page 33: Audio Output
Video Process Mode selection • [Detail] • [Video Adjust] Select the output mode of video,options Select a predefined set of the video. include: Standard, Fain, Soft, these can 1. Press ENTER . change the output display. 2. Press c/ to adjust the video {Normal} output video signal without any Brightness, Contrast, Hue and Saturation. -
Page 34: System Information
{Reencode} – When a BD containing • Depending on the disc, the effect may be weak. secondary audio and interactive audio is • The effect may differ depending on the played, the two audio signals are mixed and speakers, the AV amplifier settings, etc. converted to Dolby Digital audio or DTS audio for output. -
Page 35: About How Digital Audio Formats Are Output
About how digital audio formats are output Setting Bitstream Reencode Only the primary audio The primary audio, The primary audio, (the main sound for secondary audio and secondary audio and movies, etc.) is output. interactive audio are interactive audio are Method of The secondary audio converted into PCM... -
Page 36: Chapter 6 Additional Information
Chapter 6 Additional information Cautions on use Moving the player this happens, turn the player’s power off. In the same way, noise may be heard in the sound of a radio. If you need to move this unit, first remove the disc if there’s one loaded, and close the disc About Condensation tray. -
Page 37: Cleaning The Pickup Lens
The player’s lens should not become dirty in normal use, but if for some reason it should malfunction due to dust or dirt, consult your nearest Pioneer authorized service center. Although lens cleaners for players are Do not use benzene, thinner or other volatile commercially available, we advise against chemicals. -
Page 38: Troubleshooting
Sometimes the trouble may lie in another component. Inspect the other components and electrical appliances being used. If the trouble cannot be rectified even after checking the points below, ask your nearest Pioneer authorized service center or your dealer to carry out repair work. - Page 39 Problem Check Remedy Picture freezes and the • Press to stop playback, then restart front panel and remote playback. control buttons stop • If the playback cannot be stopped, working. press STANDBY/ON on the player’s front panel to turn off the power, then turn the power back on.
- Page 40 • See About connections to components of other makes supporting the HDMI CEC function on page13. • Even when connected to a Pioneer product compatible with the HDMI CEC function, some of the functions may not work. Also refer to the operating instructions of the...
-
Page 41: Network
Problem Check Remedy Is HDMI CEC set to Set HDMI CEC to On on the connected device. The HDMI On on the connected CEC function operates when HDMI CEC is set to On for all device? devices connected to the HDMI OUT terminal. Once connections and settings of all the devices are finished, be sure to check that the player’s picture is output to the Flat Screen TV. -
Page 42: Glossary
Glossary * Angle (Multi angle) * Dolby Digital Up to 9 camera angles can be recorded Dolby Digital is an audio format to record the simultaneously on BD-ROM or DVD-Video sound in up to 5.1 channels with a fraction of discs, letting you view the same scene from the amount of data as compared to linear PCM different angles. - Page 43 * Frames and fields * Picture-in-Picture (P-in-P) A frame is the unit for one of the still pictures This is a function for superimposing a sub video on the main video. Some BD-ROMs which compose motion pictures. One frame consists of a picture of odd lines and a picture include secondary video, which can be of even lines called fields in video signal with superimposed on the primary video.
-
Page 44: Specifications
Specifications Model BDP-3110 Type Blu-ray Disc PLAYER Rated voltage AC 110 V to 240 V Rated frequency 50 Hz/60 Hz Power consumption 16 W Power consumption 0.3 W (standby) Weight Net weight: 1.3 Kg External dimensions 360 mm (L) X 39 mm (H) X 208 mm(W) - Page 48 72- BD3110- GBRB1...