Table of Contents
Advertisement
Quick Links
Advertisement
Table of Contents

Summary of Contents for Craftex CT056
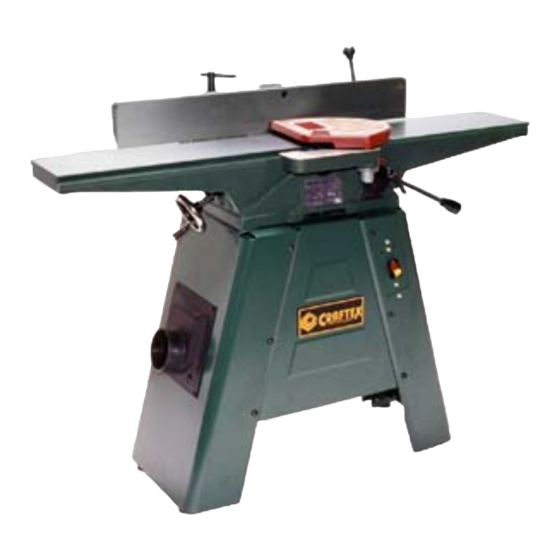
- Page 1 OWNER’S MANUAL CT056 – 6” Jointer...
-
Page 2: Table Of Contents
CRAFTEX CT056 6” WOODWORKING JOINTER INDEX GENERAL SAFETY INSTRUCTIONS PAGE 3 SPECIFIC SAFETY INSTRUCTIONS PAGE 4 CT056 Features Page 5 Features Illustration Page 6 Unpacking Page 7 Assembly Mounting the Motor Page 8 Tensioning the Belt Page 8 Power Supply... -
Page 3: General Safety Instructions
GENERAL SAFETY INSTRUCTIONS EXTREME CAUTION SHOULD BE USED IN OPERATING ALL POWER TOOLS. KNOW YOUR POWER TOOL, BE FAMILIAR WITH ITS OPERATION. READ THE OWNER’S MANUAL AND PRACTICE SAFE USAGE PROCEDURES AT ALL TIMES. CONNECT your machine ONLY to the matched and specified power source. -
Page 4: Specific Safety Instructions
CT056 JOINTER SPECIFIC SAFETY INSTRUCTIONS Always keep the cutter head knives sharp and free of rust, tar and pitch Always use push blocks when jointing stock that does not provide a reasonable distance of safety for your hands. Never allow your hands to pass directly over the cutter head. -
Page 5: Ct056 Features
FEATURES As part of the growing line of Craftex woodworking equipment, we are proud to offer the CT056. The Craftex name guarantees Craft Excellence. By following the instructions and procedures laid out in this owner’s manual, you will receive years of excellent service and satisfaction. The CT056 is a professional tool and like all power tools, proper care and safety procedures should be adhered to. -
Page 6: Features Illustration
CT056 6” WOODWORKING JOINTER ILLUSTRATED FEATURES... -
Page 7: Unpacking
Carefully remove all packing material and recycle where possible. Cleaning A protective coating is applied to your CT056 to protect it from corrosion in shipping. This material should be removed with a cloth and mineral spirits. When clean and dry, a coat of paste wax... -
Page 8: Mounting The Motor
Power Supply The CT056 is pre-wired at 110 volts and requires a 15-amp circuit. It is recommended that you use a dedicated circuit for the tool. Cutter Head Guard The shaft of the cutter head guard fits into a socket on the side face of the infeed table. -
Page 9: Outfeed Table Adjusting
CT056 Jointer disconnected from its power source. For accurate results from your CT056 Jointer, the outfeed table MUST be level with the cutter head knives at their highest point. The knives must be parallel to the outfeed table and project equally from the cutter head. -
Page 10: Operation
CT056 6” WOODWORKING JOINTER Operation Edge Planing Prior to starting any jointing operation, it is best to inspect the workpiece to determine the direction of the wood grain. The best jointing results are gained by feeding the wood into the knives with the grain. -
Page 11: Rabbeting
CT056 6” WOODWORKING JOINTER Operation, Continued Should the workpiece be too small to safely use your hands, push pads or push sticks should be employed as illustrated. Rabbeting To form a rabbet you must bring the fence forward to the required distance from the end of the knives. -
Page 12: Honing Knives
CT056 6” WOODWORKING JOINTER Operation, Continued Honing Knives For the best results from your Craftex CT056 Woodworking Jointer the machine must be regularly maintained. Dull knives, dirty knives or chipped knives will give poor jointing results. Knife blades should be checked routinely and on a regular basis. -
Page 13: Knife Replacement
CT056 6” WOODWORKING JOINTER Operation, Continued Knife Replacement Disconnect the CT056 from its power source. Loosen the five Hex-head knife-setting screws starting with the middle one and then followed by the two end screws and then the remaining two. Carefully remove the knife and the locking bar being careful not to lose any of the knife pressure springs. -
Page 14: Cutter Head Removal
Cutter Head Removal When necessary to remove the cutter head assembly for maintenance, the following procedures should be followed. Disconnect the CT056 from the power source. Remove the fence. Remove the drive belt. Set both the infeed and outfeed tables to their lowermost positions, being sure to loosen the butterfly lock screws first. -
Page 15: Ct056 Jointer
CT056 6” WOODWORKING JOINTER Schematic Diagram- Main Body... -
Page 16: Base
CT056 6” WOODWORKING JOINTER Schematic Diagram- Base Follow steps 1 – 7 for fast and accurate results in stand set up. This stand is designed to give better stability and balance. -
Page 17: Parts List
CT056 6” WOODWORKING JOINTER... -
Page 18: Parts List Continued
CT056 6” WOODWORKING JOINTER... -
Page 19: Ct056 Accessories
CT056 6” WOODWORKING JOINTER OPTIONAL ACCESSORIES Extra Blades H.S.S - Set of 3 – 8” x 1” x 1/8” Model B706N006 Extra Blades Carbide Tipped – Set of 3 – 8” x 1” x 1/8” Model B706C6 Adjustable Universal Mobile Base... -
Page 20: Warranty
CRAFTEX 2 YEAR LIMITED WARRANTY Craftex warrants every product to be free from defects in materials and agrees to correct such defects where applicable. This warranty covers two years for parts and 90 days for labour (unless specified otherwise), to...


Need help?
Do you have a question about the CT056 and is the answer not in the manual?
Questions and answers