
Related Manuals for GME TX4400


Summary of Contents for GME TX4400
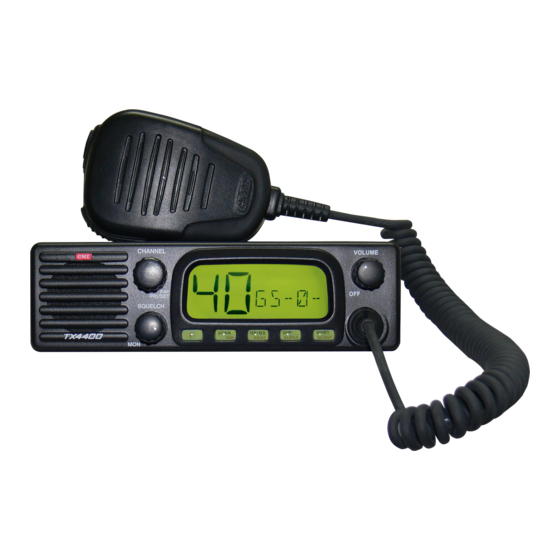
- Page 1 TX4400 UHF CB RADIO I N S T R U C T I O N M A N U A L T X 4 4 0 0 IN STRUCTION M ANUAL PAGE 1...
-
Page 2: Table Of Contents
TABLE OF CONTENTS GENERAL Recalling Fast Dial Memories . . . . . . . . . . . . . . . . . . . . . 12 . -
Page 3: General
Warranty . . . . . . . . . . . . . . . . . . . . . . . . . . . . . . . 24 THE FOLLOWING ITEMS ARE INCLUDED WITH YOUR TX4400 • TX4400 Radio... -
Page 4: Basic Operation
Function: SILENT Function: DIM Press for Monitor Function: ALPHA Function OPEN/GROUP Scan . Press first to access Function: PAGE Functions ADJUSTING THE VOLUME Rotate the Volume control clockwise past volume by listening to the receiver's background the ‘click’ to turn the TX4400 ON . Adjust the noise . When finished, rotate the Squelch knob volume control for a comfortable listening clockwise again to re-mute the radio level . If no sound is heard, rotate the Squelch knob fully counter-clockwise to temporarily un-mute the radio . You can now adjust the LCD INDICATORS Selcall Receive QUIET Mode Call Mode... -
Page 5: Squelch
Channel MONITORING FUNCTION (MON) When using CTCSS, press the Squelch knob to temporarily open the Squelch to allow you to listen for signals on the The TX4400 allows you to select duplex operation on channel . For a full description of the MON function refer to individual channels . This is particularly useful in country the CTCSS section . areas where there may only be one or two repeaters . The... -
Page 6: Priority Channel
2 . Press and hold the Channel Knob . The Channel display will flash for a moment then a high beep will be heard as SELECTING A SCAN GROUP the selected Channel is stored . The current scan group is shown on the display as OS for To recall the Priority Channel: Open Scan or GS for Group Scan . Briefly press the Channel Knob . The TX4400 will immediately switch to the Priority Channel accompanied by a high beep . SIGNAL STRENGTH METER The TX4400 has a digital signal strength meter that is displayed on the LCD . When in the normal receive mode Open scan mode Group Scan Mode... -
Page 7: To Start Scanning
4 . Repeat step 3 to add or remove other Channels in the USING THE GROUP SCAN MODE scan memory . Group Scan allows you to transmit and receive normally TO START SCANNING on your priority (working) Channel, but between breaks in To scan in the selected scan mode, briefly press the SCAN the conversation, the TX4400 will scan and listen to several key . A high beep will be heard, ‘SCAN’ will appear in the other Channels . The receiver will continue to scan the other display and the radio will begin scanning . Channels ONLY WHILE THERE ARE NO SIGNALS ON THE PRIORITY Channel. Note: If there are less than 2 Channels programmed in the scan memory in Open Scan or one Channel in Group Scan... -
Page 8: Ending The Scan
'Programming' Mode . Scan modes with separate Channel groups in each . This would allow you to scan either Channel group without the Rotate the Channel selector clockwise past Channel 40 . interruption caused by monitoring a priority Channel . You will now find that you can select additional Channel numbers 41 through 60 . Initially, these Channels will have Your TX4400 can be Dealer programmed to convert the no frequencies installed in them and are in effect, turned Group Scan function into a second Open Scan mode . If OFF. Each individual Channel will need to be turned ON you would prefer this feature over the present Group Scan and programmed with the receive frequency of your choice . option you should contact your GME Dealer to arrange for this feature to be enabled . -
Page 9: Programming The Receive-Only Channels
PROGRAMMING THE RECEIVE-ONLY frequency will flash, then the radio will beep indicating CHANNELS the frequency has been stored . To program other frequencies, repeat steps 1 to 7 above . Note: When programming, rotate the Channel selector SLOWLY . If you rotate the Channel selector too quickly, the Once you have programmed the required Channels, switch internal counter will not be able to keep up with you and the radio OFF to exit the programming mode . the frequency will not advance . Now when you switch the radio ON, you will be able 1 . S elect the Channel number that you wish to program to select the usual 40 CB Channels plus the additional (Channels 41 to 60) . Channels you have programmed . 2 . P ress and HOLD the Channel selector until the radio Note: There is no provision to transmit on the Receive-Only beeps (about 2 seconds) . -
Page 10: Receiving Selcalls On Your Receive-Only Channels
Note: Setting the QUIET mode is not mandatory . You can SELCALL IDENTIFICATION NUMBER still use Selcall on any Channel whether the QUIET mode is (IDENT) set or not . Your TX4400 is factory programmed with its own unique SELCALL MEMORIES Ident . This number identifies your radio from others in your area . You will need to make your Ident known to anyone Your TX4400 is fitted with 13 Selcall Ident memories . who may need to call you with Selcall . Whenever your • M emory locations 1 - 10 are available for normal use TX4400 hears a Selcall signal, it compares the incoming and can be programmed with your favourite Selcall Ident with it’s own . If the two Idents match, the radio Idents and Alpha Names . knows it is being called and sounds an alarm to alert you to the call . -
Page 11: Entering, Storing And Sending Selcalls
STORING SELCALL IDENTS Memory location 11 holds the Selcall Ident for the Pager function . See the ‘Page Mode’ section for more details on this Your TX4400 is fitted with 10 user programmable Selcall feature . When in ALPHA mode, this memory displays ‘PAGER’ . Ident memories, allowing you to store up to 10 frequently Memory location 12 holds the last-sent or received used Selcall Idents . The memories are accessed by pressing Selcall Ident . Whenever you send or receive a Selcall, the the CALL button on the microphone then rotating the Ident is automatically stored in this location allowing you Channel switch . to easily recall it and resend it . When in ALPHA mode, this Note: Memory locations 1 - 4 are ‘Fast Dial’ memories . memory displays ‘LAST’ . -
Page 12: Recalling Fast Dial Memories
R epeat steps (b) and (c) to program all 5 characters display mode, briefly press the F key followed by the as required . ALPHA key . The TX4400 will give a HIGH beep . To return 4 . N ow press and hold the Channel knob . The ALPHA to the IDENT display mode repeat the key press sequence . A name will flash for a few seconds, then the radio will LOW beep will confirm the IDENT display mode is selected . -
Page 13: Displaying The Caller's Ident Or Name
DISPLAYING THE CALLER’S IDENT OR QUIET MODE NAME The QUIET mode mutes the TX4400's receiver to prevent Whenever your TX4400 receives it’s own Selcall Ident, the any incoming signals from being heard in the speaker until words ‘CALL FROM' will appear on the display along with your Selcall Ident is received . In this way you can monitor a the callers Selcall Ident or ALPHA name to inform you of busy channel for personal calls without being disturbed by unwanted signals . the identity of the person calling . To switch between Selcall Idents and ALPHA Names briefly press the F key followed by If your Selcall Ident is received, the QUIET mode is then the ALPHA key . -
Page 14: De-Activating The Quiet Mode
• I f a normal signal is received on an Open channel (one Note: To ensure reliable Selcall detection when scanning, it that is not tagged with ‘Q’) the signal will be heard in is recommended that you restrict the number of channels in the usual way . the Scan group to 5 or less . • I f a signal containing your Selcall Ident is received on GROUP CALLING any channel - Open or QUIET - the QUIET mode will be cancelled and the alarm will beep to alert you to the The TX4400's Selcall system includes a Group Call function call . In addition, the callers Ident or ALPHA Name will which allows you to call up to 10 radios simultaneously . be displayed . All channels will now be open for normal This can be useful in an emergency situation where you transmission and reception . may need to transmit a message to a number of radios in SCANNING IN THE QUIET MODE your group . The Group Call function works by allowing you to enter a... -
Page 15: Programming And Sending Group Calls
. If the radio is in the ALPHA display mode, briefly press the F key followed by the ALPHA key to return to OVERVIEW the Ident display . The PAGE or transpond feature allows you to leave your 2 . Enter the required Selcall ident as follows: radio unattended yet still be informed of any incoming Selcalls . If your Selcall Ident is received while your TX4400 (a) B riefly press the channel knob . The right-hand digit is in the PAGE mode it will automatically transfer the of the Selcall Ident will flash . incoming Selcall to another UHF radio . The page mode can (b) R otate the Channel knob to select 'A' in the right- be used either while monitoring a single channel or while hand flashing digit position . This is the special code scanning in open scan or group scan mode . -
Page 16: Monitoring A Single Channel While In
Select Memory Location 11 sound the alarm and display the Ident or Alpha Name of Call To the caller . Mode Meanwhile the other receiver will be beeping to tell you Enter that someone has called you . You can then return to your Pager Ident TX4400, identify the caller’s Ident and return the call . 3 . Enter the required Selcall ident as follows: Note: Before transmitting on the Paging channel, the TX4400 will check the channel for activity and will not (a) B riefly press the Channel knob . The right-hand transmit if the channel is in use . Only when the channel is digit of the Selcall Ident will flash . clear will the paging Ident be sent . (b) R otate the Channel knob to select the required SCANNING IN PAGE MODE number in the flashing digit position . -
Page 17: Returning A Call In The
Alpha Name of the Caller . To return the call, briefly press the CALL button . The To select the required CTCSS tones on your radio, use the Caller's Ident will be transferred to the 'CALL TO' mode following procedure: ready for sending . Now press and hold the CALL button for 1 . Switch the TX4400 OFF at the volume control . a few seconds until the radio beeps . The callers Selcall Ident 2 . P ress and hold the F and SILENT keys simultaneously will be sent . If the call is successful, you will hear two quick while turning the radio ON again . 'CODE' will be acknowledge beeps in your radio's speaker as the caller's displayed and the 'SILENT' icon will be flashing . -
Page 18: Enabling The Ctcss Function On Achannel
97 .4 151 .4 192 .8 1 . Turn the radio OFF . HOW TO DISABLE FEATURES 2 . P ress and hold the SCAN key while turning the radio The TX4400 has a number of features that can be disabled back ON . A low beep will be heard and the SCAN by the user to allow for much simpler operation . This is function will no longer be available . done by disabling one or more of the keys on the front panel . These include the Function, Scan/Dim, OS/GS/ Repeat the procedure to re-enable the SCAN function . -
Page 19: Installation
Normally, UHF radios transmit and receive on the same This allows them to remain in the correct position when channel . This is known as SIMPLEX operation . However, to removing or refitting the radio . Slide the TX4400 into the communicate through repeaters, your radio must be able bracket, adjust it for the correct viewing angle and tighten to transmit and receive on different channels (known as the gimbal knobs securely . Finally, connect the power and DUPLEX) . Your TX4400 has a Duplex key to allow you to antenna leads to the sockets provided on the rear of the operate through repeaters .- radio . The Duplex function only operates on channels 1 - 8, as Note: The sides of your TX4400 have two pairs of gimbal these are the channels that have been designated for mounting holes - one pair in the centre of the case and repeater use . When Duplex mode is selected, your TX4400 the other pair towards the rear . A black label covers the receives on the selected channel (e .g . -
Page 20: Fitting The Microphone
FITTING THE MICROPHONE 2 . T urn the TX4400 upside down, remove the black grommet from the back of the radio and insert into the The microphone uses a miniature 6 pin telephone style plug front panel microphone socket aperture of the TX4400 and socket . (figure 2) . To fit the microphone: 1 . P osition the microphone plug so the plastic tab faces downwards . Press the plug into the socket until it ‘clicks’ . 2 . G ently press the rubber strain relief into the hole surrounding the socket so that the slot around the strain relief fits neatly inside the lip of the hole . Removing the microphone . -
Page 21: Dc Power Connection
DC POWER CONNECTION HIGH VOLTAGE WARNING The TX4400 is designed for 13 .8 Volt DC, negative earth The TX4400 has a built-in, high voltage detection system to installations only (i .e . where the negative terminal of the warn you if an over voltage situation occurs . battery is connected to the chassis or frame of the vehicle) . If the power supply voltage exceeds 18 Volts DC, the There are two recommended methods of installation . channel display will flash ‘hi dc’ for 5 seconds when the unit is first turned on, or at the time the voltage exceeds Radio remains on when the ignition switch is off 18 Volts . In addition, when transmitting, the TX indicator Connect the radio's negative (black) lead to the vehicle's will flash and the transmitter will select low output power . chassis, or if preferred, directly to the battery's If the over voltage warning appears you should switch your negative terminal . -
Page 22: Specifications
SPECIFICATIONS GENERAL Demodulated Audio Signal to Noise: > 45 dB unweighted . Compliance: Compliant with AS/NZS 4365 Current Consumption: 1 .4 Amps with 50 Ohm for radio communications termination . equipment in the UHF citizen RECEIVER band and personal radio service . Frequency Range: 476 .425 MHz - 477 .400 MHz RF Bandwidth: < 5 MHz Number of Channels: 40 (plus 20 receive only) Intermediate Frequencies: 21 .4 MHz and 455 kHz Frequency Range (receive only): 465 MHz - 485 MHz Sensitivity: - 123 dBm for 12 dB SINAD unweighted . -
Page 23: Optional Accessories
OPTIONAL ACCESSORIES Microphone Extension cable: LEM6P Rear connection Microphone Kit: LEM6M All values are typical unless otherwise stated and are subject to change without notice or obligation. T X 4 4 0 0 I NST RUC TIO N M AN UAL PAG E 23... -
Page 24: Warranty
(ii) t he payment of the cost of having the services in contract, tort or by statute) is to be reduced by the same supplied again . proportion as represents the proportion of the loss or damage 2. ADDITIONAL WARRANTIES caused or contributed to by the other party, its contractors or agents . 2 .1 T he warranties in this clause are in addition to the statutory GME AFTER SALES SERVICE warranties referred to in the previous clause . Your GME TX4400 is especially designed for the environment 2 .2 W e warrant our goods to be free from defects in materials and encountered in mobile or portable applications . The use of all workmanship for three years from the date of original sale solid state circuitry, careful design and rigorous testing, result in (or another period we agree to in writing) . During this period high reliability .
Need help?
Do you have a question about the TX4400 and is the answer not in the manual?
Questions and answers