Table of Contents
Advertisement
Quick Links
Advertisement
Table of Contents

Related Manuals for Hasselblad H5D


Summary of Contents for Hasselblad H5D
- Page 1 USER MANUAL...
-
Page 2: Introduction
INTRODUCTION... - Page 3 So, just when you think things can't get much better, they do. And the H5D is that model - all the good things from before and then some! The H5D series heralds a step up that is noticeably greater than before.
- Page 4 JPEG & RAW (not applicable to 60Mpix / 50MS /200MS files For the H5D-60 there is currently one limitation in effect models) can be produced simultaneously if you choose. The regarding its features mentioned and appearing in this man- JPEG files are not only 1/4 resolution they are also HNC ual concerning the 60 Mpix model.
-
Page 5: Table Of Contents
CONTENTS Introduction Shut ter and aper ture control Custom Options System requirements Filter s P1 & P2 But tons Warnings & restric tions Focusing distance calculation Display O f f Depth-of-f ield preview Sleep General over view – Infrared focus set tings Power O f f controls and displays Focus assist... -
Page 6: System Requirements
WARNINGS, RESTRICTIONS AND RECOMMENDATIONS • If you want to power the H5D from a PC laptop (as opposed to a Macintosh laptop), you must ensure that the FireWire port on the computer is capable of supplying power. Please note the following: Most recent Macintosh computers are compatible, both desktops and laptops. -
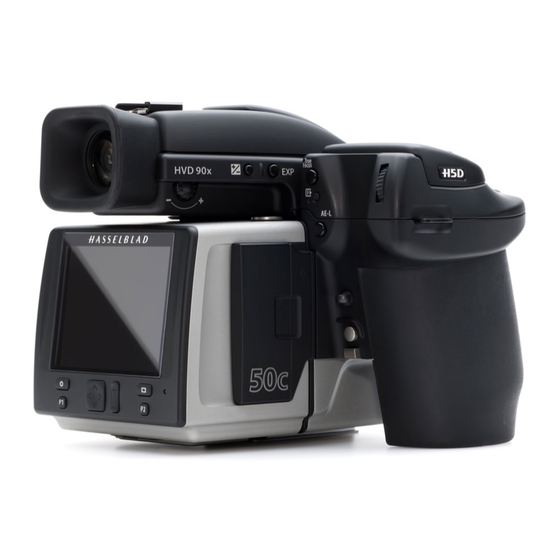
Page 7: Par Ts, Components, But Tons
PARTS, COMPONENTS, BUTTONS AND CONTROLS – OVERVIEW All of the items named on this page are described Focus Assist illuminator in greater detail elsewhere in this manual. Mirror Up button Remote release port Stop Down button Battery grip True Focus button Card format button AE-L button button Camera strap lug... -
Page 8: Grip But Tons & Controls
Press the button for 1 second to activate the camera. ally in use. Press the button for one second again to The H5D start-up logo will appear and then the main unlock (this function can be altered to lock all controls screen. -
Page 9: Camera Body But Tons & Controls
CAMERA BODY BUTTONS AND CONTROLS Note that some of the buttons can be re-assigned to another function. There are three control buttons on the rear of the grip. True Focus button At default setting, activates True Focus (see separate section for description) but also acts as a Zoom-in button when browsing or Selector button when making a setting change on the sensor unit, according to mode. -
Page 10: Sensor Unit
Main support for sensor unit. H3/H4D users please note the orientation of the Safety catch plug on the H5D! Prevents inadvertent removal of sensor unit. ‘Sensor plane’ index For physical focus measurement in critical close-up work. CF-card cover FireWire port For computer connection (please carefully note the orientation of the FireWire plug when inserting into the sensor unit). -
Page 11: Viewfinder
Also, you can download technical data sheets from the Hasselblad website, or you can download a combined version - well as a lens booklet that contains a round up of the available lenses as well as some general information. - Page 12 DISPLAY INFORMATION − OVERVIEW VIEWFINDER INFORMATION GRIP LCD INFORMATION • Metering method • Metering method • Aperture setting • Aperture setting • Shutter speed • Shutter speed • Exposure method • Exposure method • Capture counter • Capture counter • Exposure compensation •...
- Page 13 SENSOR UNIT DISPLAY AND CONTROLS − OVERVIEW When shooting, the sensor unit can display the information most often re- quired for a quick settings check. The unit’s buttons, grip scroll wheels and ISO setting Capture camera buttons are used to navigate counter the main menu and change settings.
- Page 14 GRIP DISPLAY − OVERVIEW TYPICAL GRIP DISPLAY Flash condition indication Focus setting White balance (No exposure compensation, (Manual setting) (Daylight) normal flash synchronisation) Shutter speed setting Aperture setting (1/125s) (f/8) ISO setting Exposure Value display (200 ISO) (EV 13.0) Capture counter Battery symbols Exposure mode indication Metering method...
- Page 15 VIEWFINDER DISPLAY − OVERVIEW Typical viewfinder display. Note the LEDs will only be visible when activated (by the camera or a setting). Exposure method indication Aperture setting Exposure compensation Metering method (‘aperture priority’ mode) (f/5.6) setting reminder symbol setting (Centre weighted) Focus Assist LED Flash LED True Focus (all mod-...
-
Page 16: Sensor Unit Display
REASSIGNABLE GRIP BUTTONS - FUNCTION OPTIONS These four grip buttons by de- True Focus fault are assigned according to name but can be reassigned (in Custom Options #4, #5, #6 and AE-L #7 or by using the Camera Con- figuration toolin Phocus) to var- ious other functions listed here. -
Page 17: Camera Conf Iguration
So, when renting an H5D for example, you only have to upload the saved profile to ensure that all parameters have been reset with- out you having to go through each detail –... -
Page 18: Shor Tcuts
SHORTCUTS Some buttons access shortcuts if used in different ways or contexts. 15 16 Menu button – P1 / P2 setting option access Rear scroll wheel – Menu navigator Press MENU on sensor unit and then P1 or P2 to Functions as a vertical navigator on sensor unit menu. -
Page 19: General
GENERAL Photo: Ken Hermann © / Hasselblad Masters... -
Page 20: Carrying Strap
RECHARGEABLE BATTERY GRIP The environmentally approved Battery grip Li-ion (3043356) is the standard power source for the H5D camera. The H5D requires a power supply for all actions as there is no me- chanical reserve facility. When working untethered, it is therefore advisable to keep a reserve rechargeable battery grip at hand. -
Page 21: Charging The Battery
CHARGING THE BATTERY With the battery removed from the camera, insert the jack plug from the battery charger into the socket on the battery grip. Insert the battery charger into a standard (100–240V~ /50–60 Hz) domestic socket. During the charging procedure, the lamp on the charger signifies the following: N o t e ... -
Page 22: Battery Status
BATTERY LIFE & BATTERY WARNING N o t e Battery life is dependent on a number of variable factors and therefore cannot be exactly predicted. If the camera is When the low battery message in the viewfinder and the left in the active state instead of Display Off or Sleep modes low battery icon on the sensor display appear, the camera for long periods, for example, then the battery will become... -
Page 23: Power Modes
POWER MODES The H5D can be set at three active modes − ON, Display Off and Sleep. In these active modes, battery consumption is least in Sleep mode and most in ON mode. Both the grip and the sensor unit displays are dimmed accordingly. How-... -
Page 24: Eyepiece Adjustment
RUBBER EYE CUP Two rubber eye cups are available for the H5D. The one sup- plied is suitable for users who do not intend to use eyeglass- es when photographing. The second shorter eye cup is for those who either prefer to position their eye further from the viewfinder and those who wish to wear eyeglasses. -
Page 25: Protec Tive Baseplate
4 /60MBs (400x) or better. Please see the Appendix in this manual for a list of recom- mended cards. The H5D is shipped with an 8GB (or larger) compact-flash card, which is capable of holding approximately 50 − 100 captures (according to model). Lossless compression is applied to the images, so the actual size of each capture can vary, thereby affecting the total number of shots you can fit on the card. -
Page 26: Format Ting Cf Cards
In either case, you must reformat a CF card in the sensor unit for H5D use. FORMAT BUTTON Press the Format button on the camera grip. It is purposely recessed to avoid unintentional use, so use a ball-point pen or similar. - Page 27 SENSOR UNIT – INTRODUCTION As is the case with all electronic devices pay extra care when The captured image is temporarily stored internally on a CF working in damp en vironments and avoid damp conditions card in the sensor unit or onto a computer hard disk when for storage.
-
Page 28: Tethered To A Computer
If dust manages to get between the IR filter and sensor, it can only be removed at the Has- selblad factory. Contact your Hasselblad dealer or Hasselblad Service Center for assistance. TETHERED TO A COMPUTER WITH... -
Page 29: Capture F Iles
(typically by way of Phocus) to obtain complete development. If developed in Phocus, 3FR files become Hasselblad 3F files – denoted by each file now bearing the suffix “.fff”. If developed by other RAW proces- sors, the 3FR files are not converted to 3F but can be exported directly to TIFF, PSD etc according to requirements. -
Page 30: Phocus
Phocus combines with Hasselblad Natural Color Solution the result is exactly what you would expect from Hasselblad – (HNCS) and Digital Auto Correction (DAC) to provide ultimate simply stunning image quality. -
Page 31: Focus Modes
LENSES & FOCUS MODES Photo: Joachim Schmeisser © / Hasselblad Masters... -
Page 32: Shutter And Aperture Control
ATTACHING A LENS REMOVING A LENS Depress the lens release button and Remove the front protective cover keep it depressed while rotating the on the camera body by depressing lens counter-clockwise until it stops and the lens release button and keep- lift it out. -
Page 33: Infrared Focus Settings
FOCUS ASSIST As well as the conventional view on the focusing screen to ensure a sharp image, the H5D also features an LED focus assist capability appearing as two arrowheads Lens focus setting too to the right of the viewfinder display (except for lenses with a maximum aperture far beyond the distance of f/6.7 or smaller). - Page 34 However, a warning is dis- played which disappears after confirmation. T i p To expand your range of lenses, consider using a CF adapter to allow you to use most of the lenses from the Hasselblad V- system.
-
Page 35: Manual Focus
MANUAL FOCUS There is both a Manual focus mode setting and a manual override capability. Front scroll Manual focus is a specific setting that you actively make, whereas manual over- wheel ride is always available as a temporary override of an autofocus setting. SAVE In Manual focus mode, focusing is carried out by rotating the focusing ring in the conventional manner. -
Page 36: Single Shot
SINGLE SHOT At Single Shot setting (AF S), the shutter release will be blocked until the camera finds the optimum focus setting. This ensures that no captures can be made that are not finely focused. However, this delay will normally be only a fraction of a second in good lighting conditions with a clear focusing pattern. -
Page 37: True Focus, Absolute Position Lock
True Focus uses yaw rate technology and by way of the Absolute Position Lock (APL) processor, logs camera movement as the basis for an extremely rapid compensatory focus reset without any shutter lag. The H5D’s firmware then further perfects the focus using the precise data retrieval system found on all HC/HCD lenses. -
Page 38: True Focus And Camera Handling
TRUE FOCUS AND CAMERA HANDLING To obtain the maximum benefit from True Focus you should ✘ try to work within the requirements of the system. This might need a little practice but it will improve the accuracy of the measurements and thereby provide better results. Firstly, try to remain as still as possible when making the first True Focus measurement and wait for the audio signal or ready light to show green again before continuing. -
Page 39: True Focus, Four Methods
FOUR TRUE FOCUS METHODS ACTIVATED BY SHUTTER RELEASE BUTTON – TRUE FOCUS RETAINED MENU > SETTINGS > CUSTOM OPTIONS > # 31 In this mode the autofocus function is effectively converted into the True Focus function. That is, focus is set by half-pressing the shutter release button. - Page 40 FOUR TRUE FOCUS METHODS – CONT ACTIVATED BY TRUE FOCUS BUTTON – AUTOFOCUS DEACTIVATED In this mode the True Focus function is activated by pressing the True Focus button. Normal autofocus is de-activated, therefore, pressing the shutter release button will not reset the focus. Useful when many shots are required with the same focus setting.
-
Page 41: Exposure Control
EXPOSURE CONTROL Photo: Joe Felzman © / Hasselblad Masters... -
Page 42: Iso & White Balance On Grip
ISO & WHITE BALANCE Both ISO and White Balance can be set either via the grip, the sensor unit or, when tethered, via Phocus. On the grip, the ISO/WB button provides immediate access to ISO and White Balance settings. The front and rear scroll wheels are used to make the desired changes. -
Page 43: Exposure Setting Modes
EXPOSURE SETTING MODES In manual mode, aperture is set by the front scroll wheel and Exposure can be controlled either manually or by using one the shutter speed by the rear scroll wheel unless set other- of four automatic modes. These have the following designa- wise in Custom Options #26. -
Page 44: Automatic Exposure Mode 4
To help you find them, the H5D can provide an overexposure indicator, which shows precisely which areas of your shot are overexposed (i.e., pixels that are at maxi-... -
Page 45: Ae-L But Ton
AE- L BUTTON This button has two main functions that can be incorporat- the metered area is saved as a mid-grey (Zone 5). When the ed in various working methods involving exposure locking. spot area is then placed over another part of the scene, the It also has an extra function for the flash measure capability new area is then compared to the saved area and the dif- (see AE-L section under Flash). -
Page 46: E Xp Compensation/Quick Adjust
EXPOSURE COMPENSATION / QUICK ADJUST Custom Options #3, The exposure compensation function, for both manual and #17 and #23 used to automatic modes can be set from -5 to +5 EV, in 1/3, 1 or deactivate and alter 1/2 EV increments (Custom Option #3) and is visible above the settings for the the scale in the viewfinder and as a ±... -
Page 47: Navigating The Menus
NAVIGATING THE MENUS Photo: Tom D. Jones © / Hasselblad Masters... -
Page 48: Sensor Unit Menu
BASIC DESCRIPTION OF SENSOR UNIT MENU ITEMS By using the buttons on the control panel and the scroll wheels on the grip you can navigate down through the various levels in the menu. Below is an overview of the setting options available. Sets the light sensitivity of the sensor. -
Page 49: Navigating Menu And Set Tings On Su
OVERVIEW OF NAVIGATING MENU AND SETTINGS ON SENSOR UNIT. Navigating the menu and accessing the settings on the sensor unit are achieved by pressing the appropriate buttons surround- ing the display. Note that some of the buttons are modal and so have dual functions which is indicated by the designation that appears closest to that particular button when navigating. -
Page 50: Navigating Menu And Settings On Grip
OVERVIEW OF NAVIGATING MENU AND SETTINGS ON GRIP Navigating the menu and accessing the settings on the grip is achieved by pressing the buttons surrounding the display and turning the scroll wheels. Note that some of the buttons are modal and so have several functions which is indicated by the designation that appears closest to that particular button when navigating. -
Page 51: Previews And Browsing
PREVIEWS & BROWSING Photo: Wai Kuen Eric Wong © / Hasselblad Masters... -
Page 52: Preview Modes
PREVIEW MODES Use the Display button to cycle through the available pre- Two additional screens also available, accessible from the view modes which are: Histogram screen: • Standard preview: • Combined Histogram: Shows a preview image surrounded by a display of a few Shows a preview image overlaid with a histogram display- important settings. -
Page 53: Browsing
HISTOGRAM TYPES There are three types of histogram representation available: Histogram and Full details, Combined histogram and Histogram mode. Histogram and Full details Combined Histogram Histogram mode In Histogram and Full details mode, In Combined Histogram mode, the In Histogram mode, the individual you can read a list of camera set- RBG channels are represented to... -
Page 54: Current Folder Selec Tion
ZOOMING IN AND OUT There are four views in Browse mode. Zoom in by using the the Zoom in ( ) / out ( ) buttons or True Focus ( ) and AE-L ( buttons. Zoomed View is reached by zooming in from the Standard View. When zoomed in, you can select the area of interest by using the front and back scroll wheels or the navigation button. -
Page 55: Sensor Unit Settings
SENSOR UNIT SETTINGS Photo: Denis Rouvre © / Hasselblad Masters... -
Page 56: Sensor Unit Menu Layout
BASIC OVERVIEW OF SENSOR UNIT MENU The menu is structured in a manner similar to very many digitally controlled personal devices and should be familiar to most. Once the menu is accessed navigation, selection and confirmation are made by the various buttons beneath the display, the scroll wheels on the grip as well as the True Focus and AE-L buttons. -
Page 57: Iso & Wb Set Ting On Sensor Unit
ISO SETTING ON SENSOR UNIT SENSOR UNIT MENU > ISO ISO and White Balance can be set either on the sensor unit, the grip or, when tethered, via Phocus. On the sensor unit, the settings are automatically and simultaneously transferred from the sensor unit to the grip. Likewise all changes on the grip are automatically transferred to the sensor unit display. -
Page 58: Image Format
WHITE BALANCE SETTING BY USING A ‘GREY CARD’: • Make the first shot a grey card/Qp card close-up and then There are two ways to make manual white/grey balance set- make the adjustment in Phocus for the session. tings using a ‘Grey card’ or ‘Qp card’. If colour accuracy is not critical, you can use any neutrally coloured area or surface •... -
Page 59: Storage
STORAGE SETTINGS > STORAGE Storage includes three entries: Create new folder, Delete and Format. CREATE NEW FOLDER SENSOR UNIT MENU > STORAGE > FORMAT See section in “Previews & Browsing” chapter. DELETE SENSOR UNIT MENU > STORAGE > DELETE Delete allows you to make single or multiple deletes of captures. -
Page 60: Set Tings
SOUND Error: SENSOR UNIT MENU > SETTINGS > USER INTERFACE > SOUND The H5D offers audio feedback to relay information. This menu item has Volume Ready: (choose between High, Low and Off), Key Click (choose between On and Off) and Exposure Warning (choose between On and Off). -
Page 61: Display
SENSOR UNIT MENU > SETTINGS > USER INTERFACE > DATE & TIME The H5D has an internal clock that keeps track of the date and time. This informa- tion is used to mark each shot with the date and time at which it was taken. It is also used to label folders with the date on which each folder was created. -
Page 62: Custom Options
SETTINGS > CUSTOM OPTIONS BUTTON P1 & P2, DISPLAY OFF, SLEEP, POWER OFF, IMAGE ORIENTATION, SHOW PREVIEW Custom Options allows the setting of various options, as listed here. The setting procedure is the same for these features: 1. Press MENU. 2. -
Page 63: • Power Off
SENSOR UNIT AND VIEW / LARGE FORMAT CAMERAS For optimum use, the H5D sensor unit can also be used with view cameras (with the appropriate adapter and cables). The exposure time set on the unit sets the maximum length of exposure. The default setting is 1/8 sec and this is the setting that can be kept for all exposures from 1/8 sec through 1/2000sec. -
Page 64: Ser Vice
Firmware update: Download the latest firmware update for camera” option should be selected. Select “From host” for the sensor unit from the Hasselblad website. Unzip the file all other configurations. first and then transfer the “.cim” file to a CF card. Insert the card in the camera and navigate to “Firmware update”. -
Page 65: Spirit Level
SPIRIT LEVEL Normal (at default setting) The integrated electronic spirit level provides a rapid and accurate way of ensuring the camera is either horizontally neutral in alignment (level) and/or vertically neutral in align- ment (plumb). It uses two methods that are fully visible on the sensor unit display and partly visible in the viewfinder. -
Page 66: Grip Menu Settings
GRIP MENU SETTINGS Photo: Frank Meyl © / Hasselblad Masters... -
Page 67: Over View Of Grip Menu
GENERAL OVERVIEW OF GRIP MENU Text setting Self timer options Bracketing options Interval Settings options options Custom Options System status Drive These arrows signify the FRONT scroll wheel is used to select these options. These arrows signify the REAR scroll wheel is used to make settings changes. -
Page 68: Self Timer
These provide the integral finess- es that make the H5D a powerful and sophisticated tool to satisfy a variety of professional demands. There are five functions: Self timer, Bracketing, Interval, Settings and Drive. - Page 69 SELF TIMER SETTING – continued Front scroll wheel 1) Press MENU on grip. ENTER 2) Turn Front scroll wheel until Self Timer appears. SAVE MENU 3) Press ENTER. Front 4) Turn scroll wheel to access the options, that are: Rear scroll wheel Delay Mirror sequence...
-
Page 70: Bracketing
BRACKETING options available 2 frames 3 frames 5 frames options available options available 1/3 EV 1/2 EV 1 EV 2 EV 3 EV The bracketing function provides an automatic series of cap- Note the difference in operation between Single and Con- tures;... - Page 71 Rear 7) In turn the scroll wheel to choose the amount of EV variation required: 3, 2, 1, 1/2, 1/3 EV. 8) Press SAVE. Sequence highlighted. Step highlighted. 1/3 EV variation chosen as option. ‘Standard, over, under’ 9) Press ENTER again from the Bracketing screen to activate chosen as option.
-
Page 72: Inter Val
INTERVAL options available 2 frames – 255 frames options available 2 seconds − 1 hour lance, nature study, etc. The exposure and focus settings (Man- By using the interval setting, you can allow the camera to ual or Auto) will be according to the camera settings at the time take a series of captures automatically over a set period. -
Page 73: Set Tings
SETTINGS > CUSTOM OPTIONS options available CUSTOM OPTIONS sub- settings you can access further items for setting chang- From the Settings screen you can access four main sub-set- es. Look at the main menu chart to get an idea of where all tings: Custom options, Image info, Date &... -
Page 74: Custom Options
CUSTOM OPTIONS (ON GRIP) Stop down function The following is a description of all the Custom Options ac- • Stop Down cessible through the grip display. They are accessed by Menu but can be reassigned to: > Settings > Custom Options. The words and figures in red AF Drive •... - Page 75 Generates Zone makes the camera behave in message on grip display if attempted. the same fashion as the Hasselblad 205FCC. That is, the central spot No allows the lens shutter and auxiliary is placed over a particular area of...
- Page 76 Rear wheel quick adjust 17 Interval & Self Timer • • No • Exit • Stay Allows rear scroll wheel to make a Allows either the Interval or Self rapid EV adjustment (or EV compen- Timer mode to remain active after sation) in auto-exposure mode.
- Page 77 Aperture control in Manual 26 Always return mirror • • Yes • Front wheel • Rear wheel Selects which scroll wheel changes Automatically lowers mirror again the aperture setting when in Manual for viewing at the end of every mir- ror-up sequence.
-
Page 78: Image Info
SETTINGS > IMAGE INFO In Image info you can compose your own combination of letters, words, symbols, etc to be included in the metadata. The same procedure is also used to change a Profile name. IMAGE INFO SETTING Front scroll wheel 1) Press MENU. -
Page 79: Image Info Tex T Set Ting
IMAGE INFO SETTING Here is an example of how to change existing text (in this case the word ‘Text’ to a copyright symbol plus a photogra- pher’s name -’Jens Karlsson’). See previous section 4.2 Im- age info for procedure description. 1) Start by accessing the Image info screen. -
Page 80: System Status
SETTINGS > SYSTEM STATUS Check component usage and general servicing information as follows: SYSTEM STATUS DISCLOSURE Front scroll wheel MENU 1) Press on grip. ENTER 2) Turn the Front scroll wheel until Settings appears. NEXT MENU 3) Press ENTER. Front scroll wheel to access System Status. -
Page 81: Drive
DRIVE In Continuous mode, the camera automatically makes cap- There are two drive modes: Single and Continuous. In Single tures and makes ready for the next capture in a continuous mode, a capture is made when the shutter release button is manner as long as you maintain pressure on the shutter re- pressed and the camera is made ready for the next capture. -
Page 82: Profiles
PROFILES Photo: Vicente Ansola © / Hasselblad Masters... -
Page 83: Prof Iles
PROFILES Full auto: normal flash sync, autofocus (single), single drive, The profiles feature allows rapid access to pre-determined programmed exposure, centre weighted metering, -None combinations of settings that increase the speed and secu- rity of workflow. One example might be in a social situation Studio: normal flash sync, manual focus, single drive, manu- where there might be a need for formal outdoor portraiture al exposure, spot metering, - AF... -
Page 84: Changing A Profile Name
USING PROFILES 1) From the main screen, click PROFILES on the grip and the profile screen will appear. SAVE 2) Use the scroll bar to go through the list and highlight the desired profile. PROFILES Load 3) Press (AF button). -
Page 85: Flash /Strobe
FLASH / STROBE Photo: Olivier Valsecchi © / Hasselblad Masters... -
Page 86: General
IR and similar wireless flash release devices are used. Victor Hasselblad AB can accept no responsibility whatsoever for accidents that might occur or damage caused when Hasselblad equipment is used in combination with third-party backs of any description. -
Page 87: Integral Flash
ACCESS TO CONTROLS FLASH Front scroll 1. Activate the camera and press the button once. FLASH wheel Front 2. Turn the scroll wheel to set the amount of com- pensation required: • from +3EV through -3EV • press to clear the setting quickly if required. -
Page 88: Flash Measure
SEPARATE FLASH UNIT CONNECTION Separate flash units can be electrically connected either by way of the hot shoe accessory holder (see previous warn- ings) on the top of the viewfinder or via a cord to the PC con- nection port on the left hand side of the camera body. -
Page 89: Accessories
ACCESSORIES Photo: Milosz Wozaczynski © / Hasselblad Masters... - Page 90 SCA3902 TTL Flash Lenses Adapter All HC/HCD lenses, including extension tubes and converter Sensor unit (included) Camera body View cameras – Flash sync shutters Any view camera with Hasselblad H adapter Flash sync input cable Host computer with FireWire, running Phocus...
- Page 91 HC LENS RANGE HCD 4.8/24mm HCD 4/28mm HC 3.5/35mm HC 2.8/80mm HC 2.2/100mm HC 3.5/50-IImm HC 3.2/150mm HC Macro 4/120-IImm HC 4/210mm HC 4.5/300mm HC 3.5–4.5/50–110mm HCD 4.0–5.6/35–90mm Most V system C type lenses with optional CF lens adapter...
-
Page 92: Optional Accessories
GIL (Global Image Locator) Improves comfort and security with (3053300) hand-held photography. Complete with quick plate H. The Hasselblad GIL (3053300 ) pro- vides automatic creation and storage of GPS information for all H-system Camera strap H digital cameras. The data is tagged... -
Page 93: Battery Adapter
13 mm, 26 mm and 52 mm. As the H5D has a TTL light metering system, exposure compensation is au- tomatic. Check www.hasselblad.com for further details about lens shades, endcaps, lens pouches etc or news of new accessories. -
Page 94: Multi Shot
The technology behind the multi-shot feature is high preci- sion piezo controlled movements of the sensor. In the case of a H5D-200MS 6-shot capture sequence, for example, four separate shots are taken in succession in pixel sized incre- ments (one for each color, but with green captured twice for extra sharpness), followed by two more captures moved by half-pixel increments to fill most of the gaps. -
Page 95: Appendix
APPENDIX Photo: Jon Lowenstein © / Hasselblad Masters... -
Page 96: Technical Specif Ications
6 programmable buttons. Complete camera set-up can be saved to 7 custom profiles. Lenses Hasselblad H System lens line (12 lenses from 24 to 300 mm) with integral central lens shutter. All central lens shutter V system Carl Zeiss lenses via optional CF adapter. -
Page 97: All Models
2900 mAh output. External dimensions Complete camera with HC 80mm lens: 153 x 131 x 205 mm [W x H x L] (153 x 131 x 209 mm - H5D 50MS). Weight Camera body with HC 80mm lens, Li-Ion battery and CF card: 2330g (60), 2290g (40, 50). -
Page 98: Default Set Tings
DEFAULT SETTINGS (DEFAULT PROFILE) A (Aperture priority) GENERAL Exp.mode Centre weighted LM mode Exp. adjust AF-S Focus mode Drive mode Normal (beginning of exp.) Flash sync Flash adjust 10 sec SELf TIMER Delay Mirror up / Delay Sequence Mirror goes down Mirror mode BRACKETING Frames... -
Page 99: True Exposure
Therefore, when using flash/strobe as the main light speeds, e.g. 1/500s, the effect becomes clearly visible. As source, you should set True Exposure to OFF in Custom Hasselblad knows exactly how the shutters behave in HC Options #13 on grip. lenses, automatic compensatory measures in speed setting adjustments are therefore employed. -
Page 100: P & P V Modes
5. 6 1000 1000 Shutter speed Shutter speed Shutterspeed LIGHT METERING METHOD SENSITIVITY DISTRIBUTION RECOMMENDED CF CARDS FOR H5D Please ensure you format all Card type Size GB Marked speed previously unused cards in the sensor unit before use. Lexar Professional Compact Flash... -
Page 101: Problems, Equipment Care And Service
PROBLEMS, EQUIPMENT CARE & SERVICE Loss: Hasselblad equipment is much sought after and you should take The H5D is a very sophisticated camera that relies on much information obvious steps to prevent theft. Never leave it visible in an unattended being passed and processed to and from each modular back to produce car, for example. -
Page 102: Index
INDEX About General Self Timer Accessories Grip but tons & controls Sensor unit Accessor y connec tion Grip display Sensor unit display AE-L but ton Grip menu Sensor unit maintenance Appendix Grip Menu Set tings Sensor unit menu At taching /removing the view f inder Sensor unit menu layout At taching/removing a lens Sensor unit set tings... - Page 103 Victor Hasselblad AB. The images in this manual were not taken with a Hasselblad H5D. They are used for illustrative purposes only and are not intended to represent the image quality produced by a Hasselblad H5D.
Need help?
Do you have a question about the H5D and is the answer not in the manual?
Questions and answers