Rational SelfCooking Center Operating Manual
Hide thumbs
Also See for SelfCooking Center:
- Training manual (96 pages) ,
- Operating instructions manual (80 pages) ,
- Applications manual (80 pages)
Table of Contents

Related Manuals for Rational SelfCooking Center


Summary of Contents for Rational SelfCooking Center
-
Page 1: Operating Instructions
Operating instructions SelfCooking Center ® o u r f r p f o r y S i g n u o f C l u e r s h i p m e m b o w . N A L n... -
Page 2: Safety Instructions
Safety Instructions Warning: Incorrect installation, adjustment, servicing, maintenance, cleaning, or unauthorized modifi cations to the appliance can result in damage, injury or death. Read the Operating Manual carefully before starting to use the appliance. For your safety: Do not store or use any fl ammable gases or liquids near this appliance. What to do in the event of danger or if you smell gas: - Shut the gas supply immediately - Do not touch any electric control elements... - Page 3 Installer installed on: You can reach our Technical Customer Support Service 7 days a week on: +44-1582-480388. For any queries relating to use please ring the RATIONAL ChefLine : +44 7743 389863 ® We reserve the right to make technical changes in the interest of progress!
-
Page 4: Table Of Contents
Contents General Instructions / For Your Safety Daily cleaning and care Features General Operating Instructions SelfCooking Control ® Mode Controls Operation Combi-steamer mode Controls Moist heat Dry heat Dry heat and moist heat ClimaPlus Control ® Time settings, continuous operation, preheating Working with the core temperature probe Pressure humidifi... - Page 5 Contents Service Descaling the steam generator Descaling the humidifying nozzle Draining the steam generator, unit and software identifi cation, Service-Info Data communications USB data memory (USB stick) HACCP logging, software update Importing and exporting programs Appliance settings Real-time, time format, time format for cooking sequences Temperature unit, enter IP address for Ethernet, language Factory default, buzzer sound and time, display contrast, CleanJet ®...
-
Page 6: General Instructions / For Your Safety
General Instructions / For Your Safety • Please take the time to read the following safety Caution! Daily checks before and operating instructions carefully. switching on • Keep this manual carefully so that it can always • Lock air baffl e top and bottom. be consulted by anyone using the appliance. - Page 7 General Instructions / For Your Safety Display indication In order to avoid unnecessary power consumption, WARNING – If containers are fi lled the intensity of indications is automatically reduced with liquid or contents which liquefy during in 2 stages during routine operation. cooking, do not use rack levels higher After 10 minutes there is an initial reduction in than those where the user can see into the...
- Page 8 General Instructions / For Your Safety Loading/removal Mobile oven rack Open appliance door slowly. Working with mobile oven racks, mobile plate racks and transport trolleys for When it is opened heating and fan wheel shut table-top units (option) down automatically. - Remove grid shelf The integral fan wheel brake is activated.
- Page 9 General Instructions / For Your Safety Working with mobile plate racks Low water Please always insert core temperature probe into ceramic tube. This may appear on the display when you switch on. It means that the steam generator is not yet fi...
-
Page 10: Cool Down
General Instructions / For Your Safety Cool Down Hand shower Use the „Cool Down“ function to cool the cooking - To use pull hand shower out at least 20 cm. cabinet . - Hand shower has no lock-in position. The hose may be damaged if the hand shower is tugged beyond the available max. - Page 11 General Instructions / For Your Safety Maintenance Descaling • Inspection, maintenance and repair work must • Note that the steam generator must be descaled only be carried out by trained technicians. as required (see Descaling chapter). • The unit must be switched off at the mains when cleaning (except CleanJet ®...
-
Page 12: Daily Cleaning And Care
Daily cleaning and care • Daily cleaning of the cooking cabinet seal with a non-abrasive cleaning agent will extend the Warning! service life. • Your unit must be cleaned every day to • Remove and clean the incoming air fi lter once per maintain the high quality of the stainless month (see Maintenance). -
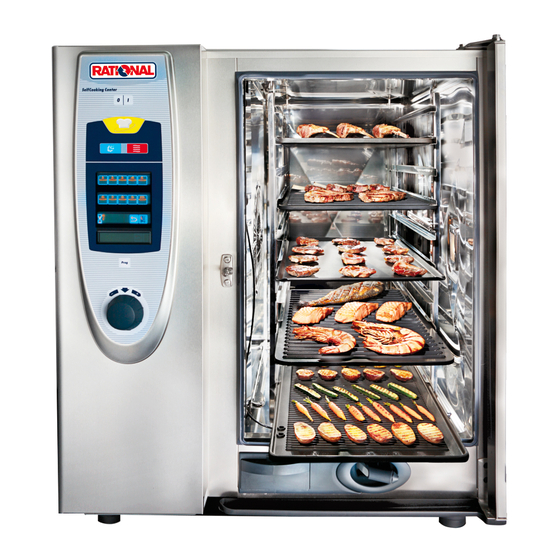
Page 13: Features
Features Appliance serial number (visible only when door open) Draft diverter (gas appliances only, optional) Interior lighting Appliance door with double glass panel Door handle Table-top units: one-handed operation with slam function Floor units: (One-handed operation) Unlocking device to open double glass door panel (inside) Integral and self-draining door drip pan (inside) - Page 14 General User Instructions SelfCooking Control Combi-Steamer-Mode Programming-Mode ® Mode Clean Level Control copy change delete After switching on or operating By operating the Moist Heat, Dry By operating the „Prog” button the SelfCooking Control ® button Heat or Combination Moist Heat you enter Programming- you enter SelfCooking and Dry Heat button you enter...
-
Page 15: Help Function
General User Instructions Your SelfCooking Center has a touch screen. You Central dial ® can enter data on your SelfCooking Center ® by just touching it lightly with your fi nger. You can enter your desired values by rotating the Selecting a function central dial. -
Page 16: Selfcooking Control Mode
SelfCooking Control Mode ® On/Off switch SelfCooking Control ® 9 Modes: Large roasts Pan fries Poultry Fish Side dishes Potato products Egg dishes/desserts Bakery products Finishing ® Function button Programming Mode button Central dial with Push Function - 16 -... -
Page 17: Controls
The remaining cooking time is displayed. Crisping Examples and useful hints on how to cook your Proofi ng volume products like child‘s play can be found in the SelfCooking Center ® user manual. Smooth baking Time settings Delta-T cooking... -
Page 18: Operation
SelfCooking Control Mode – Operation ® We would like to explain the operation by giving After preheating you can change the default you 5 examples. Your User Manual will give you settings as desired within the fi rst 60 seconds. plenty of other helpful tips on how to make preparing meals child’s play, or simply follow the The unit preheats automatically –... - Page 19 SelfCooking Control Mode – Operation ® Note: The required total cooking time is displayed when the cooking time has elapsed and the cooking cabinet door is opened. You can cook different-sized roasts at the same time. To do this, fi rst insert the core temperature probe into the smallest joint.
- Page 20 SelfCooking Control Mode – Operation ® Example 2: Muffi ns Unit preheats automatically – display shows: preheat As soon as the preheat temperature is reached display shows Load Select „Bakery Products“ mode baking with baking moisture Please use the positioning aid. Select „baking“...
- Page 21 SelfCooking Control Mode – Operation ® Note: The requisite cooking time is displayed once the cooking time is up and the cooking cabinet doors have been opened. Discontinuing an operation in SelfCooking Control Mode ® An operation in SelfCooking Control ®...
- Page 22 SelfCooking Control Mode – Operation ® Example 3: „Finishing ® – à la carte” Unit preheats automatically – display shows: preheat As soon as the preheat temperature is reached display shows Load Select „Finishing ® “ mode LevelControl ® LevelControl is automatically activated for ®...
- Page 23 SelfCooking Control ® Mode – Operation „LevelControl “ ® With Level Control you can enter an individual ® time for each of your appliance racks and have it displayed. That way you can always see exactly when each rack is ready. A buzzer sounds and the indicated level fl...
- Page 24 SelfCooking Control Mode – Operation ® Example 4: „Finishing ® – Banquet” As soon as the preheat temperature is reached display shows: Load Select „Finishing ® “ mode plates plates banquet à la carte container coloration bakery Please note that the core temperature probe must pizza produkts be inserted in the ceramic tube on the mobile plate...
- Page 25 SelfCooking Control Mode – Operation ® Example 5: Rice If the core temperature probe is not inserted or incorrectly inserted (see chapter on working with Core Temperature Probe) the buzzer sounds and you see an appropriate message on the display: The cooking process continues once the probe position has been corrected.
-
Page 26: Combi-Steamer Mode
Combi-Steamer-Mode All Combi-Steamer functions are available in Combi-Steamer Mode. You enter Combi-Steamer Mode by operating the Moist Heat, Dry Heat or Combination Moist Heat and Dry Heat button. - 26 -... -
Page 27: Controls
Combi-Steamer Mode – Controls Request current cooking data On/Off switch 3 operating modes: Hold down temperature button (2 sec.) „Moist Heat“ button The following values are displayed: „Dry Heat“ button • current cooking cabinet humidity • current cooking cabinet temperature Combination of •... - Page 28 Combi-Steamer Mode – Moist Heat The fresh steam generator generates hygienic fresh Optional functions, e.g. air speed (excepting steam. CleanJet ® , Descale and Cool Down), may be incorporated. Cooking cabinet temperature can be set to between 30 °C and 130 °C. Cooking methods: Steaming, stewing, blanching, simmering, soaking, vacuum cooking, thawing, preserving...
- Page 29 Combi-Steamer Mode – Dry Heat Powerful heating elements heat the dry air. Cooking Optional functions, e.g. air speed (excepting cabinet temperature can be set to between 30 °C CleanJet ® , Descale and Cool Down), may be and 300 °C incorporated.
- Page 30 Combi-Steamer Mode – Combination of Moist Heat + Dry Heat „Moist Heat“ and „Dry Heat“ cooking modes are or work with combined. This combination creates a hot humid core temperature probe cabinet climate for especially intensive cooking. Cooking cabinet humidity can be defi ned (see 19°C 76°C chapter on ClimaPlus Control...
-
Page 31: Moist Heat
Combi-Steamer-Mode – ClimaPlus Control ® ClimaPlus Control measures and regulates the While cooking is taking place you can see what ® humidity in the cooking cabinet to within one ClimaPlus Control ® is doing: percent. You can set the exact product-specifi c climate for each food in the clima window. -
Page 32: Time Settings, Continuous Operation, Preheating
Combi-Steamer-Mode – Time settings, Continuous operation, Preheat Timer Manual Preheat 0:33 CONT. preheat Rotate central dial to the left. First Continuous operation „Continuous“ appears, then „Preheat“. CONT. Real-time setting Press clock symbol and hold button down until „Continuous“ appears on the display. (see chapter on Appliance Settings). -
Page 33: Working With The Core Temperature Probe
Combi-Steamer-Mode – Working with the Core Temperature Probe The cooking process is regulated by a 6-point core Using the core temperature probe temperature measurement in the food. on frozen food Clean core temperature probe prior to use and cool With the drill bit provided drill a hole in the thickest with hand shower. -
Page 34: Air Speed
Combi-Steamer Mode – Humidifi cation, air speed Humidifi cation Air speed A powerful jet atomises bursts of water and 5 air speeds are available. The appliance operates at distributes it throughout the cooking cabinet. a standard air speed factory setting. Humidifi... -
Page 35: Cool Down
Combi-Steamer Mode – Cool Down You have been operating your appliance at high cooking cabinet temperature and now want to Warning! continue working at low cabinet temperature. • During „Cool Down“ the fan wheel does „Cool Down“ Function lets you cool the cabinet not switch off when the door is opened. -
Page 36: Programming Mode Controls
Programming Mode – Controls It takes no time at all to create your own cooking programs in Programming Mode using the easy-to-understand control concept. Select program Clean Program name New program Level Control New LevelControl program ® copy Copy program Clean change Change program... -
Page 37: Programming Mode
Programming Mode “Programming SelfCooking Mode“ Programming SelfCooking Mode You can copy or adapt the 9 operating modes (Roasts, Grills, Poultry, Fish, Side Dishes, Potato Products, Egg Dishes/Desserts, Baked Products, Finishing ) to meet your individual requirements ® and store them under a new name. A B C D E F H I J K L M Examples:... -
Page 38: "Programming - Combi-Steamer Mode
Programming Mode – “Programming - Combi-Steamer Mode“ Programming Manual-Mode You can store your program, add extra program steps, or end programming. A B C D E F H I J K L M Enter desired program name. Dial letter with central dial and press central dial to select. -
Page 39: Change Program
Programming-Mode “Start, check, change program“ Start program TEST e.g. „Test“ Program Program step 2 Change program Test e.g. „Test“ program Test TEST During program execution the program name and program step appear on the display. Test Note: You can adjust the settings (ClimaPlus Control ®... -
Page 40: Copy Program
Programming-Mode – “Delete, copy programm“ Delete individual programs Copy program e.g. „Test“ program e.g. „Test“ program Test Test delete copy delete A B C D E F H I J K L M Name can be changed as required. If the program name is not changed the Delete all programs appliance allocates a consecutive index number. - Page 41 Welcome to...
- Page 42 We are at the start of a new era in cooperation. You can now become a member of CLUB RATIONAL – the RATIONAL owners’ club – free of charge. As a Club member we will offer you many options to extend your knowledge about cooking with RATIONAL cooking technology.
- Page 43 I have the following RATIONAL SelfCooking Center units: ® (Please note that we will need the serial and software numbers of EACH of your SelfCooking Center units for the ® upgrades to run without error. If you have more than three units, please make a copy of this form.) The serial and software numbers can be displayed using the “Type”...
-
Page 45: Levelcontrol
Programming-Mode – „LevelControl “ ® With Level Control you can enter an individual ® 160°C time for each of your appliance racks and have it displayed. That way you can always see exactly when each rack is ready. The buzzer sounds and the indicated level fl... - Page 46 Programming-Mode – “LevelControl “ ® „Start“ Level Control Program 3 LevelControl programs ® ® e.g. „Test“ program You can activate up to 3 LevelControl ® programs with different cooking times (e.g. broccoli 15 min., spinach 8 min., tomatoes 2 min.) This is subject to the operating mode, climate, cooking cabinet temperature and air speed being identical.
-
Page 47: Program Lock
Programming-Mode – “Program Lock“ Setting Program Lock: Change password Prog Prog Level 1 change password New programs cannot be created when _xxxx „Program Lock“ is set. You can use existing programs, but not change, copy or delete them. enter old password Level 2 A B C D E F H I J K L M... -
Page 48: Cleanjet
CleanJet ® CleanJet ® is the automatic cleaning system for Deselect cooking programmes or control mode. cleaning the cooking cabinet. Note: Attention: For safety reasons CleanJet can only be selected ® For hygiene reasons and to prevent when cooking process is deselected. malfunctions it is essential to clean the unit every day. - Page 49 CleanJet ® open door remove containers You are asked to open the door and remove the container. Stainless steel grids, CombiFry ® and Super-Spike poultry grids can stay in the cabinet during Rinse Aid tablet (blue): Remove outer cleaning. protective foil only. Do not damage the transparent protective fi...
- Page 50 CleanJet ® Start CleanJet medium 0:43 The cleaning time is displayed. do not open door The buzzer sounds for 20 seconds once the selected cleaning program has fi nished. Place Cleaner tablet (white) on top of Rinse 0:00 Aid tablet (blue). Your unit is ready for cooking again.
- Page 51 CleanJet ® Examples of cleaning step selections: Cleaning step Description/application Cleaner/Rinse Aid Rinse without tablets Rinse cabinet with warm water. Rinse For non-greasy limescale deposits Rinse Aid e.g. after baking, working in Moist Heat. Interim cleaning For all deposits – without drying and rinsing. Cleaner Short cleaning time with increased user of Cleaner.
- Page 52 CleanJet /Interrupt CleanJet ® ® Interrupting the CleanJet ® Note: Program: If the unit is again switched off and on during the Abort Program the following appears: If there is a power cut of more than 10 minutes or after the unit is switched off the display shows. manual rinse Interrupt CleanJet The cooking cabinet should then be thoroughly...
- Page 53 CleanJet – Request ® CleanJet ® Request CleanJet request This function allows a fi xed operating hours time to be set for CleanJet ® cleaning. The display shows this message when the set operating time is reached, the activated cooking process is complete or after the unit is switched on.
-
Page 54: Delta T Cooking, 1/2 Power, Power Optimisation Connection
Delta T cooking, 1/2 power, power optimisation connection By gradually raising the temperature in the cabinet 1/2 Power until the cooking process ends and maintaining (Cannot be selected in SelfCooking Control mode!) ® a constant differential to the current core The power consumption of the heating elements in temperature, the meat is cooked more slowly. -
Page 55: Automatic Start Time
Automatic start time If your kitchen setup so requires, you can set your unit to start automatically. Select cooking mode in SelfCooking Control mode, ® Enter automatic start time: manual mode or program and make the desired set-tings (time, cabinet temperature, core tempera- ture etc.). - Page 56 ChefLine , CalcDiagnosis system (CDS) ® ® ChefLine ® CalcDiagnosis system ® (CDS) You are given the opportunity of having the The CalcDiagnosis System rinses and drains the ® ChefLine ® telephone number displayed. steam generator as required by the amount of use.
- Page 57 Steam generator descaling Descaling Note: If the cabinet temperature exceeds 40 °C, the display will show the message Warning! unit to hot • The process described involves working with an aggressive chemical fl uid – danger open door of corrosive burns! •...
- Page 58 Steam generator descaling fill 5 liter descaler Use the appliance manufacturer’s hand pump to very slowly fi ll with the amount of descaling fl uid shown on the display. Guide the hose into the steam inlet up to the Caution! mark shown on the hose.
- Page 59 Steam generator descaling Aborting the descaling process cooking cabinet being rinsed If necessary you can discontinue the descaling process. 1:30 Not yet fi lled with descaling fl uid: Descaling processes and descaling time are shown on the display. Already fi lled with descaling fl uid: Switch unit off and on.
-
Page 60: Descaling The Humidifying Nozzle
Humidifying nozzle descaling Descaling the humidifying nozzle Please check the humidifying nozzle for limescale deposits once a month. Warning! • The process described involves working with an aggressive chemical fl uid – danger Release the union nut of the humidifying nozzle of corrosive burns! (turn anticlockwise –... -
Page 61: Draining The Steam Generator, Unit And Software Identifi Cation, Service-Info
Draining the steam generator, unit and software identifi cation, Service-Info Draining the steam generator Service-Info You can drain the steam generator before moving it The following service notices can be displayed in the or to stop it freezing. Service-Info area. Deselect cooking process. -
Page 62: Usb Data Memory (Usb Stick)
USB data memory (USB stick) USB data storage (USB stick) You can read out cooking programs and HACCP data from the unit with the USB stick. USB stick connected. HACCP data present. You will need the appliance manufacturer’s USB memory stick: Article No.: 42.00.035 The status of the USB data memory is shown on the USB stick connected, HACCP data present, stick is display:... -
Page 63: Haccp Logging, Software Update
HACCP logging, software update There is a continuous output of HACCP process data The following data is logged: via the unit interface. HACCP process data is also Data output every 60 sec (in ASCCII format) stored for a period of 10 days and can be –... -
Page 64: Importing And Exporting Programs
Importing and exporting programs Importing and exporting programs Program import: You can copy your cooking programs to an original USB memory stick made by the appliance manu- Plug USB memory stick into USB interface below facturer. The cooking programs can subsequently be control panel copied to a computer or another unit. -
Page 65: Real-Time, Time Format, Time Format For Cooking Sequences
Real-time, time format, time format for cooking sequences Basic appliance settings can be displayed and Time format for cooking changed. sequences Real-time settings Press the display to change between h:m and m:s settings. Set time format glows red. Possible time settings: h:m setting: hours : minutes m:s setting: minutes : seconds Note:... -
Page 66: Temperature Unit, Enter Ip Address For Ethernet, Language
Temperature unit, enter IP address for Ethernet, language Modifying the basic settings settings Temperature unit setting Enter IP address for Ethernet Your appliance gives you the choice of two temperature units. °C / °F Edit Press the display to change between the temperature units °C and °F. -
Page 67: Factory Default, Buzzer Sound And Time, Display Contrast, Cleanjet ® Prompt
Factory default, buzzer sound and time, display contrast, CleanJet prompt ® Modifying the basic settings settings Factory Defaults Display Contrast setting Briefl y press key 1x, a red frame fl ashes. Hold key down until the background changes from red to blue. Rotate the central dial to change the contrast Press the button to reset the basic settings on the display. -
Page 68: Manual Clean
Manual cleaning Or, instead of cleaning with CleanJet , you can ® clean your unit manually. For hygiene reasons and to prevent Clean malfunctions it is essential to clean the unit every day. If the temperature in the cooking cabinet Warning! exceeds 60 °C the display shows: •... - Page 69 Manual cleaning Close unit door, cleaning starts automatically. Attention: • To stop the high-quality nickel-chromium Follow the appliance menu prompt. steel corroding, your unit must be cleaned regularly, even if it is only operated in 0:50 “Moist Heat” mode. • Leave the appliance door slightly open if it is The cleaning time is shown on the display.
-
Page 70: Maintenance
Maintenance Inspections which shoud only be Changing the interior lighting carried out by experienced staff technicians. Replace the halogen bulb when the interior lighting fails. First switch off the unit at the mains! Cover the outlet inside the cabinet with a cloth and Danger! remove the 4 screws holding the glass retaining •... -
Page 71: Help Function
Maintenance Help Function Replacing the door gasket Help Function The door gasket comprises a vulcanised frame Help texts are fi led in your appliance so that you which slots into a guide on the cooking cabinet. can use its extensive potential as fully and as simply as possible. -
Page 72: Appliance Options
Appliance options Draft diverter Access ramp for 20 x 1/1 and (gas appliances only) 20 x 2/1 GN Exhaust gas pipe diameter: 180 mm UltraVent condensation hood ® SLevels out unevenness in the kitchen fl oor to a maximum of 20 mm in the direction of insertion. Levels out unevenness in the kitchen fl... - Page 73 Appliance options Combi Duo Pedestal fastenings table-top units Floor fastening for fl oor units and base cabinets. Model 6 x 1/1 on 6x1/1 or 10 x 1/1 GN (electric) Model 6 x 2/1 on 6 x 2/1 or 10 x 2/1 GN (electric) Model 6 x 1/1 on 6x1/1 GN (gas) Model 6 x 2/1 on 6x2/1 GN (gas) Standard...
-
Page 74: Fault Indications
Fault indications Any faults developed by your unit will be shown on Faults on your unit which allow you to continue the display: using the unit can be suppressed by pressing the arrow button. Service 26 Tel.: Fault When and how What to do indication Service 10... - Page 75 Fault indications Service 25 Indicated for 30 seconds during CleanJet not functioning! ® CleanJet cleaning • Turn water tap on full ® • Check supply fi lter • Remove containers from cooking cabinet • If you cannot identify the fault please notify Customer Service.
-
Page 76: Troubleshooting
Before you call customer service Error Possible cause To eliminate Water dripping out of the Door is not closed correctly. If the door is closed correctly, the door handle unit’s door will point down on fl oor units. Door seal is worn or Replace the door seal (see the „Maintenance”... - Page 77 Before you call customer service Error Possible cause To eliminate The unit does not indicate a External main switch is Switch on at the main switch. function after it is switched switched off. Fuse on the premises’ Check the fuses on the premises’ distribution distribution board has board.
- Page 78 EU Declaration of Conformity for electrical units Manufacturer: Rational AG Address: Iglinger Straße 62 D-86899 Landsberg, Germany Product: Circulating hot-air oven with steaming unit for commercial kitchens Type designation: SCC 61, SCC 62, SCC 101, SCC 102, SCC 201, SCC 202...
- Page 79 EU Declaration of Conformity for electrical units Manufacturer: Rational AG Address: Iglinger Straße 62 D-86899 Landsberg, Germany Product : Circulating hot-air oven with steaming unit for commercial kitchens Type designation: CM 61, CM 62, CM 101, CM 102, CM 201, CM 202...
- Page 80 EU Declaration of Conformity for gas units Manufacturer: Rational AG Address: Iglinger Straße 62 D-86899 Landsberg, Germany Product: Circulating hot-air oven with steaming unit for commercial kitchens Type designation: CM 61 G, CM 62 G, CM 101 G, CM 102 G, CM 201 G, CM 202 G...
- Page 81 EU Declaration of Conformity for gas units Manufacturer: Rational AG Address: Iglinger Straße 62 D-86899 Landsberg, Germany Product: Circulating hot-air oven with steaming unit for commercial kitchens Type designation: CM 61 G, CM 62 G, CM 101 G, CM 102 G, CM 201 G, CM 202 G...
- Page 82 Notes - 78 -...
- Page 84 UK RATIONAL International 80.01.001 · V-09 · MediaDesign and Services · Ad · 09/06...
Need help?
Do you have a question about the SelfCooking Center and is the answer not in the manual?
Questions and answers