
Related Manuals for Denon AVR-390


Summary of Contents for Denon AVR-390
- Page 1 AV SURROUND RECEIVER AVR-390 Owner’s Manual Bedienungsanleitung Manuel de l’Utilisateur Manual del usuario Инструкция по эксплуатации Instrukcja Obsługi Kullanım Kılavuzu...
- Page 2 łatwo dostępny dla EN60065, EN55013, EN55020, EN61000-3-2 ve EN61000-3-3. użytkownika. 2006/95/EC ve 2004/108/EC sayılı Yönerge hükümlerini takiben. DİKKAT: DENON EUROPE Division of D&M Germany GmbH Ürünün elektrikle bağlantısını tamamen kesmek için fişi, duvardaki An der Landwehr 19, Nettetal, prizden çekiniz. D-41334 Germany Elektrik prizi, cihaza gelen elektriği bütünüyle kesmek için kullanılmakta olup kullanıcının kolayca erişebileceği bir yerde...
- Page 3 TÜRKÇE POLSKI РУССКИЙ ESPAÑOL FRANCAIS DEUTSCH ENGLISH NOTE ON USE / HINWEISE ZUM GEBRAUCH / OBSERVATIONS RELATIVES A L’UTILISATION / NOTAS SOBRE EL USO / ЗАМЕЧАНИЯ ПО ЭКСПЛУАТАЦИИ / WSKAZÓWKI DOTYCZĄCE OBSŁUGI / KULLANIM NOTLARI CAUTION: • The ventilation should not be impeded by covering the ventilation openings with items, such as newspapers, tablecloths, curtains, etc.
- Page 4 ENGLISH DEUTSCH FRANCAIS ESPAÑOL РУССКИЙ POLSKI TÜRKÇE A NOTE ABOUT RECYCLING: This product’s packaging materials are recyclable and can be reused. Please dispose of any materials in accordance with the local recycling regulations. When discarding the unit, comply with local rules or regulations. Batteries should never be thrown away or incinerated but disposed of in accordance with the local regulations concerning battery disposal.
-
Page 5: Table Of Contents
ENGLISH n Contents Operations Surround Modes Menu Map ····················································································· 15 Selecting the Surround Mode······················································ 19 Getting Started Stereo Playback ············································································ 19 Accessories ······················································································ 2 Cautions on Handling ····································································· 2 Menu Operations Parameter Cautions on Installation ································································· 2 About the Remote Control Unit ···················································· 3 Operations ·····················································································... -
Page 6: Getting Started
Check once again that all connections are correct and that there are Convenient Functions ·································································· 28 Thank you for purchasing this DENON product. To ensure proper no problems with the connection cables. Adjusting Each Channel Level with Test Tone ···························· 28 operation, please read this owner’s manual carefully before using the... -
Page 7: About The Remote Control Unit
ENGLISH About the Remote Control Unit Operating Range of the Remote Control Unit Inserting the Batteries Point the remote control unit at the remote sensor when operating q Lift the clasp and remove the rear cover. w Load the two batteries properly as indicated by the marks in the battery compartment. -
Page 8: Part Names And Functions
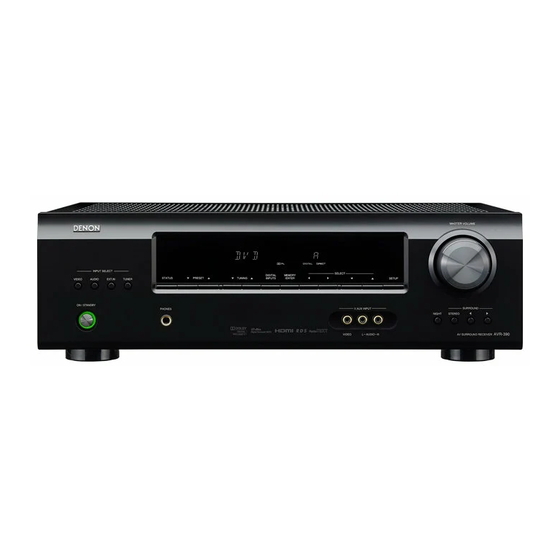
ENGLISH Part Names and Functions For buttons not explained here, see the page indicated in parentheses ( ). Front Panel Display Decoder indicators Tuner reception mode indicators These light when the respective decoders are These light according to the reception conditions y u i operating. -
Page 9: Rear Panel
ENGLISH Rear Panel Digital audio connectors FM/AM antenna terminals HDMI connectors ································ (10 ~ 13) (OPTICAL / COAXIAL) ························ (10 ~ 13) (TUNER ANTENNA) ···································· (14) DOCK CONTROL jack ································· (12) EXT. IN connectors ····································· (14) VIDEO / S-VIDEO connectors ············ (11 ~ 13) Analog audio connectors Speaker terminals (SPEAKERS) ···················... -
Page 10: Remote Control Unit (Rc-1115)
ENGLISH Remote Control Unit (RC-1115) Remote control signal transmitter ·············· (3) Power buttons ············································ (22) Number buttons ········································· (24) PRESETS button ········································· (24) Test Tone button (TEST) ····························· (28) Digital Input button (D. INPUTS) ··············· (22) SURROUND PARAMETER button ·············· (21) SETUP button ·············································... -
Page 11: Connections
With some types of connections, certain settings must be made Cables Used for Connections on the AVR-390. For details, refer to the instructions for the respective connection items below. Select the cables according to the equipment being connected. -
Page 12: Speaker Connections
ENGLISH Speaker Connections Speaker Connections Subwoofer Front speakers Center speaker Speaker Installation The illustration below shows a basic example of installation of the AVR-390 combined with 6 speakers Subwoofer and a monitor. with built-in Subwoofer Center speaker amplifier Front speakers... - Page 13 Carefully check the left (L) and right (R) channels and + (red) and If the core wires touch the rear panel and the screws etc., or the ± – (black) polarities on the speakers being connected to the AVR-390, sides touch each other, the protection circuit will be activated and and be sure to interconnect the channels and polarities correctly.
-
Page 14: Connecting Equipment With Hdmi Connectors
HDMI connector. b The AVR-390 is compatible with 30- and 36-bit Deep Color. b The AVR-390 can be connected to a device equipped with an HDMI output connector using an HDMI cable. b The AVR-390 is compatible with HDMI Ver. 1.3a Deep Color and xvYCC. -
Page 15: Connecting The Monitor
NOTE Because video signals are output from the AVR-390’s monitor output terminal in the same format as the S-Video connector S-Video connector video input signals, the monitor output terminal should be of the same type as the terminal used for input. -
Page 16: Cd Player
NOTE dock for iPod’s operating instructions. The audio signal input to the HDMI input connector cannot be played on the AVR-390. Input the audio signal to the digital audio iPod input connector or analog audio input connector. TV Tuner... -
Page 17: Connecting The Recording Components
When connecting a CD recorder, MD recorder or tape deck to AVR-390, be sure also to connect these • When recording via the AVR-390, the playback device’s cable must be of the terminals beforehand. same type as the cable used to connect the AVR-390’s VCR OUT connector. -
Page 18: Component With Multi-Channel Output Connectors
(vpage 22) (vpage 11). q :Remove the vinyl tie and take out the connection line. • To play copyright-protected discs, connect the AVR-390’s EXT. w :Bend in the reverse direction. IN connector with the DVD player’s analog multi-channel output e-a :With the antenna on top of any stable surface. -
Page 19: Operations
ENGLISH Operations Menu Operations Operations Menu Map Symbols used to indicate buttons in this manual The same operation is possible on the main unit or remote control Button located on both the main unit and the remote BUTTON unit. control unit System Setup (vpage 16) <BUTTON>... -
Page 20: System Setup
ENGLISH System Setup iPod Assign Speaker Setup Power On Level Assign Speaker Configuration This sets the volume set when the main zone’s power is turned Assign control dock for iPod to this source. Select speaker configuration and size (bass reproduction capability). [Display] [Display] [Display] [Assignable input source] [Variable range] VCR DVD CD-R / TAPE... -
Page 21: Subwoofer
ENGLISH : Select this when using large speakers with ample low frequency Distance measurement reproduction capabilities. • This can be set when “Speaker Setup” – “Speaker Configuration” Select the speaker you want to set, then set the distance. – “Subwoofer” is set to “Y”. : Select this when using small speakers without ample low Set the value closest to the measured distance. -
Page 22: Channel Level Setup
ENGLISH Channel Level Setup Adjust channel levels to obtain equal volume from all speakers. w P ress to adjust the level of the selected channel or program Symbols used to indicate buttons in this manual source’s LFE as desired. [Display] [Variable range] Button located on both the main unit and the remote BUTTON... -
Page 23: Surround Modes
ENGLISH Surround Modes Selecting the Surround Mode Stereo Playback Symbols used to indicate buttons in this manual Button located on both the main unit and the remote STEREO SURROUND Select by pressing Select by pressing BUTTON control unit <BUTTON> [Selectable items] [Selectable items] Button only on the main unit [BUTTON]... -
Page 24: Parameter
ENGLISH Parameter Symbols used to indicate buttons in this manual Button located on both the main unit and the remote BUTTON control unit Adjust surround sound parameters. <BUTTON> Button only on the main unit The parameters (items) which can be adjusted differ depending upon the following conditions. [BUTTON] Button only on the remote control unit •... -
Page 25: Night Mode
ENGLISH Night Mode Dolby PLg Music Information Optimized setting for late-night listening. You can adjust the various surround parameters for optimum Set the dynamic range compression of the output audio. surround effect. [Display] [Display] Symbols used to indicate buttons in this manual Button located on both the main unit and the remote BUTTON control unit... -
Page 26: Playback
ENGLISH Playback Selecting the Input Source Preparations Symbols used to indicate buttons in this manual Button located on both the main unit and the remote INPUT SELECT Select the source using BUTTON control unit Turning the Power On The input source changes as follows each time you press <BUTTON>... -
Page 27: Operations During Playback
ENGLISH Checking the currently playing program source, etc. Operations During Playback Listening to FM/AM Broadcasts STATUS Press The current program source and various settings are indicated on Adjusting the Master Volume the display. <MASTER VOLUME> [MASTER See page 29 for tuning interval change mode. Either turn or press For details, refer to “Information”... -
Page 28: Presetting Fm/Am Stations Manually
ENGLISH Presetting FM/AM Stations Manually Performing Preset Search Symbols used to indicate buttons in this manual Up to 30 stations (total for FM and AM) can be preset. [PRESETS] Press Button located on both the main unit and the remote BUTTON control unit This lets you search the receivable broadcast stations from... -
Page 29: Rds Search
ENGLISH Traffic Program (TP) PTY Search TP Search TP identifies programs that carry traffic announcements. Use this function to find RDS stations broadcasting a designated Use this function to find RDS stations broadcasting traffic This allows you to easily find out the latest traffic conditions in your program type (PTY). programs (TP stations). area before leaving home. For a description of each program type, refer to “Program Type TUNER> [BAND] Press <... -
Page 30: Ipod ® Playback
<ON/STANDBY> Make the necessary preparations. [ENTER] Press q S et the iPod in the DENON control dock for iPod. Playback starts. (vSee the control dock for iPod’s operating instructions.) [POWER OFF] w Assign the control dock for iPod’s input. -
Page 31: Viewing Still Pictures Or Videos On The Ipod
• Depending on the type of iPod and the software version, some functions may not operate. When viewing a still picture, perform the same operation as with • DENON will accept no responsibility whatsoever for any loss of ASD-1R or ASD-11R. iPod data. -
Page 32: Other Operations And Functions
Tone First connect the device from which you want to record to the [BUTTON] Button only on the remote control unit AVR-390. The volume level of each channel can be adjusted easily with the test tone function. <INPUT SELECT> Press to choose the input source to <INPUT SELECT>... -
Page 33: Personal Memory Plus Function
ENGLISH Personal Memory Plus Function Special Mode This function sets the settings (input mode, surround mode etc.) last selected for the individual input sources. When you switch to an input source, the settings are automatically set to the ones that were set the last time that input source was Resetting the Microprocessor Tuning Interval Change used. -
Page 34: Other Information
Other Information About Speaker Installation Surround DTS Surround The AVR-390 is equipped with a digital signal processing circuit that DTS Digital Surround Examples of speaker layouts lets you play program sources in the surround mode to achieve the same sense of presence as in a movie theater. -
Page 35: Surround Modes And Parameters
ENGLISH HDMI Surround Modes and Parameters (High-Definition Multimedia Interface) Signals and adjustability in the different modes Signals and adjustability in the different modes HDMI is a digital interface standard for next generation TVs based Parameter (default values are shown in Channel output on DVI (Digital Visual Interface) standards and optimized for use in Surround mode... -
Page 36: Troubleshooting
AVR- parts of the unit. sufficiently. persist, there may be a malfunction. 390, the power • Please re-install AVR-390 in a – In this case, disconnect the power immediately and contact your store of purchase. indicator will flash place having good ventilation. - Page 37 “STEREO”. mode. signals are not HDMI input connector cannot be from surround output from played on the AVR-390. Input the speakers. speakers. audio signal to the digital audio input connector or analog audio No sound is • Subwoofer’s power not turned •...
-
Page 38: Specifications
ENGLISH Specifications Audio section General • Power amplifier Power supply: AC 230 V, 50 Hz Rated output: Power consumption: Front: 300 W 100 W + 100 W (6 Ω/ohms, 1 kHz with 0.7 % T.H.D.) 0.8 W (Standby) 125 W + 125 W (6 Ω/ohms, 1 kHz with 10 % T.H.D.) Maximum external dimensions: 440 (W) x 141 (H) x 377 (D) mm Center: Weight: 8.9 kg... - Page 39 Denon Brand Company, D&M Holdings Inc. Printed in China 5411 10272 005D...
Need help?
Do you have a question about the AVR-390 and is the answer not in the manual?
Questions and answers