Table of Contents
Advertisement
Advertisement
Table of Contents

Related Manuals for LifeCore Fitness LC?R100 Rower


Summary of Contents for LifeCore Fitness LC?R100 Rower
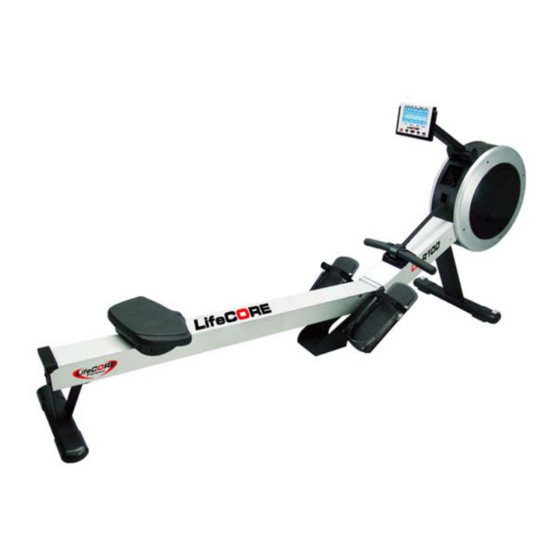
- Page 1 User’s Product Manual LifeCore LC‐R100 Rower ...
-
Page 2: Introduction
In order to make your experience with LifeCORE the best it can be, please review the enclosed user’s manual prior to assembly and first use. Be sure to keep the instructions for reference and/or maintenance. -
Page 3: Table Of Contents
Table of Contents Introduction……………………………………………………………………………………..... Purchaser’s Reference Information …………………………………………………………………. Table of Contents……………………………………………………………………………………… Safety Instructions and Warnings……………………………………………………………………. Assembly Instructions…………………………………………………………………………………. Setting Up Your Rower ………………………………………………………………………………. Correct Rowing Guide ………………………………………………………………………………... Console Operation Instructions ……………………………………………………………………… Calculating Target Heart Rate ………………………………………………………………………. Heart Rate Monitoring Devices………………………………………………………………………. Care and Maintenance ………………………………………………………………………………. Trouble Shooting ………………………………………………………………………………………... -
Page 4: Safety Instructions And Warnings
Safety Instructions & Warnings The LC-R100 Rower is designed and manufactured to meet or exceed all domestic and international safety standards; however, certain precautions need to be followed when operating any exercise equipment. General Safety Instructions: 1. It is important to consult your physician before beginning any exercise program. 2. -
Page 5: Assembly Instructions
Assembly Instructions Step 1: Unpackaging Step 4: Foot Rest Assembly Before assembling your product, distinguish a proper and appropriate location for the unit. Note: For SAFETY REASONS: Additional Clear a big enough working space before assistance may be needed to help lift main unpacking your LC-R100 Rower. - Page 6 Step 6: Rail Assembly Step 5: Rear Stabilizer Assembly Tools Needed: Note: For SAFETY REASONS: Additional 6mm Allen wrench assistance may be needed to help lift rail on to frame. A. Locate the aluminum beam (001) and place Tools Needed: it on top of the carton lid as shown in the diagram below.
- Page 7 Step 7: Seat Assembly Step 8: Seat Carriage Cover Tools Needed: Tools Needed: 6mm Allen wrench Philips screw driver A. Locate the seat (119) and remove the A. Using the Philips screw driver on the preassembled Qty. 4 bolts (300). opposite side of the 6mm Allen wrench, and remove the Qty.
-
Page 8: Setting Up Your Rower
Setting Up Your Rower Powering Unit The R100 has the capacity to run on AC adaptor (ONLY USE A 6v 800mA Adaptor) or 4 C batteries. To prevent damaged to the electronics, it is recommended to only use one power method at a time with the R100 rower. - Page 9 Unfolding the Rail 1) Loosen Clamp Knob: (Image 1) While the rower is in the folded position, rotate the clamp knob (125) counter-clockwise five to seven turns. 2) Lowering the Beam: (Image 2 & 3) Position one hand on the aluminum beam (001) while the other hand pulls down on the clamp knob to release the safety lock.
- Page 10 Sitting Down 1) Position yourself in the middle of the aluminum beam (001). 2) Grab the seat assembly and position it below yourself. 3) With one hand on the seat assembly and one hand on the aluminum beam, slowly sit down. Heel Support Adjustment 1) Squeeze the heel support levers on each side to release the locking mechanism.
- Page 11 4) Adjust the strap by pushing down on the strap release tab, and pull on the inner strap to loosen. 5) Once the foot is properly positioned, pull on the strap to tighten foot securely to foot pedals. Computer Angle Adjustment The computer (714) and computer arm (015) is designed to pivot and adjust to accommodate to almost any users height and view preference.
- Page 12 Handle Bar Holder When you have finished your workout remember to store the handle bar into the handle bar holder (108) as shown in the diagrams below Transportation and Storage 1) Before transporting the rower, make sure the aluminum beam (001) is in the folded position. (Reference Folding the Rail section) 2) As illustrated below, tilt the rower forward until the front transportation wheels are touching the ground.
-
Page 13: Correct Rowing Guide
Correct Rowing Guide Over Reaching Fault Stretching the back or the body is stretched too far forward. (Sore Back) Solution Always keep your back as straight as possible; pull and push with your legs and arms instead. Do not use your back to pull the pull strap out. Rowing with Arms Fault Rowing by pulling the pull strap out with the arms first. - Page 14 Bent Wrists Fault Pulling out the pull strap with the wrist or bent hands. (Sore Forearms) Solution Keep wrists and arms straight at all times. Always rows with flat wrists through the entire stroke. Pulling the Body to the Handle Fault Pulling the body towards the pull strap or crunching forward.
- Page 15 Elbows too High Fault Elbows are sticking out from the body at the finish and the handle is at chest level. (Sore Arms) Solution Pull the pull strap towards the middle of the body. The wrists are flat and the elbows are pulled back towards the body.
-
Page 16: Console Operation Instructions
Console Operation Instructions Please read the console operating instruction thoroughly and familiarize yourself with the console layout before choosing a workout. Going through the console first will give you ideas to the type of workout possibilities you can choose from. Below is the console layout and detailed operation instructions. - Page 17 DISPLAYS Dot Matrix Profile Window: Displays program profile during program setting and executing. The program profile will change according to which program is selected. For resistance profile display: There are 20 columns of LCD representing 20 segments of time; each segment time = total program time divided by 20 columns.
- Page 18 KEYS: There are 5 function keys for program operation. START/STOP Key: Pressing the START/STOP key once will start the program and all data will begin to count. Press the START/STOP key again to stop the computer program. To resume, simply press START/STOP one more time to start program. Press & hold START/STOP key for a couple of seconds to reset the console back to program selection mode.
- Page 19 will be using the machine. User profile information such as height, weight, age, gender information and user profile programs will be saved permanently in each profile unless a user changes them. Setting Up User Profiles: Step 1: Select User Number: Power up the console press the USER button to enter user profiles. Rotate the SELECT dial to choose a user profile U1 - U4.
- Page 20 2. Choose Time: A default 30:00 min will display in the data display window and this number can be changed by increments of 1 min by using the SELECT dial to adjust between ranges of 0 – 99:00min. Press the START/STOP button, start rowing and time and data display windows will start to count.
- Page 21 Intervals programs: There are two types of Interval programs on the R100, Intervals- distance and Intervals- time. The difference between these two programs is in the “INTERVALS-DISTNCE” program, you select a work distance and in the “INTERVALS-TIME” program you select a work time. Interval programs combine short and high intense workouts followed by a short recovery phase;...
- Page 22 User Profile Program: This program is designed for user’s to build the program profile segment by segment “resistance level” before exercising. It provides endless possibilities to keep you motivated. Once you build your unique profile, it will be stored under the associated user number permanently.
- Page 23 3. Choose Watt: A default watt of 100 will display in the data display window. Use the SELECT dial to adjust watt. Press the START/STOP button, start rowing and time and data display windows will start to count. 60%; 75% & 85% Max Heart Rate Control Programs: H.R.C. programs are based off of user profile information (AGE).
-
Page 24: Calculating Target Heart Rate
Calculating Target Heart Rate In order to obtain the greatest cardiovascular benefits from your exercise workout, it is important to work within your target heart rate zone. The American Heart Association defines this target as 60%- 85% percent of your maximum heart rate. Your maximum heart rate may be roughly calculated by subtracting your age from 220. -
Page 25: Heart Rate Monitoring Devices
Heart Rate Monitoring Devices Chest Strap The R100 is equipped with a built-in wireless 5k receiver for your heart rate monitoring transmitter. Please contact your dealer to purchase a compatible 5k chest strap transmitter, if you would like to use more wireless heart rate features. To get an accurate reading using these devices, you will need to be within three feet of the console, and a minimum of four feet from others using a heart rate monitoring device. -
Page 26: Care And Maintenance
Care and Maintenance The LifeCORE R100 is made from the best materials and has been tested and received a quality control review prior to its packaging to ensure the correct parts and proper fitting of each component. The amount of maintenance required is very little and very simple; however, a failure to implement preventative maintenance suggestions can prevent the machine from operating as designed. -
Page 27: Trouble Shooting
Trouble Shooting 1. Issue: Clicking or knocking sound from seat Check wheels on seat rail for cracks. Clean wheels and rail to allow wheels to roll smooth. Use Windex and a paper towel to remove any dirt build up on rail and wheels. Check to see if wheels are tight. -
Page 28: Parts List And Parts Diagram
Parts List & Parts Diagram Page 29 ... - Page 29 Page 30 ...
-
Page 30: Warranty Card
This Limited Warranty does extent to any Product that is damaged or rendered defective; (a) as a result of accident, misuse, or abuse; (b) use with the Product of any part not manufactured or sold by LifeCORE; (c) by modification of the Product;... - Page 31 State to State. LifeCORE does not and has not authorized any person or entity to create for it any other obligation, promise, duty or obligation in connection with this Product. Warranty Registration. PLEASE SEND IN THE ATTACHED WARRANTY CARD WITHIN (10) DAYS OF PURCHASE TO REGISTER YOUR PRODUCT WITH LIFECORE FITNESS.
- Page 32 Customer Service Toll Free (888) 815‐5559 Mon‐Friday 7:30 ‐ 5:30 PT Service@lifecorefitness.com Lifecore Fitness Inc. 2575 Pioneer Ave. Suite 101 Vista, CA 92081 Visit our website for assembly videos: www.lifecorefitness.com ...
Need help?
Do you have a question about the LC?R100 Rower and is the answer not in the manual?
Questions and answers
Loud clicking noise when power is turned on to LC-R100 Rower