
Subscribe to Our Youtube Channel
Related Manuals for Unical Air MFCS 12HI


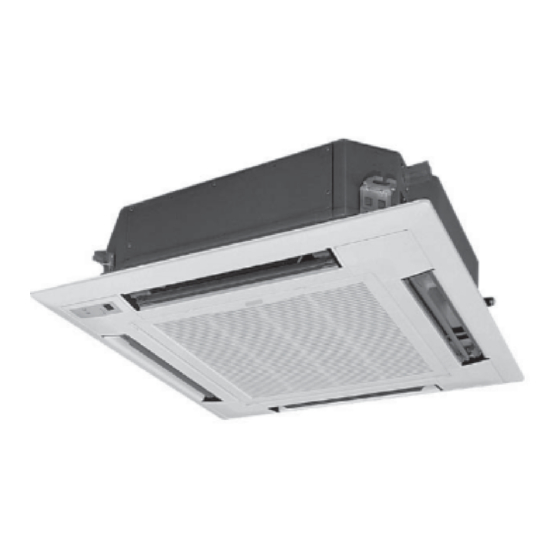
Summary of Contents for Unical Air MFCS 12HI
- Page 1 MFCS 12HI - MFCS 18HI MFCS 21HI FREEMULTI INVERTER CASSETTE AIR CONDITIONER CLIMATIZZATORI D’ARIA A CASSETTA USER MANUAL MANUALE DI USO E MANUTENZIONE...
- Page 2 MFCS 12HI - MFCS 18HI MFCS 21HI FREEMULTI INVERTER CASSETTE AIR CONDITIONER CLIMATIZZATORI D’ARIA A CASSETTA USER MANUAL MANUALE DI USO E MANUTENZIONE...
- Page 3 Togliere le batterie per prevenire eventuali problemi causati da possibili perdite di elettrolito. In caso di accidentale contatto del liquido delle batterie con la pelle, gli occhi, o la bocca, lavare immediatamente con acqua la parte interessata, e rivolgersi ad un medico. Nuovamente grazie. Unical AG S.p.A...
-
Page 4: Table Of Contents
Indice Indice Comando a filo ................................... 4 Vista del comando a filo ..............................4 Display LCD del comando a filo ............................4 Introduzione ai simboli del display LCD .......................... 5 Tasti ................................... 5 Tasti del comando a filo ..............................5 Funzione dei tasti ................................ -
Page 5: Comando A Filo
Istruzioni d’uso 1 Comando a filo 1.1 Vista del comando a filo ® Fig.1 Vista del comando a filo 1.2 Display LCD del comando a filo Fig.2 Display LCD del comando a filo... -
Page 6: Introduzione Ai Simboli Del Display Lcd
Istruzioni d’uso 1.3 Introduzione ai simboli del display LCD Simboli Descrizione Indicatore funzione SWING Indicatore funzione riduzione notturna SLEEP (3 tipi: sleep 1,sleep2 e sleep 3). Indicatore delle modalità di funzionamento dell’unità interna (Raffreddamento, Deumidificazione, Ventilazione e Riscaldamento). Indicatore della funzione di sbrinamento dell’unità esterna . Indicatore della funzione di controllo GATE ( funzione non attiva per questa unità). -
Page 7: Funzione Dei Tasti
Istruzioni d’uso 2.2 Funzione tasti del telecomando Nome Funzione Enter/cancel 1) Attivare o annullare una funzione. 2) Premere per 5 secondi per esaminare la temperatura esterna. 1) Impostazione della temperatura dell’unita’ interna , da 16 a 30°C 2) Impostazione del timer, da:0.5 a 24 hr. 3) Commutazione fra funzione quiet/auto quiet o modalità... -
Page 8: Impostazione Modalità Di Funzionamento
Istruzioni d’uso 3.2 Impostazione modalità di funzionamento Dopo aver premuto “On” per accendere l’unità, premere il tasto Mode per selezionare la modalità di funzionamento come da seguente sequenza: Modalità Auto - Raffreddamento (Cooling)- Deumidificazione (Dry) – Ventilazione (Fan) - Riscaldamento (Heating). -
Page 9: Impostazione Timer
Istruzioni d’uso 3.5 Impostazione Timer Premere Timer per impostare il timer off/on , sul display LCD si visualizzerà “ora xx.x” con ora lampeggiante. Nella modalità Ventilazione (Fan), la temperatura impostata è fissa a 26°C. Esempio dell’ impostazione Timer off a unità accesa (Fig. 8). ®... -
Page 10: Impostazione Riduzione Notturna Sleep
Istruzioni d’uso 3.7 Impostazione riduzione notturna Sleep Sleep on: Premere il tasto “Function” a macchina accesa fino a trovare l’icona Sleep, quidi premere per scegliere Sleep 1 Sleep 2 o Sleep 3, a seguire premere Enter/cancel per confermare l’impostazione. Sleep off: Quando la funzione Sleep e’ attiva premere il tasto “Function” per l’ impostazione Sleep e premere Enter/Cancel per cancellare questa funzione. - Page 11 Istruzioni d’uso Fig.11 Curva temperatura Sleep 2 in modalità raffreddamento. Nella modalità di riscaldamento la temperatura può essere impostata a 16 o tra 17 - 20 , 21 -27 o 28 - 30°C E le loro curve dell Sleep sono indicate nella Fig.12: Fig.12 Curva temperature Sleep 2 in modalità...
- Page 12 Istruzioni d’uso c. Sleep 3 Impostazione della curva di temperatura Sleep 3 (modalità fai da te) Nella modalità Sleep 3 premere pulsante Timer per accedere alle impostazioni Sleep Impostare orari e temperature corri- spondenti e salvare col Tasto “ Enter / cancel”. L’impostazione di regolazione in modalità...
- Page 13 Istruzioni d’uso 3.8 Impostazione Turbo L’unità può funzionare con una velocità “turbo” della ventola per raggiungere un rapido raffreddamento o riscaldamento, in modo che la temperatura della stanza può velocemente avvicinarsi al valore di impostazione. Nella modalità raffreddamento o riscaldamento premere il tasto “ Function” fino a raggiungere l’impostazione Turbo e quindi premere Enter/Cancel per confermare l’impostazione.
-
Page 14: Impostazione Risparmio Energetico "Save
Istruzioni d’uso Impostazione risparmio energetico “Save” Save: la funzione “risparmio energetico” si avrà quando il condizionatore funzionerà con un basso range di temperatura. Impostazione “Save” in modalità raffreddamento e deumidificazione: A unità accesa, premere il tasto “Function” fino a selezionare il parametro “Save” e premere i tasti per impostare il valore limite inferiore di temperatura. - Page 15 Istruzioni d’uso ® ® ® ® ® ® Fig.16 Impostazioni Save per riscaldamento Note: Se si preme il pulsante “Function” per l’impostazione Save e se non ci sono operazioni per 5 secundi dopo aver premuto l’ultimo tasto, le impostazioni Save verranno automaticamente annullate dal sistema, con memorizzazione dei dati di imposta- zione attuali.
-
Page 16: Impostazione Funzione Antimuffa (Blow)
Istruzioni d’uso Funzione Blow: Dopo aver spento l’unità, il ventilatore continuerà a funzionare per evaporare eventuale condensa che potrebbe originare muffe. Nella modalità raffreddamento / deumidificazione, premere il tasto “Function” fino a lla visualizzazione della funzione Blow e quindi premere il tasto Enter/Cancel per attivare questa funzione. Quando la funzione Blow è... -
Page 17: Impostazione Funzione Quiet
Istruzioni d’uso 3.12 Impostazione Quiet La funzione Quiet è di due tipi: quiet e auto quiet. Premere tasto “Function” fino a accedere all’ impostazioni Quite e appariranno sul display “Quiet” o “Auto” lampeggianti; scegliere una delle due opzioni e quindi premere Enter/Cancel per confermare. Quando la funzione Quiet è... -
Page 18: Altre Funzioni
Istruzioni d’uso 3.13 Altre funzioni a Blocco tasti Premendo contemporaneamente i tasti per 5 secondi, si attiverà la funzione di blocco tasti. In questo caso sul display LCD apparirà il simbolo . Dopo di che premere nuovamente questi due tasti contemporaneamente per 5 secondi per uscire da questa funzione. Nello stato di Blocco ogni altro pulsante premuto non darà... - Page 19 Istruzioni d’uso Elenco errori Error Codice di errore Protezione alta pressione Protezione bassa pressione Protezione mandata refrigerante Protezione per sovra-corrente Errore di comunicazione Anomalia portata acqua Conflitto modalità di funzionamneto Protezione antigelo Sbrinamento o ritorno olio in riscaldamento Errore sensore temperature ambiente interno Errore sensore temperatura evaporatore Errore sensore temperature ingresso evaporatore (liquid valve) Errore sensore temperature ingresso evaporatore (gas valve)
-
Page 20: Telecomando
Istruzioni d’uso Telecomando Note: 1) Assicurarsi che non vi siano ostacoli tra il ricevitore dell’unità e il telecomando. 2) Avere cura di non far cadere o lanciare il telecomando. 3) Evitare che alcun liquido entri a contatto col telecomando. 4) Non esporre il telecomando alla luce diretta del sole, non lasciare il telecomando vicino a fonti di calore. 5) Questo è... - Page 21 Istruzioni d’uso 3) TASTO SLEEP Sleep On e Sleep Off possono essere selezionate premendo questo Tasto. Dopo aver acceso l’unità, la funzione Sleep è di default Off. Dopo che l’unità è stata spenta la funzione Sleep, se attiva, verrà cancellata. Quando la funzione sleep è attiva il simbolo sarà...
-
Page 22: Funzioni Generali
Istruzioni d’uso 12) SWING UP/DOWN ( Premendo questo pulsante si può cambiare l’angolazione del flusso d’aria in modo ciclico come segue: 13) AIR ( AIR ON e Air OFF : funzione non attiva. 14) TIMER ON Accensione programmata dell’unità. Premendo questo tasto, verrà visualizzata sul display la scritta “ON” che lampeggierà per 5 secondi; potrà essere impostato l’orario di accensione dell’unità... -
Page 23: Avvertenze
Istruzioni d’uso AVVERTENZE · Collegare il climatizzatore ad una linea elettrica appositamente dedicata, servita da un interruttore magnetotermico di portata adeguata all’assorbimento dell’apparecchio. · Quando il climatizzatore si avvia o si ferma, specie in riscaldamento, si possono sentire degli scricchiolii: questo fatto è dovuto all’espansione termica delle parti che compongono l’apparecchio. -
Page 24: Manutenzioni
Istruzioni d’uso PULIZIA DEI FILTRI Per un buon rendimento del climatizzatore, la pulizia dei filtri è essenziale. FILTRI ANTIPOLVERE · Estrarre i filtri sfilandoli lateralmente, esercitando una leggera pressione nei punti indicati (fig.3). · Pulirli con l’aspirapolvere o lavarli con acqua tiepida e detersivo neutro. - Page 25 Remove the batteries in order to prevent possible problems caused by losses of electrolyte. In case of acciden tal contact of the battery liquid with the skin, eyes or mouth, wash the part immediately with water, and apply to a doctor. Unical AG S.p.A...
- Page 26 Contents Contents Wired Controller ................................Outside View of the Wired Controller ..........................LCD of the Wired Controller .............................. Introduction to the Symbols on LCD ..........................Buttons ..................................27 Buttons on the Wired Controller ............................Function of the Buttons ..............................Operation Instructions ............................... On/Off ..................................
-
Page 27: Wired Controller
User’s Instructions 1 Wired Controller 1.1 Outside View of the Wired Controller ® Fig.1 Outside View of the Wired Controller 1.2 LCD of the Wired Controller Fig.2 LCD of the Wired Controller... -
Page 28: Introduction To The Symbols On Lcd
User’s Instructions 1.3 Introduction to the Symbols on LCD Symbols Description Swing function. Sleep function (3 types: sleep 1,sleep2 and sleep 3). Running modes of the indoor unit (Cooling, Dry, Fan and Heating). Defrosting function for the outdoor unit. Gate-control function (this function is yet unavailable for this unit). Lock function. -
Page 29: Function Of The Buttons
User’s Instructions 2.2 Function of the Buttons Name Function Enter/cancel 1) Function selection and cancellation. 2) Press it for 5s to examine the outdoor ambient temperature. 1) Running temperature setting of the indoor unit, range:16 30 2) Timer setting, range:0.5-24 hr. 3) Switchover between quiet/auto quiet or among sleep1/sleep2/sleep 3. -
Page 30: Mode Setting
User’s Instructions 3.2 Mode Setting Under the “On” state of the unit, press Mode to switch the operation modes as the following sequence: Cooling-Dry-Fan-Heating. 3.3 Temperature Setting Press to increase/decrease the preset temperature. If press either of them continuously, the temperature will be increased or decreased by 1°C every 0.5s,as shown in Fig.6. -
Page 31: Timer Setting
User’s Instructions 3.5 Timer Setting Under the “On”/”Off” state of the unit, press Timer to set timer off/on. Timer on setting: press Timer, and then LCD will display “xx.x hour”, with “hour” blinking. In this case, press to adjust the timing value. Then press Enter/Cancel to confirm the setting. Timer off setting: press Timer, if LCD won’t display xx.x hour, and then it means the timer setting is canceled. -
Page 32: Sleep Setting
User’s Instructions 3.7 Sleep Setting Sleep on: Press Function under on state of the unit till the unit enters the Sleep setting interface. Then setting press to switch among Sleep1, Sleep 2 and Sleep 3. After that, press Enter/cancel to confirm the setting. Sleep off: When the Sleep function is activated, press Function to enter the Sleep setting interface. - Page 33 User’s Instructions Fig.11 Sleep Curve of Sleep 2 in Cooling Mode In the Heating mode, the temperature may be set at 16°C or between 17°C - 20°C, 21°C -27°C or 28°C - 30°C and their Sleep curves are shown in Fig.12: Fig.12 Sleep Curve of Sleep 2 in Heating Mode For example, the temperature in the Heating mode is set at 22°C.Under the mode of Sleep2, the temperature will decrease by 1°C every 1hr.
- Page 34 User’s Instructions c. Sleep 3 Sleep curve setting under Sleep 3(DIY mode) d.Under the mode of Sleep 3, press Timer to enter the Sleep setting. In this case, “1 HOUR” is displayed where the timing value once is displayed and the corresponding temperature with the last Sleep curve setting is displayed where the ambient/preset temperature once in displayed.
-
Page 35: Turbo Setting
User’s Instructions 3.8 Turbo Setting Turbo function: The unit at the high fan speed can realize quick cooling or heating so that the room temperature can quickly approach the setting value. In the Cooling or Heating mode, press Function till the unit enters the Turbo setting interface and then press Enter/cancel to confirm the setting. -
Page 36: Save Setting
User’s Instructions 3.9 Save Setting Save: Energy saving which will result the air conditioner runs in smaller temperature range is realized by setting lower limited value in the Cooling or Dry mode and upper limited value in the Heating mode. Save Setting for Cooling: Under the “On”... -
Page 37: E-Heater Setting
User’s Instructions ® ® ® ® ® ® Fig.16 Save Setting for Heating Notes: 1) If press Function on the Save setting interface or if there is not any operation for 5s after last button press, the Save setting will be canceled automatically by the system, with memorizing the present setting data. 2) When power is on after the power failure, the Save function will be memorized. -
Page 38: Blow Setting
User’s Instructions 3.11 Blow Setting Blow function: After the unit is turned off, the water in evaporator of indoor unit will be automatically evaporated to avoid mildew. In the Cooling or Dry mode, press Function till the unit enters the Blow setting interface and then press Enter/Cancel to active this function. -
Page 39: Quiet Setting
User’s Instructions 3.12 Quiet Setting Quiet function consists of two kinds: quiet and auto quiet. Press Function till the unit enters the Quite setting interface, with “Quiet” or “Auto” blinking. In this case, press to switch between Quiet and Auto and then press Enter/cancel to make a confirmation. When the Quiet function is activated, press Function till the unit enters the Quite setting interface, with “Quite”... -
Page 40: Other Functions
User’s Instructions 3.13 Other Functions a. Lock Upon startup of the unit without malfunction or under the “Off” state of the unit, press at the same time for 5s till the wired controller enters the Lock function. In this case, LCD displays . - Page 41 User’s Instructions Meaning of Each Error Error Code High pressure protection Low pressure protection Discharge protection Over-current protection Communication error Indoor water overflow protection Mode conflict Anti-freezing protection Defrosting or oil returning for heating Indoor ambient temperature sensor open/short circuit Evaporator temperature sensor open/short circuit Indoor unit (liquid valve) refrigerant pipe inlet temperature sensor error Indoor unit (gas valve) refrigerant pipe outlet temperature sensor error...
-
Page 42: Wireless Remote Controller
User’s Instructions Wireless Remote Controller Notes: 1) Be sure that there are no obstructions between the receiver and the remote controller. 2) Do not drop or throw the remote controller. 3) Do not let any liquid into the remote controller. 4) Do not expose the remote controller to direct sunlight or any place where is very hot. - Page 43 User’s Instructions 3) SLEEP Sleep On and Sleep Off can be selected by pressing this button. After powered on, the default is Sleep Off. After the unit is turned off, the Sleep function is canceled. When the sleep function is set already, the symbol will be displayed.
-
Page 44: Guide For General Operation
User’s Instructions 12) SWING UP/DOWN ( The swing angle which circularly changes as below can be selected by pressing this button: This kind of remoter controller is universal. And the three swing statuses of are the same as that of If the swing function is deactivated when the air guide louver is swing up and down, it will stop at the current position. -
Page 45: Warning
User’s Instructions WARNINGS · Connect the air conditioner to its own power socket protected by a thermal-magnetic safety switch suited to the electrical input of the appliance. · When the air conditioner starts or stops, especially during heating, unusual creaking sounds may be heard. This is caused by the thermal expansion of the unit parts. -
Page 46: Maintenance
User’s Instructions FILTER CLEANING Filter cleaning is essential for the good working order of the air conditioner ANTI-DUST FILTERS · Withdraw the filters by pulling them gently sideways and pressing lightly on the indicated points (fig.3). · Clean the filters with a vacuum cleaner or wash them with warm water and mild detergent. - Page 49 - info@unical-ag.com La Unical declina ogni responsabilità per le possibili inesattezze se dovute ad errori di trascrizione o di stampa. Si riserva altresì il diritto di apportare ai propri prodotti quelle modifiche che riterrà necessarie o utili, senza pregiudicarne le caratteristiche essenziali.
Need help?
Do you have a question about the MFCS 12HI and is the answer not in the manual?
Questions and answers