
Related Manuals for SportsArt Fitness 8300


Summary of Contents for SportsArt Fitness 8300
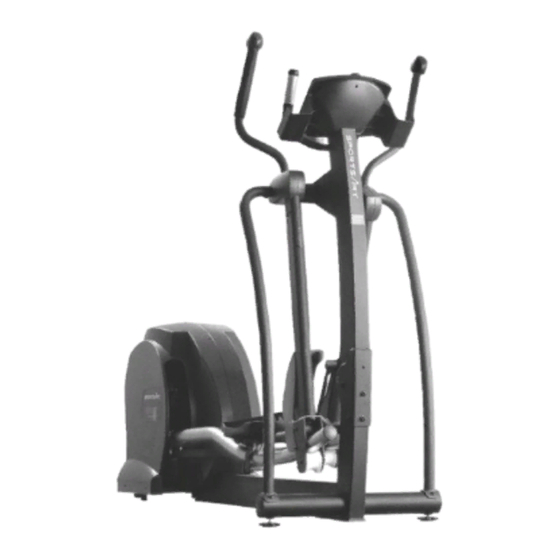
- Page 1 8300 and E8300 Elliptical Trainer – Mechanical Repair Guide Version 2.1. Revised 03-18-05...
- Page 2 Notes: (1) Some parts of this manual refer to the 8300 Elliptical Trainer and no reference to the E8300 is made. Mechanically, the 8300 and E8300 are the same. No effort was made to include the word E8300 on every page.
- Page 3 8300 and E8300 Elliptical Trainer – Mechanical Repair Guide - Contents Chapter 1 – Blowup Diagram and Part List 1-1-1Blowup Diagram and Part List – CONTENTS REMOVED 03-18-05; SEE BLOWUP DIAGRAM. Chapter 2 - Component Removal and Installation Procedures 2-1-1 Access Cover Removal and Installation...
- Page 4 8300 and E8300 Elliptical Trainer – Mechanical Repair Guide Chapter 1 – Blowup Diagram and Part List 1-1-1 Blowup Diagram and Part List CONTENTS REMOVED 03-18-05; PLEASE REFER TO BLOWUP DIAGRAMS AVAILABLE ON THE WEB SITE. Version 2.1 Revised 03-18-05...
- Page 5 8300 Elliptical Trainer – Mechanical Repair Guide Chapter 2 - Component Removal and Installation Procedures 2-1-1 Access Cover Removal and Installation 2-2-1 Stride Motor Removal and Installation 2-3-1 Flywheel Removal and Installation 2-4-1 Flywheel Washer Removal and Installation Version 2...
- Page 6 SportsArt America 8300 Component Removal and Installation Procedures Access Cover Removal and Installation Step 1 - Removal Step 2 - Installation Step 1 Step 4 Remove the access cover by pressing up (1), then Reinstall the access cover by pressing in (3), then pulling out (2) as shown above.
- Page 7 SportsArt America 8300 Component Removal and Installation Procedures Stride Motor Removal and Installation Step 1 Step 2 Use these instructions when calibrating or replacing the Press the stride key on the display or the stride switch until stride motor sets.
- Page 8 SportsArt America 8300 Component Removal and Installation Procedures Stride Motor Removal and Installation Step 3 Screw Types in the Shoulder Cover Tape Use tape to secure the inner cover (A). Remove the six Remove the screws in this order: (1) Remove the screws that secure the outer cover (B).
- Page 9 SportsArt America 8300 Component Removal and Installation Procedures Stride Motor Removal and Installation Step 4 Step 5 Remove the stride linkage bushing cover (B). Remove the First, loosen the mushroom-head Phillips screw (C) that holds inner hex head bolt (A). Detach the stride linkage.
- Page 10 SportsArt America 8300 Component Removal and Installation Procedures Stride Motor Removal and Installation Step 6 Step 7 Remove the mushroom-head Phillips screws shown above First, remove the protective bracket on the stride motor set. (A). Pull the stride motor set upward to remove it.
- Page 11 SportsArt America 8300 Component Removal and Installation Procedures Stride Motor Removal and Installation Step 8 Step 9 馬達 Motor 軸心 Connector 油嘴 Zirc fitting In installing the stride motor set, note that the stride linkage Use the stride linkage connector to guide the stride motor connector must face the stride linkage.
- Page 12 SportsArt America 8300 Component Removal and Installation Procedures Stride Motor Removal and Installation Step 10 Step 11 Before installing the stride support assembly, put the washers Connect the VR, motor, and switch wires, then stuff the in place on the pedestal shaft, with the regular washer on the connectors into the stride support arm.
- Page 13 SportsArt America 8300 Component Removal and Installation Procedures Stride Motor Removal and Installation Step 12 Step 13 Tape Put the stride support assembly in place. Put on washers as Put the outer cover in place. Screw in the five screws. And follows: Teflon washer (A), Teflon side facing the stride remove the tape.
- Page 14 SportsArt America 8300 Component Removal and Installation Procedures Stride Motor Removal and Installation Outer Cover Screws Step 14 First screw in the metal screws (2), then the sharp screws (1). Install the stride linkage as shown. Put the flat washer (B) on the stride linkage screw (A), and tighten down the screw.
- Page 15 SportsArt America 8300 Component Removal and Installation Procedures 8300 Stride Motor Removal and Installation Step 15 Put support arms in place. Then tighten support arm screws to complete the job. A. Mushroom-head hex screws (5/16”*L19) Support washer (D18*d8.5*t2); support washer (D20*d7*t2.0)
- Page 16 SportsArt America 8300 Component Removal and Installation Procedures Flywheel Removal and Installation Step 1 Step 2 Remove the 14 mushroom-top Phillips-head screws (A) Remove the mushroom-top Phillips-head metal screws (A) from the rear cover, and remove the cover from the unit as from the guard panel (A) and remove the finger guard as shown.
- Page 17 SportsArt America 8300 Component Removal and Installation Procedures Flywheel Removal and Installation Step 3 Step 4 Remove the mushroom-top inner hex screw from the Loosen the nut (C) and screw (A) that attaches the generator left-side knuckle, and pull the knuckle off the crank.
- Page 18 SportsArt America 8300 Component Removal and Installation Procedures Flywheel Removal and Installation Step 5 Step 6 Detach the idler pulley springs (A), and remove the Disconnect the magnet wires as shown. multi-channel belt (B) (460J7). Note: When removing idler pulley springs, pull from both ends to maintain even pressure, preventing the springs from loosing their flexibility and wearing out early.
- Page 19 SportsArt America 8300 Component Removal and Installation Procedures Flywheel Removal and Installation Step 7 Step 8 Remove the flywheel nut (B) and washer (A). Remove the nut (B) and washer (C) that secures the flywheel in place. Then remove the flywheel.
- Page 20 SportsArt America 8300 Component Removal and Installation Procedures Flywheel Removal and Installation Step 9 Step 10 Insert the axle of the new flywheel into the flywheel Put the flywheel washer (B) in place on the axle, with the bracket on the frame. Lift the magnet (D) up into the washer protrusion facing back, then hand-tighten nut (A) into flywheel attachment screw (C).
- Page 21 SportsArt America 8300 Component Removal and Installation Procedure Flywheel Removal and Installation Step 11 Step 12 Connect magnet wires as shown. Put the drive belt (B) (440J5) in place, making sure that it meshes well on the drive pulley. Then gradually tighten nut (C) onto the generator screw (A).
- Page 22 SportsArt America 8300 Component Removal and Installation Procedures 8300 Flywheel Removal and Installation Step 13 Step 14.1 Put belt (C460J7) onto the wheel and adjust the idler pulleys Inspect the Installation (A) so the belt sits well. Rotate the flywheel (C) so the belt 1.
- Page 23 SportsArt America 8300 Component Removal and Installation Procedures Flywheel Removal and Installation Step 14.2 Step 14.3 Inspect the Installation Inspect the Installation 2. Rotate the crank and press the LEVEL up key on the 3. Rotate the crank and inspect whether a steps-per-minute display.
- Page 24 SportsArt Industrial 8300 Component Removal and Installation Procedures Flywheel Removal and Installation Step 15 Step 16 Install washer (A) and wave washer (B) onto the crank Put the guard panels in place and screw in their mushroom-top arm. Then install the left side of the knuckle (C) onto the Phillips-head metal screws.
- Page 25 SportsArt America 8300 Component Removal and Installation Procedures Flywheel Removal and Installation Step 17 Install rear covers onto unit. Tighten the mushroom-head Phillips screws to complete the job. Note: The cover attachment plate on the unit frame has three holes in it, making it easy to screw the cover onto the wrong hole.
- Page 26 SportsArt America 8300 Component Removal and Installation Procedures 8300 Flywheel Washer Removal and Installation Step 1 Step 2 Remove the 14 mushroom-top, Phillips-head screws (A) Remove the mushroom-top, Phillips-head metal screws (A) from the cover, then remove the cover as shown.
- Page 27 SportsArt America 8300 Component Removal and Installation Procedures Flywheel Removal and Installation Step 3 Step 4 From the left side glide rail, remove the mushroom-top Loosen the outer hex-head screw (A) and nut (C) from the inner hex screw. Then remove the glide rail.
- Page 28 SportsArt America 8300 Component Removal and Installation Procedures Flywheel Washer Removal and Installation Step 5 Step 6 From the left side, remove the idler pulley springs (A) and Remove the nut (B) and flywheel washer (A). the multi-channel belt B(460J7).
- Page 29 SportsArt America 8300 Component Removal and Installation Procedures Flywheel Washer Removal and Installation Step 7 Step 8 Put the flywheel washer (C) in place on the spindle Put generator belt B(440J5) in place. Rotate the flywheel to (B), inserting the protruding part of the washer make sure that the belt channels mesh in the grooves.
- Page 30 SportsArt America 8300 Component Removal and Installation Procedures Flywheel Washer Removal and Installation Step 9 Step 10.1 Install the multi-channel belt (C460J7) onto the flywheel. Inspect the work: Adjust the idler pulleys (A) so that the idler pulleys ride on 1.
- Page 31 SportsArt America 8300 Component Removal and Installation Procedures Flywheel Removal and Installation Step 10.2 Step 10.3 Inspecting the Installation Inspecting the Installation 2. Turn the crank and operate the display. Inspect 3. Turn crank and operate the display. Inspect whether the resistance operation.
- Page 32 SportsArt America 8300 Component Removal and Installation Procedures Flywheel Removal and Installation Step 11 Step 12 Put the flywheel washer (A) and the wave washer (B) on Hold the finger guards in place and secure them with the the crank. Put the knuckle (C) onto the crank. Then put mushroom-top Phillips-head metal screws.
- Page 33 SportsArt America 8300 Component Removal and Installation Procedures Flywheel Removal and Installation Step 17 Install covers and fasten them with the mushroom-top, Phillips-head screws, to complete flywheel installation procedure. Note: In installing covers, because the cover attachment plates on the frame have three screw holes, it is easy to make a mistake.
- Page 34 8300 Elliptical Trainer – Mechanical Repair Guide Chapter 3 - Troubleshooting 3-1-1 Pulsating Vibration Version 2 Revised 09-28-04...
- Page 35 SportsArt America 8300 Troubleshooting: Pulsating Vibration Problem: Exercise on the unit. There’s a pulsating vibration felt especially in the feet. Order Item Reason for Abnormality Inspection Procedure a. Inspect the flywheel belt for Some belts are longer than others due to spec issues or signs of damage.
- Page 36 8300 Elliptical Trainer – Mechanical Repair Guide Chapter 4 – Design Change Record 4-1-1 Changes Due to Rust Issue 4-2-1 Change to Prevent Foam from Sliding Down Version 2 Revised 09-28-04...
- Page 37 SportsArt America 8300 Design Change Record: Changes Due to Rust Issue Problem: Unit frame, frame support, stride support arm, glide rail, and external screws rusted. Resolution: A. Added covers to prevent water from entering the stride support arm. (Appendix I) B.
- Page 38 SportsArt America Appendix II Screw Cap B 08093025R 169A 2 Screw Cap C 08093022R 173A 2 Part Part Number (pcs) Screw Cap D 08093023R 2 Screw Cap E 08093024R 076A 2 Assembly Illustration Component Use in M5 Hole Use on Axle...
- Page 39 SportsArt America Appendix III Mushroom-head, Phillips-head 002209058 screw Part Part Number Flat washer 003301050 (pcs) Mushroom-top, inner hex screw 002203008 Assembly Illustration Component Illustration M5*0.8*L16 1/4”D19*t1.0 1/4”L3/4” 4-1-3...
- Page 40 SportsArt America Mushroom-top, inner hex screw 002203018 Support arm washer 003305011 Part Part # 26A Support arm washer 003305010 (pcs) Mushroom-top, inner hex screw 002203008 Assembly Illustration Component Illustration 5/16”*L19 D18*d8.5*t1.2 1/4”*L3/4” D20*d7*t2.0 4-1-4...
- Page 41 SportsArt America Round-top, Phillips-head screw 002211077 Flat washer 003301054 Part Part Number Round-head, Phillips-screw 002211077 (pcs) Mushroom-top, Phillips-head 002209058 metal screw Assembly Illustration Component Illustration 5/32*D11*t1.0 M4*P0.7*L8 M5*0.8*L16 4-1-5...
- Page 42 SportsArt America Beveled inner hex (pivot) screw 002202021 Flat washer 003301051 Part Part Number Mushroom-top, inner hex screw 002203031 (pcs) Beveled, Phillips-head metal 002208032 screw Assembly Illustration Component Illustration 3/8”*L1 3/8”*L3/4 3/8*D20*t3.0 M4*L10 4-1-6...
- Page 43 SportsArt America Mushroom-top, inner hex screw 002203018 Flat washer 003301053 Part Part Number (pcs) Mushroom-top, inner hex screw 002203018 Flat washer 003301052 Assembly Illustration Component Illustration 5/16”*L19 5/16”D29*t2.0 5/16”*L19 5/16”D19*t1.5 4-1-7...
- Page 44 SportsArt America 8300 Design Change Record: Change to Prevent Foam from Sliding Down Problem: The foam under stride/level switches slid down and was difficult to get back in place. Resolution: A. Mechanism to attach the foam to the unit was changed. (See Appendix I.) B.
- Page 45 SportsArt America Appendix 1 If the foam below stride/level adjusters slips down, secure it back in place as follows. Step 1 Step 2 Remove the mushroom-top, Phillips-head screw (A) Push from the bottom to slide the foam (A) back into place.
- Page 46 SportsArt America Appendix 1 Step 3 Step 4 Insert screw (A) into washer (B) and fasten onto unit as Roll up a small part of the foam, and squirt a dab of quick-dry shown. First measure the position of the hole, so you glue (Cyanoacrylate Adhesive), then put the foam back in place.
- Page 47 SportsArt America Appendix 1 Step 5: The Finished Product 4-2-4...
Need help?
Do you have a question about the 8300 and is the answer not in the manual?
Questions and answers