
Summary of Contents for Meos dvd121b
- Page 1 12.1” portable tv/dvd player dvd121b Instruction manual PLEASE READ CAREFULLY BEFORE USE...
-
Page 3: Table Of Contents
Table of Contents INTRODUCTION .............5 How to Use this Manual ..............5 Controls and Connectors..............6 Remote Controller ....................7 Power and battery-charging ...............7 Connecting a TV aerial................8 Connecting to a TV................9 Reading a USB Device or Memory Card ..........9 Connecting AV Equipment ...............10 Using your Player as a PC Monitor..........11 PLAYING DVD/CDs ............12 Inserting a Disc ...................12... - Page 4 Viewing Digital TV ................19 Changing Channels................19 Using the EPG..................20 Recording Digital TV .................21 Direct Recording....................21 Recording from the EPG ..................21 Manually Scheduling a Recording................22 Replaying Recorded Programs ............24 Using the Hot Key ....................24 From the Digital TV Menu...................24 Deleting Recordings................24 PLAYING GAMES............25 NES Games ..................25 Onboard Games .................26...
- Page 5 Configuration......................34 Using Parental Control ..................37 IN-VEHICLE USE ............38 Fitting the Headrest Bracket............38 Mounting the Player................38 Releasing the Player................38 TROUBLESHOOTING ..........39 TV ......................39 DVD......................40 General....................40 10. SPECIFICATION............42 Features ....................42 Technical Details ................43 Accessories..................44...
-
Page 7: Introduction
INTRODUCTION Thank you for buying the Meos 12.1” Portable TV/DVD Player. The 12.1” Portable TV/DVD Player supports both digital DVB-T (Freeview) and analog TV formats. It is a DVD and CD Player, a digital photo viewer, it can play and rip CDs, offers AV input and output, reads USB devices and SD memory cards. -
Page 8: Controls And Connectors
Controls and Connectors... -
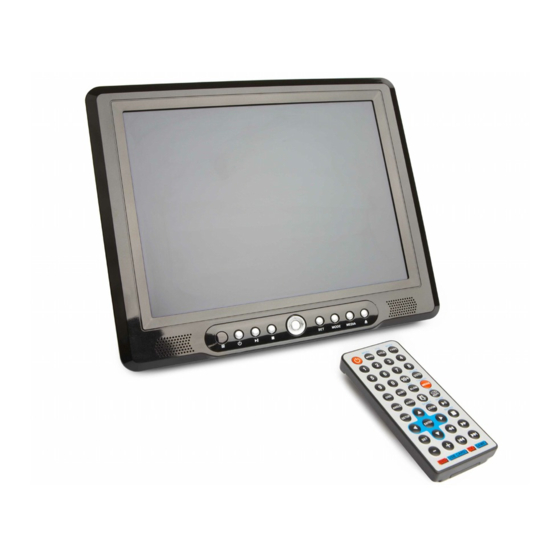
Page 9: Remote Controller
Remote Controller Many of the buttons support different functions in the player’s DVD and DVB-T modes. Blue text indicates general functions (shown here), black text relates to a button’s function in DVD mode (see page 13) and green text describes the buttons function in DVB-T mode (see page 19). -
Page 10: Connecting A Tv Aerial
Connecting a TV aerial Whether you intend to view analog or digital (Freeview) TV, you will need to connect your player to a good quality and compatible antenna or aerial. Use a connection to an external, roof-top, aerial if possible. You may be able to get good reception using an indoor aerial but this will depend on the transmission strength in your area and the positioning of the aerial. -
Page 11: Connecting To A Tv
Connecting to a TV You can connect the player to your TV set to view DVDs, play games or view photos on a bigger screen. Reading a USB Device or Memory Card When you are using the player as a digital TV, you can record programmes to the USB device or memory card and view them at a future time. -
Page 12: Connecting Av Equipment
Connecting AV Equipment Connect the cable from your device to the AV port on the right side of the unit. To view the output from the connected AV device, press the MODE button on the remote controller or the player. Use the arrow keys to highlight AV and then press the ENTER?OK button. -
Page 13: Using Your Player As A Pc Monitor
Using your Player as a PC Monitor You can use the Player to view any compatible VGA output from, for example, a PC or another DVD Player. The unit only supports VGA signals with a refresh rate of 60Hz and a screen resolution of 800 X 600 (or less). Connect the VGA cable to your PC. -
Page 14: Playing Dvd/Cds
PLAYING DVD/CDs This section describes how you can use your player to view DVDs or listen to audio CDs. If you have a data disc, and want to play audio files, or view photos or videos, read the first section, Inserting a Disc, and then turn to page 27. Inserting a Disc Switch the player on. -
Page 15: Playing Audio Cds
Playing Audio CDs If the disc is a music CD, a small display across the top of the screen shows track and time information. Press the OSD button on the remote controller to change the time information (time into track, time remaining in track, time into CD or time remaining on CD) or hide the display. -
Page 16: Setting Parental Controls
Setting Parental Controls The player allows you to set a rating to define the type of DVDs that can be viewed. The MPAA (Motion Picture of America) ratings correspond closely with other international rating systems: KID SAFE Suitable for all children - especially preschool children. General audiences. -
Page 17: Receiving Analog Tv
RECEIVING ANALOG TV Have you connected an antenna? To receive analog TV transmissions, the player must first be connected to a compatible antenna (see page 8). Select Analog TV Mode Switch the player on. Change to the Analog TV mode. Press the MODE button on the remote controller or the player console;... -
Page 18: Receiving Digital Tv (Freeview)
RECEIVING DIGITAL TV (FREEVIEW) This chapter describes the digital TV functions of the player: How to set up the signal How to view TV using the remote controller and the buttons on the player How to record and playback programs Getting Started Have you connected an antenna? To receive digital TV transmissions, the player must first be connected to a compatible antenna (see page 8). - Page 19 Select the OSD Language e.g. English. This is the language used to display commands and options in the DVB Setup menu. Set your Country e.g. England. If you select the wrong area, the player will not be able to locate any TV channels.
-
Page 20: Setting Up Digital Tv At Other Times
Setting up Digital TV at Other Times You can set up the digital reception at any time from the DVB-T Setup menu. Press the Setup button on either the player’s console or on the remote controller. The Main Menu is displayed. Select the Digital TV option and then press the OK/Enter button. -
Page 21: Viewing Digital Tv
Viewing Digital TV The Remote Controller provides you with full control of the player in its digital TV mode. In addition, you can change channels and adjust the volume directly, using the controls on the player itself. Infrared transmitter DVB-T Setup Menu Teletext On/Off Mode... -
Page 22: Using The Epg
Using the EPG The EPG lists the digital channels, shows information about current and future programs on each channel and allows you to program recordings. Press the EPG button on the remote controller to view the Electronic Program Guide in its Daily mode. -
Page 23: Recording Digital Tv
Recording Digital TV You can record the programme you are currently viewing or schedule the recording of a programme using the Player’s timer function. The player can only record programmes to a connected USB device such as an external hard drive or USB memory stick. If you want to record to a memory card, you will need to purchase a suitable USB adapter. -
Page 24: Manually Scheduling A Recording
Manually Scheduling a Recording You can set up the player to record a TV or Radio channel at a specific time and date using the Player’s Wakeup Timer function. You can define to 10 timed events. To set up a timed recording: Press the Setup button on either the player or remote controller. - Page 25 Press the Enter/OK button when you have finished editing the details of the scheduled task. Press the Setup or Return/Exit button to return to the Configuration menu. Further presses of the buttons will return you to the Main Menu and finally to the digital TV mode.
-
Page 26: Replaying Recorded Programs
Replaying Recorded Programs There are two ways you can replay programs recorded on a memory device: By using the ‘Hot’ key: the yellow button is pre-programmed to playback recorded TV. Through the Disk Manager. Using the Hot Key Switch off the player. -
Page 27: Playing Games
PLAYING GAMES You can also use you Player to play games. The player comes with a CD featuring 300 NES (Nintendo Entertainment System) game. The player also has three on- board games: Mine, Tetris and Gomuko. NES Games To play the games on the CD: Switch the player off. -
Page 28: Onboard Games
Onboard Games The player has three onboard games: Mine, Tetris and Gomoku, and these can be accessed from the Game option on the DVB-T Setup menu. To access these games: Press the Mode button until the player enters its DVB-T (Digital TV) mode. -
Page 29: Photos, Music And Video
PHOTOS, MUSIC AND VIDEO You can use the player to play media stored on a memory card, USB device or CD. This includes photos, music, video and NES games. For photos, you can use the player as a digital photo frame and view an automatic slideshow of your photos. -
Page 30: Viewing Photos
The player displays music files, if any are present, but you can change the view to Photos, NES Games or Videos by selecting the buttons across the bottom of the screen. Use the arrow keys to select the required media type. Use the Up and Down arrow keys to browse through the available folders. -
Page 31: Changing Settings
CHANGING SETTINGS The player provides many options to customize the way that it displays media. Adjusting the player’s picture To adjust the picture of the player, press the SET button on the remote controller or on the player itself. The Picture menu is displayed. Further presses of the Menu button display the CHANNEL, FUNCTION and OSD menus. -
Page 32: Changing The Dvd Setup
Changing the DVD Setup To change the way the device plays DVDs, press the Setup button on either the remote controller or on the player itself. System Setup TV SYSTEM Choose the video format: NTSC/PAL/AUTO (default) POWER RESUME HD OUTPUT Select HD display modes: 720P or 1080i or disable HD mode. -
Page 33: Audio Setup
DIVX[R] VOD: The player allows you to watch downloaded DIVX movies. To do so, you need to create an account and activate your player using its 8- character Registration Code. Visit http://vod.divx.com for details. Audio Setup AUDIO OUT: Choose format: SPDIF/OFF, SPDIF/RAW or SPDIF/PCM MIC SETUP: Auto or OFF KEY: Adjust the audio tone: # / +4 / +2 / 0 / -2 / -4 / b ECHO: OFF: / 2 / 4 (default) / 6 / 8... -
Page 34: Changing The Dvb-T Setup
Changing the DVB-T Setup To adjust the settings for digital TV, press the Setup button on either the remote controller or the player itself. Then select the Digital TV option. The Digital TV menu allows you to configure all aspects of digital TV viewing including manual searching for channels. -
Page 35: Installation
Channel Sorting This menu offers three ways to sort and organize the channel list: By Country By FTA or Scrambled By Channel No. or alphabetical order. Channel Grouping The channel grouping menu allows you to organize channels into seven categories: News, Science, Sport, Movies, Kids, Music and Fashion. -
Page 36: Configuration
Manual Search Pick a channel number for the search and then press the Enter/OK button. If the player identifies any channels, the information will be added to the channel list. Auto Search Use this option to search for channels in a specific range of frequencies. Configuration The Configuration option allows you to change the appearance and... - Page 37 Aspect Ratio: Set the aspect ratio of the displayed image: 4:3 PS (the picture is cropped to fit the screen – some of the picture may be lost at the edges). 4:3 LB (Letterbox – the picture is reduced to fit the screen; there may be black bands along the sides of the image).
- Page 38 Wakeup Timer Use this menu to manage timed events. You can set up to ten timed events such as the scheduled recording of TV programs, switching the unit on or off or displaying messages. The use of the Wakeup Timer for recording TV programs has been described on page 22.
-
Page 39: Using Parental Control
Using Parental Control The player has a parental control feature: you can apply a ‘Lock’ to password- protect one or more digital TV channels. The password is a 4-digit PIN code; the default PIN is "0000". You should change this as soon as possible – see ‘How to Change the PIN’... -
Page 40: In-Vehicle Use
IN-VEHICLE USE Your player is designed for use by rear seat passengers within a vehicle. The standard accessories include a headrest mounting bracket and a 12V cigar lighter socket power lead/adapter. Fitting the Headrest Bracket Take out the headrest bracket from the accessories box and unfasten the two velcro strips. -
Page 41: Troubleshooting
TROUBLESHOOTING I can’t get a TV signal Check the antenna: is it disconnected, damaged or misaligned? Use an aerial known to receive a strong signal when used with other TV sets. Does the antenna feed through a distribution system? This may reduce the strength of the signal. Does your area have a good signal? For digital TV (Freeview) check that you are in a good area for Freeview broadcasts. -
Page 42: Dvd
The Player cannot play a DVD Have you changed the player’s mode to "DVD" by pressing the "DISC/USB/CARD" button? How do you turn the subtitles off in DVD mode? Press the SUB button on the remote controller (see page 13). Can the player read "DVD+R"... - Page 43 An MPEG4 disc plays with sound but no picture There are several MPEG4 disc formats; the player only supports the "home theatre 640 x 480” format. Some MPEG4 files can only be played on a PC or other device capable of higher screen resolutions. How do I start a game from the CD? Use the numeric keys on the remote controller to select the game;...
-
Page 44: 10. Specification
10. SPECIFICATION Features 12.1 inch TFT (16:9), RGB resolution 800x 480 pixels. Receives European Standard DVB-T Digital TV. Use in England, Germany, Italy, France, Portugal, Spain, Netherlands, China, and Taiwan. Record digital TV programs in the MPEG2 format file and save to a memory card (via the USB port only) or USB device. -
Page 45: Technical Details
Technical Details DVD Video D/A Video D/A Converter 10 bit Converter Horizontal resolution 500 lines DVD audio Frequency response 20Hz-20kHz output Dynamic range 80db Audio D/A converter 96kHz / 24bit Specifications TFT Panel 12.1(4:3) 800 x 600 or 1024 x 768 pixels Signal system PAL / NTSC / AUTO Power source... -
Page 46: Accessories
Accessories Remote controller Car power adaptor User's manual Game controller Antenna Earphones AC / DC adaptor Audio/Video cables Headrest bracket VGA connect cable Because of continuous improvements, we reserve the right to modify product designs and specifications without notice.
Need help?
Do you have a question about the dvd121b and is the answer not in the manual?
Questions and answers