JVC GY-HM100U Instructions Manual
Hd memory card camera recorder
Hide thumbs
Also See for GY-HM100U:
- Quick start manual (49 pages) ,
- Manual (34 pages) ,
- Brochure & specs (14 pages)

Related Manuals for JVC GY-HM100U


Summary of Contents for JVC GY-HM100U
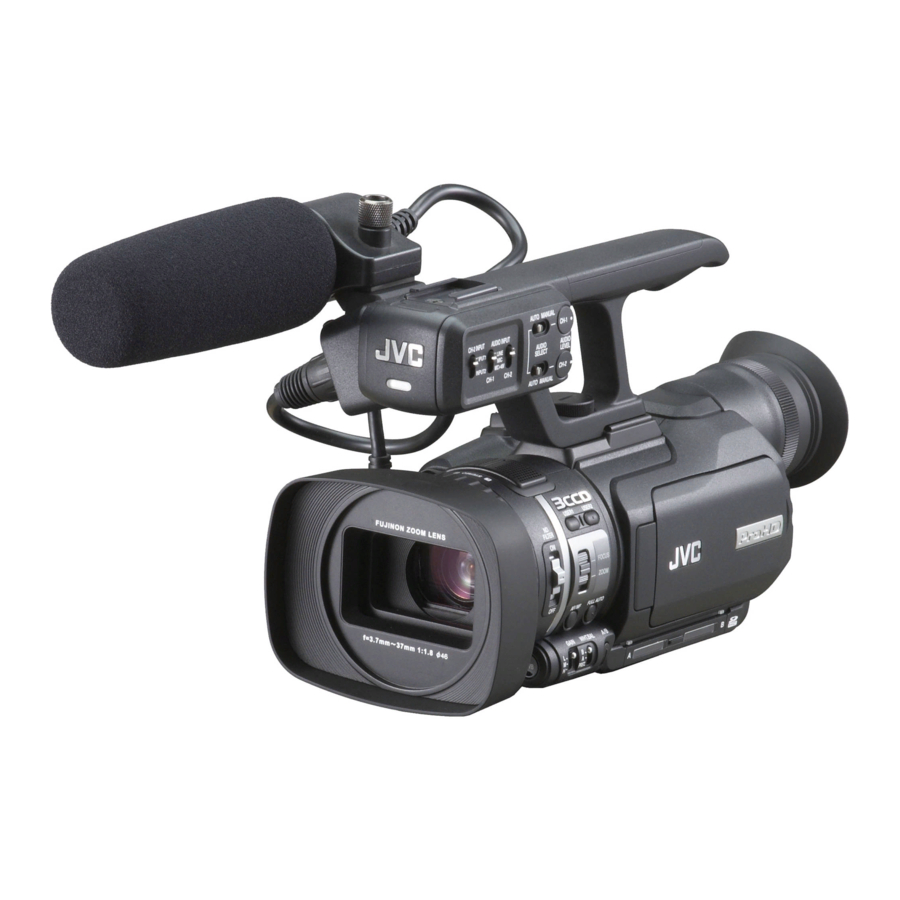
- Page 1 HD MEMORY CARD CAMERA RECORDER GY-HM100U INSTRUCTIONS イラストは GY-HM100 に付属のマイクを取り付けた例です。 The illustration shows the GY-HM100U with the provided microphone attached. For Customer Use: LYT2089-001D...
-
Page 2: Getting Started
Getting Started Safety Precautions CAUTION CAUTION CAUTION RISK OF ELECTRIC SHOCK RISK OF ELECTRIC SHOCK RISK OF ELECTRIC SHOCK DO NOT OPEN DO NOT OPEN DO NOT OPEN CAUTION: CAUTION: CAUTION: TO REDUCE THE RISK OF ELECTRIC SHOCK, TO REDUCE THE RISK OF ELECTRIC SHOCK, TO REDUCE THE RISK OF ELECTRIC SHOCK, DO NOT REMOVE COVER (OR BACK). - Page 3 Changes or modifications not approved by JVC could void the user’s authority to operate the equipment. This equipment has been tested and found to comply with the limits for a Class B digital device, pursuant to Part 15 of the FCC Rules.
-
Page 4: Main Features
Getting Started Main Features This camcorder enables recording of HD format images as videos or still pictures on an SD card, and also playback of these videos or still pictures. Supports various HD video recording formats (1080i, 1080p, and 720p) -
Page 5: Table Of Contents
Selecting a Focusing Mode ..... 26 Using the Camcorder in the Video Shooting Mode ..26 Setting the Video Format . - Page 6 : Indicates the reference page numbers and reference items. Content of this manual ● All rights reserved by JVC. Unauthorized duplication or reprinting of this manual, in whole or in part, is strictly prohibited. ● All other product names used in this manual are trademarks or registered trademarks of their respective companies.
-
Page 7: Accessories
Power Cord Audio Unit CD-ROM The CD-ROM provided with this camcorder comes with [JVC ProHD Clip Manager] and other application software as well as the user guides. TFor detail, refer to the user guides for each application software. Attaching the Audio Unit The audio unit (with handle) is not attached to the camcorder unit when purchased. -
Page 8: Precautions For Proper Use
If placed on its side, heat release efficiency will deteriorate. Precautions for transportation ● When carrying the camcorder, be sure to hold the carrying handle. Holding the lens or viewfinder may result in damage. ● Do not drop or hit this device against a hard object. -
Page 9: Characteristic Ccd Phenomena
Rechargeable Battery Be sure to use only JVC batteries. We do not guarantee the safety and performance of this device if a battery other than a JVC product is used. The battery is not charged when purchased. When using the battery in a low temperature environment (10°C or below), the operating time... -
Page 10: Names Of Parts And Functions
Getting Started Names of Parts and Functions Front Front Tally lamp (A Page 56) Tally lamp (A Page 56) Remote control sensor (A Page 18) [AWB] Auto White Balance button (A Page 35) For adjusting the white balance. Lens/Lens cover (A Page 20) Shoe For mounting separately sold accessories. - Page 11 LCD Side Built-in microphone (A Page 40) Lens cover switch (A Page 20) Manual ring (A Page 30) [ND FILTER] switch (A Page 32) Reduces the amount of incident light to 1/10. [GAIN] switch (A Page 37) For selecting one of the three sensitivity levels. [WHT.BAL.] White balance selection switch (A Page 35) For selecting one of the three types of white balance.
-
Page 12: Getting Started
Built-in speaker (A Page 47) [CAM/MEDIA] Camera shooting/media playback selection button (A Page 25) For setting this camcorder to the Camera Shooting or Media Playback mode. [USER3] User 3 button (A Page 21) A specific feature in the menu setting can be assigned to this button according to the user’s preference. - Page 13 Rear ACCESS IRIS SHUTTER OPEN AE ± CLOSE U V W X Rear [IRIS] Aperture button (A Page 37) Press this button to set the aperture manually. [SHUTTER] Shutter Speed button (A Page 37) Press this button to set the shutter speed manually. [AE±] Exposure button (A Page 33) Press this button to set the exposure manually.
-
Page 14: Names Of Remote Control Parts And Functions
[N] Reverse button Returns to the beginning of the file during playback. [PLAYLIST] button This function is not available on this camcorder. [DISP] DISPLAY button For switching the displays on the LCD screen and viewfinder. [INDEX] button Displays the remaining space on the SD card and the remaining battery power. -
Page 15: Indications On The Lcd Screen And In The Viewfinder
4 : 5 0 P M N O V. 1 . 2 0 0 9 DISPLAY displayed, pressing the DISPLAY button displays the file information. the video output terminal of this camcorder, set [DISPLAY ON TV] in the [CONNECTION SETTINGS] menu to [ON]. -
Page 16: Items Displayed During Video And Still Picture Shooting
Getting Started Indications on the LCD Screen and in the Viewfinder (continued) Items Displayed During Video and Still Picture Shooting ± 0 F5.6 1 0 x 1/4000 3200K SPORT Shooting Mode A : Full Auto Shooting M : Manual Shooting Focusing Mode AF : Auto Focus MF : Manual Focus... -
Page 17: Items Displayed During Still Picture Shooting Only
Items Displayed During Still Picture Shooting Only Still Picture Mode Focus Icon Blinks in yellow: Focusing in progress Lights in green: Focusing completed Self-Timer : 10-second self-timer : 2-second self-timer Still Picture Recording Shutter Mode : Continuous Shooting : Bracket Shooting Remaining Number of Shots on the SD Card Still Picture Quality FINE : High... -
Page 18: Preparations
Open the pad and adjust the position of the grip belt accordingly. Caution : ● If the grip is loose, the camcorder may fall off resulting in injuries or malfunction. ● Parents should take extra care when your child is using the camcorder. -
Page 19: Removing The Hood
● Recording time is shortened in cold environments. ● Recording time is shortened when the zoom lens and Turn off the power of the camcorder. Attach the supplied battery. With the battery mark (D) on the left, insert it into the camcorder, and slide it to the left. -
Page 20: Checking The Remaining Battery Power
5 minutes or longer. Lens Cover Before shooting, open the lens cover. When this camcorder is not in use, close the lens cover to protect the lens. Memo : ● Do not press against the lens cover with force. Doing so may damage the lens or the cover. -
Page 21: Setting The Date
STOP Display Assigning Functions to the USER Buttons This camcorder comes with three USER buttons. A specific function can be assigned to each USER button according to your preference. To do so, make use of [USER1], [USER2], and [USER3] in the [CAMERA SETTINGS] menu. -
Page 22: Viewing The Viewfinder/Lcd Screen
Preparations Settings and Adjustments Before Use (continued) Viewing the Viewfinder/LCD Screen You can monitor video images on this camcorder using the viewfinder, LCD screen, or both. Viewing with the viewfinder Pull out the viewfinder. Incline the viewfinder vertically to a position that enables easy viewing. -
Page 23: Inserting An Sd Card
Inserting an SD Card This camcorder comes with two SD card slots. (Slot A and Slot B) SD cards to use ● See ASD CardsB on Page 7. ● SDXC cards are not supported. Notched Corner Preparation: Turn off the power. -
Page 24: Formatting The Sd Card
The file name appears as follows. *** _0001_01.extension to *** _9999_99.extension *** : Unique number (last 3 digits of the camcorder’s serial number) T Up to 600 folders/files for videos in QuickTime(MOV) or MP4 format can be recorded on the SD card. -
Page 25: Shooting
● Still pictures can be recorded when in the video shooting mode. (A Page 28) ● If the [SYSTEM SELECT] menu is set to [720-**], switching between the video/still picture mode reboots the camcorder. Selecting the Full Auto/Manual Shooting Mode There are two adjustment modes for shooting, namely the Full Auto and Manual modes. -
Page 26: Selecting A Focusing Mode
Specify the video system (vertical resolution and frame rate) for this camcorder. Example: 1080-60/30 Setting Set the [SYSTEM SELECT] menu. (A Page 61) When settings in this menu are altered, the camcorder will reboot automatically. Setting the recording mode Specify the horizontal resolution, frame rate, scan method, and picture quality mode. -
Page 27: Displaying The Remaining Space On The Sd Card
Shooting Videos Preparation: Set to the video shooting mode. (A Page 25) This camcorder comes with two REC buttons for shooting videos. (Located at the rear and on the LCD cover) You can shoot videos using any of the two buttons. -
Page 28: Capturing Still Pictures In The Video Shooting Mode
Shooting Using the Camcorder in the Video Shooting Mode (continued) Checking the most recently recorded video Set to the Record Pause mode. Press Q.REVIEW. ● The last 5 seconds of the preceding scene is played back. ● After playback ends, the video switches to the Record Pause mode. -
Page 29: Using The Camcorder In The Still Picture Shooting Mode
Set the [GAIN UP] menu. (A Page 68) Size Capturing Still Pictures Preparation: Set to the still picture shooting mode. (A Page 25) ● The camcorder automatically adjusts the focus and Shutter Speed Display ● A still picture is recorded. APHOTOB appears on the Picture Quality... -
Page 30: Zoom Operation
Camcorder’s zoom lever on the top surface Camcorder’s manual ring: This can be used as a zoom ring when the [FOCUS/ ZOOM] ring switch at the side of the camcorder is set to ZOOM. Sub zoom lever on the LCD cover... -
Page 31: Adjusting The Focus Manually
Adjusting the Focus Manually Preparation: Set to the video shooting or still picture shooting mode. Setting to the Manual Focus mode Press AF/MF to display the Manual Focus icon (MF). AF/MF 0 0 : 0 0 : 0 0 : 0 1 18dB Manual Focus Mode Set the [FOCUS/ZOOM] ring switch to FOCUS. -
Page 32: Shooting Different Scenes And Conditions
Press the USER button that is assigned the feature. Memo : ● When shooting in Lolux mode, secure the camcorder using a tripod as camera shakes may blur the image. ● Shutter speed and gain cannot be adjusted when setting Lolux in the video mode. -
Page 33: Adjusting The Exposure Manually
Adjusting the Exposure Manually Applicable to: Full Auto shooting mode A, Manual shooting mode M Generally, the brightness of the subject that is being shot is automatically adjusted according to the reference values of the camera. However, the brighter or darker areas of an image may appear unclear depending on the shooting conditions. -
Page 34: Displaying The Zebra Pattern
Shooting Displaying the Zebra Pattern Applicable to: Video shooting mode A Full Auto Shooting Mode M Manual Shooting Mode During video shooting, diagonal lines (zebra pattern) are displayed only at areas with the specified luminance levels. You can specify the luminance level range for displaying the zebra pattern. -
Page 35: Adjusting The White Balance
Adjusting the White Balance Applicable to: Manual shooting mode M Set to the Manual shooting mode. Select a white balance type using the WHT.BAL. switch. You can select one of the three white balance types using the WHT.BAL. switch. WHT.BAL. Description Switch Switches to the white balance type that... -
Page 36: Using The Full Auto White Balance (Faw) Function
● The accuracy of FAW is inferior to that of Auto White Balance. ● When the power of the camcorder is turned on with the FAW mode selected, it takes about 10 seconds for the FAW adjustment to complete. Do not start recording during this interval. -
Page 37: Adjusting Manual Gain
Adjusting Manual Gain Applicable to: Video shooting mode Manual shooting mode M Set to the Manual shooting mode. The light sensitivity can be electrically boosted using the GAIN switch when there is insufficient illumination on the subject. (3 positions) GAIN Switch Description 0 dB (No boosting is applied.) 9 dB (Boosts sensitivity by about 3 times.) -
Page 38: Setting The Photometry Area
Shooting Set to the Manual shooting mode. Set to the aperture adjustment mode. Press the IRIS button. ● The current F-number is displayed. IRIS Select an F-number. Turn the ADJ./VOL. knob up or down. ● The selected F-number is displayed. Confirm the F-number. -
Page 39: Displaying The Color Bar
Displaying the Color Bar Applicable to: Manual shooting mode M Set to the Manual shooting mode. Displays the color bar on the screen and starts recording in this state. (See below) There are two ways to display the color bar. Set [COLOR BAR] in the [CAMERA PROCESS] menu to [ON]. -
Page 40: Audio Recording
Shooting Audio Recording Applicable to: Video shooting mode There are three ways to input audio sound. Built-in microphone MIC terminal INPUT1 terminal / INPUT2 terminal The priority order of the input is in the sequence of C > B > TWhen the built-in microphone or MIC terminal is in use, remove the audio unit cable from the AUDIO IN terminal. -
Page 41: Monitoring Audio Sound Using A Headphone
TC: Displays the time code. UB: Displays the user’s bit. Recording the Time Code The time code of the camcorder’s built-in time code generator as well as user’s bit can be recorded. The time ACCESS code generator comes in the preset and regeneration modes. -
Page 42: Presetting The Time Code/User's Bit
Shooting Time Code Recording Setting (continued) Presetting the Time Code/User’s Bit The time code and user’s bit can be set in the [TC/UB] menu. There are two ways to display the [TC/UB] menu. Display the menu screen using the MENU button, then select the [TC/UB] menu. -
Page 43: Playback
Memo : ● If the [SYSTEM SELECT] menu is set to [720-**], switching between the video/still picture mode reboots the camcorder. Playing Videos on the SD Card Preparation: Insert an SD card, and select the card slot. Playing Back Videos from the Playback Index Screen ●... - Page 44 Playback Playing Videos on the SD Card (continued) Select a file. Push the Set Lever up/down or to the left/right to move the cursor to the thumbnail you want to play. Memo : ● You can move to files under the next or previous date by pressing the + or –...
-
Page 45: Selecting A File On The Date Search Screen
Selecting a File on the Date Search Screen Press the INDEX button when the playback index screen is displayed. ● The date search screen appears. INDEX A list of dates based on the date of the selected file on the playback index screen is displayed. -
Page 46: Viewing Video File Information
Playback Playing Videos on the SD Card (continued) Viewing Video File Information Select the file to view information when the index screen is displayed. Set to the still mode during video playback. Press the DISPLAY button. ● The file information is displayed. DISPLAY AUTO MANUAL CH-1... -
Page 47: Enlarging A Still Image
Enlarging a Still Image Make use of the remote control. Memo : ● This function is not available on the camcorder unit. ● To use the remote control, set [REMOTE] in the [CAMERA SETTINGS] menu to [ON]. Set to the still mode during the video playback mode. -
Page 48: Playing Still Pictures On The Sd Card
Playback Playing Still Pictures on the SD Card Preparation: Insert an SD card, and select the card slot. Set to the still picture playback mode. (A Page 43) ● The still picture index screen appears. Cursor (Selected thumbnail) Current Page/Total Pages IMAGE SELECT INDEX... -
Page 49: Viewing Still Picture File Information
AEnlarging a Still ImageB(A Page 47) Viewing Videos on a Monitor Applicable to: Video shooting mode, video playback mode There are three video output terminals on this camcorder. Choose the most suitable terminal according to the monitor in use. A/V OUT terminal : Outputs composite video and audio signals. -
Page 50: Editing Files
You can enable or disable the file protection feature, which helps to prevent a video or still picture file from being deleted. The file protection feature is indicated on the camcorder as follows. Enable protection : “Append OK mark” Disable protection : “Delete OK mark”... -
Page 51: Appending To Or Deleting From All Files
Appending To or Deleting From All Files Select [MARK ALL] or [DELETE ALL] in the [OK MARK] menu, and press the center of the Set Lever. ● A confirmation screen appears. Select [YES] to execute. Push the Set Lever up or down to select [YES]. Press the center of the Set Lever. -
Page 52: Deleting All Files
Editing Files Deleting Files (continued) Press the MENU button. A screen to confirm deletion appears. MENU Select [EXECUTE AND QUIT] to execute. Push the Set Lever up or down to select [EXECUTE AND QUIT]. Press the center of the Set Lever. ●... -
Page 53: Moving Files
Specify [MEDIA] and [FILE UNIT]. Push the Set Lever up or down to select an item. Push the Set Lever to the left or right to select a setting value. When [FILE UNIT] is set to [SCENE] (for videos) or [FILE] (for still pictures) Press the center of the Set Lever to display the screen for selecting the files to copy. -
Page 54: Other Features
Saving/Loading Settings Applicable to: Video/still picture shooting modes, video/still picture playback modes The current settings of the camcorder can be saved to an SD card. The settings that are saved on the SD card can be reloaded on the camcorder. -
Page 55: Loading Settings From An Sd Card
● Returns to the [STORE FILE] screen. Loading Settings from an SD Card Settings saved on an SD card can be loaded on the camcorder. Select a file from EXT1 to EXT4. Preparation Insert an SD card. Stop recording if it is in progress. -
Page 56: Operation Sound And Tally Settings
Push the Set Lever up or down to select [EXECUTE]. Next, press the center of the Set Lever. ● The menu screen closes, and the settings are reset to their default values. The camcorder reboots automatically if there are changes in the [SYSTEM SELECT] menu. QUIT... -
Page 57: Menu Screens
Menu Screens Setting Menu Screens The settings are saved in the memory of the camcorder, and will not be deleted even when the power of the camcorder is turned off. Menu settings vary according to the operation mode. Set to the operation mode you want to configure. -
Page 58: List Of Valid Menu Items For Each Operation Mode
Menu Screens List of Valid Menu Items for Each Operation Mode Although the menu items below are displayed on the screen, some of them may not be available depending on the operation mode. : Valid setting. : Invalid setting. Video Menu Item Shooting Shooting... -
Page 59: Menu Screens Of The Video Shooting Mode
Menu Screens of the Video Shooting Mode Item Description Items that are shaded ( ) are common to all modes. Settings with the mark are default values. For setting the camera operation and image quality during shooting. FOCUS ASSIST For selecting whether to add color to the contour of the focused image upon switching the image to black-and-white. - Page 60 Menu Screens Menu Screens of the Video Shooting Mode (continued) Item Description Items that are shaded ( ) are common to all modes. Settings with the mark are default values. COLOR MATRIX For setting the COLOR MATRIX. STANDARD CINEMA VIVID COLOR CINEMA SUBDUED COLOR : Sets to a subdued cinema color.
- Page 61 720-50/25 1080-24 720-24 Memo : ● When the setting of this item is altered, the camcorder will reboot (restart) automatically. : A separate screen is displayed. (A Page 38) Specify the photometry area. : Color bars are output. : Enables closeup shots up to about 80 cm.
- Page 62 Menu Screens Menu Screens of the Video Shooting Mode (continued) Item Description Items that are shaded ( ) are common to all modes. Settings with the mark are default values. REC MODE For setting the recording mode. The following settings can be selected according to the [SYSTEM SELECT] menu item settings. SYSTEM SELECT 1080-60/30...
- Page 63 Item Description Items that are shaded ( ) are common to all modes. Settings with the mark are default values. For setting connections with external devices. DISPLAY ON TV For specifying whether to enable on-screen display on the monitor. OFF : Disables on-screen display. VIDEO OUTPUT For selecting the monitor type.
-
Page 64: Off Display
Menu Screens Menu Screens of the Video Shooting Mode (continued) Item Description Items that are shaded ( ) are common to all modes. Settings with the mark are default values. AUDIO REF. LEVEL For setting the reference audio recording level. -20dB -12dB MIC LEVEL SETTING... - Page 65 STORE FILE A separate screen is displayed. (A Page 54) Use this item to save the current menu settings or camcorder settings to an SD card. Up to four setting files (EXT1 to EXT4) can be saved to the SD card.
- Page 66 Use this item to reset the menu and camcorder settings to their default values. AUTO POWER OFF For selecting whether to turn off the power automatically when the camcorder is not operated for more than 5 minutes. OFF : Power does not turn off automatically.
-
Page 67: Menu Screens Of The Still Picture Shooting Mode
Menu Screens of the Still Picture Shooting Mode Item Description Items that are shaded ( ) are common to all modes. Settings with the mark are default values. For setting the camera operation and image quality during shooting. FOCUS ASSIST For selecting whether to add color to the contour of the focused image upon switching the image to black-and-white. - Page 68 Menu Screens Menu Screens of the Still Picture Shooting Mode (continued) Item Description Items that are shaded ( ) are common to all modes. Settings with the mark are default values. GAIN UP For brightening the image electrically when shooting a dark subject. AUTO CONNECTION Same as in video shooting mode.
-
Page 69: Menu Screens Of Video/Still Picture Playback Modes
Menu Screens of Video/ Still Picture Playback Modes Item Description Items that are shaded ( ) are common to all modes. Settings with the mark are default values. DELETE A separate screen is displayed. (A Page 51) For deleting video or still picture files. CURRENT FILE SELECT DELETE ALL... -
Page 70: Troubleshooting
Others Troubleshooting Before sending for repair, check the camcorder’s problem according to the table below. If the problem persists, consult our authorized dealers or JVC service center. Symptom SD card cannot be inserted. Power cannot be switched Shooting cannot be performed. - Page 71 ● Charge the battery fully, use it up, and then charge again. ● If the camcorder is used for long periods of time in high or low temperatures, or if the battery is repeatedly charged, the remaining battery level may not be displayed correctly.
-
Page 72: Warning Displays
RECORDING CANCELLED ● Open the lens cover. ● Set the date and time. ● Using an AC adapter, charge the camcorder for over 24 hours, then set the date and time. ● Attach the battery again. ● Replace the SD card. -
Page 73: Estimated Recordable Time/Number
Estimated Recordable Time/Number The estimated recording time and estimated number of still picture shots are only a guide. Changes may occur depending on the shooting environment, SD card in use, and the battery condition. Estimated Video Recording Time QuickTime/MP4 Quality HQ(1080i/720p) SP(1080i) SP(720P) -
Page 74: Specifications
Others Specifications Camcorder General Power : DC 11 V (using AC adapter) DC 7.2 V (using battery) Power consumption : Approx 7.8 W (when backlight is set to [STANDARD] while the LCD screen or viewfinder is in use) Rated Current Consumption: 1A Dimensions : 366 mm (W) ×... -
Page 75: Remote Control
Remote Control Type : DC 3 V (button battery CR2025) Battery life : Approx. 1 year (varies according to frequency of use) Operating distance : Approx. 5 m (16.4ft) (along front axis) Allowable operating temperature : 0°C to 40°C (32°F to 104°F) Dimensions : 42 mm (W) ×... - Page 76 © 2010 Victor Company of Japan, Limited LYT2089-001D...
Need help?
Do you have a question about the GY-HM100U and is the answer not in the manual?
Questions and answers